
Introduction
Thank you for choosing the Tangxi Mini 3D Printer. This compact and user-friendly 3D printer is designed for beginners, students, and hobbyists, offering a simple "one-click" printing experience. It supports 1.75mm PLA and TPU filaments and features a print size of 100x100x100mm. This manual provides essential information for setting up, operating, and maintaining your 3D printer to ensure optimal performance and longevity.
Please read this manual thoroughly before operating the device.
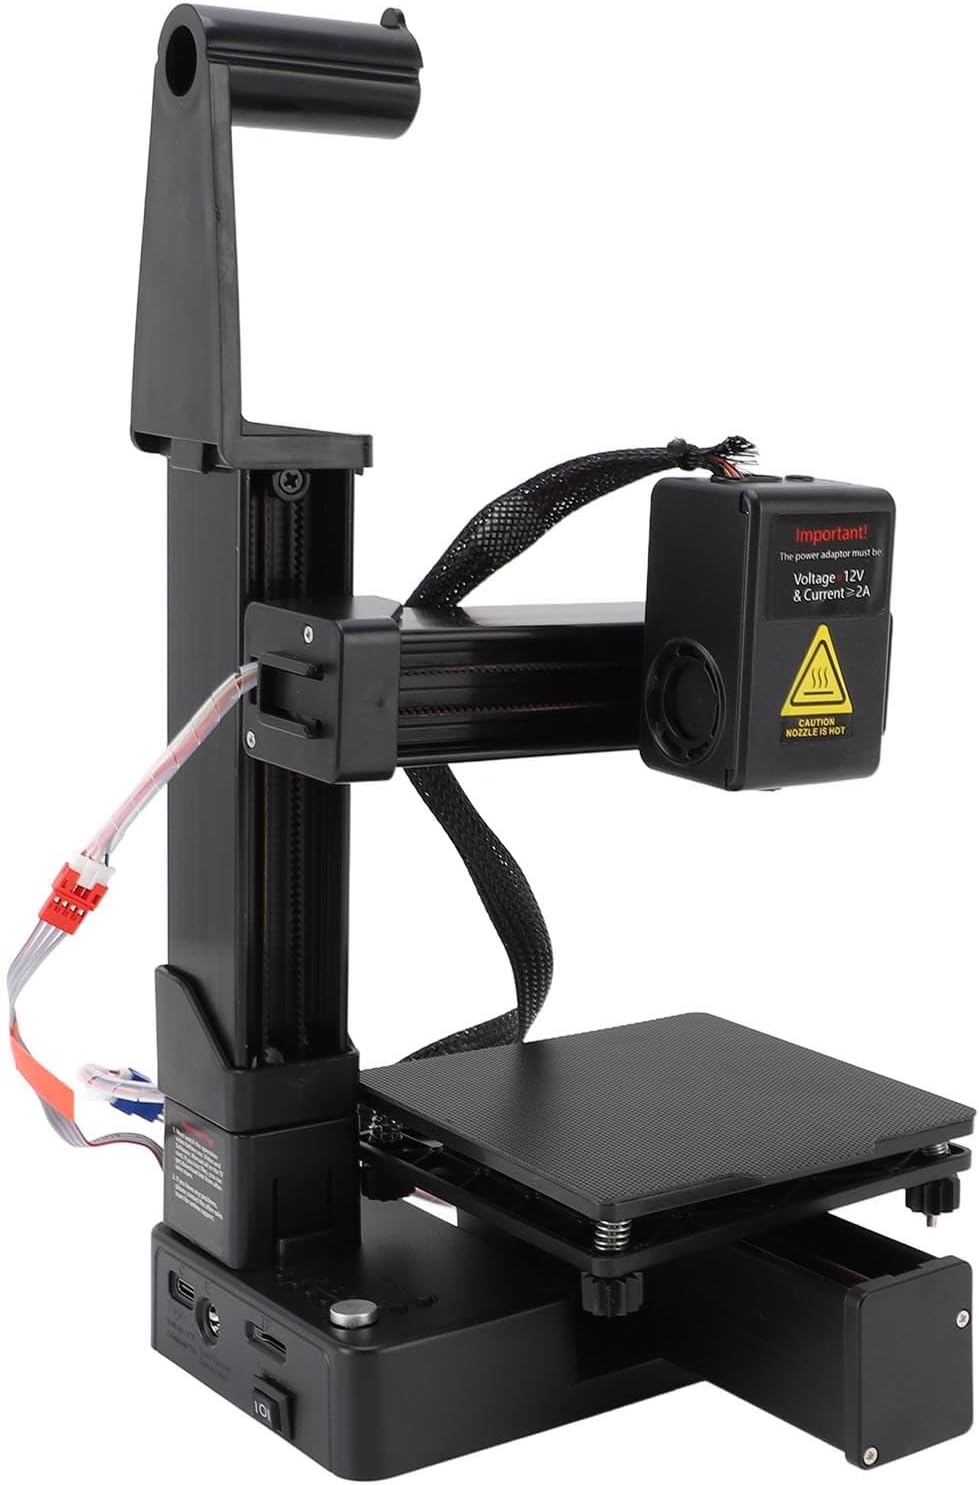
Figure 1: Assembled Tangxi Mini 3D Printer with a sample print.
Safety Information
- Always operate the printer in a well-ventilated area.
- Keep hands clear of moving parts during operation.
- The print nozzle and print bed can reach high temperatures. Avoid touching them directly during or immediately after printing.
- Use only the specified power adapter (Voltage=12V, Current≥2A, Port: Type C). Using an incorrect power supply may damage the printer or pose a fire hazard.
- Keep the printer away from water and moisture.
- Supervise children when they are near or operating the printer.
Package Contents
Carefully unpack the box and ensure all components are present. If any parts are missing or damaged, please contact customer support.
- Printer X Axis
- Printer Y Axis
- Printer Control Box with Print Head
- Print Platform
- Power Cord
- Z Axis Bracket
- PLA Consumable (sample filament)
- Power Adapter
- Screwdriver
- User Manual (2 copies)

Figure 2: Exploded view of printer components.
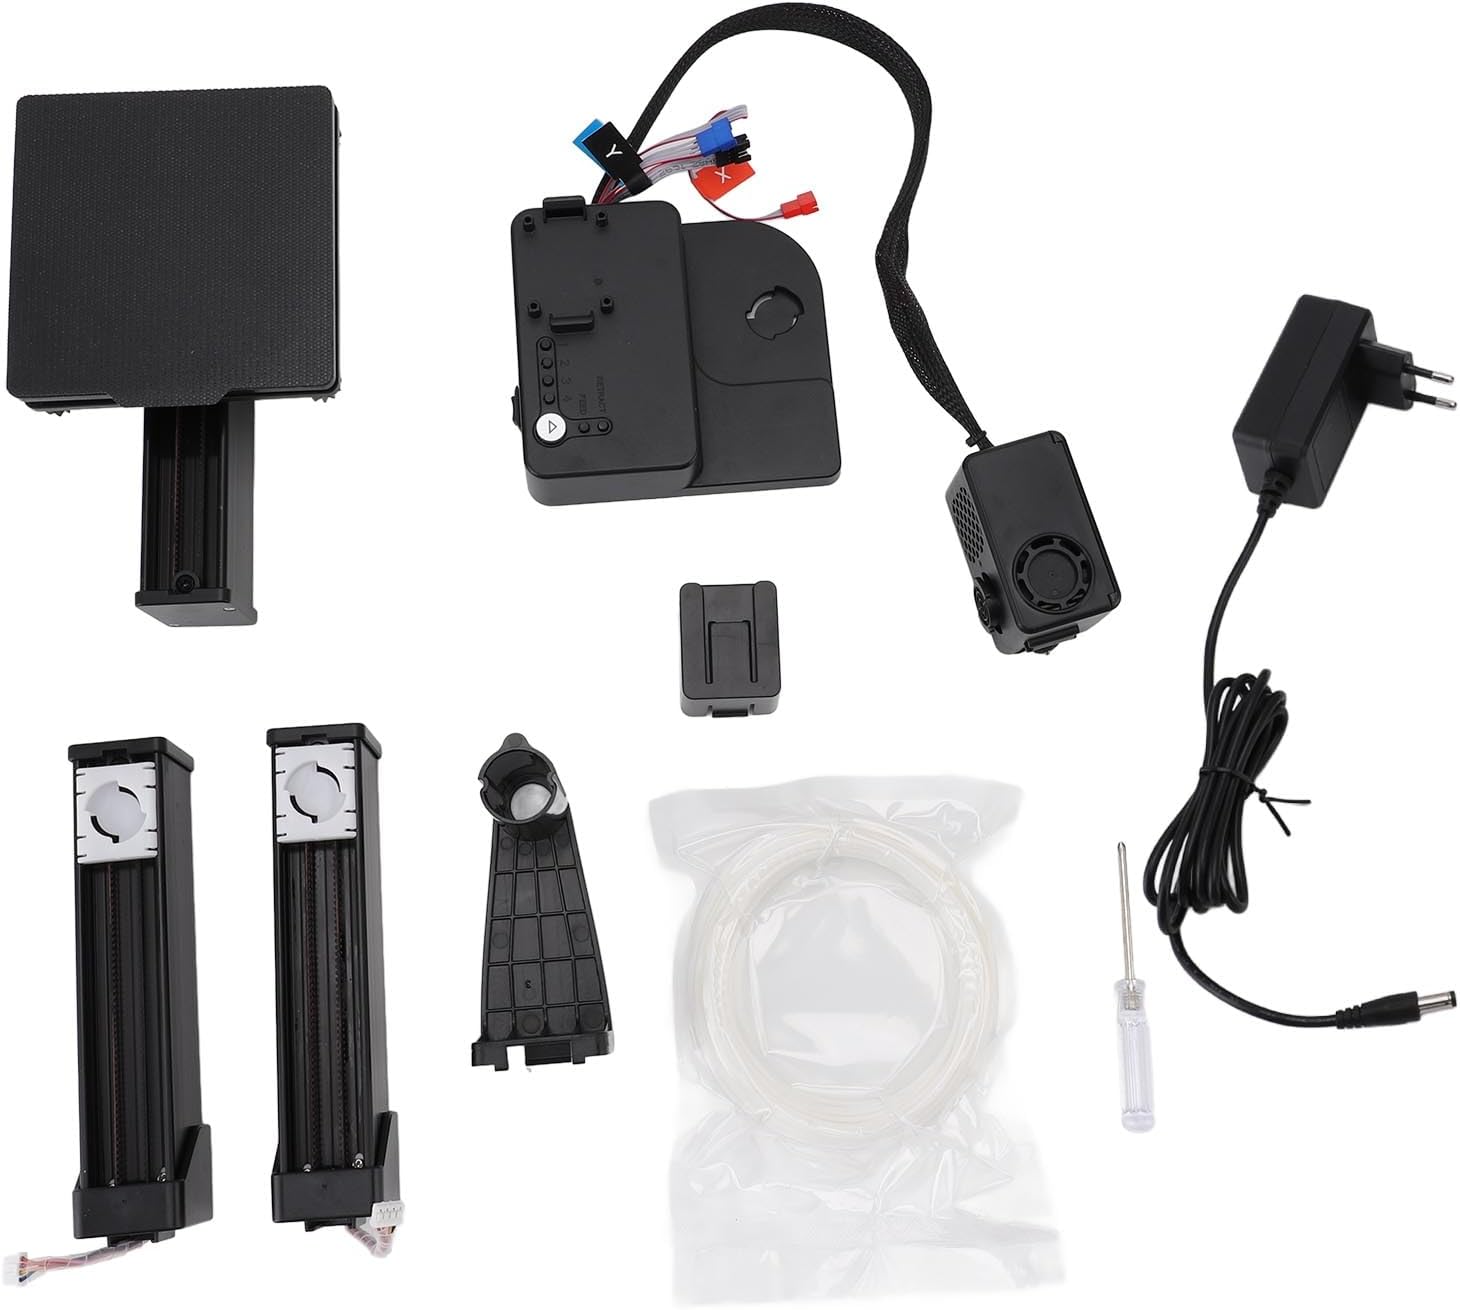
Figure 3: All included components.
Setup Guide
The Tangxi Mini 3D Printer is designed for quick and easy assembly. Follow these steps to get your printer ready for its first print.
1. Assemble the Printer
- Place the Control Box Base (1) on a stable surface.
- Attach the Y Axis & Platform (2) to the Control Box Base.
- Secure the Z-axis Bracket (3) to the Y Axis & Platform.
- Mount the Z Axis (4) onto the Z-axis Bracket.
- Attach the X Axis (5) to the Z Axis.
- Install the Print Head (6) onto the X Axis.
- Attach the Filament Holder (7) to the top of the Z Axis.
- Connect all necessary cables as indicated in the diagram (refer to Figure 2).
Note: The printer is largely pre-assembled. The steps above describe connecting the main modules. Use the provided screwdriver for any necessary fastenings.
2. Power Connection
- Connect the provided power adapter to the printer's Type C power port.
- Plug the power adapter into a suitable electrical outlet.
- Ensure the power adapter meets the specifications: Voltage = 12V, Current ≥ 2A.
Figure 4: Power requirements label on the printer.
3. Filament Loading
- Place a spool of 1.75mm PLA or TPU filament onto the filament holder. The included sample PLA consumable can be used.
- Gently feed the filament into the extruder's input hole until it reaches the print head.
- The printer will automatically heat up and load the filament when a print job is initiated or when manually commanded.
Operating Instructions
1. Preparing Your 3D Model
- Obtain a 3D model file in STL or OBJ format.
- Use a slicing software such as Easyware or CURA to convert your 3D model into a G-code file. This software allows you to adjust print settings like layer thickness, infill, and print speed.
- Save the generated G-code file to a small memory card (TF card) or prepare for USB connection.

Figure 5: Printer connected to a computer for model preparation.
2. Starting a Print
There are two primary ways to start a print:
Option A: Printing from Memory Card
- Insert the memory card containing your G-code file into the printer's card slot.
- Press the print button (often a single button for "one-click" operation). The printer will automatically warm up the print head and bed, then begin printing.
Option B: Printing via USB Connection
- Connect the printer to your Windows (7/8/10, 32/64 bit) or OS X PC using a USB cable.
- Open your slicing software (e.g., Easyware, CURA) and ensure the printer is recognized.
- Initiate the print directly from the software.
The printer's heat bed reaches 100 degrees Celsius in approximately 5 minutes, ensuring quick readiness for printing.
3. Monitoring and Removing Prints
- Monitor the printing process to ensure proper adhesion and extrusion.
- Once the print is complete, allow the print bed and nozzle to cool down.
- The printer features a removable magnetic platform, making it easy to detach finished prints. Gently flex the platform to release the object.

Figure 6: Examples of objects printed with the Tangxi Mini 3D Printer.
Maintenance
Regular maintenance ensures the longevity and consistent performance of your 3D printer.
- Clean the Print Bed: After each print, ensure the print bed is clean and free of debris or filament residue. A clean bed promotes better adhesion for subsequent prints.
- Clean the Nozzle: Periodically check the nozzle for clogs. If filament is not extruding properly, the nozzle may need to be cleaned or replaced. Refer to online resources or contact support for detailed nozzle cleaning procedures.
- Lubricate Moving Parts: Apply a small amount of lubricant to the Z-axis lead screw and other moving rods every few months to ensure smooth operation.
- Store Filament Properly: Store unused filament in a cool, dry place to prevent moisture absorption, which can degrade print quality.
- Firmware Updates: Check the manufacturer's website periodically for any available firmware updates that may improve printer performance or add new features.
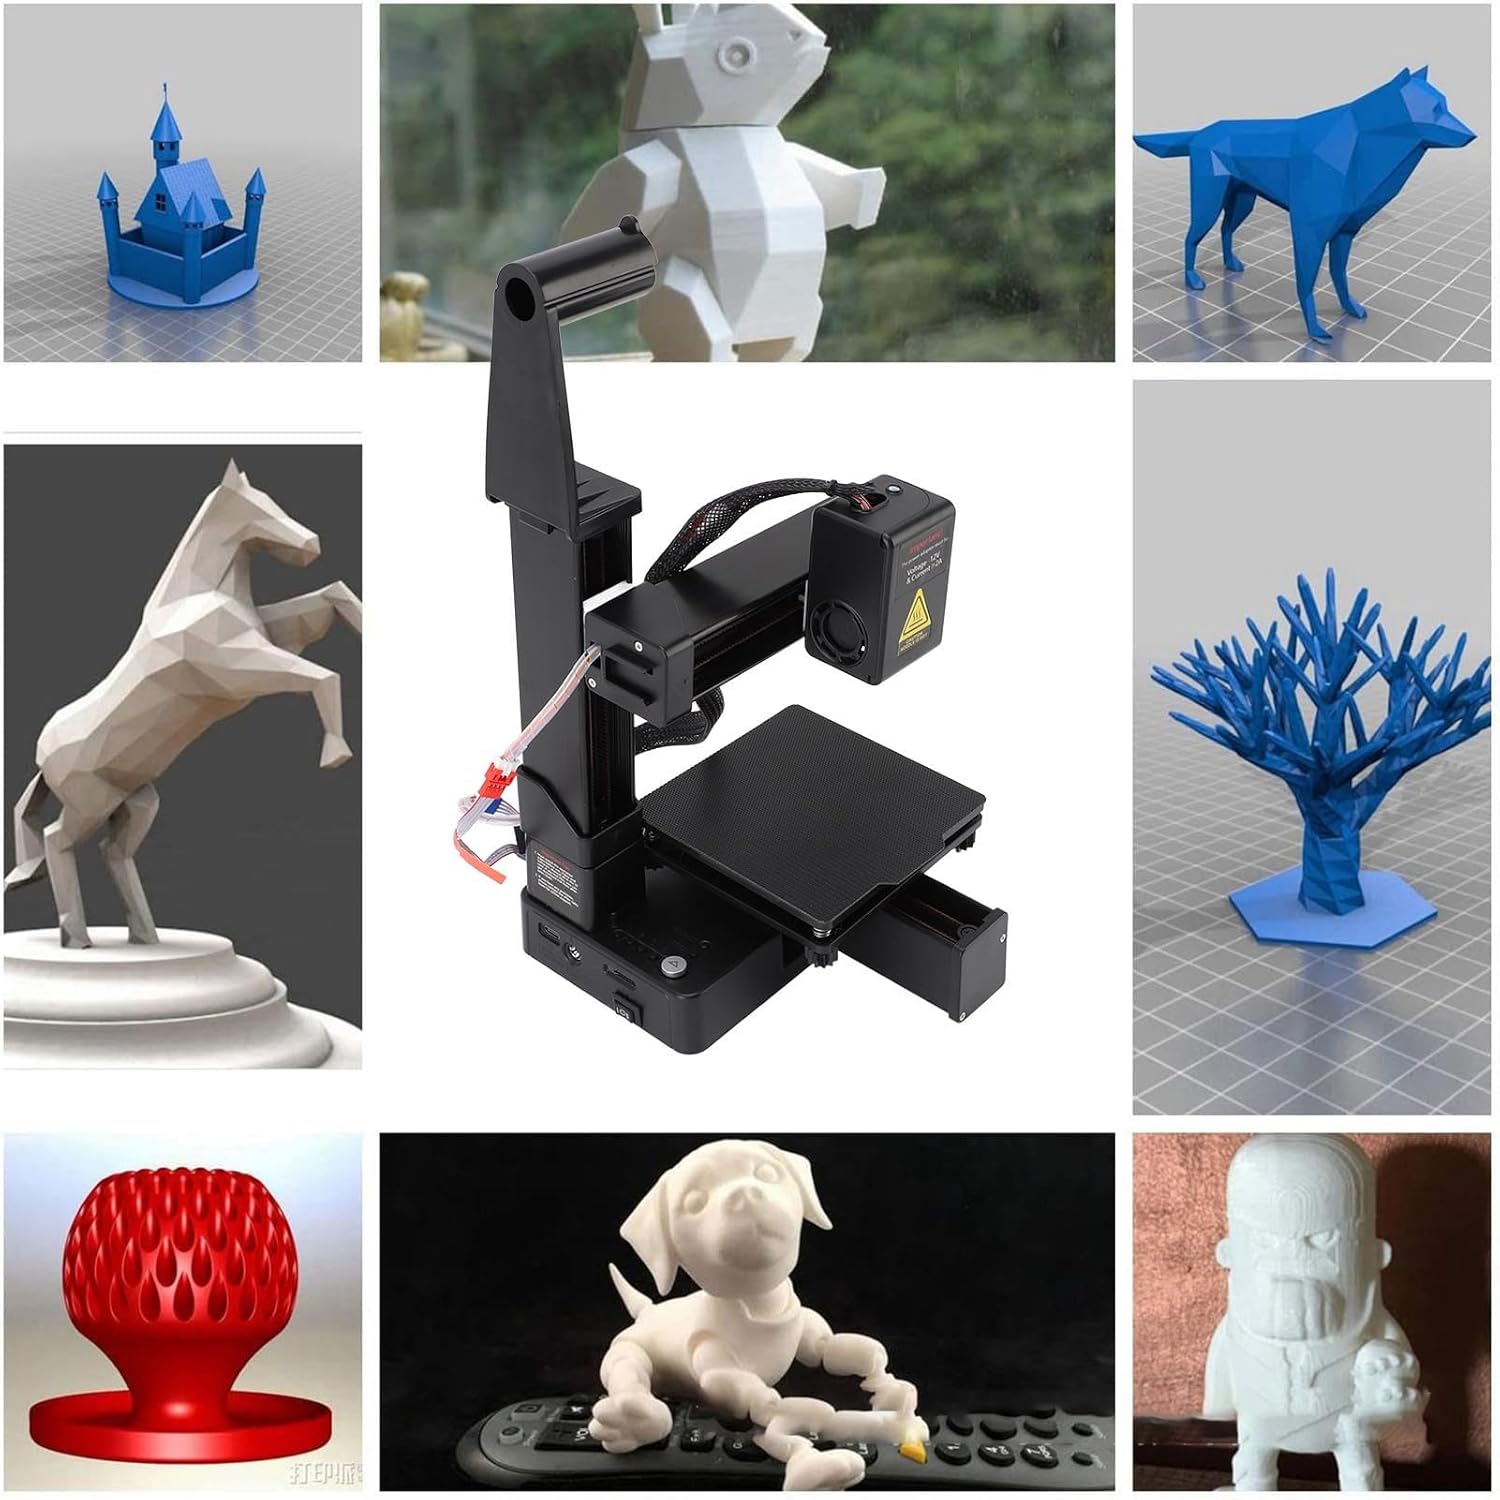
Figure 7: Print head and nozzle area.
Troubleshooting
Here are some common issues and their potential solutions:
| Problem | Possible Cause | Solution |
|---|---|---|
| Filament not extruding | Clogged nozzle, tangled filament, incorrect temperature. | Clean the nozzle, ensure filament is untangled, verify print temperature settings. |
| Print not sticking to bed | Dirty print bed, incorrect bed temperature, improper bed leveling. | Clean the print bed, adjust bed temperature, ensure the bed is level. |
| Poor print quality (layer shifting, stringing) | Incorrect print speed, loose belts, filament quality. | Reduce print speed, check and tighten belts, use high-quality filament. |
| Printer not powering on | Loose power connection, incorrect power adapter. | Check all power connections, ensure the power adapter meets 12V/2A specifications. |
Specifications
| Feature | Specification |
|---|---|
| Print Technology | Fused Deposition Modeling (FDM) |
| Print Size | 100 x 100 x 100 mm (3.94 x 3.94 x 3.94 inches) |
| Layer Thickness | 0.05 - 0.3 mm |
| Compatible Filaments | PLA, TPU (1.75 mm) |
| Print Precision | 0.1 - 0.2 mm |
| Slicing Software | Easyware, CURA |
| Extruder Temperature | 180 - 230 °C |
| Print Speed | Up to 40 mm/s |
| Input Format | STL, OBJ |
| Output Format | G-code |
| Print Platform | Removable Magnetic |
| Compatible Operating Systems | Windows 7/8/10 (32-bit/64-bit), OS X |
| Product Dimensions | 10.24 x 8.27 x 3.54 inches (260 x 210 x 90 mm) |
| Item Weight | 2.36 pounds (1.07 kg) |
| Model Number | Tangxiomi4wj07c6-12 |

Figure 8: Printer dimensions and print size.
Warranty and Support
For warranty information, please refer to the documentation included with your purchase or contact the retailer. For technical support, product inquiries, or to report any issues, please contact Tangxi customer service through their official website or the platform where the product was purchased.
Always provide your model number (Tangxiomi4wj07c6-12) and purchase date when contacting support.