
1. Introduction
Thank you for choosing the FEIFANKE 145A 110V MINI MIG Welder. This versatile 3-in-1 welding machine is designed for Flux Core MIG, Lift TIG, and Stick (ARC) welding, offering robust performance for various applications. Featuring IGBT Inverter technology and a Synergy LED Display, it provides precise control and ease of use for both beginners and experienced welders. This manual provides essential information for safe operation, setup, maintenance, and troubleshooting to ensure optimal performance and longevity of your welding tool.
2. Safety Instructions
Welding can be dangerous if proper safety precautions are not observed. Always read and understand all safety warnings and instructions before operating this equipment. Failure to follow these instructions may result in electric shock, fire, serious injury, or death.
- Electric Shock: Welding current can kill. Do not touch live electrical parts. Wear dry, insulating gloves and protective clothing. Ensure the workpiece is properly grounded.
- Fumes and Gases: Welding fumes and gases can be hazardous to your health. Work in a well-ventilated area. Use a fume extractor if necessary.
- Arc Rays: Arc rays can burn eyes and skin. Wear a welding helmet with appropriate shade filter. Protect exposed skin with flame-resistant clothing.
- Fire and Explosion: Welding sparks and hot metal can cause fires. Keep flammable materials away from the welding area. Have a fire extinguisher readily available.
- Burns: Hot metal and sparks can cause severe burns. Wear protective gloves, long sleeves, and appropriate footwear.
- Personal Protective Equipment (PPE): Always wear appropriate PPE, including a welding helmet, safety glasses, welding gloves, and flame-resistant clothing.
- Maintenance: Disconnect power before performing any maintenance or service.
3. Package Contents
Upon unpacking, please verify that all items listed below are present and undamaged. If any items are missing or damaged, contact your retailer immediately.
- FEIFANKE 145A 110V MINI MIG Welder Machine (Model: ARC)
- MIG Welding Torch
- Lift TIG Torch (WP17V type)
- Electrode Holder (for Stick Welding)
- Ground Clamp
- Flux Core Wire Spool (small sample)
- User Manual
- Other standard accessories (e.g., contact tips, gas hose if applicable for TIG)
4. Product Overview
The FEIFANKE 145A welder is a compact and powerful 3-in-1 unit designed for various welding tasks. Its advanced IGBT Inverter technology ensures stable arc performance and energy efficiency. The intuitive Synergy LED Display simplifies parameter adjustments, making it suitable for a wide range of materials including stainless steel, iron, and carbon steel.
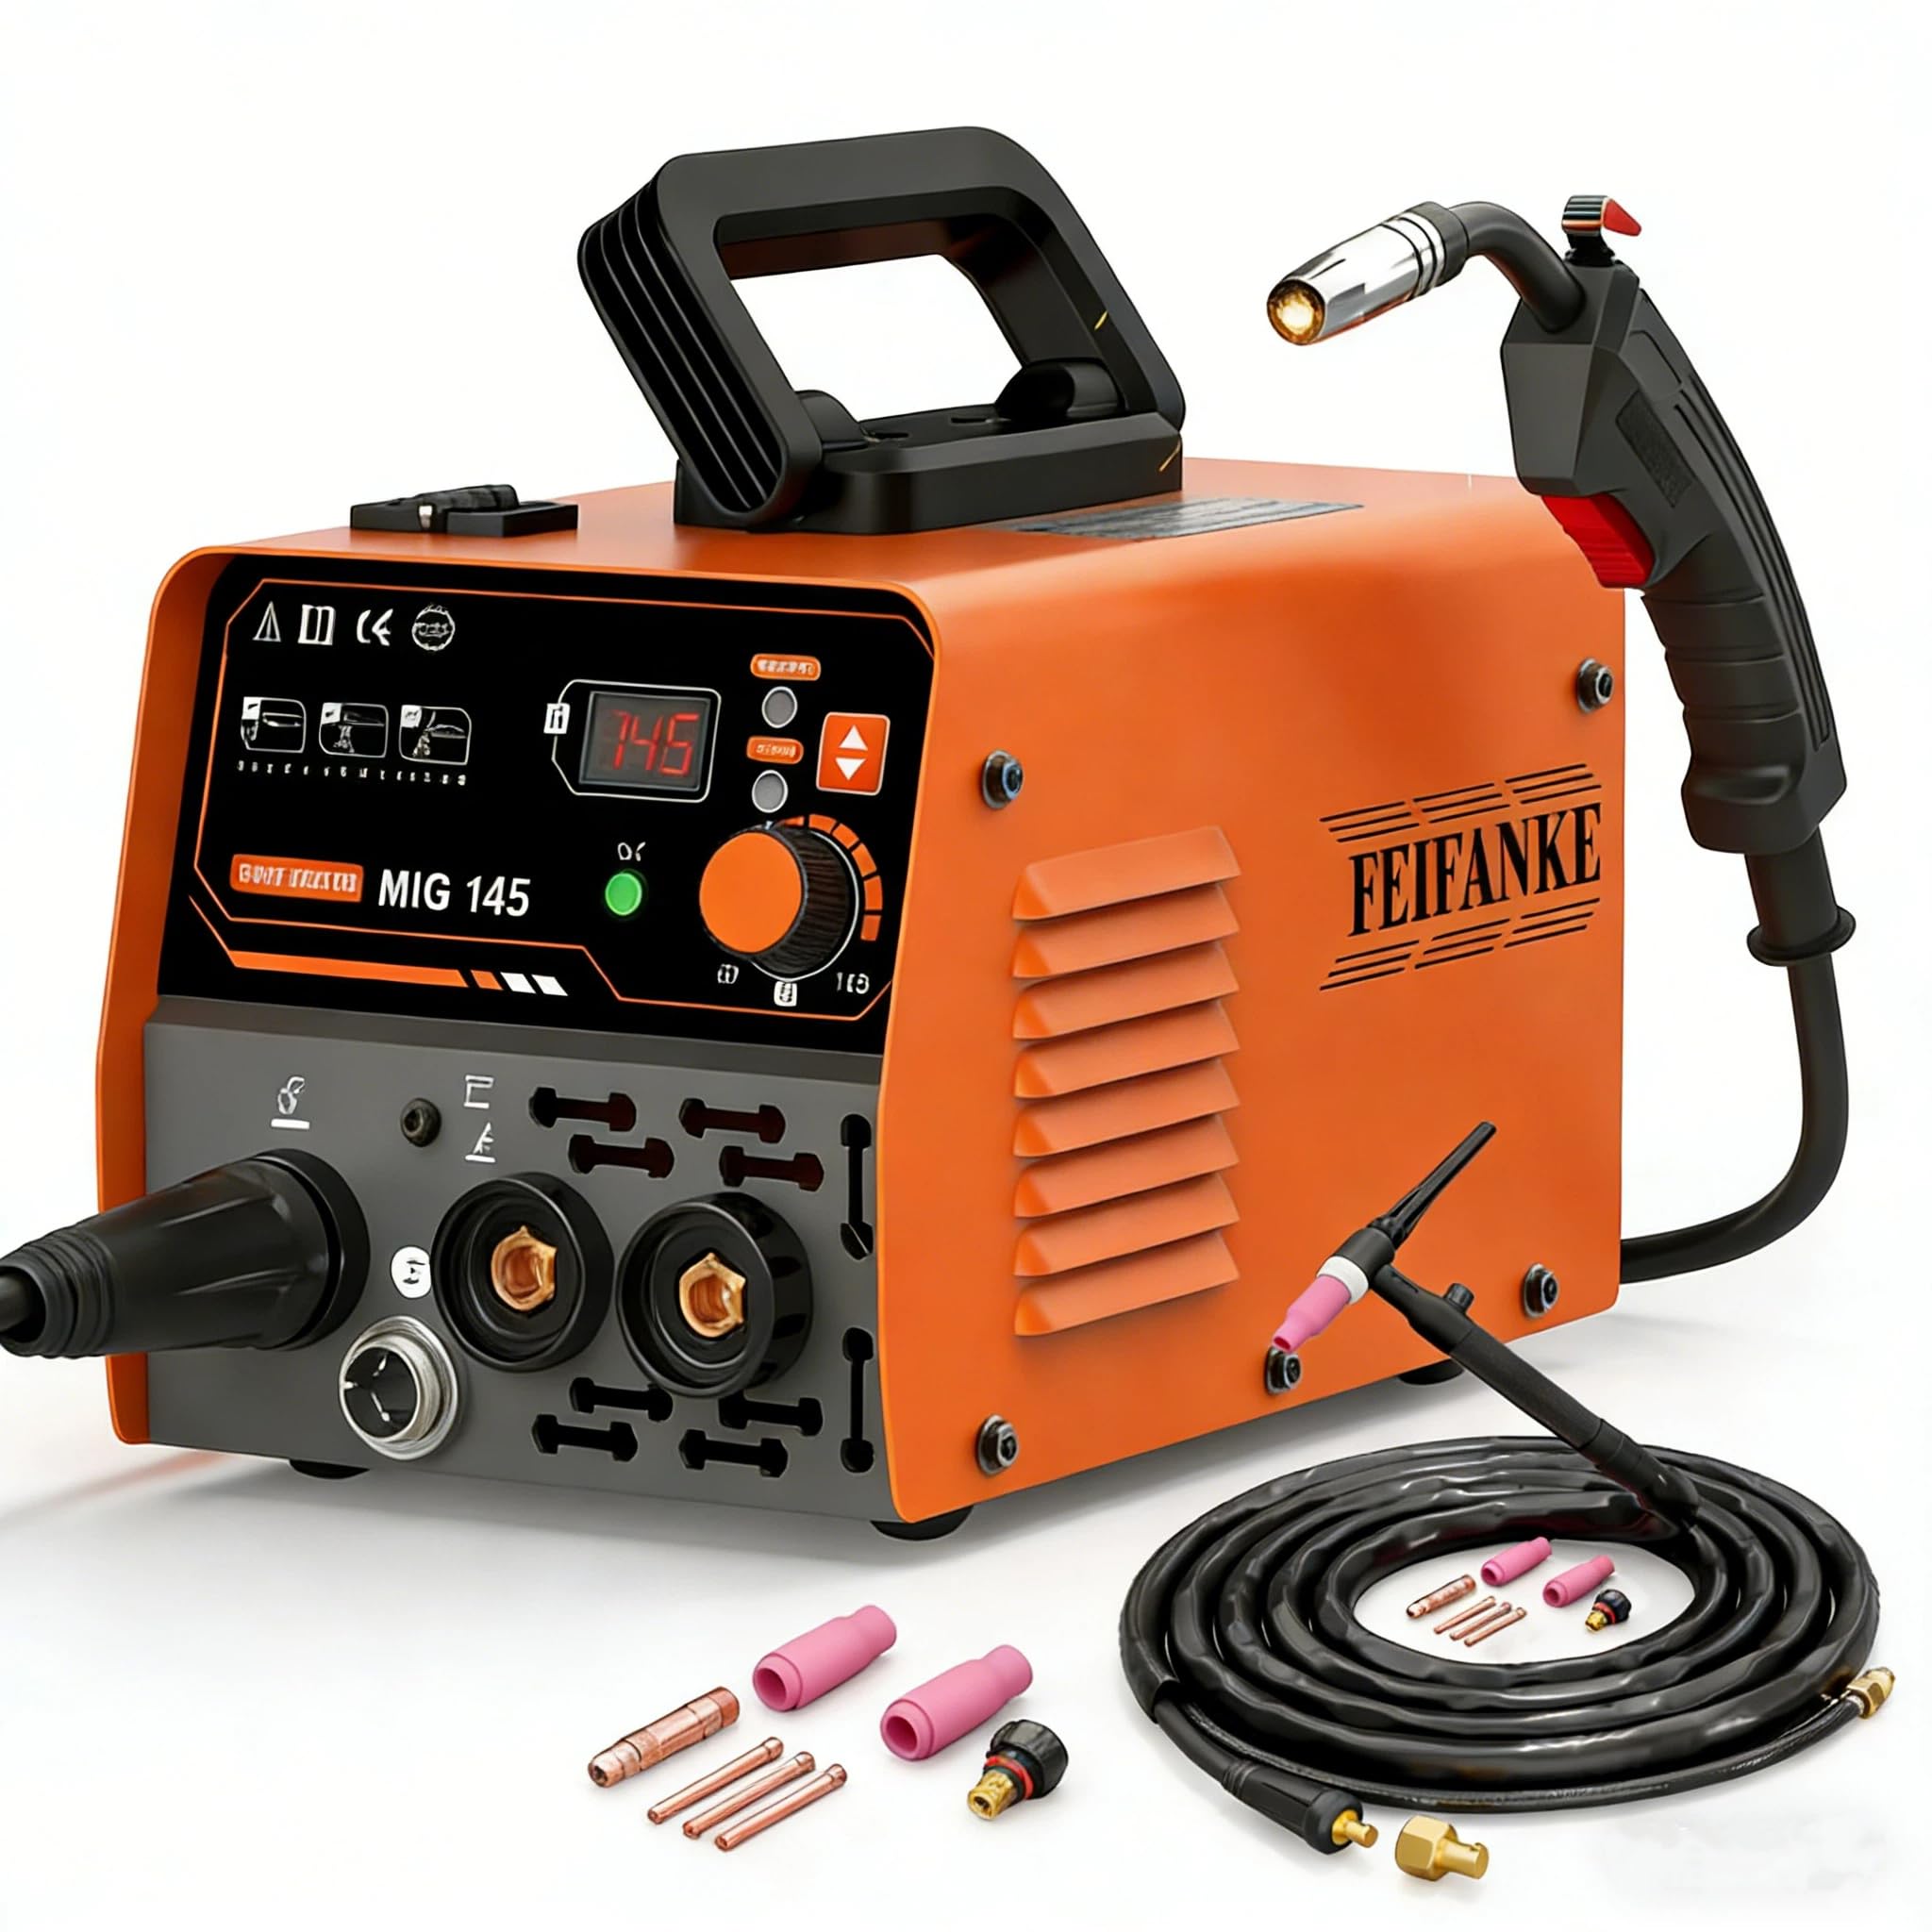
Figure 4.1: Front view of the FEIFANKE 145A 110V MINI MIG Welder. This image displays the compact design, control panel with Synergy LED display, and connection points for welding cables and torches.
Key Features:
- 3-in-1 Functionality: Supports Flux Core MIG, Lift TIG, and Stick (ARC) welding.
- IGBT Inverter Technology: Provides stable current output, high efficiency, and reliability.
- Synergy LED Display: Intuitive interface for easy adjustment of welding parameters.
- Compact and Portable: Lightweight design for easy transport and storage.
- 110V Input: Operates on standard household power outlets.
5. Setup
Before beginning any welding operation, ensure the machine is properly set up according to the specific welding process you intend to use.
5.1 Power Connection
- Ensure the welder's power switch is in the OFF position.
- Connect the power cord to a grounded 110V AC power outlet. Ensure the outlet can provide sufficient amperage for welding (typically 20A or more).
5.2 Ground Clamp Connection
- Connect the ground clamp cable to the appropriate terminal on the welder (usually marked with a "-" or ground symbol).
- Securely attach the ground clamp to the workpiece or a sturdy metal workbench that is in direct electrical contact with the workpiece. Ensure a clean, bare metal connection for optimal conductivity.
5.3 MIG Welding Setup (Flux Core)
- Install Wire Spool: Open the wire feed compartment. Place the flux core wire spool onto the spindle, ensuring it rotates freely. Thread the wire through the guide tube and into the drive rollers.
- Set Drive Rollers: Adjust the drive roller tension to firmly grip the wire without crushing it. Ensure the correct groove size on the drive roller matches your wire diameter.
- Connect MIG Torch: Connect the MIG torch cable to the designated MIG output terminal on the welder.
- Feed Wire: With the power on and the machine in MIG mode, press the trigger on the MIG torch (away from the workpiece) to feed the wire through the torch liner and out of the contact tip. Trim any excess wire.
- No Gas Required: For flux core welding, no external shielding gas cylinder is needed.
5.4 Lift TIG Welding Setup
- Connect TIG Torch: Connect the WP17V Lift TIG torch to the appropriate terminal on the welder (usually marked with a "+" or TIG symbol).
- Install Tungsten Electrode: Insert a sharpened tungsten electrode into the collet body of the TIG torch and tighten the collet cap. Ensure the correct tungsten diameter for your application.
- Connect Shielding Gas: Connect a suitable shielding gas cylinder (e.g., Argon) to the gas inlet on the welder (if available) or directly to the TIG torch with a gas valve. Set the gas flow rate using a flowmeter.
5.5 Stick (ARC) Welding Setup
- Connect Electrode Holder: Connect the electrode holder cable to the appropriate terminal on the welder (usually marked with a "+" or ARC symbol).
- Insert Electrode: Securely clamp the desired welding electrode (stick rod) into the electrode holder.
6. Operating Instructions
Always wear full personal protective equipment (PPE) before operating the welder.
6.1 Power On and Mode Selection
- Turn the main power switch to the ON position.
- Use the mode selection button on the control panel to choose between MIG, TIG, or ARC (Stick) welding. The Synergy LED Display will indicate the selected mode.
6.2 Parameter Adjustment (Synergy LED Display)
- The Synergy LED Display allows for intuitive adjustment of welding parameters.
- MIG Mode: Adjust voltage and wire feed speed. The synergistic control may automatically suggest optimal settings based on material thickness and wire type. Fine-tune as needed.
- TIG Mode: Adjust welding current (amperage). For Lift TIG, the arc is initiated by briefly touching the tungsten to the workpiece and then lifting it slightly.
- ARC (Stick) Mode: Adjust welding current (amperage) based on the electrode type and diameter.
- Refer to welding charts or practice on scrap material to find optimal settings for your specific application.
6.3 Welding Techniques
- MIG Welding: Maintain a consistent stick-out (distance from contact tip to workpiece). Use a push or pull technique depending on the joint and desired penetration.
- Lift TIG Welding: Hold the torch at a slight angle. Touch the tungsten to the workpiece to initiate the arc, then lift slightly to establish the arc. Maintain a short arc length. Add filler rod manually if required.
- Stick Welding: Strike the arc by scratching or tapping the electrode on the workpiece. Maintain a consistent arc length and travel speed.
7. Maintenance
Regular maintenance ensures the longevity and safe operation of your welder. Always disconnect the power supply before performing any maintenance.
- Cleaning: Periodically clean the exterior of the machine with a dry cloth. Use compressed air to blow out dust and debris from inside the machine, especially around cooling vents.
- Cable and Connection Inspection: Regularly inspect all welding cables, torches, and connections for wear, damage, or loose fittings. Replace damaged components immediately.
- MIG Torch Maintenance:
- Clean the contact tip and nozzle regularly to remove spatter.
- Check the wire liner for blockages or wear. Replace if necessary.
- TIG Torch Maintenance:
- Inspect the tungsten electrode for proper sharpening and contamination. Resharpen or replace as needed.
- Check collets and collet bodies for wear.
- Storage: Store the welder in a clean, dry environment, protected from dust and moisture.
8. Troubleshooting
This section provides solutions to common issues you might encounter. For problems not listed here, contact customer support.
| Problem | Possible Cause | Solution |
|---|---|---|
| Welder does not power on. | No power from outlet; tripped circuit breaker; faulty power cord. | Check power outlet and circuit breaker. Inspect power cord for damage. |
| No arc or weak arc. | Poor ground connection; incorrect settings; worn contact tip/electrode; wrong polarity. | Ensure ground clamp has good contact. Adjust current/voltage. Replace consumables. Check polarity for specific welding process. |
| MIG wire feeding issues. | Incorrect drive roller tension; wrong groove size; clogged liner; tangled wire spool. | Adjust drive roller tension. Ensure correct groove. Clean or replace liner. Untangle wire. |
| Overheating protection activated. | Exceeded duty cycle; blocked cooling vents. | Allow machine to cool down. Ensure proper ventilation and clear cooling vents. |
9. Specifications
Technical specifications for the FEIFANKE 145A 110V MINI MIG Welder (Model: ARC).
- Model Number: ARC
- Input Voltage: 110V AC
- Welding Processes: Flux Core MIG, Lift TIG, Stick (ARC)
- Max Output Current: 145A
- Technology: IGBT Inverter
- Display: Synergy LED Display
- Power Source: AC/DC
- Package Dimensions: 12.6 x 8.07 x 6.69 inches
- Manufacturer: FEIFANKE
- ASIN: B0GH15WV49
10. Warranty and Support
For warranty information, technical support, or service inquiries, please refer to the official FEIFANKE website or contact your authorized dealer. Keep your purchase receipt as proof of purchase for warranty claims.
FEIFANKE Customer Service: Please visit FEIFANKE Store on Amazon for contact details and further product information.
