
1. Introduction
The GEARGO T18 Wireless Tire Pressure Monitoring System (TPMS) is designed to provide real-time monitoring of your vehicle's tire pressure and temperature. This system enhances driving safety by alerting you to abnormal tire conditions, helping to prevent accidents and extend tire life. It features both solar and USB charging capabilities for continuous operation and includes four external sensors for easy installation.
Key Features:
- Real-time monitoring of tire pressure and temperature for up to 4 tires.
- Six distinct alarm modes: high pressure, low pressure, high temperature, fast leak, slow leak, low sensor battery, and signal loss.
- Dual power supply: integrated solar panel and USB charging port for reliable power.
- Simple installation: external sensors screw directly onto valve stems without complex wiring.
- Clear LCD display with selectable pressure units (PSI/BAR) and temperature units (℃/℉).
2. Package Contents
Please check the package contents upon opening to ensure all components are present:
- 1 x GEARGO T18 TPMS Monitor
- 4 x External Tire Pressure Sensors
- 4 x Anti-theft Nuts
- 1 x Wrench
- 1 x USB Charging Cable
- 1 x User Manual (this document)
3. Product Overview
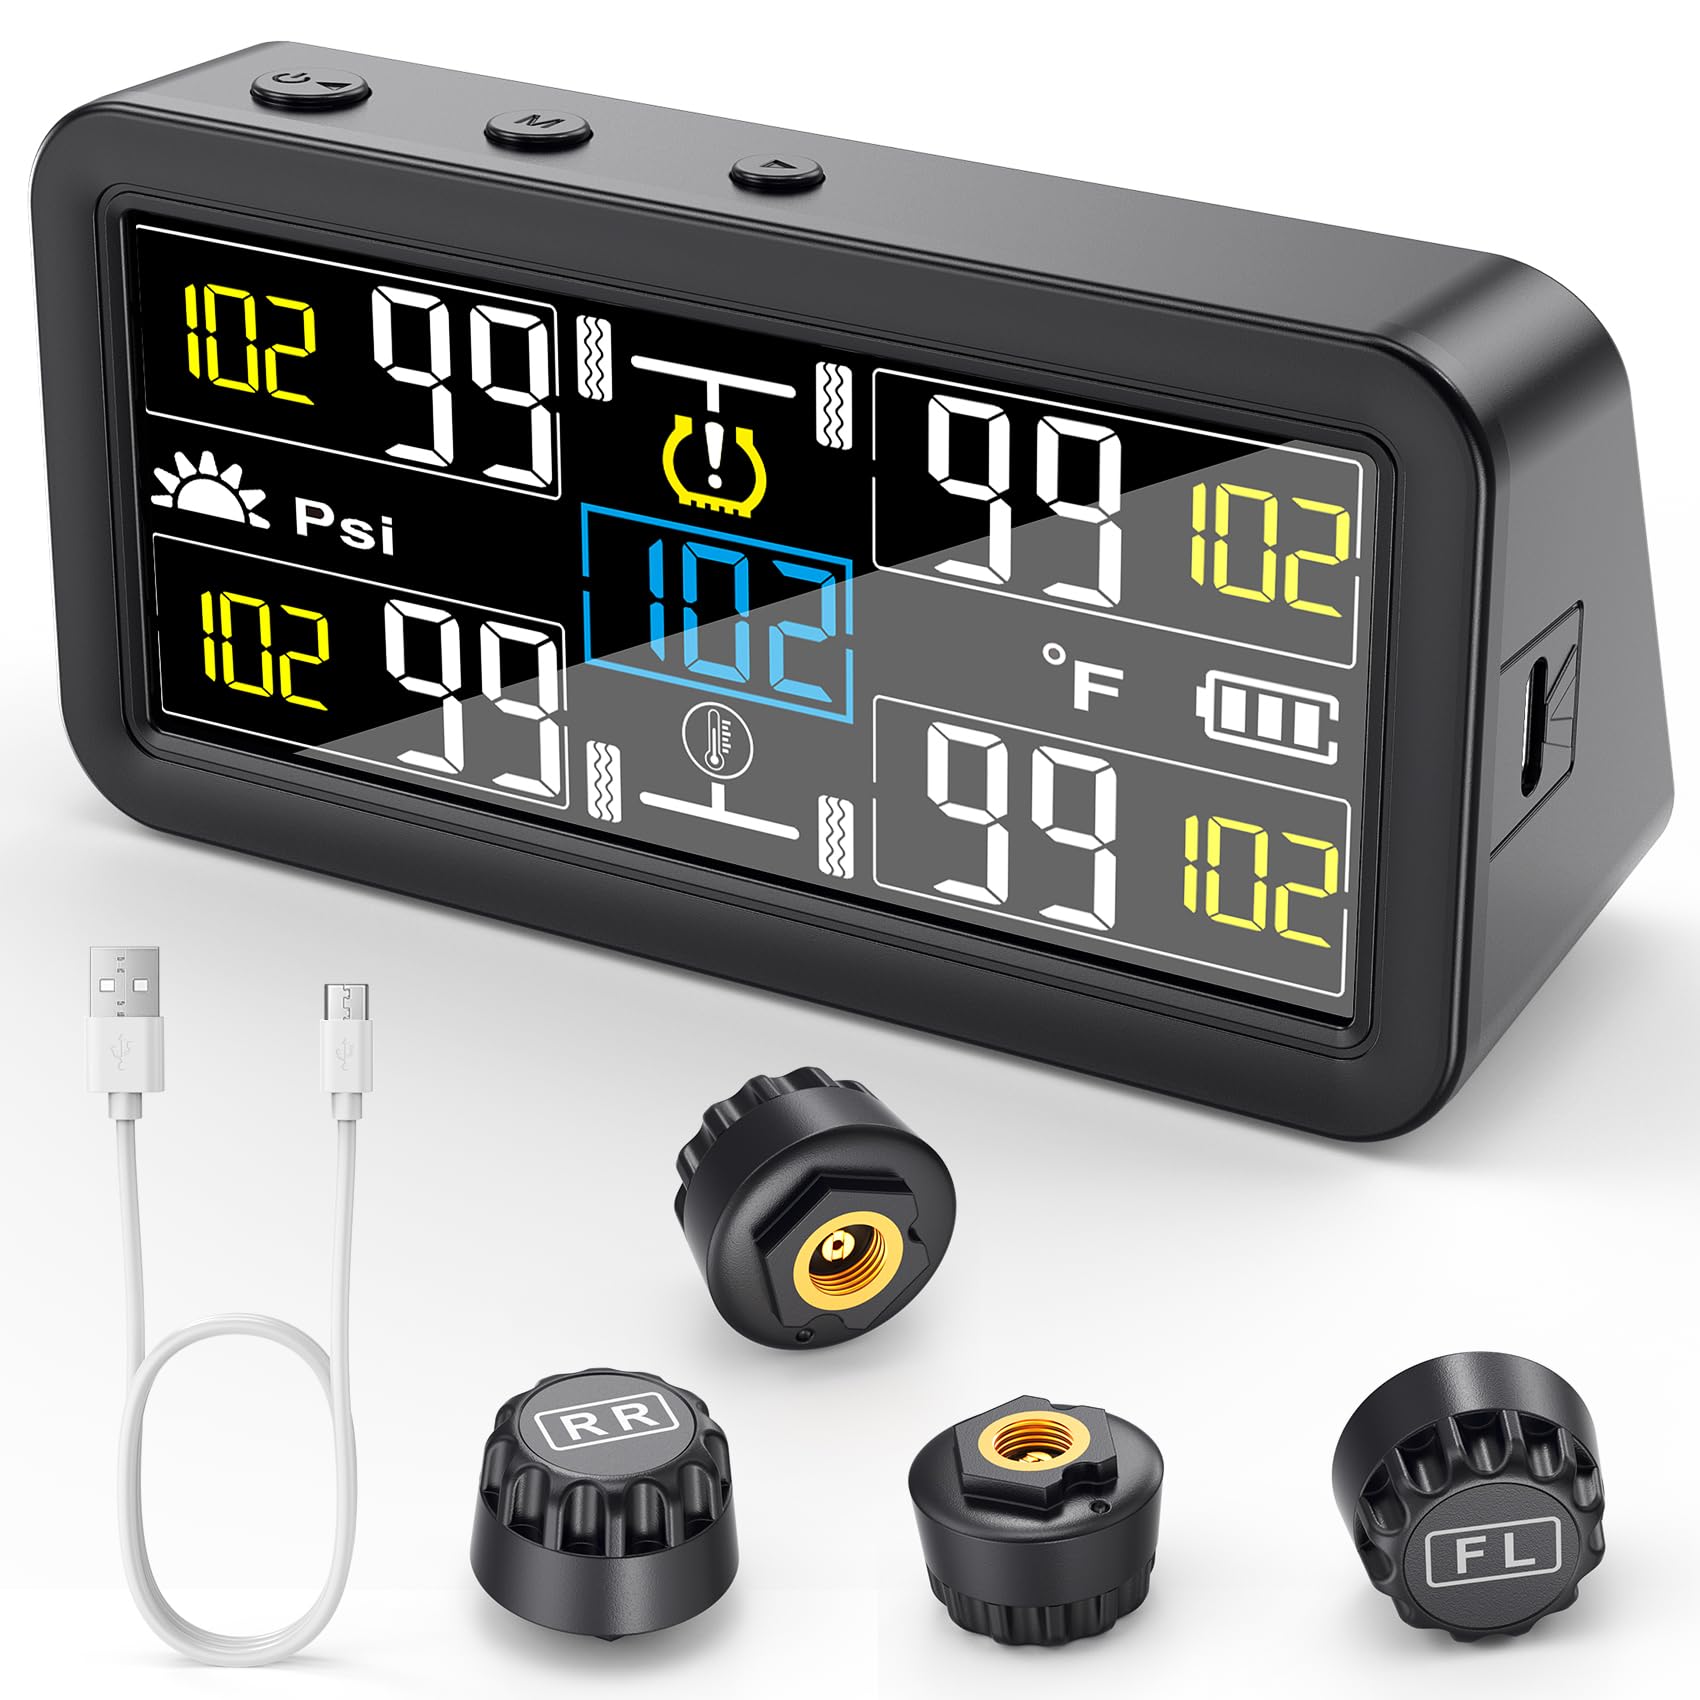
Image 1: The GEARGO T18 Wireless Tire Pressure Monitoring System, showing the central monitor unit and four external tire sensors. The monitor features a clear display and buttons for control, while the sensors are compact and designed for valve stem installation.
The system consists of a main display unit and four external sensors. The display unit shows real-time tire data and alarm notifications. The sensors are installed on the tire valve stems and transmit data wirelessly to the display.
4. Setup
4.1 Charging the Monitor
Before first use, fully charge the monitor. The monitor can be charged via two methods:
- Solar Charging: Place the monitor on your dashboard where it can receive direct sunlight. The built-in solar panel will charge the internal battery.
- USB Charging: Connect the provided USB charging cable to the monitor's charging port and a 5V USB power source (e.g., car charger, computer USB port). The charging indicator will illuminate during charging and turn off when fully charged.
4.2 Sensor Installation
Install the external sensors on your vehicle's tire valve stems. Each sensor is labeled for its corresponding tire position (e.g., FL for Front Left, FR for Front Right, RL for Rear Left, RR for Rear Right).
- Unscrew the original valve cap from the tire valve stem.
- Screw on an anti-theft nut onto the valve stem.
- Screw the corresponding sensor onto the valve stem until it is hand-tight.
- Using the provided wrench, tighten the anti-theft nut against the sensor to secure it. This helps prevent theft and ensures a tight seal.
- Repeat for all four tires.
Note: Ensure the sensors are installed on the correct tire positions as indicated by their labels for accurate display readings.
4.3 Monitor Placement
Place the monitor on your vehicle's dashboard in a position that allows for clear visibility while driving and optimal exposure to sunlight for solar charging. Ensure it does not obstruct your view or interfere with airbags.
5. Operating Instructions
5.1 Power On/Off
- Power On: Press and hold the 'M' button for approximately 3 seconds. The display will light up.
- Power Off: Press and hold the 'M' button for approximately 3 seconds until the display turns off. The system will also automatically power on when it detects vibration (e.g., when the vehicle starts moving) and power off after a period of inactivity.
5.2 Display Overview
The LCD display shows the following information for each tire:
- Tire position (FL, FR, RL, RR)
- Current tire pressure
- Current tire temperature
- Sensor battery status
- Monitor battery status
5.3 Unit Settings
To change pressure and temperature units:
- With the monitor powered on, press and hold the 'M' button until the unit setting icon flashes.
- Press the '+' or '-' button to cycle through pressure units (PSI/BAR) and temperature units (℃/℉).
- Press the 'M' button again to confirm your selection and exit the setting mode.
5.4 Alarm Settings
You can set custom high pressure, low pressure, and high temperature alarm thresholds.
- With the monitor powered on, press and hold the 'M' button until the unit setting icon flashes.
- Press the 'M' button repeatedly to cycle through the alarm settings: High Pressure, Low Pressure, High Temperature.
- When the desired setting is flashing, use the '+' or '-' buttons to adjust the value.
- Press 'M' to confirm the value and move to the next setting, or hold 'M' to exit the setting mode.
Recommended Pressure Range: 0-87 PSI. Adjust settings based on your vehicle manufacturer's recommendations.
5.5 Alarm Modes
The system will alert you with an audible alarm and visual warning on the display for the following conditions:
- High Pressure Alarm: Tire pressure exceeds the set high pressure threshold.
- Low Pressure Alarm: Tire pressure drops below the set low pressure threshold.
- High Temperature Alarm: Tire temperature exceeds the set high temperature threshold.
- Fast Leak Alarm: Rapid decrease in tire pressure.
- Slow Leak Alarm: Gradual decrease in tire pressure over time.
- Low Sensor Battery Alarm: A specific sensor's battery is low and requires replacement.
- Signal Loss Alarm: The monitor is not receiving a signal from a sensor.
6. Maintenance
6.1 Monitor Charging
Ensure the monitor receives adequate sunlight for solar charging. If the vehicle is parked indoors or in shaded areas for extended periods, use the USB cable to charge the monitor's internal battery.
6.2 Sensor Battery Replacement
When a low sensor battery alarm occurs, the sensor battery needs to be replaced. External sensors typically use a CR1632 button cell battery.
- Unscrew the sensor from the valve stem and remove the anti-theft nut.
- Carefully open the sensor casing (usually by twisting or prying gently).
- Remove the old CR1632 battery and insert a new one, ensuring correct polarity (+ side up).
- Close the sensor casing securely and re-install the sensor on the valve stem following the installation steps in Section 4.2.
6.3 Cleaning
Wipe the monitor and sensors with a soft, damp cloth. Avoid using harsh chemicals or abrasive cleaners that could damage the surfaces or electronic components.
7. Troubleshooting
- No Display/Monitor Not Turning On:
- Ensure the monitor is charged. Connect it to a USB power source for at least 30 minutes.
- Press and hold the 'M' button for 3 seconds to power on. - Sensor Not Displaying Data / Signal Loss Alarm:
- Check if the sensor is installed correctly and securely on the valve stem.
- Ensure the sensor battery is not low (replace if necessary).
- Drive the vehicle for a short distance (5-10 minutes) to allow sensors to transmit data.
- If the issue persists, try re-pairing the sensor (refer to advanced settings in a more detailed manual if available, or contact support). - Inaccurate Readings:
- Verify that the sensors are installed on the correct tire positions.
- Ensure the tires are inflated to the correct pressure using a calibrated gauge, then compare with the TPMS reading. A slight difference (e.g., +/- 1-2 PSI) is normal.
- Check for any physical damage to the sensor. - Constant Alarm:
- Check the tire pressure and temperature immediately. Address any actual tire issues.
- Review your alarm threshold settings (Section 5.4) to ensure they are appropriate for your vehicle.
8. Specifications
| Feature | Specification |
|---|---|
| Brand | GEARGO |
| Model | T18 |
| Part Number | T18-001 |
| Pressure Range | 0-87 PSI (0-6 BAR) |
| Pressure Accuracy | ±1.5 PSI (±0.1 BAR) |
| Temperature Accuracy | ±3℃ |
| Operating Frequency | 433.92MHz |
| Monitor Charging | Solar / USB |
| Sensor Battery Type | CR1632 (replaceable) |
| Monitor Dimensions (L x W x H) | 6.29 x 5.11 x 2.12 inches (approximate) |
| Manufacturer | Xiaozhanluos |