
Introduction
This manual provides instructions for the safe and effective use of your Gardtech AM/FM Radio Hearing Protection Headphones. Please read this manual thoroughly before operating the device and retain it for future reference.
Important Safety Information
- Always ensure the earmuffs fit snugly to achieve the stated Noise Reduction Rating (NRR).
- Do not modify the device. Unauthorized modifications may compromise safety and void the warranty.
- Keep the device away from extreme temperatures and moisture.
- Use only the provided charging cable or a certified equivalent.
- Regularly inspect the earmuffs for damage, especially the ear cushions and headband. Replace damaged parts immediately.
What's in the Box
Verify that all items are present upon unboxing:
- 1 x Gardtech AM/FM Radio Hearing Protection Headphones
- 1 x Type-C Charging Cable
- 1 x User Manual

Image: Contents of the Gardtech headphone package.
Product Overview
Familiarize yourself with the main components and controls of your headphones.

Image: Headphone controls and display.
Controls and Features
- LED Display: Shows current frequency, mode, and battery status.
- Previous Item Button: Navigates to the previous radio station or setting.
- AM/FM Mode Button: Switches between AM and FM radio bands.
- Next Item Button: Navigates to the next radio station or setting.
- Automatic Scan Button: Initiates automatic scanning and storage of radio stations.
- Volume/On-Off Dial: Rotates to adjust volume; press and hold to power on/off.
- 3.5mm AUX Audio Cable Port: For connecting external audio devices (cable not included).
Setup
Charging the Battery
The headphones are equipped with a 1200mAh rechargeable battery. Before first use, fully charge the device.
- Connect the provided Type-C charging cable to the charging port on the headphones.
- Connect the other end of the cable to a USB power adapter (not included) or a computer USB port.
- The LED display will indicate charging status. A full charge takes approximately 2 hours.
- A fully charged battery provides up to 40 hours of uninterrupted use.

Image: Battery and charging information.
Adjusting the Headphones
For optimal noise reduction and comfort, ensure a proper fit.
- Extend or retract the adjustable headband to fit your head size.
- Position the earcups over your ears, ensuring they completely cover your ears and create a seal.
- The soft noise-reducing foam cushions are designed for comfort during extended wear.
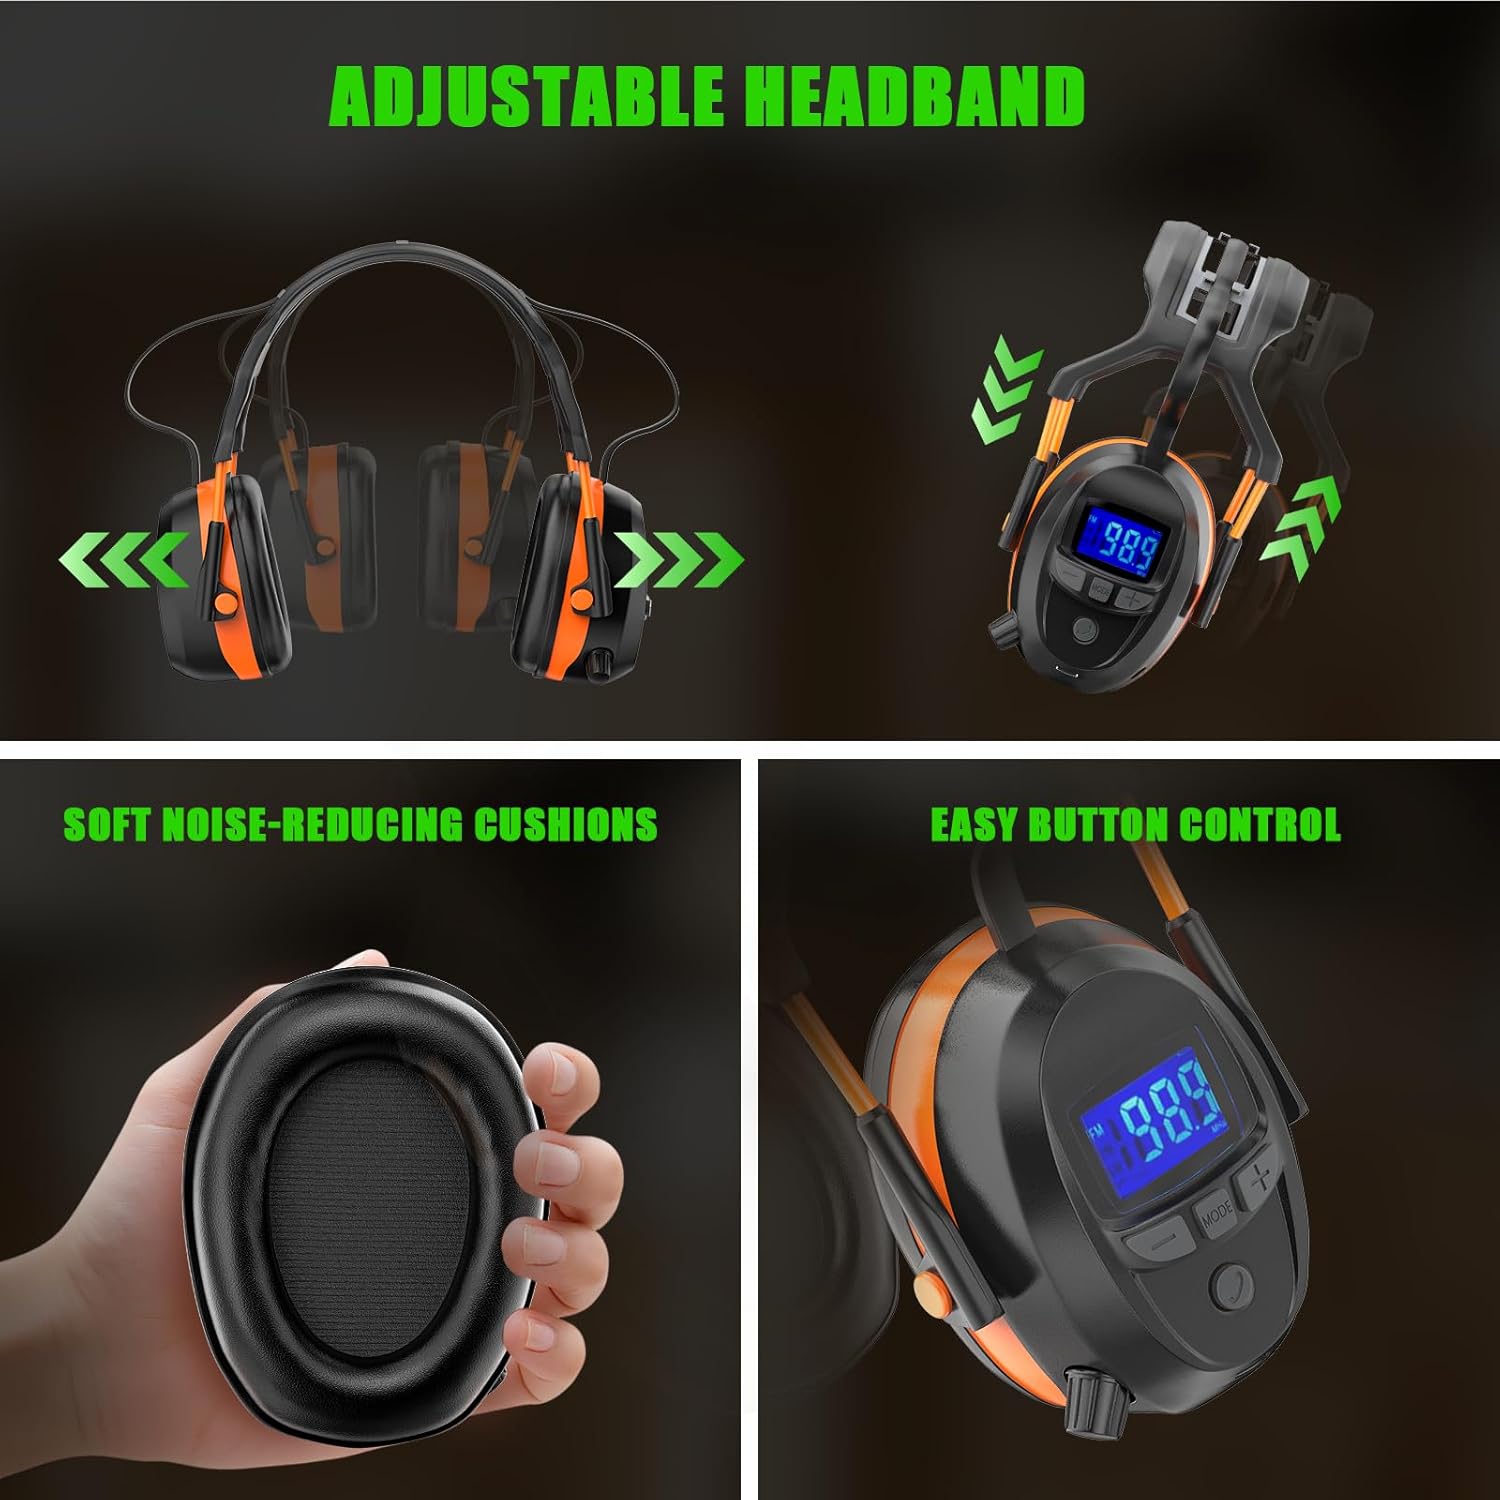
Image: Adjustable headband and ear cushions.
Operating Instructions
Power On/Off and Volume Control
- Power On: Press and hold the Volume/On-Off Dial (Control 6) for a few seconds until the LCD display illuminates.
- Power Off: Press and hold the Volume/On-Off Dial (Control 6) again until the display turns off.
- Adjust Volume: Rotate the Volume/On-Off Dial (Control 6) clockwise to increase volume and counter-clockwise to decrease volume.
Tuning the Radio (AM/FM)
- Select Band: Press the AM/FM Mode Button (Control 3) to switch between AM and FM radio bands. The selected band will be shown on the LED display.
- Automatic Scan and Store: Press and hold the Automatic Scan Button (Control 5) for 2-3 seconds. The headphones will automatically scan for available stations and store up to 10 AM and 10 FM stations.
- Manual Tuning: Use the Previous Item Button (Control 2) and Next Item Button (Control 4) to manually tune to desired frequencies or navigate through stored stations.

Image: Auto scan and store feature steps.
Maintenance
- Cleaning: Wipe the exterior of the headphones with a soft, damp cloth. Do not use abrasive cleaners or immerse the device in water.
- Ear Cushions: Periodically check ear cushions for wear and tear. Replace them if they become damaged or lose their sealing capability to maintain optimal noise reduction.
- Storage: Store the headphones in a cool, dry place away from direct sunlight and extreme temperatures when not in use.
- Care Instructions: Dry Clean Only (as per product specifications, likely referring to the fabric components if any, or a general care note).
Troubleshooting
| Problem | Possible Cause | Solution |
|---|---|---|
| No power | Battery is depleted. | Charge the headphones using the provided Type-C cable. |
| Poor radio reception/static | Weak signal area or interference. | Move to an area with better signal. Try auto-scanning again. |
| Low volume | Volume setting is too low. | Increase volume using the Volume/On-Off Dial. Note that radio volume may be lower than other audio sources due to hearing protection design. |
| Headphones do not fit comfortably | Headband not adjusted correctly. | Adjust the headband to ensure a snug yet comfortable fit over your ears. |
Specifications
| Feature | Detail |
|---|---|
| Noise Reduction Rating (NRR) | 29 dB |
| Battery Capacity | 1200mAh |
| Playtime | Up to 40 hours |
| Charging Time | Approx. 2 hours |
| Radio Bands | AM/FM |
| Display | LCD |
| Material Type | Plastic |
| Color | Orange |
| Product Dimensions | 8.27 x 6.42 x 4.1 inches |
| Weight | 1.13 Pounds |
Warranty and Support
Gardtech provides a 2-year warranty for these headphones. For any product inquiries, technical support, or warranty claims, please contact Gardtech customer service. Responsive after-sales support is available to assist you.