
GUTINNEEN A68
GUTINNEEN Outdoor Rabbit Hutch with Run and Wheels
Model A68 Instruction Manual
1. Introduction
This manual provides comprehensive instructions for the assembly, operation, maintenance, and troubleshooting of your GUTINNEEN Outdoor Rabbit Hutch, Model A68. Please read all instructions carefully before assembly and use to ensure the safety and well-being of your pets.
2. Safety Instructions
- Always supervise pets, especially during initial use, to ensure they adapt safely to their new environment.
- Regularly inspect the hutch for any damage, loose parts, or sharp edges that could harm your pets.
- Ensure all locks and latches are securely fastened to prevent escapes.
- Place the hutch on a level, stable surface to prevent tipping.
- Protect the hutch from extreme weather conditions. While designed for outdoor use, prolonged exposure to heavy rain or direct intense sunlight may affect its longevity.
- Keep small children away from the hutch during assembly and when pets are inside.
- This hutch is designed for small animals such as rabbits and guinea pigs. Do not use for other animals.
3. Parts List
Before beginning assembly, ensure all components are present and undamaged. If any parts are missing or damaged, please contact customer support.
- Wooden panels (walls, roof sections, floor)
- Wire mesh panels
- Pull-out trays
- Wheels with brakes
- Ramps
- Sliding doors
- Hardware (screws, hinges, latches)
- Assembly tools (usually a screwdriver, not included)
4. Setup and Assembly
Assembly typically requires two people and a Phillips head screwdriver. Follow the included graphical instructions for detailed step-by-step guidance. Ensure all screws are tightened securely, but avoid over-tightening to prevent wood damage.

Image: Fully assembled GUTINNEEN Outdoor Rabbit Hutch, showcasing its overall structure and design.
Key Assembly Steps:
- Base Construction: Assemble the main floor and side panels, ensuring they are aligned correctly.
- Wheel Attachment: Securely attach the six wheels to the bottom of the hutch base. Ensure the brake casters are functional.
- Hutch and Run Walls: Install the wire mesh panels and wooden walls for both the enclosed hutch areas and the open run sections.
- Roof Installation: Attach the waterproof asphalt roof sections. Ensure they are properly aligned to provide maximum weather protection.
- Door and Ramp Installation: Install all multi-access doors, sliding doors, and ramps. Verify that all hinges and latches operate smoothly and securely.
- Tray Insertion: Slide the no-leak pull-out trays into their designated slots beneath the wire mesh flooring.
5. Operating Instructions
The GUTINNEEN Rabbit Hutch is designed for ease of use and pet comfort. Familiarize yourself with its features for optimal functionality.
Video: Overview of the GUTINNEEN Rabbit Hutch features, including access points, internal structure, and pull-out trays.
- Mobility: The hutch is equipped with 6 wheels, including brake casters. To move the hutch, release the wheel brakes. To secure it in place, engage the brakes on the casters.
- Multi-Access Doors: Multiple doors are provided for easy access to different sections of the hutch. Use these for feeding, watering, and interacting with your pets. Ensure all doors are securely latched after use.
- Sliding Door: A middle sliding door allows you to separate the left and right sections of the hutch, creating two distinct areas or connecting them for a larger space. Slide the door to open or close the passage as needed.
- Pull-Out Trays & Wire Netting: The hutch features removable wire netting above pull-out trays. This design keeps pets from standing in waste and simplifies cleaning. The trays can be pulled out from either the front or back for convenience.
- Weather Protection: The hutch is equipped with a waterproof asphalt roof to provide protection from the elements, ensuring a dry interior.
- Additional Features: The hutch includes metal fencing to deter chewing, quality locks for durability, ramps for convenient pet access, and windows for better observation.

Image: Close-up of the hutch wheels, highlighting the brake casters for secure placement.
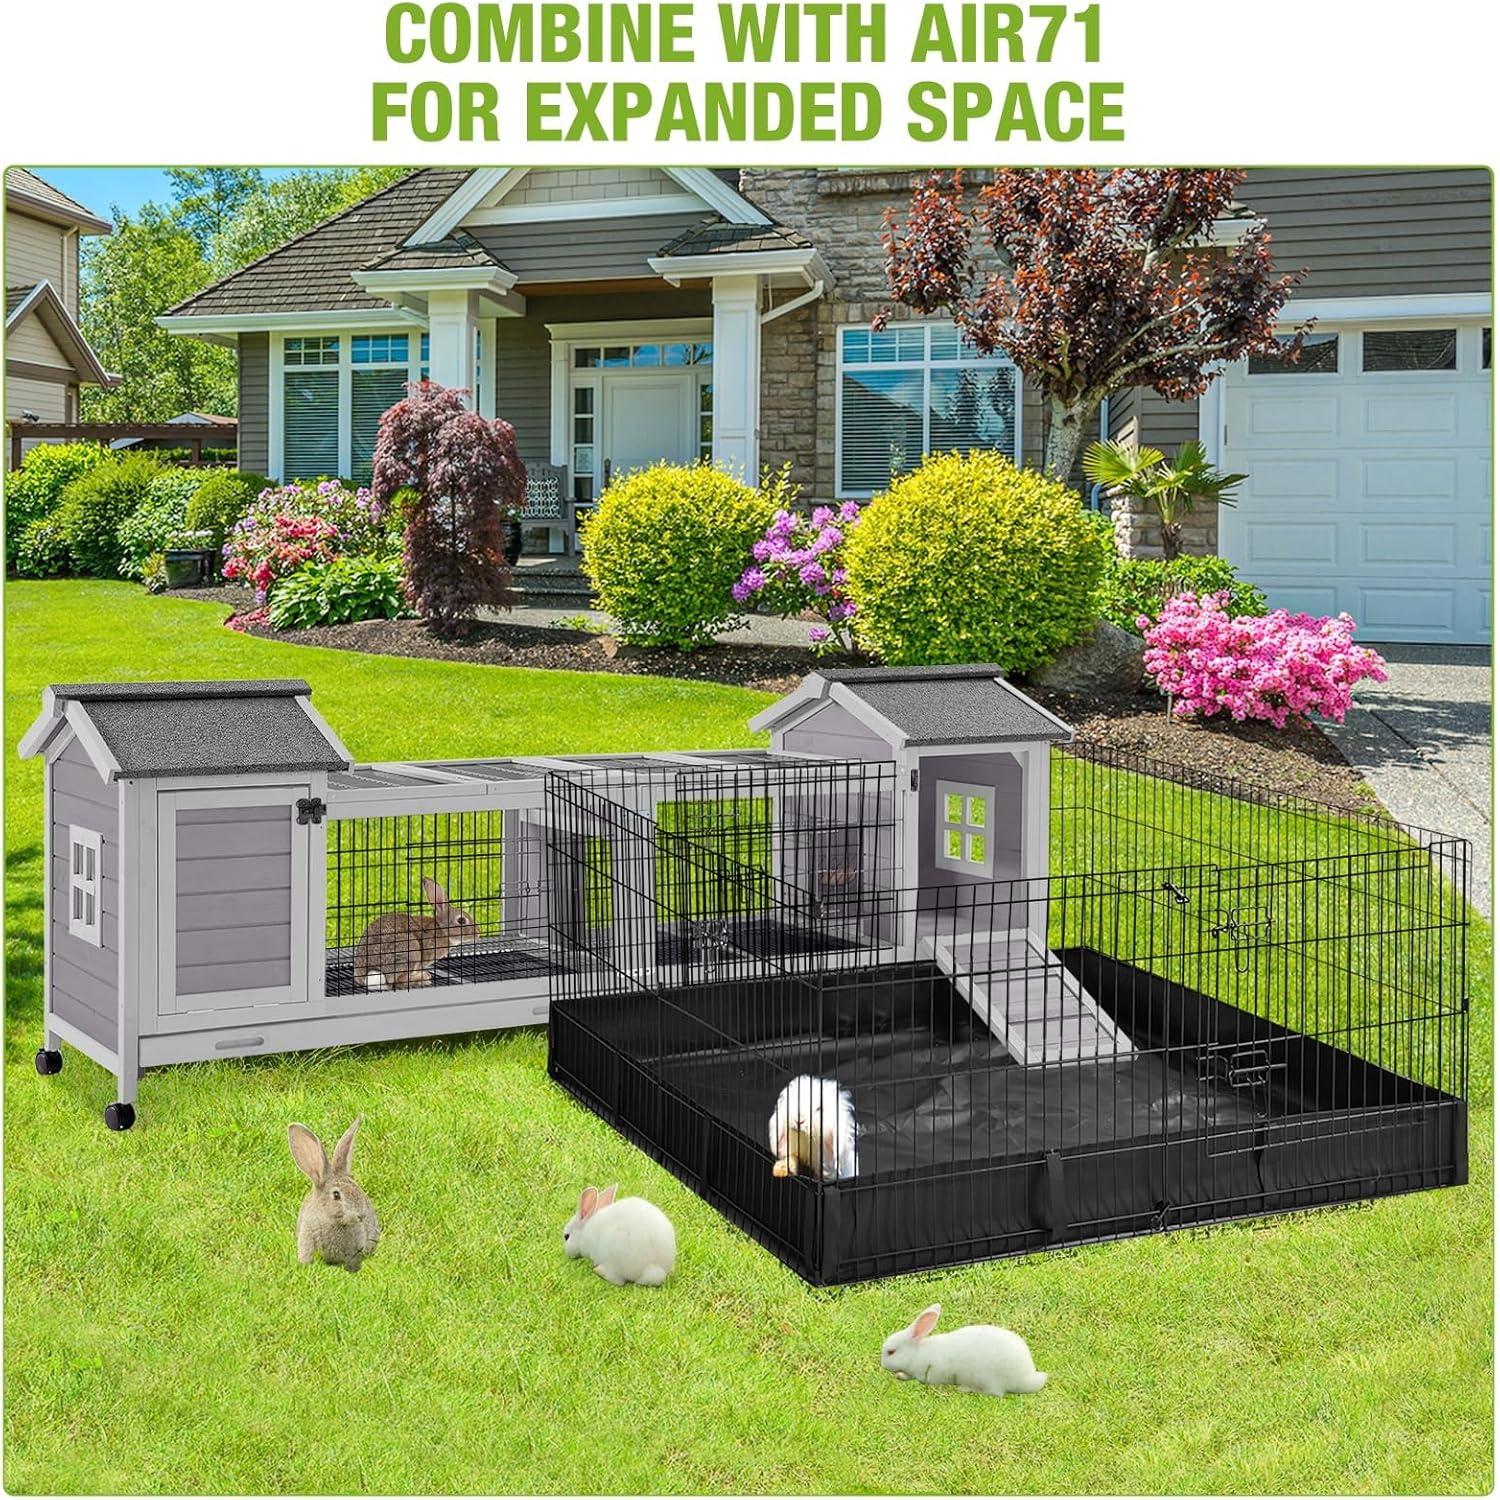
Image: Illustration of the sliding door mechanism, showing its open and closed positions to divide or connect hutch sections.
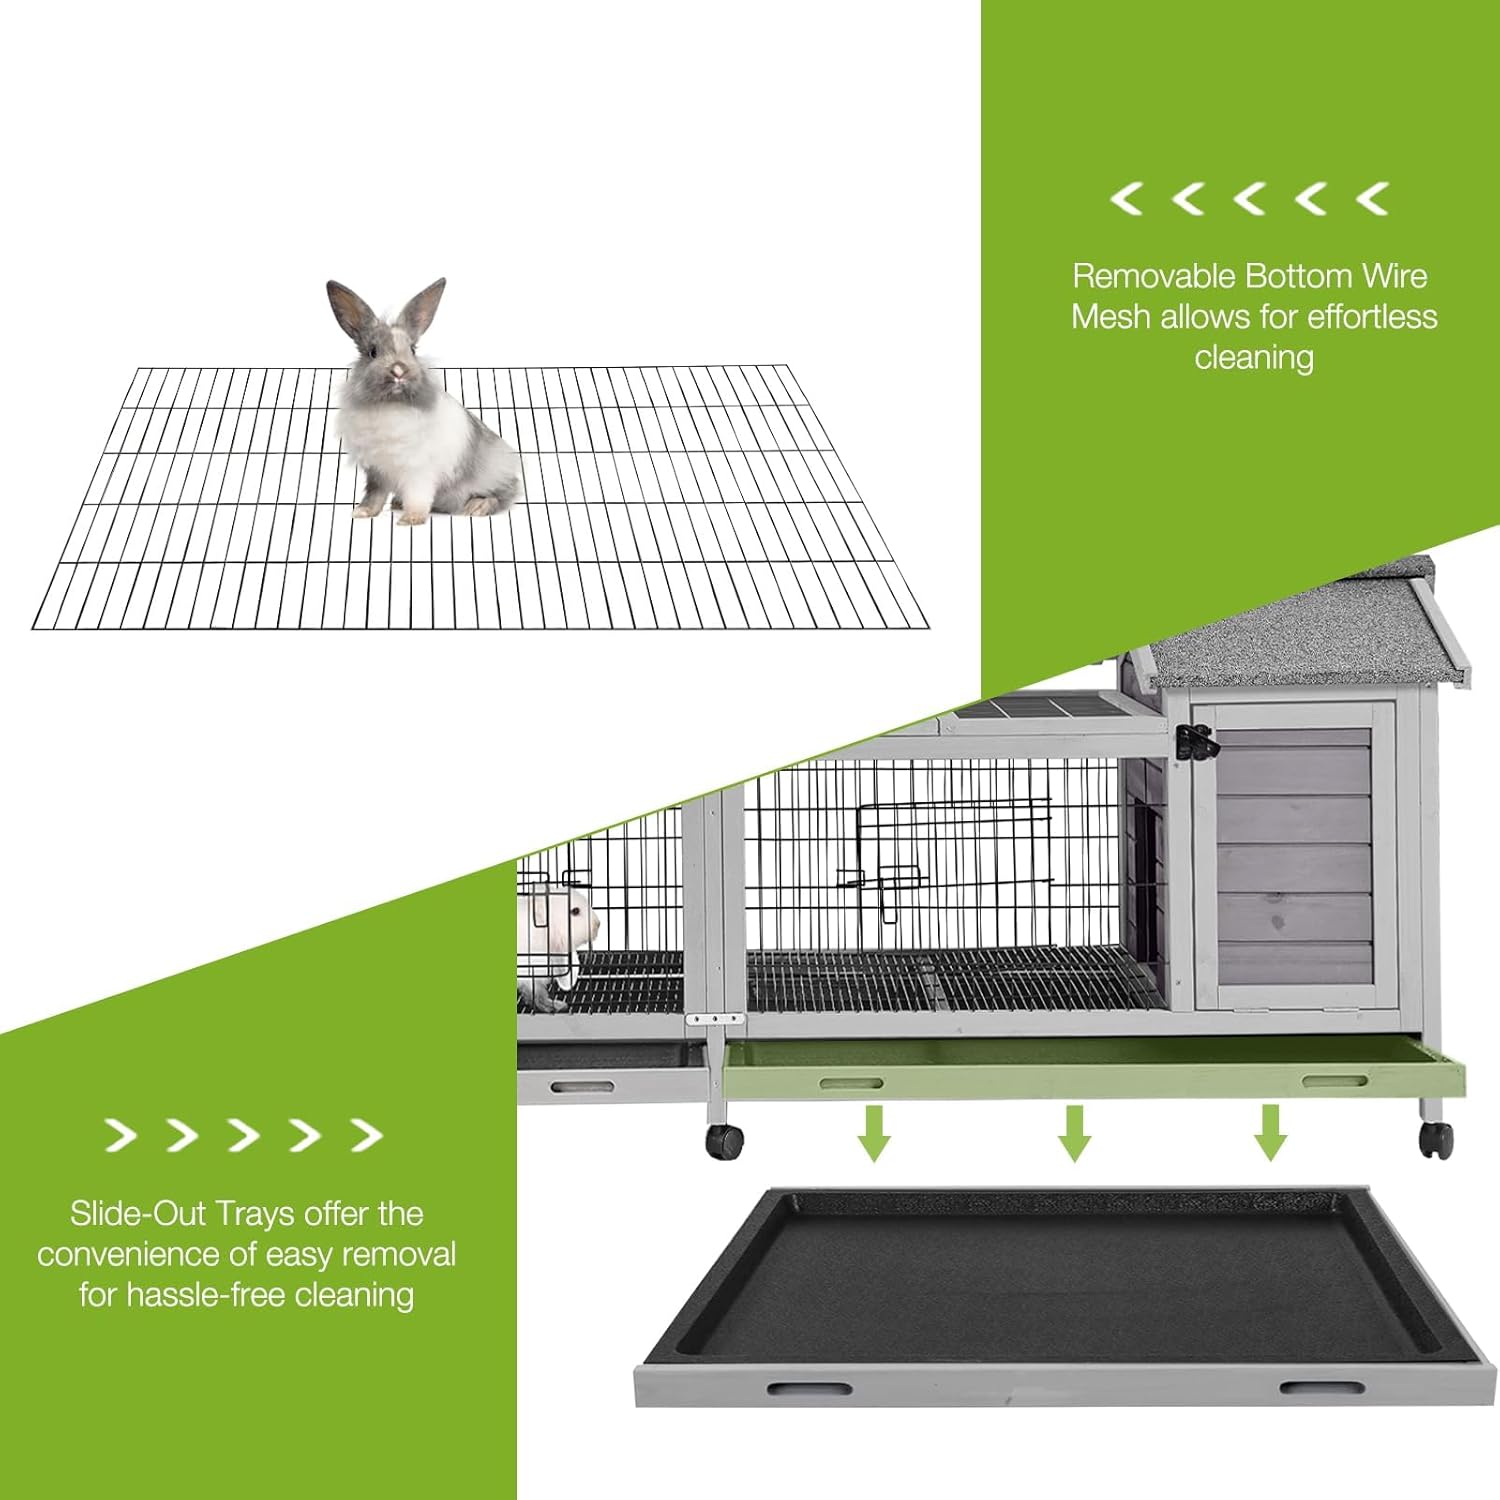
Image: Demonstrates the removable wire mesh and slide-out trays, designed for easy cleaning and pet hygiene.

Image: Close-up of the waterproof asphalt roof, highlighting its protective features against weather.

Image: A collage showing detailed features such as metal fencing, secure locks, access ramps, and observation windows.
6. Maintenance
- Daily Cleaning: Regularly remove waste from the pull-out trays. The removable wire netting can be lifted for thorough cleaning of the trays.
- Weekly Cleaning: Wipe down all surfaces with a pet-safe cleaner. Ensure the hutch is completely dry before returning pets.
- Structural Inspection: Periodically check all wooden components for signs of chewing or wear. Replace damaged parts as necessary. Inspect hinges, latches, and wheels for proper function.
- Weather Protection: While the roof is waterproof, consider additional covers during prolonged periods of harsh weather to extend the hutch's lifespan.
7. Troubleshooting
- Difficulty Pulling Out Trays: Ensure the hutch is on a level surface. Check for any debris or obstructions in the tray runners. Apply a small amount of pet-safe lubricant if necessary.
- Wood Chewing: Provide alternative chew toys for your pets to redirect their chewing behavior. Regularly inspect and reinforce any areas showing significant chewing.
- Wheels Not Rolling Smoothly or Breaking: Check for debris in the wheel mechanisms. Ensure the wheels are securely attached. If a wheel is damaged, contact customer support for replacement options.
- Hutch Instability: Verify that all assembly screws are tightened. Ensure the hutch is placed on a firm, level surface.
8. Specifications

Image: Diagram illustrating the key dimensions of the rabbit hutch.
| Feature | Detail |
|---|---|
| Model Number | A68 |
| Product Dimensions (L x W x H) | 80.12" x 22.82" x 28.64" |
| Material | Fir Wood |
| Color | Grey |
| Target Species | Rabbit, Small Animals |
| Special Features | Spacious, Wheels, Pull-Out Trays, Waterproof Roof |
| Number of Levels | 1 |
| Included Components | Removable Tray |
9. Warranty
This GUTINNEEN Rabbit Hutch, Model A68, comes with a 1-year manufacturer's warranty from the date of purchase. This warranty covers defects in materials and workmanship under normal use. It does not cover damage resulting from misuse, neglect, accidents, or unauthorized modifications. Please retain your proof of purchase for warranty claims.
10. Customer Support
For any questions, concerns, or assistance with your GUTINNEEN Rabbit Hutch, please contact our customer support team. We are dedicated to providing you with the best possible service.
- Email: support@gutinneen.com
- Website: GUTINNEEN Official Store
Ask a question about this manual
Ask about setup, troubleshooting, compatibility, parts, safety, or missing instructions. Manuals+ will review the question and use this page’s manual context to help answer it.