
Introduction
Thank you for choosing the Ausic Q9 21" Portable Ceiling Fan with Light & Remote. This versatile device is designed to provide cooling and illumination in various indoor and outdoor settings, including patios, gazebos, tents, and during emergencies. Featuring a powerful battery, detachable blades for portability, and convenient remote control, the Q9 fan offers comfort and functionality wherever you need it.
This manual provides essential information for the safe and efficient operation of your Ausic Q9 fan. Please read it thoroughly before use and retain it for future reference.
Video: An overview demonstrating the features and portability of the Ausic Q9 portable ceiling fan.
What's in the Box
Carefully unpack all components and ensure you have the following items:
- Fan Host
- Fan Blades (5 pieces)
- Strap
- Hook
- Storage Bag
- Charging Cable (Type-C)
- Remote Control

Image: The Ausic Q9 fan disassembled, showing the main unit, detachable blades, and accessories.
Safety Information
- Always ensure the fan is turned off before assembly, disassembly, or cleaning.
- Keep fingers and other objects away from the fan blades during operation. The fan features an automatic stop mechanism if blades are accidentally contacted.
- Do not immerse the fan unit in water or expose it to heavy rain.
- Keep out of reach of small children and pets.
- Use only the provided charging cable or a compatible Type-C cable for charging.
- Do not attempt to repair or modify the fan. Contact customer support for assistance.
- Ensure the hanging point is sturdy enough to support the fan's weight.
Setup
1. Assembly
- Take out the fan host and the five fan blades from the storage bag.
- Align each fan blade with the upper slot on the fan host and push it in until it clicks into place. Repeat for all five blades.
- Ensure all blades are securely attached before operation.
Video: A step-by-step guide on how to assemble and install the Ausic Q9 portable ceiling fan blades.
2. Charging the Battery
- Connect the provided Type-C charging cable to the charging port on the fan host.
- Connect the other end of the cable to a compatible USB power adapter (not included).
- The battery indicator lights will show the charging status. A full charge typically takes approximately 5 hours.
- Ensure the fan is fully charged before its first use for optimal performance.

Image: Visual representation of the 20400mAh battery, charging time, and estimated runtimes.
3. Hanging the Fan
- Use the integrated silicone strap and hook to hang the fan from a secure point, such as a tent pole, gazebo frame, or umbrella.
- Ensure the fan is hung securely and is stable before turning it on.
Operating Instructions
Using the Remote Control
The Ausic Q9 fan comes with a remote control for convenient operation from up to 40 feet away. The signal can penetrate obstacles, so direct line-of-sight is not always required.
- Power Button: Turns the fan and light on/off.
- Fan Speed Button: Cycles through 4 fan speed settings.
- Light Button: Turns the light on/off and cycles through color temperatures (3000K Warm, 4500K Neutral, 6500K Cool).
- Dimmer Buttons (+/-): Adjusts the light brightness from 10% to 100%.
- Timer Buttons (2H, 3H, 5H): Sets the fan to automatically turn off after 2, 3, or 5 hours.
- Silent Button: Disables button beeps for quiet operation, especially at night.
The fan features a smart memory function that remembers your last settings after a power cycle or battery drain.

Image: The Ausic Q9 fan operating in an outdoor setting, highlighting the remote control's range.
Manual Controls on Fan Host
The fan host also has buttons for basic control:
- One button controls fan speed and power.
- Another button controls light settings and power.

Image: The fan's light function demonstrated in a tent, showing adjustable color temperatures and brightness.

Image: The fan in an indoor setting, illustrating the 2, 3, and 5-hour timer options.
Maintenance
- Cleaning: The fan blades are washable. Detach the blades from the fan host and clean them with water and mild soap. Ensure they are completely dry before reattaching. Wipe the fan host with a soft, damp cloth. Do not use abrasive cleaners or solvents.
- Storage: When not in use, detach the blades and store all components in the provided storage bag. Store in a cool, dry place away from direct sunlight.
- Battery Care: For optimal battery life, charge the fan at least once every three months if not in regular use.

Image: Demonstrating the washability of the fan blades for easy cleaning.
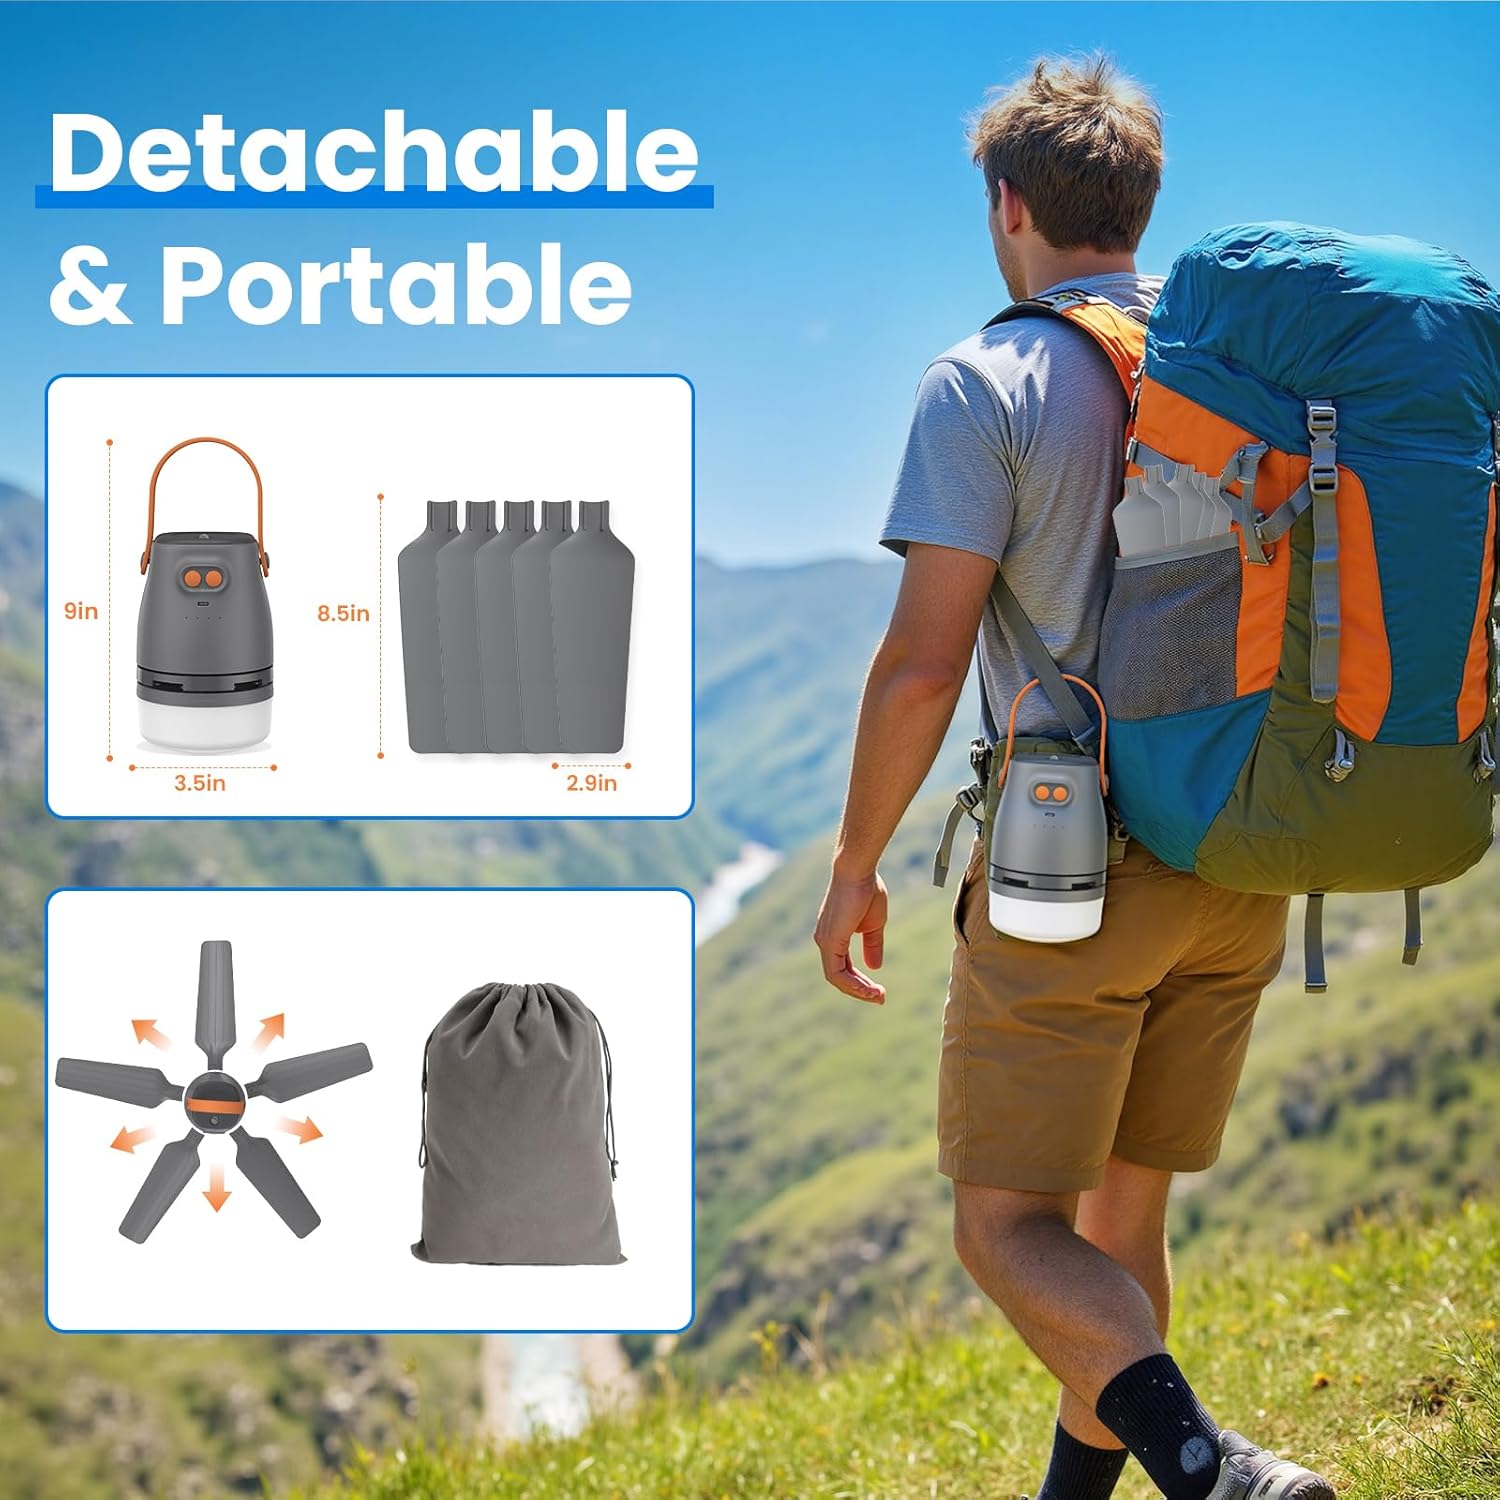
Image: The fan disassembled and packed into its storage bag, highlighting its portability.
Troubleshooting
| Problem | Possible Cause | Solution |
|---|---|---|
| Fan does not turn on. | Battery is depleted. | Charge the fan using the Type-C cable. |
| Fan blades are not spinning. | Blades not properly installed or obstructed. | Ensure blades are clicked into place. Remove any obstructions. |
| Remote control is not working. | Remote battery is low or depleted. Obstruction between remote and fan. | Replace remote battery. Ensure remote is pointed generally towards the fan (though direct line-of-sight is not always needed). |
| Light is dim or not working. | Light brightness set too low. Battery is low. | Adjust brightness using the remote. Charge the fan. |
| Battery life is shorter than expected. | Operating at higher fan speeds or maximum light brightness. | Lower fan speed or light brightness to extend battery life. |
Specifications
| Feature | Detail |
|---|---|
| Brand | Ausic |
| Model Name | Q9 |
| Product Dimensions | 3.5"D x 21"W x 9"H |
| Power Source | Battery Powered (20400mAh) |
| Number of Speeds | 4 |
| Light Color Temperatures | 3000K (Warm), 4500K (Neutral), 6500K (Cool) |
| Light Brightness Adjustment | 10% to 100% |
| Control Method | Remote, On-unit buttons |
| Timer Options | 2H, 3H, 5H |
| Material | Plastic |
| Installation Type | Portable (Clip On/Hangable) |
| Indoor/Outdoor Usage | Indoor, Outdoor |
Warranty and Support
For warranty information or technical support, please refer to the product packaging or contact Ausic customer service directly. Keep your purchase receipt as proof of purchase.
For further assistance, please visit the official Ausic website or contact their support channels.