Introduction
This manual provides detailed instructions for the installation, operation, and maintenance of your Homary 71 Inch Whirlpool Bathtub. Please read this manual thoroughly before installation and use to ensure safe and efficient operation and to maximize the lifespan of your product.
Safety Information
To prevent injury or damage, always adhere to the following safety guidelines:
- Read all instructions carefully before using the bathtub.
- Electrical installation must be performed by a qualified electrician in accordance with all local and national electrical codes. The bathtub requires a dedicated 110V, GFCI-protected electrical circuit.
- Do not operate the hydromassage system without the bathtub being filled with water to a level above the jets.
- Keep children and pets away from the bathtub unless under constant, close supervision.
- Consult a physician before use if you have any medical conditions, are pregnant, or have concerns about using a jetted bathtub.
- Avoid using any electrical appliances near the bathtub to prevent electric shock.
- Do not use harsh chemicals, abrasive cleaners, or sharp objects on the bathtub's surface, as these can cause damage.
- Ensure proper ventilation in the bathroom during and after use.
Package Contents
Please verify that all components are present and undamaged before beginning installation. If any parts are missing or damaged, contact customer support immediately.
- Homary 71 Inch Whirlpool Bathtub Unit
- Faucet Assembly (including hot/cold switches, transfer switch, tub filler)
- Drain Assembly
- Overflow Assembly
- LCD Control Panel
- Handheld Shower Head
- Double Bath Pillows (PU material)
- Installation Hardware (e.g., screws, seals, gaskets)
Specifications
| Feature | Detail |
|---|---|
| Brand | Homary |
| Model Number | H94925522-1250 |
| Product Dimensions (L x W x H) | 71.65" x 51.97" x 27.56" |
| Material | Acrylic |
| Color | White |
| Item Weight | 434.3 Pounds |
| Capacity | 118.88 gallons |
| Installation Type | Alcove / Back-to-Wall |
| Number of Jets | 38 (Water and Air Jets) |
| Lighting | Chromatherapy Color Lights |
| Electrical Requirement | 110V |
| Included Components | Drain, LCD Control, Tub Filler, Shower Head |
Setup and Installation
Important: Installation should be performed by a licensed professional plumber and electrician. Ensure all local plumbing and electrical codes are strictly followed.
Pre-Installation Checklist
- Verify that all parts listed in the 'Package Contents' section are present and undamaged.
- Ensure the installation area is level, clean, and structurally sound to support the weight of the filled bathtub and its occupants (approximately 118.88 gallons of water + 434.3 lbs tub weight + occupant weight).
- Confirm access to a dedicated 110V electrical supply with GFCI protection, hot and cold water lines, and a suitable drain connection point.
- Review the detailed plumbing and electrical diagrams provided with your product for specific connection points.
Step-by-Step Installation
- Positioning: Carefully move the bathtub to its desired alcove or back-to-wall location. Ensure sufficient clearance for future maintenance access if required.
- Leveling: Adjust the bathtub's integrated leveling feet to ensure the unit is perfectly level on all sides. Use a spirit level for accuracy.
- Drain Connection: Connect the bathtub's drain assembly to your home's drainage system. Apply plumber's putty or sealant as necessary to ensure all connections are watertight.
- Water Supply Connection: Connect the hot and cold water supply lines to the bathtub's faucet inlets. Use appropriate plumbing tape or sealant on threaded connections to prevent leaks.
- Electrical Connection: A qualified electrician must connect the bathtub's 110V power supply to the dedicated GFCI-protected circuit. Refer to the specific wiring diagram included with your product for correct connections. Ensure all wiring is secured and protected.
- Faucet and Shower Head Installation: Install the deck-mount faucet and handheld shower head according to the manufacturer's instructions. Secure all components firmly.
- Leak Test: Once all connections are made, fill the bathtub with water to the overflow level and allow it to sit for at least 15 minutes. Carefully inspect all plumbing connections for any signs of leaks. Operate the jets briefly to ensure proper function and check for any leaks from the jet system. Drain the bathtub completely after the test.

Operating Instructions
Filling the Bathtub
Ensure the drain is securely closed. Use the inlet faucet to fill the bathtub with water. For proper operation of the jets, the water level must be above the highest jets.
Using the Whirlpool Jets
Your Homary bathtub features a powerful 38-jet hydromassage system, combining both water and air jets for a comprehensive spa experience.
- Locate the smart touch control panel on the rim of the bathtub.
- Press the designated 'Jet' or 'Massage' button to activate the water jets.
- Press the 'Air' button to activate the air jets, which provide a gentler, bubbling massage.
- If your model supports it, use the '+' and '-' buttons on the control panel to adjust the intensity of the jets.

Chromatherapy Lighting
The bathtub includes built-in colored lighting to enhance your relaxation and create a soothing visual atmosphere.
- On the control panel, press the 'Light' button to turn on the chromatherapy lights.
- Press the 'Light' button repeatedly to cycle through different colors or activate a color-changing mode, depending on your model's features.

Faucet and Shower Head Operation
Use the hot and cold water switches on the faucet assembly to control the water temperature. The transfer switch allows you to direct water flow between the main tub filler and the handheld shower head.
Draining the Bathtub
After use, open the drain assembly to empty the bathtub. Ensure all water is drained to prevent stagnation and maintain hygiene.
Video Demonstration
Video 1: Homary 2-Person Whirlpool Tub Overview. This video provides a visual demonstration of the key features and operational aspects of the Homary whirlpool bathtub.
Maintenance
Regular maintenance will ensure the longevity and optimal performance of your Homary whirlpool bathtub.
Cleaning the Bathtub Surface
- For general cleaning, use a soft cloth or sponge and a non-abrasive, mild bathroom cleaner.
- Avoid cleaners containing ammonia, acetone, harsh acids, or abrasive particles, as these can damage the acrylic surface and finish.
- Rinse the bathtub thoroughly with clean water after cleaning to remove all cleaner residue.
Jet System Cleaning
Periodically clean the jet system to prevent the buildup of soap scum, oils, and bacteria.
- Fill the bathtub with warm water to a level approximately 2-3 inches above the highest jets.
- Add 2-3 tablespoons of low-foaming dishwasher detergent or a specialized whirlpool bath cleaner to the water.
- Run the jets for 10-15 minutes to circulate the cleaning solution through the system.
- Drain the bathtub completely.
- Refill the bathtub with clean water and run the jets again for a few minutes to rinse the internal plumbing.
- Drain the bathtub completely and wipe down the surface.
Acrylic Surface Care
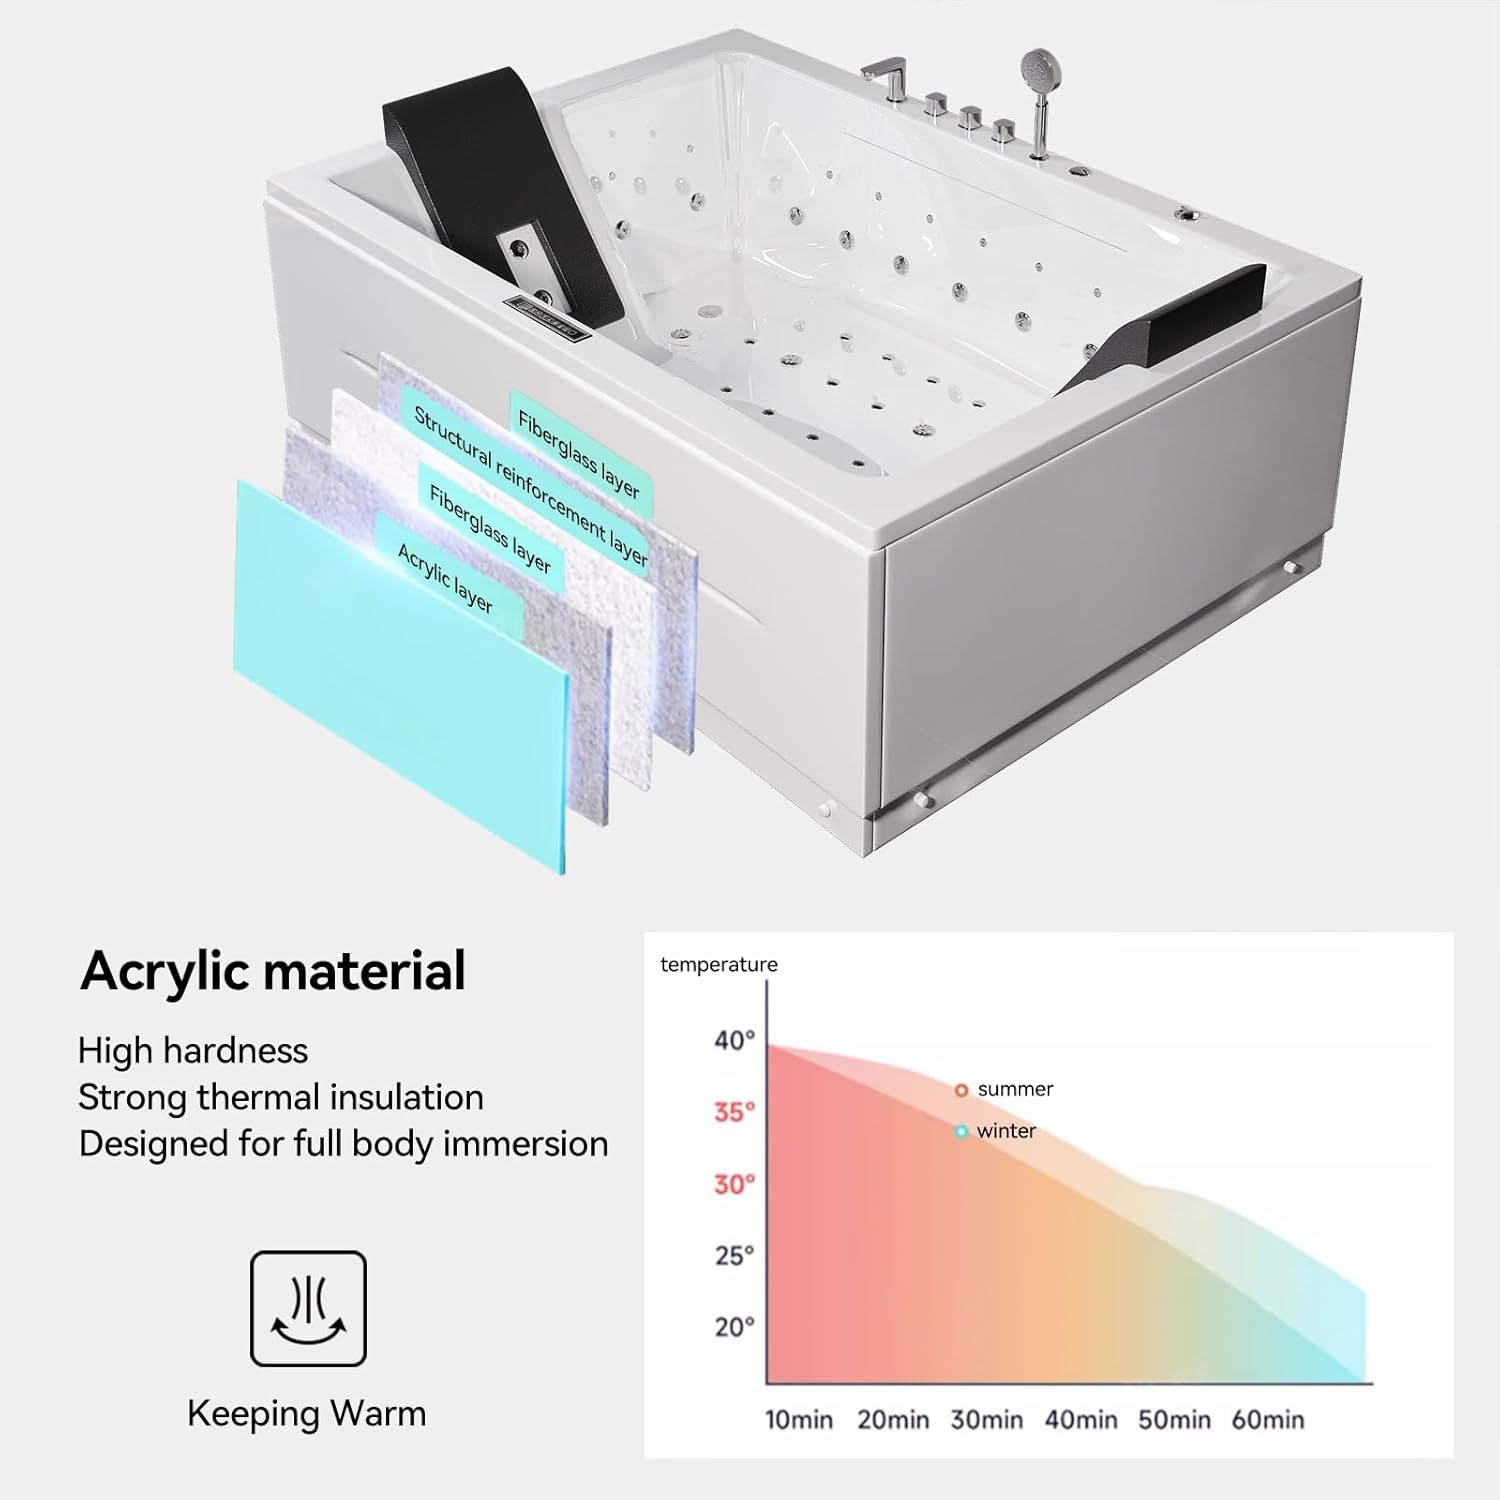
The high-purity acrylic material is designed for durability, a smooth finish, and excellent thermal insulation. To maintain its pristine appearance:
- Avoid dropping heavy or sharp objects into the tub, which could chip or scratch the surface.
- Do not use abrasive sponges, steel wool, or stiff brushes for cleaning.
- Minor scratches can often be buffed out using a soft cloth and a non-abrasive acrylic polish specifically designed for bathtubs.
Troubleshooting
If you encounter any issues with your Homary whirlpool bathtub, refer to the table below for common problems and their solutions. If the problem persists, contact customer support.
| Problem | Possible Cause | Solution |
|---|---|---|
| Jets not working | No power to the unit; Water level too low; GFCI tripped; Pump malfunction | Check power supply and ensure the GFCI has not tripped; Ensure water level is above all jets; Reset power to the unit; If problem persists, contact customer support. |
| Water leaks from plumbing connections | Loose plumbing connections; Damaged seals or gaskets | Carefully inspect and tighten all visible plumbing connections; If seals are damaged, they may need replacement by a qualified plumber. |
| Chromatherapy lights not functioning | Electrical fault; Light module malfunction | Check power supply to the unit; Try cycling the lights on/off from the control panel; If problem persists, contact customer support. |
| Control panel unresponsive | Temporary power interruption; Panel malfunction | Turn off power to the bathtub at the circuit breaker for 5 minutes, then restore power; If still unresponsive, contact customer support. |
| Water not draining properly | Drain clogged; Drain mechanism faulty | Check for obstructions in the drain; Inspect the drain mechanism for proper operation; Consult a plumber if necessary. |
Warranty Information
Homary products are manufactured to high-quality standards and are backed by a manufacturer's warranty. The specific terms and duration of your warranty may vary. Please refer to the warranty card included with your purchase or visit the official Homary website for detailed warranty terms and conditions. It is essential to retain your proof of purchase (receipt or invoice) for any warranty claims.
Customer Support
If you have any questions, require technical assistance, or need to report an issue with your Homary 71 Inch Whirlpool Bathtub, please do not hesitate to contact our dedicated customer support team.
- Email: service@homary.com
- Service Time: Our team typically responds to inquiries within 24 hours, excluding public holidays.
- To expedite your service request, please provide your order number and a detailed description of the issue when contacting support.