
Introduction
Thank you for choosing Ollny S11 30FT Solar String Lights. This manual provides essential information for the safe and efficient use of your solar string lights. Please read it thoroughly before installation and operation.
These solar string lights are designed for outdoor use, featuring shatterproof Edison bulbs, remote control with timer functions, and multiple lighting modes. They are powered by solar energy with a USB charging backup, and are built to withstand various weather conditions.
What's in the Box
- Solar String Lights (30FT length)
- Solar Panel with ground stake/mounting options
- Remote Control
- User Manual (this document)
- Spare Bulbs

Image: The package contents include the 30-foot string lights with 10+1 bulbs, a solar panel with a 5.8ft lead cable, and a USB port for charging. The diagram illustrates the 2.5ft spacing between bulbs.
Specifications
| Feature | Detail |
|---|---|
| Model Number | NYD010A |
| Length | 30 Feet (360 inches) |
| Bulb Type | S11 Edison LED, Shatterproof |
| Light Color | Warm White (2700 Kelvin) |
| Power Source | Solar Powered, USB Charging Backup |
| Battery Capacity | 2000mAh |
| Charging Time (Solar) | 6 hours (direct sunlight) |
| Charging Time (USB) | 4 hours |
| Operating Time | Up to 10 hours (fully charged) |
| Water Resistance | IP65 (Solar Panel), IP45 (String Lights) |
| Control Method | Remote Control |
| Special Features | Automatic On-Off, Dimmable, 3 Lighting Modes, Timer Function |

Image: Illustration of the dual charging capabilities, showing solar charging in 6 hours and USB charging in 4 hours, both providing up to 10 hours of illumination.
Setup and Installation
- Unpack Components: Carefully remove all items from the packaging. Ensure all parts listed in "What's in the Box" are present.
- Solar Panel Placement:
Choose a location for the solar panel that receives direct sunlight for at least 6 hours daily. Avoid shaded areas. The solar panel can be installed using one of three methods:
- Ground Stake: Insert the stake into soft ground.
- Wall Mount: Use screws (not included) to attach the panel to a wall.
- Clamp: Attach the panel to a fence or board using the provided clamp.

Image: Demonstrates three ways to install the solar panel: inserting it into the ground, mounting it on a wall, or clamping it to a wooden structure.
- String Light Installation:
Hang the string lights in your desired location. Each bulb socket has a built-in hook for easy hanging. Ensure the bulbs are securely tightened into their sockets to prevent moisture ingress and ensure proper function.
Warm Tip: If a bulb is not lighting up, gently tighten it into its socket. The bulbs are shatterproof, designed to resist impacts.
- Initial Charge: Before first use, allow the solar panel to charge in direct sunlight for at least 6 hours, or use the USB charging option for 4 hours, to ensure the battery is fully charged.
Operating Instructions
Automatic Operation
The string lights feature an intelligent photosensitivity sensor. They will automatically charge during the day when exposed to bright light and turn on automatically at dusk or in dark environments.

Image: Illustrates the automatic on/off function, with the solar panel absorbing sunlight during the day and the lights turning on automatically at night.
Remote Control Functions
Use the provided remote control for manual operation and to access advanced features.
- ON/OFF: Press the "ON" button to turn the lights on, and "OFF" to turn them off.
- Lighting Modes: Cycle through 3 lighting modes:
- Steady On: Lights remain continuously lit.
- Flash: Lights flash intermittently.
- Breath: Lights slowly fade in and out.
- Brightness Adjustment: Use the brightness buttons (typically '+' and '-') to increase or decrease the light intensity (25% to 100%).
- Timer Settings: Select from 5 timer options to automatically turn off the lights after a set duration: 30 minutes, 2 hours, 4 hours, 6 hours, or 8 hours.
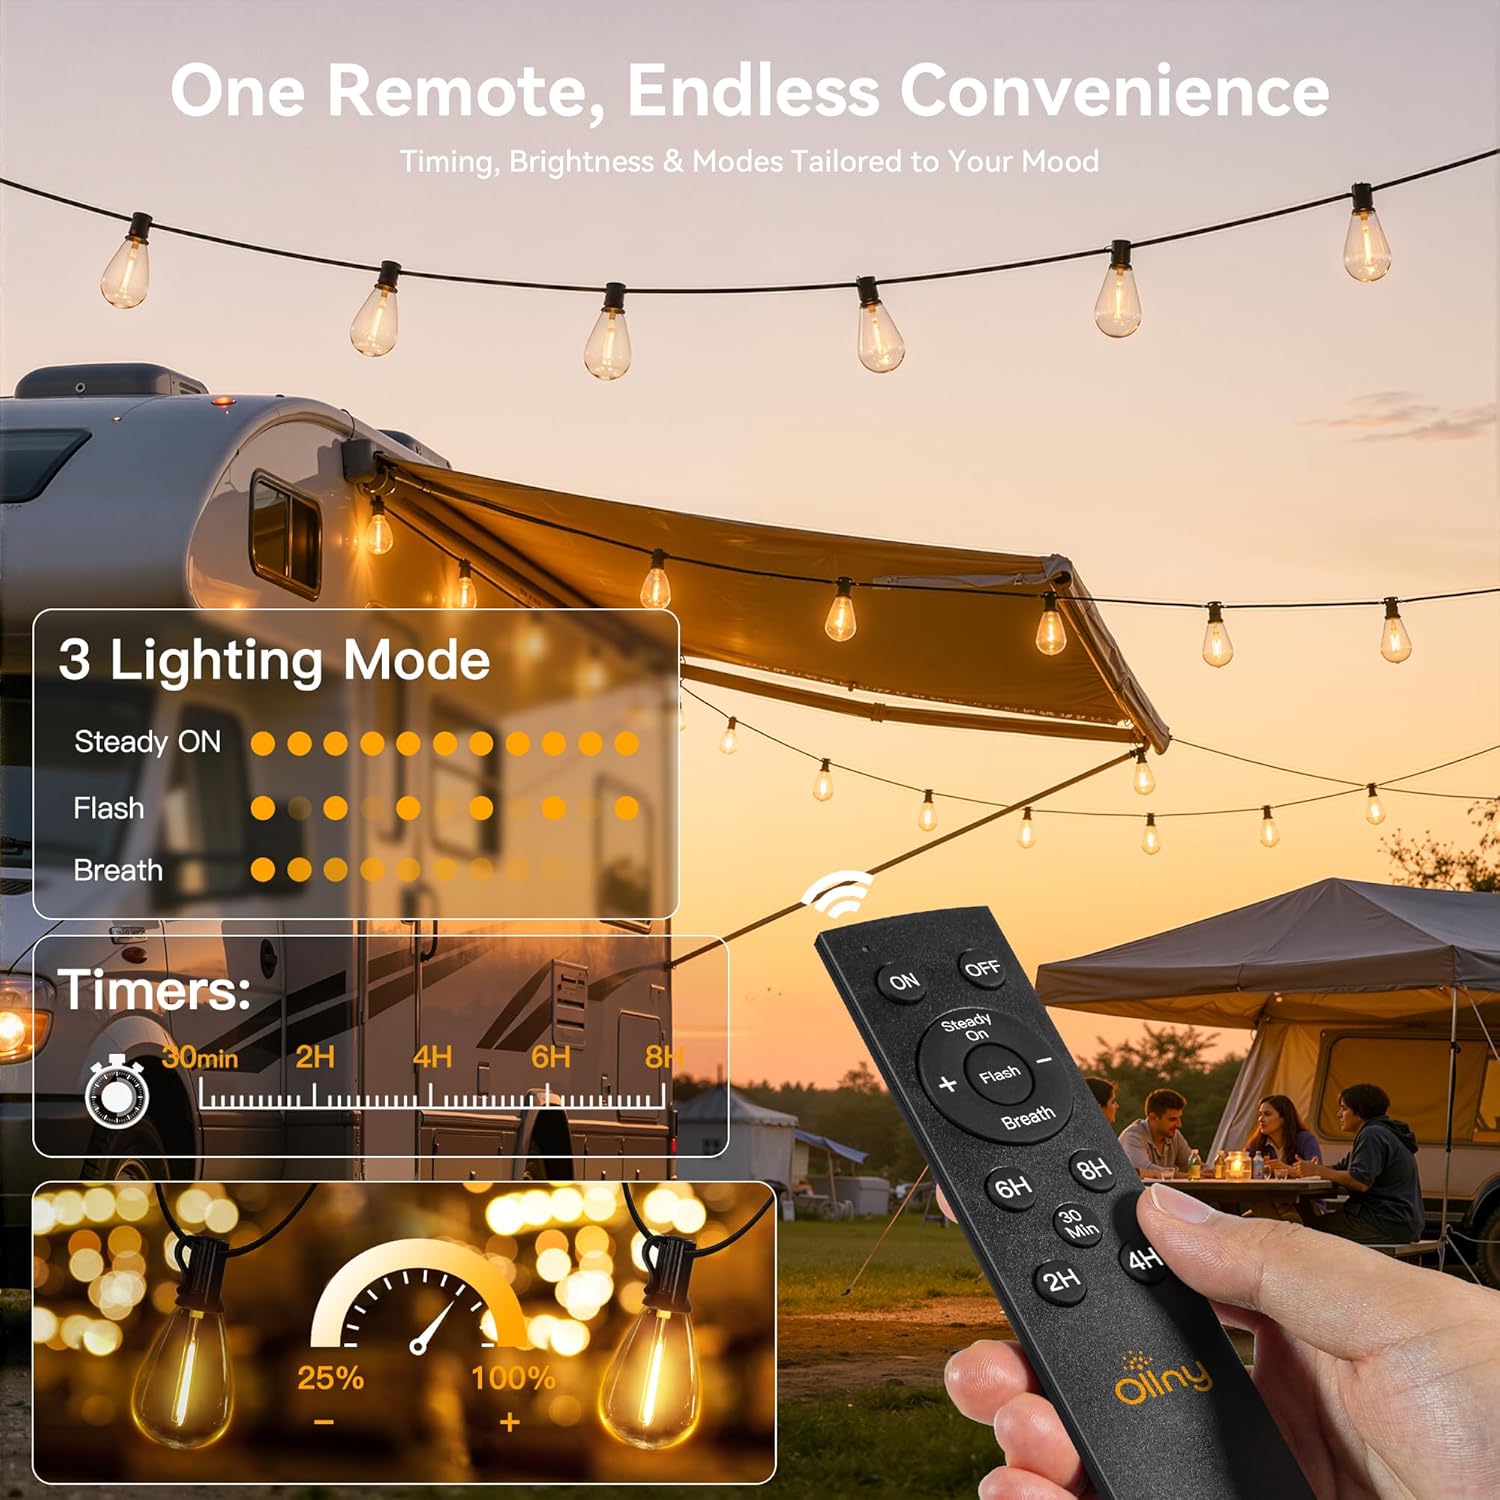
Image: The remote control displays options for turning the lights on/off, selecting between Steady On, Flash, and Breath modes, adjusting brightness, and setting timers for 30 minutes, 2, 4, 6, or 8 hours.
Video: This video demonstrates the features of the Ollny 30FT Solar Patio Lights, including their all-weather durability, 33 ft remote control distance, solar charging capabilities, and various lighting modes and timer functions.
Maintenance
- Clean Solar Panel: Regularly wipe the solar panel with a soft, damp cloth to remove dust, dirt, or debris. A clean panel ensures optimal charging efficiency.
- Bulb Inspection: Periodically check all bulbs to ensure they are securely tightened. If a bulb is not working, try tightening it before considering replacement.
- Storage: If storing the lights for an extended period, ensure the battery is fully charged. Store in a cool, dry place.
- Weather Resistance: The lights are designed to be weatherproof (IP65 for solar panel, IP45 for string lights), withstanding rain, snow, and wind. No special weather-related maintenance is typically required beyond ensuring the solar panel is clear.

Image: The string lights and solar panel are shown in a rainy outdoor setting, highlighting their sunproof, snowproof, rainproof, and windproof features for year-round use.
Troubleshooting
| Problem | Possible Cause | Solution |
|---|---|---|
| Lights do not turn on at night. |
|
|
| Lights are dim or only stay on for a short time. |
|
|
| Remote control is not working. |
|
|
| Individual bulb not lighting up. |
|
|
Warranty and Support
Ollny S11 Solar String Lights come with a 1-year manufacturer's warranty from the date of purchase. This warranty covers defects in materials and workmanship under normal use.
For warranty claims, technical support, or any questions regarding your product, please contact Ollny customer service through the retailer where the product was purchased or visit the official Ollny website for contact information.
Please retain your proof of purchase for warranty validation.
