
1. Introduction
Thank you for choosing the Ausic P36 Portable Misting Fan. This manual provides essential information for the safe operation, maintenance, and troubleshooting of your new fan. Please read this manual thoroughly before use and retain it for future reference.

Image 1.1: Ausic P36 Portable Misting Fan, fully assembled.
2. Safety Information
- Always place the fan on a stable, level surface to prevent tipping.
- Do not immerse the fan unit or power cord in water or other liquids.
- Keep children and pets away from the fan during operation.
- Ensure the power adapter and charging port are dry before connecting to power.
- Do not block the fan's air intake or exhaust while in use.
- Use only clean water in the water tank. Do not add chemicals or other substances.
- Unplug the fan from the power source before cleaning or performing any maintenance.
- Do not operate the fan if any part is damaged or malfunctioning. Contact customer support.
3. Package Contents
Verify that all components are present in the package:
- Ausic P36 Misting Fan Unit
- 20L Water Bucket/Tank with Rolling Wheels
- Telescopic Handle
- Remote Control
- Power Adapter (for charging)
- User Manual
4. Setup
4.1 Assembly
- Attach Wheels: If not pre-attached, securely insert the rolling wheels into the designated slots on the bottom of the 20L water bucket.
- Mount Fan Unit: Place the Ausic P36 fan unit securely onto the top of the 20L water bucket. Ensure it is properly seated and stable.
- Extend Telescopic Handle: Pull the telescopic handle upwards from the back of the water bucket until it locks into position. This facilitates easy transport.
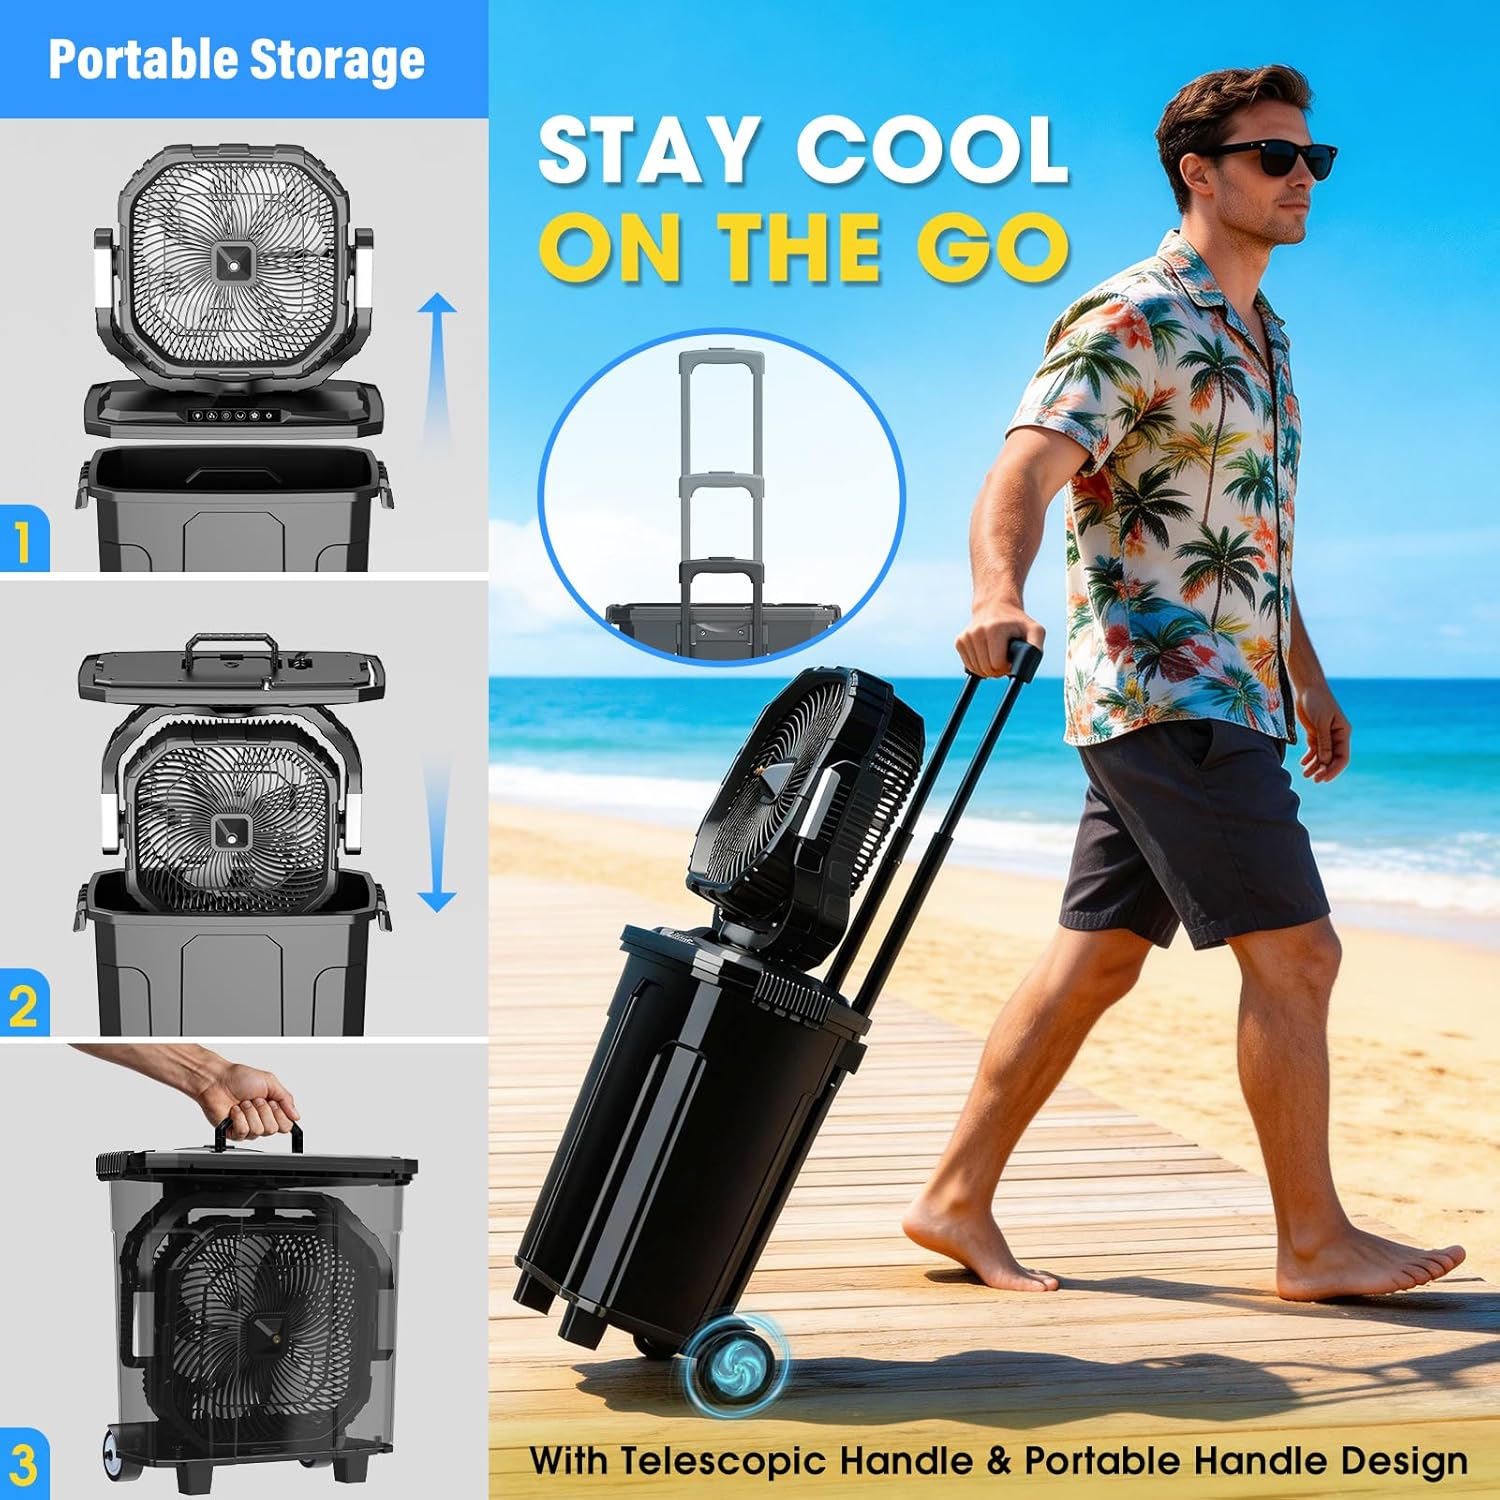
Image 4.1: The fan unit can be stored inside the bucket for compact transport. The telescopic handle and rolling wheels enhance portability.
4.2 Filling the Water Tank
- Ensure the fan unit is turned off and disconnected from any power source.
- Carefully remove the fan unit from the water bucket.
- Fill the 20L water bucket with clean, cool water. Do not overfill.
- Place the fan unit back onto the water bucket, ensuring a secure fit.
Video 4.1: This video demonstrates the assembly and portability features of the Ausic P36 Misting Fan, including the telescopic handle and how the fan unit integrates with the bucket.
5. Operating Instructions
5.1 Charging the Battery
Connect the provided power adapter to the fan's charging port and plug it into a suitable power outlet. The fan features a 30000mAh battery, requiring approximately 6 hours for a full charge. A full charge provides 7-62 hours of continuous operation depending on the speed and misting settings.

Image 5.1: Illustration of the 30000mAh battery capacity and 6-hour charging time for extended use.
5.2 Control Panel and Remote Control
The fan can be operated using the control panel on the unit or the included remote control. The remote control offers convenient operation from up to 5 meters away.

Image 5.2: The fan unit showing the control panel, LED lights, and the remote control for convenient operation.
5.3 Fan Speed Settings
Press the 'Speed' button on the control panel or remote to cycle through 4 fan speed settings: Low, Medium, Medium-High, and High. The fan is equipped with a powerful brushless motor for efficient airflow.
5.4 Misting Function
Press the 'Mist' button to activate the misting function. The fan offers continuous and intermittent misting modes. Ensure the water tank is filled before using this feature.

Image 5.3: The Ausic P36 Misting Fan providing cooling mist in an outdoor setting.
5.5 Oscillation and Rotation
Press the 'Oscillation' button to activate horizontal oscillation (45°/90°). The fan head can also be manually rotated 100° vertically to direct airflow as needed.

Image 5.4: Visual representation of the fan's oscillation and rotation capabilities for wide cooling coverage.
5.6 LED Light
Press the 'Light' button to turn on the integrated LED light. There are two brightness settings available for ambient lighting.
5.7 Timer Function
Press the 'Timer' button to set an automatic shut-off time. Available settings include 1, 2, 4, and 8 hours.
Video 5.1: This video provides an overview of the 12-inch 20L Ausic Misting Fan, showcasing its features and operation in an outdoor environment.
6. Maintenance
6.1 Cleaning the Fan
- Ensure the fan is turned off and unplugged before cleaning.
- Use a soft, damp cloth to wipe down the exterior surfaces of the fan unit and water bucket.
- For fan blades, use a soft brush or vacuum cleaner to remove dust. Do not use abrasive cleaners or solvents.
6.2 Water Tank Care
- Regularly empty and clean the water tank to prevent mold or mildew buildup.
- Rinse the tank with clean water. For deeper cleaning, use a mild soap solution and rinse thoroughly.
- Ensure the tank is completely dry before storing the fan for extended periods.
7. Troubleshooting
| Problem | Possible Cause | Solution |
|---|---|---|
| Fan does not turn on | Battery is depleted Power button not pressed | Charge the battery fully Press the power button firmly |
| No mist is produced | Water tank is empty Misting nozzle is blocked | Refill the water tank Clean the misting nozzle gently |
| Reduced airflow | Fan intake/exhaust blocked Fan blades are dirty | Clear any obstructions Clean the fan blades |
| Remote control not working | Battery in remote is dead Obstruction between remote and fan | Replace remote battery Ensure clear line of sight to fan sensor |
8. Specifications
| Feature | Detail |
|---|---|
| Brand | Ausic |
| Model Number | P36 |
| Fan Size | 12 inches |
| Water Tank Capacity | 20 Liters (approx. 5 Gallons) |
| Battery Capacity | 30000mAh |
| Working Time | 7-62 hours (depending on settings) |
| Charging Time | Approx. 6 hours |
| Fan Speeds | 4 levels |
| Horizontal Oscillation | 45°/90° |
| Vertical Rotation | 100° |
| Special Features | Misting, LED Light (2 brightness), Timer (1/2/4/8H), Remote Control, Telescopic Handle, Rolling Wheels |
| Product Dimensions (Stored) | 8.7"D x 17.7"W x 17.3"H |

Image 8.1: Key specifications of the Ausic P36 fan compared to a smaller model, highlighting its larger size, airflow, and features.
9. Warranty and Support
For warranty information or technical support, please refer to the contact details provided with your purchase documentation or visit the official Ausic website. Do not attempt to repair the device yourself, as this may void the warranty and pose safety risks.