
1. Introduction
This manual provides comprehensive instructions for the assembly, operation, and maintenance of your GarveeLife 6x10 FT Greenhouse. Please read all instructions carefully before beginning assembly and retain this manual for future reference. Proper assembly and care will ensure the longevity and optimal performance of your greenhouse.
2. Safety Information
WARNING: This product contains sharp edges and heavy components. Always use appropriate safety gear when handling. Be cautious of tripping hazards when installing the greenhouse. Always follow the assembly instructions carefully to ensure safe installation.
- Always wear gloves and eye protection during assembly.
- Ensure the assembly area is clear of obstructions and level.
- Two or more people are recommended for safe assembly.
- Securely anchor the greenhouse to the ground to prevent wind damage.
- Keep children and pets away from the assembly area.
3. Package Contents
Verify that all components listed below are present and undamaged before beginning assembly. This greenhouse is packaged and shipped in 2 separate boxes.
- Aluminum Frame Components
- 720 g/m² Polycarbonate Panels
- 4 Heavy-Duty Ground Nails
- Sliding Lockable Door Components
- Vent Window Components
- Water Gutter System Components
- Fasteners and Assembly Tools
- Instruction Manual
4. Setup and Assembly
The GarveeLife greenhouse is designed for quick and secure setup. Follow the detailed instruction manual included in your package for step-by-step guidance. The innovative slide-in PC panels simplify installation.
4.1 Site Preparation
- Choose a level, well-drained site that receives adequate sunlight.
- Clear the area of any debris, rocks, or vegetation.
- Consider the direction of prevailing winds for optimal placement and stability.
4.2 Frame Assembly
Assemble the aluminum frame according to the provided diagrams. Ensure all connections are secure before proceeding to panel installation.

Figure 1: Greenhouse Dimensions (120"L x 72"W x 75.6"H)
4.3 Panel Installation
The polycarbonate panels feature a slide-in design for easier and more secure installation. Carefully slide each panel into the designated frame channels. Ensure panels are fully seated to prevent gaps.

Figure 2: Detail of Polycarbonate Panels and Slide-In Assembly
4.4 Anchoring
Secure the greenhouse firmly to the ground using the provided heavy-duty ground nails. For enhanced stability, especially in windy conditions, consider additional anchoring methods such as concrete slabs or base plates.
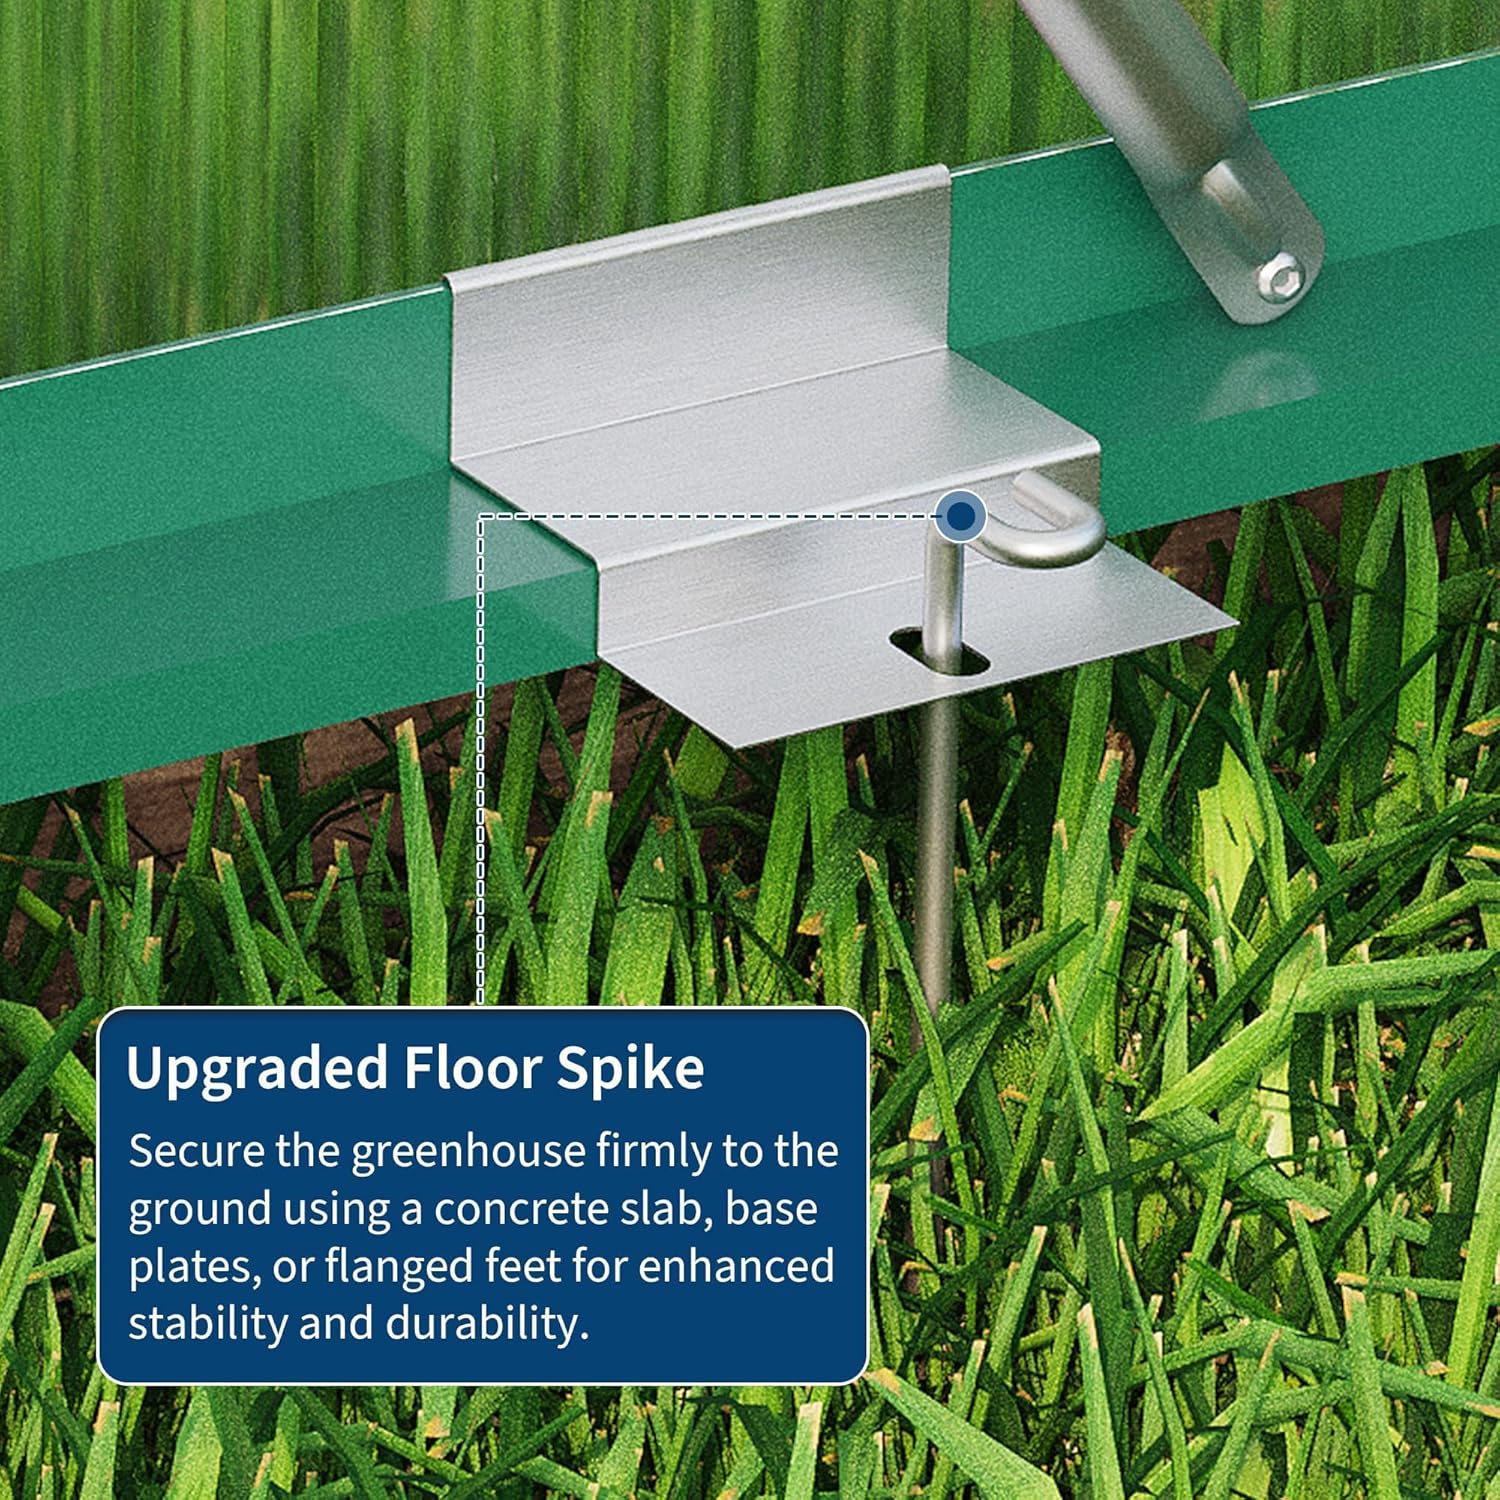
Figure 3: Ground Nail for Secure Anchoring
4.5 Installation Video
For a visual guide to the assembly process, please refer to the official installation tutorial video:
Video 1: Greenhouse Installation Tutorial. This video provides a step-by-step visual guide to assembling your GarveeLife greenhouse.
5. Operation
5.1 Ventilation
The greenhouse features an adjustable top vent to facilitate airflow control. Open the vent to release excess heat and humidity, and close it to retain warmth. Proper ventilation is crucial for maintaining an ideal internal environment for plant growth.

Figure 4: Adjustable Top Vent for Airflow Control
5.2 Sliding Lockable Door
The greenhouse is equipped with a sliding door for easy access. The door can be locked to secure your plants and equipment. Ensure the door slides smoothly along its track and is properly secured when closed.
5.3 Water Management
An intelligently designed water gutter system along the sides enhances drainage and allows for rainwater collection. This eco-friendly feature provides a sustainable water source for your plants and helps manage excess water.

Figure 5: Water Gutter System for Drainage and Rainwater Collection
6. Maintenance
- Cleaning: Regularly clean the polycarbonate panels with mild soap and water to ensure maximum light transmission. Avoid abrasive cleaners that could scratch the panels.
- Frame Inspection: Periodically check all frame connections and fasteners for tightness. Tighten any loose bolts or screws.
- Panel Integrity: Inspect panels for any cracks or damage. Replace damaged panels promptly to maintain insulation and protection.
- Anchoring: Verify that the ground nails and any additional anchoring remain secure, especially after strong winds or heavy rain.
- Gutter System: Keep the water gutter system clear of leaves and debris to ensure proper drainage and rainwater collection.
7. Troubleshooting
- Greenhouse Instability: If the greenhouse feels unstable, ensure all frame components are correctly assembled and all fasteners are tightened. Verify that the ground nails are fully inserted and secure. Consider adding extra anchoring if located in a high-wind area.
- Water Leaks: Check for any gaps between panels or where panels meet the frame. Ensure all panels are properly seated in their channels. Apply silicone sealant if necessary to seal small gaps.
- Poor Ventilation: Ensure the top vent is fully operational and not obstructed. Clear any debris from the vent mechanism.
- Difficulty with Door Operation: Check the door track for any obstructions or debris. Ensure the door rollers are clean and functioning correctly.
8. Specifications
| Feature | Specification |
|---|---|
| Brand | GarveeLife |
| Model Number | ZCU01066g |
| Product Dimensions (L x W x H) | 120"L x 72"W x 75.6"H (6x10 FT) |
| Item Weight | 87.5 pounds |
| Frame Material | Aluminum |
| Cover Material | Polycarbonate (PC) 720 g/m² |
| Number of Vents | 1 (Adjustable Top Vent) |
| Door Type | Sliding, Lockable |
| Anchoring | 4 Heavy-Duty Ground Nails included |
9. Warranty and Support
GarveeLife is committed to customer satisfaction. If you encounter any issues or have questions regarding your greenhouse, our dedicated customer service team is available 24/7 to assist you. Please refer to your purchase documentation for specific warranty details.
For support, please contact GarveeLife customer service through the retailer's platform or the contact information provided with your product.