
Welcome
This manual provides detailed instructions for the assembly, operation, and maintenance of your VASAGLE Conner Collection RMB123G101 Bed Frame. Please read these instructions carefully before assembly and use to ensure safe and correct operation. Keep this manual for future reference.
Safety Guidelines
- Ensure all parts are present and undamaged before beginning assembly. Do not use if any parts are missing or defective.
- Assemble the bed frame on a soft, clean surface to prevent scratches.
- Do not overtighten screws during assembly, as this may damage the components.
- Regularly check all connections and fasteners to ensure they remain tight.
- Do not exceed the maximum static load capacity of 500 kg (1100 lbs).
- Keep children and pets away from the assembly area.
- Use only the provided tools and hardware.
- For electrical components (LEDs, charging station), ensure proper connection to a suitable power source. Do not overload the charging station.
Package Contents
Before assembly, verify that all components listed in the packaging are present. If any parts are missing or damaged, please contact customer support immediately.
The package typically includes:
- Metal frame components
- Headboard with upholstered panels and integrated shelf
- LED strip and remote control
- Integrated charging station (2 AC outlets, 1 USB-A, 1 USB-C port)
- Slats and slat connectors
- Assembly hardware (screws, bolts, plastic fittings, rubber isolators)
- Assembly tools (e.g., Allen key)
Assembly Instructions
Follow these steps carefully to assemble your VASAGLE bed frame. It is recommended to have two people for assembly.
1. Prepare the Components
Unpack all components and lay them out on a clean, soft surface. Identify each part using the provided parts list (not included in this manual, refer to your product packaging).

Figure 1: Product Dimensions and Static Load Capacity. The bed frame measures 208.9 cm in length, 140.5 cm in width, and 104.5 cm in height. It supports a maximum static load of 500 kg.
2. Assemble the Main Frame
Connect the side rails and crossbars to form the main bed frame. Ensure all connections are secure but do not fully tighten screws until the frame is complete.

Figure 2: Robust H-shaped feet provide enhanced stability for the bed frame.
3. Install the Slats and Headboard
Attach the bed slats to the frame using the provided plastic fittings. These fittings are designed to reduce noise and prevent squeaking. Secure the headboard to the main frame.

Figure 3: The bed frame features 9 robust support feet and 11 durable slats. Silent plastic fittings and integrated rubber isolators are used to minimize noise and ensure a stable, quiet sleep environment.

Figure 4: Detail of the secure slat attachment mechanism, designed to prevent movement and noise.

Figure 5: The integrated back panel on the headboard helps secure items on the shelf and keeps your space tidy.
4. Final Tightening
Once all components are in place, go back and fully tighten all screws and bolts. Ensure the bed frame is stable and level.

Figure 6: Protective caps on the bed frame feet prevent floor damage.
Operating Instructions
1. LED Lighting System
The integrated RGB LED strip can be controlled via the included remote control or a dedicated mobile application (refer to the product packaging for app details).
- Power On/Off: Use the power button on the remote or app.
- Color Selection: Choose from over 29 colors.
- Brightness Adjustment: Adjust the light intensity to your preference.
- Timer Function: Set a timer for the lights to turn off automatically.
- Dynamic Modes: Select various dynamic lighting effects.
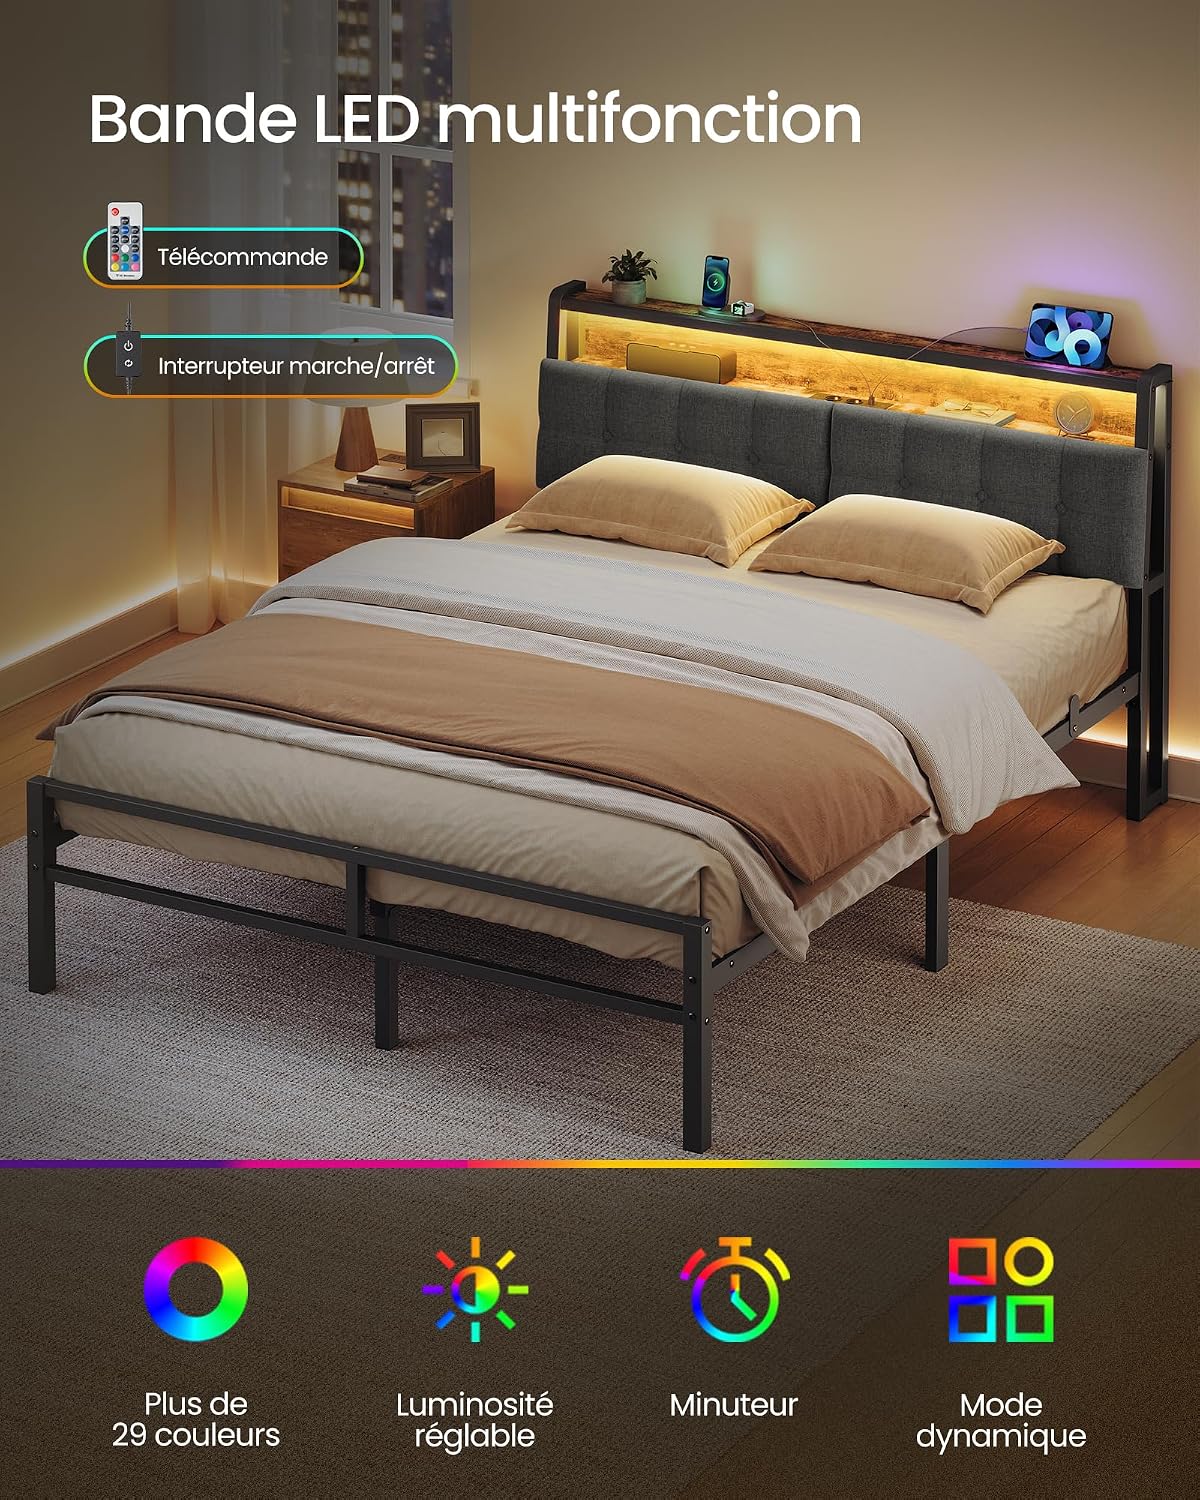
Figure 7: Multifunction LED strip features, including remote control, on/off switch, color options, adjustable brightness, timer, and dynamic modes.
2. Integrated Charging Station
The headboard features a built-in charging station with 2 AC outlets, 1 USB-A port, and 1 USB-C port. A 2-meter power cable is provided to connect the station to a wall outlet.
- Connect the bed frame's power cable to a standard wall outlet.
- Plug your devices into the appropriate AC, USB-A, or USB-C ports for charging.
- Do not exceed the maximum power rating of the charging station.

Figure 8: Headboard with integrated charging station, featuring 2 AC outlets, 1 USB-A port, and 1 USB-C port for convenient device charging.
3. Headboard Shelf and Under-Bed Storage
The double-level shelf on the headboard provides convenient storage for small items like glasses, phones, or books. The 31 cm clearance under the bed frame allows for additional storage using boxes or containers.

Figure 9: Under-bed storage space with 31.2 cm clearance, ideal for organizing various items.

Figure 10: The ergonomic headboard is inclined at 95 degrees and features breathable dark grey fabric for optimal back support and comfort while reading or watching videos.
Care and Maintenance
- Cleaning: Wipe the metal frame with a damp cloth and mild detergent. For the upholstered headboard, use a fabric cleaner suitable for dark grey fabric. Avoid harsh chemicals.
- Dusting: Regularly dust the headboard shelf and frame to prevent buildup.
- Fasteners: Periodically check all screws and bolts to ensure they are tight. Retighten if necessary to maintain stability and prevent squeaking.
- Electrical Components: Ensure the charging station and LED strip are kept dry. Do not attempt to repair electrical components yourself; contact qualified personnel if issues arise.
Troubleshooting
| Problem | Possible Cause | Solution |
|---|---|---|
| Bed frame is unstable or wobbly. | Loose screws or incorrect assembly. | Ensure all screws and bolts are fully tightened. Review assembly steps. |
| Squeaking noises during use. | Loose connections, friction between metal parts or slats. | Retighten all fasteners. Ensure plastic fittings and rubber isolators are correctly installed. |
| LED strip is not lighting up. | Power cable not connected, remote battery low, or LED strip malfunction. | Check power connection. Replace remote battery. Ensure LED strip is properly connected. |
| Charging station not providing power. | Power cable not connected, wall outlet issue, or device not compatible. | Verify the bed frame's power cable is securely plugged into a working wall outlet. Test with another device. |
| Missing or incorrect assembly parts. | Packaging error. | Immediately contact customer support with your product model number and a description of the missing/incorrect parts. Do not attempt to force assembly with incorrect parts. |
Product Specifications
| Feature | Detail |
|---|---|
| Model Number | RMB123G101 |
| Brand | VASAGLE |
| Overall Dimensions (L x W x H) | 208.9 cm x 140.5 cm x 104.5 cm |
| Compatible Mattress Size | 140 cm x 190 cm |
| Under-Bed Clearance | 31 cm |
| Static Load Capacity | 500 kg (1100 lbs) |
| Material | Carbon Steel, Upholstered Fabric (Headboard) |
| Color | Matte Black + Rustic Brown |
| Charging Station | 2 AC Outlets, 1 USB-A Port, 1 USB-C Port (2m cable) |
| LED Lighting | RGB, adjustable via remote/app (29+ colors, brightness, timer, dynamic modes) |
| Item Weight | 25.2 kg |
| Assembly Required | Yes |

Figure 11: Overview of the VASAGLE Conner Collection RMB123G101 Bed Frame.
Warranty and Customer Support
For any questions, missing parts, or issues not covered in this manual, please contact VASAGLE customer support. Refer to your purchase documentation for warranty details and contact information.
You can also visit the official VASAGLE website for additional resources and support.