
Introduction
This manual provides detailed instructions for the installation, operation, and maintenance of your TRJZWA 172FT Drip Irrigation System Kit with a 2 Zone Water Timer. This system is designed to provide efficient and precise watering for gardens, vegetable patches, greenhouses, and lawns, helping to conserve water and simplify garden management. Please read this manual thoroughly before setup and use to ensure optimal performance and longevity of your irrigation system.
Package Contents
Verify that all components listed below are included in your package. If any parts are missing or damaged, please contact customer support.

Figure 1: All components included in the TRJZWA Drip Irrigation System Kit.
- 131.2 FT (1/2 inch / 12mm) Mainline Tubing
- 39.4 FT (1/4 inch / 6mm) Branch Tubing
- 1x 2-Zone Smart Water Timer
- 4x 6-Way Fast-Plug Manifolds
- 10x Universal 360° Rotating Nozzles
- 8x Drip-Spray Integrated Heads
- 4x Fan-Shape/8-Hole Sprayers
- 10x Adjustable Drip Emitters
- 2x Mainline Connectors
- 1x Pipe Cutter
- 1x Thread Seal Tape
- 1x Y-Splitter Connector
- 20x Tubing Stakes
- Various small fittings (end caps, tees, elbows)
Installation Guide
Follow these steps to set up your drip irrigation system. The innovative fast-plug technology allows for tool-free installation.
1. Planning Your Layout
Before cutting any tubing, plan the layout of your irrigation system. Consider the location of your water source, the areas you want to water (Zone 1 and Zone 2), and the types of plants in each area. The 1/2" mainline tubing provides consistent water pressure over the entire 172FT system.
2. Connecting the Mainline
- Attach the 2-zone water timer to your outdoor faucet. Ensure a tight, leak-free connection.
- Connect the 1/2" mainline tubing to the outlets of the water timer. Use the provided connectors.
- Lay out the mainline tubing according to your plan. Use the pipe cutter to make clean cuts where manifolds or emitters will be inserted.
3. Attaching Manifolds and Emitters
The system features 6-way fast-plug manifolds and various adjustable nozzles for customized watering.
- To install a manifold or emitter, cut the 1/2" mainline tubing at the desired point.
- Insert the cut end of the tubing into the manifold or emitter connector. Push firmly until it clicks into place.
- For branch lines, cut the 1/4" tubing and connect it to the manifold outlets or directly to the mainline using appropriate fittings.
- Position the emitters and nozzles near the base of your plants. Use tubing stakes to secure the lines and emitters in place.

Figure 2: Plug and play installation steps for connecting tubing and emitters.

Figure 3: Detail of the effortless plug-and-play connection mechanism.
4. Securing the System
Once all connections are made, use the provided tubing stakes to secure the mainline and branch lines to the ground. This prevents movement and ensures consistent water delivery.
Video 1: An official TRJZWA video demonstrating the installation process of the drip irrigation system and sprinkler timer.
Operating the System
1. Water Timer Programming
The 2-zone smart water timer allows independent programming for two separate watering areas. Each zone supports up to three individual watering plans (P1/P2/P3).
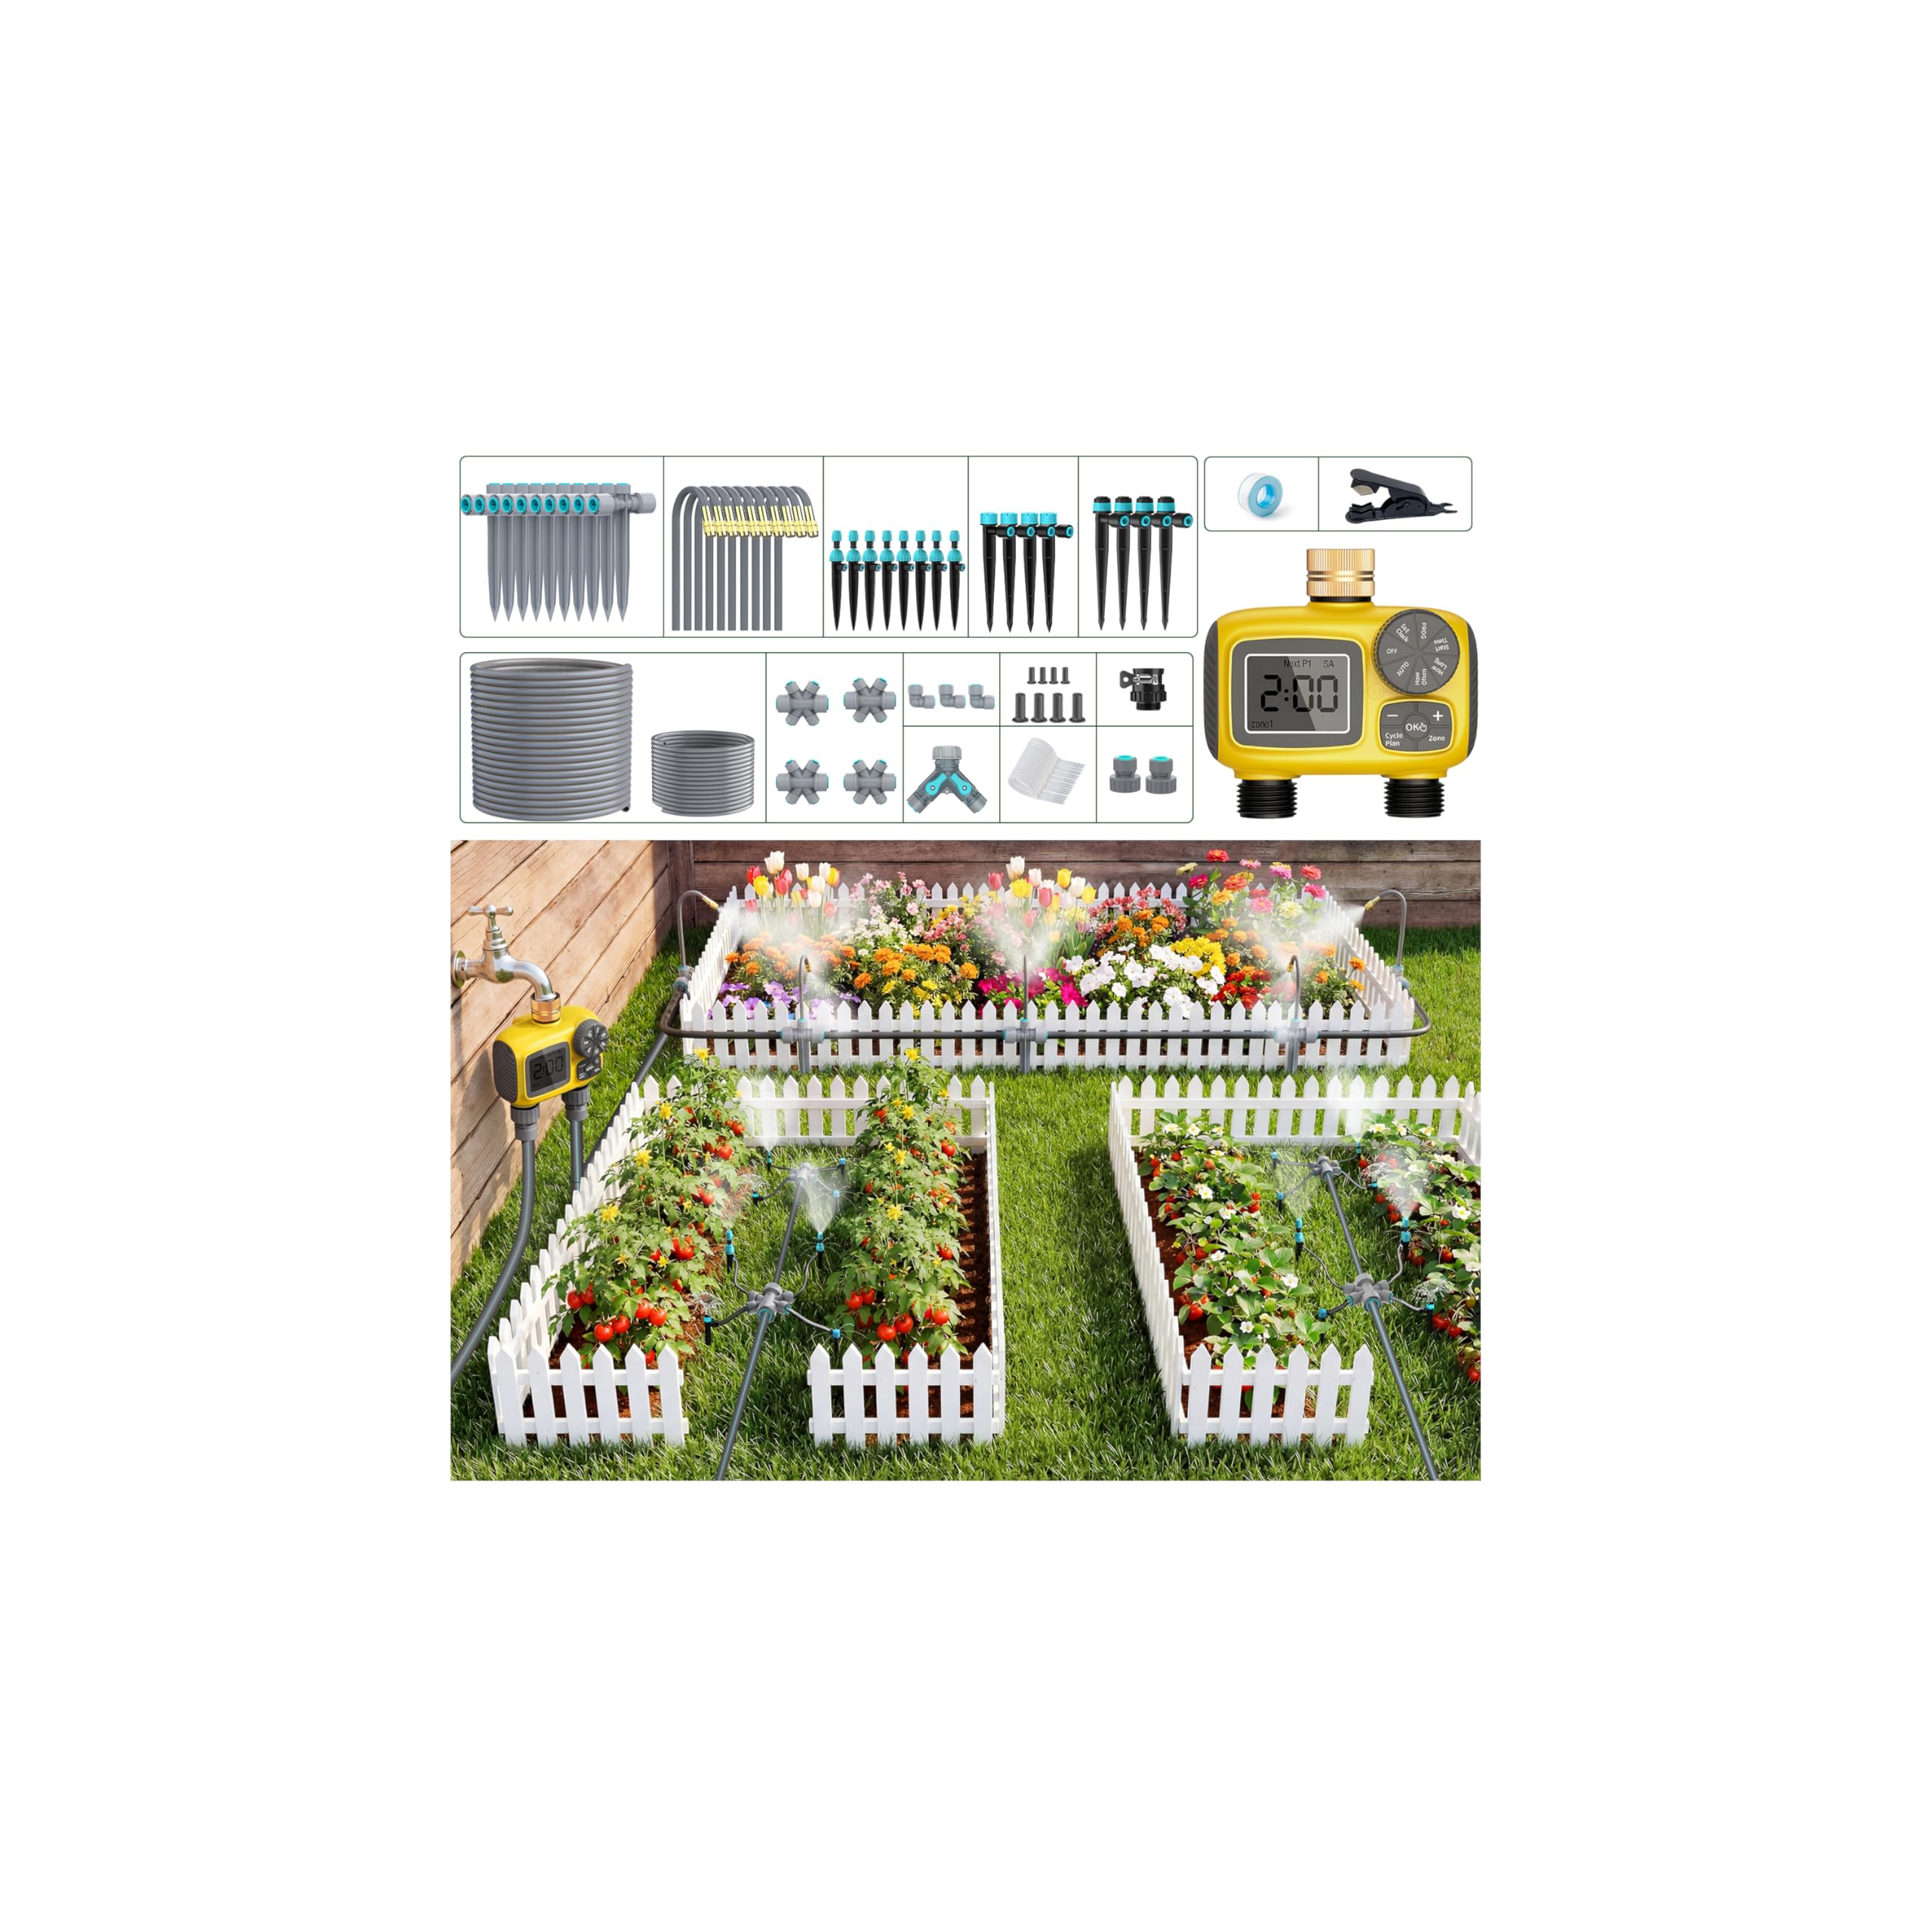
Figure 4: The TRJZWA 2-zone automatic water timer in operation.

Figure 5: Independent programming for Zone 1 and Zone 2.
Refer to the separate timer instruction manual for detailed programming steps, including setting current time, start time, watering duration, and frequency for each zone and plan. The timer also features a rainfall delay function and child lock.
2. Adjusting Water Flow and Spray Patterns
The system includes various adjustable nozzles and emitters to customize water delivery for different plant needs.
- 360° Rotating Nozzles: These nozzles can be rotated to adjust the spray direction and coverage area.
- Drip-Spray Integrated Heads: Adjust these heads to switch between fine misting and targeted dripping.
- Fan-Shape/8-Hole Sprayers: These offer specific spray patterns. Adjust the cap to control flow rate and spray intensity.

Figure 6: Adjustable nozzle settings for various spray patterns.

Figure 7: 360° bendable hose misting for flexible watering.

Figure 8: Full-range 360° adjustment for precise water targeting.

Figure 9: Innovative 3-in-1 drip head with adjustable flow.
Maintenance
Regular maintenance ensures the longevity and efficient operation of your drip irrigation system.
- Inspect for Leaks: Periodically check all connections and tubing for any signs of leaks. Tighten connections or replace damaged sections as needed.
- Clean Emitters and Nozzles: Over time, mineral deposits or debris can clog emitters. Disassemble and clean them with a small brush or by flushing the system.
- Filter Maintenance: If your water source has sediment, consider installing an inline filter and clean it regularly to prevent clogging.
- Winterization: Before the first frost, disconnect the water timer and drain all water from the system to prevent freezing and damage. Store the timer indoors.
- Tubing Inspection: Check tubing for kinks, cracks, or damage from pests. Repair or replace damaged sections to maintain optimal water flow.
Troubleshooting
This section addresses common issues you might encounter with your drip irrigation system.
| Problem | Possible Cause | Solution |
|---|---|---|
| Low water pressure at emitters | Clogged emitters/nozzles; kinked tubing; insufficient water supply; too many emitters on one line. | Clean emitters/nozzles. Straighten tubing. Ensure faucet is fully open. Reduce number of emitters or add another mainline. |
| Leaks at connections | Loose connections; damaged O-rings; improper installation. | Ensure tubing is fully inserted into fast-plug connectors. Check O-rings for damage and replace if necessary. Use thread seal tape on threaded connections. |
| Water timer not activating | Low battery; incorrect programming; water supply off. | Replace batteries. Review timer programming (time, duration, frequency). Ensure faucet is open. |
| Uneven watering | Nozzles/emitters not adjusted correctly; pressure variations. | Adjust individual nozzles for desired spray pattern and flow. Check for clogs or kinks affecting pressure. |
Product Specifications
| Feature | Specification |
|---|---|
| Brand | TRJZWA |
| Model Name | PGGL4001P |
| Hose Length (Mainline) | 131.2 feet (1/2 inch / 12mm) |
| Total Tubing Length | Approximately 172 feet (131.2ft mainline + 39.4ft branch) |
| Number of Pieces | 205 |
| Water Timer Zones | 2 independent zones |
| Material | Plastic |
| Power Source | Water Pressure-driven (Timer requires batteries, not specified in product data) |
| Fit Type | Push-fit |
| Item Dimensions | 13.19 x 16.34 x 5.51 inches (Packaging/Kit dimensions) |
Warranty and Customer Support
For warranty information or if you encounter any issues not covered in this manual, please contact TRJZWA customer support. Details for contacting support are typically found on the product packaging or the seller's official website. Please have your model number (PGGL4001P) and purchase date ready when contacting support.

