Introduction
The BSIDE OT5 Mini Digital Oscilloscope is a compact and portable instrument designed for basic electrical measurements and waveform analysis. Featuring a 50 MHz bandwidth and a 200 MSa/s real-time sampling rate, it provides clear and detailed waveform displays on its 3.2-inch color LCD. Its intuitive interface and robust design make it suitable for various applications, including electronics, audio, and automotive diagnostics.
What's in the Box
Carefully unpack the contents and ensure all items are present:
- 1 x BSIDE OT5 Mini Oscilloscope
- 1 x BNC Oscilloscope Probe
- 1 x USB C Charging Cable
- 4 x Color Rings (for probe identification)
- 1 x Carrying Case
- 1 x Alignment Screwdriver
- 1 x User Manual (English)

Image: All components included in the BSIDE OT5 Mini Oscilloscope package.
Product Overview
The OT5 Mini Oscilloscope features an ultra-slim and compact design, making it highly portable for on-the-go measurements. Its dimensions are approximately 130.1 x 64.1 x 23 mm, and it weighs only 143g.

Image: The compact BSIDE OT5 Mini Oscilloscope, easily held in one hand.
Display
The device is equipped with a 3.2-inch full-viewing angle TFT color LCD, providing bright and clear waveform readings from various perspectives. This display ensures that all measurement data and waveforms are easily visible.

Image: The 3.2-inch full-viewing LCD of the oscilloscope displaying a waveform.
Controls
The oscilloscope features an intuitive interface with four main buttons for essential functions and a side rotary wheel for quick adjustments, enhancing operational speed and ease of use.
Setup
Charging the Device
Before first use, fully charge the oscilloscope using the provided USB C charging cable. Connect the cable to the device's USB C port and a standard USB power adapter (not included). The built-in 1200 mAh rechargeable lithium-ion battery provides over 8 hours of continuous operation when fully charged.

Image: Internal view highlighting the 1200mAh rechargeable battery.
Connecting the Probe
Connect the BNC oscilloscope probe to the BNC connector on the device. Ensure a secure connection. The probe can be set to X1 or X10 attenuation. Adjust the oscilloscope's settings to match the probe's attenuation for accurate measurements.
Operating Instructions
Powering On/Off
Press and hold the power button to turn the oscilloscope on or off.
Basic Measurement
The device supports both automatic and manual waveform capture. For quick analysis, use the auto-ranging function. The oscilloscope can capture various waveform types, including sinusoidal, square, triangular, sawtooth, and more.
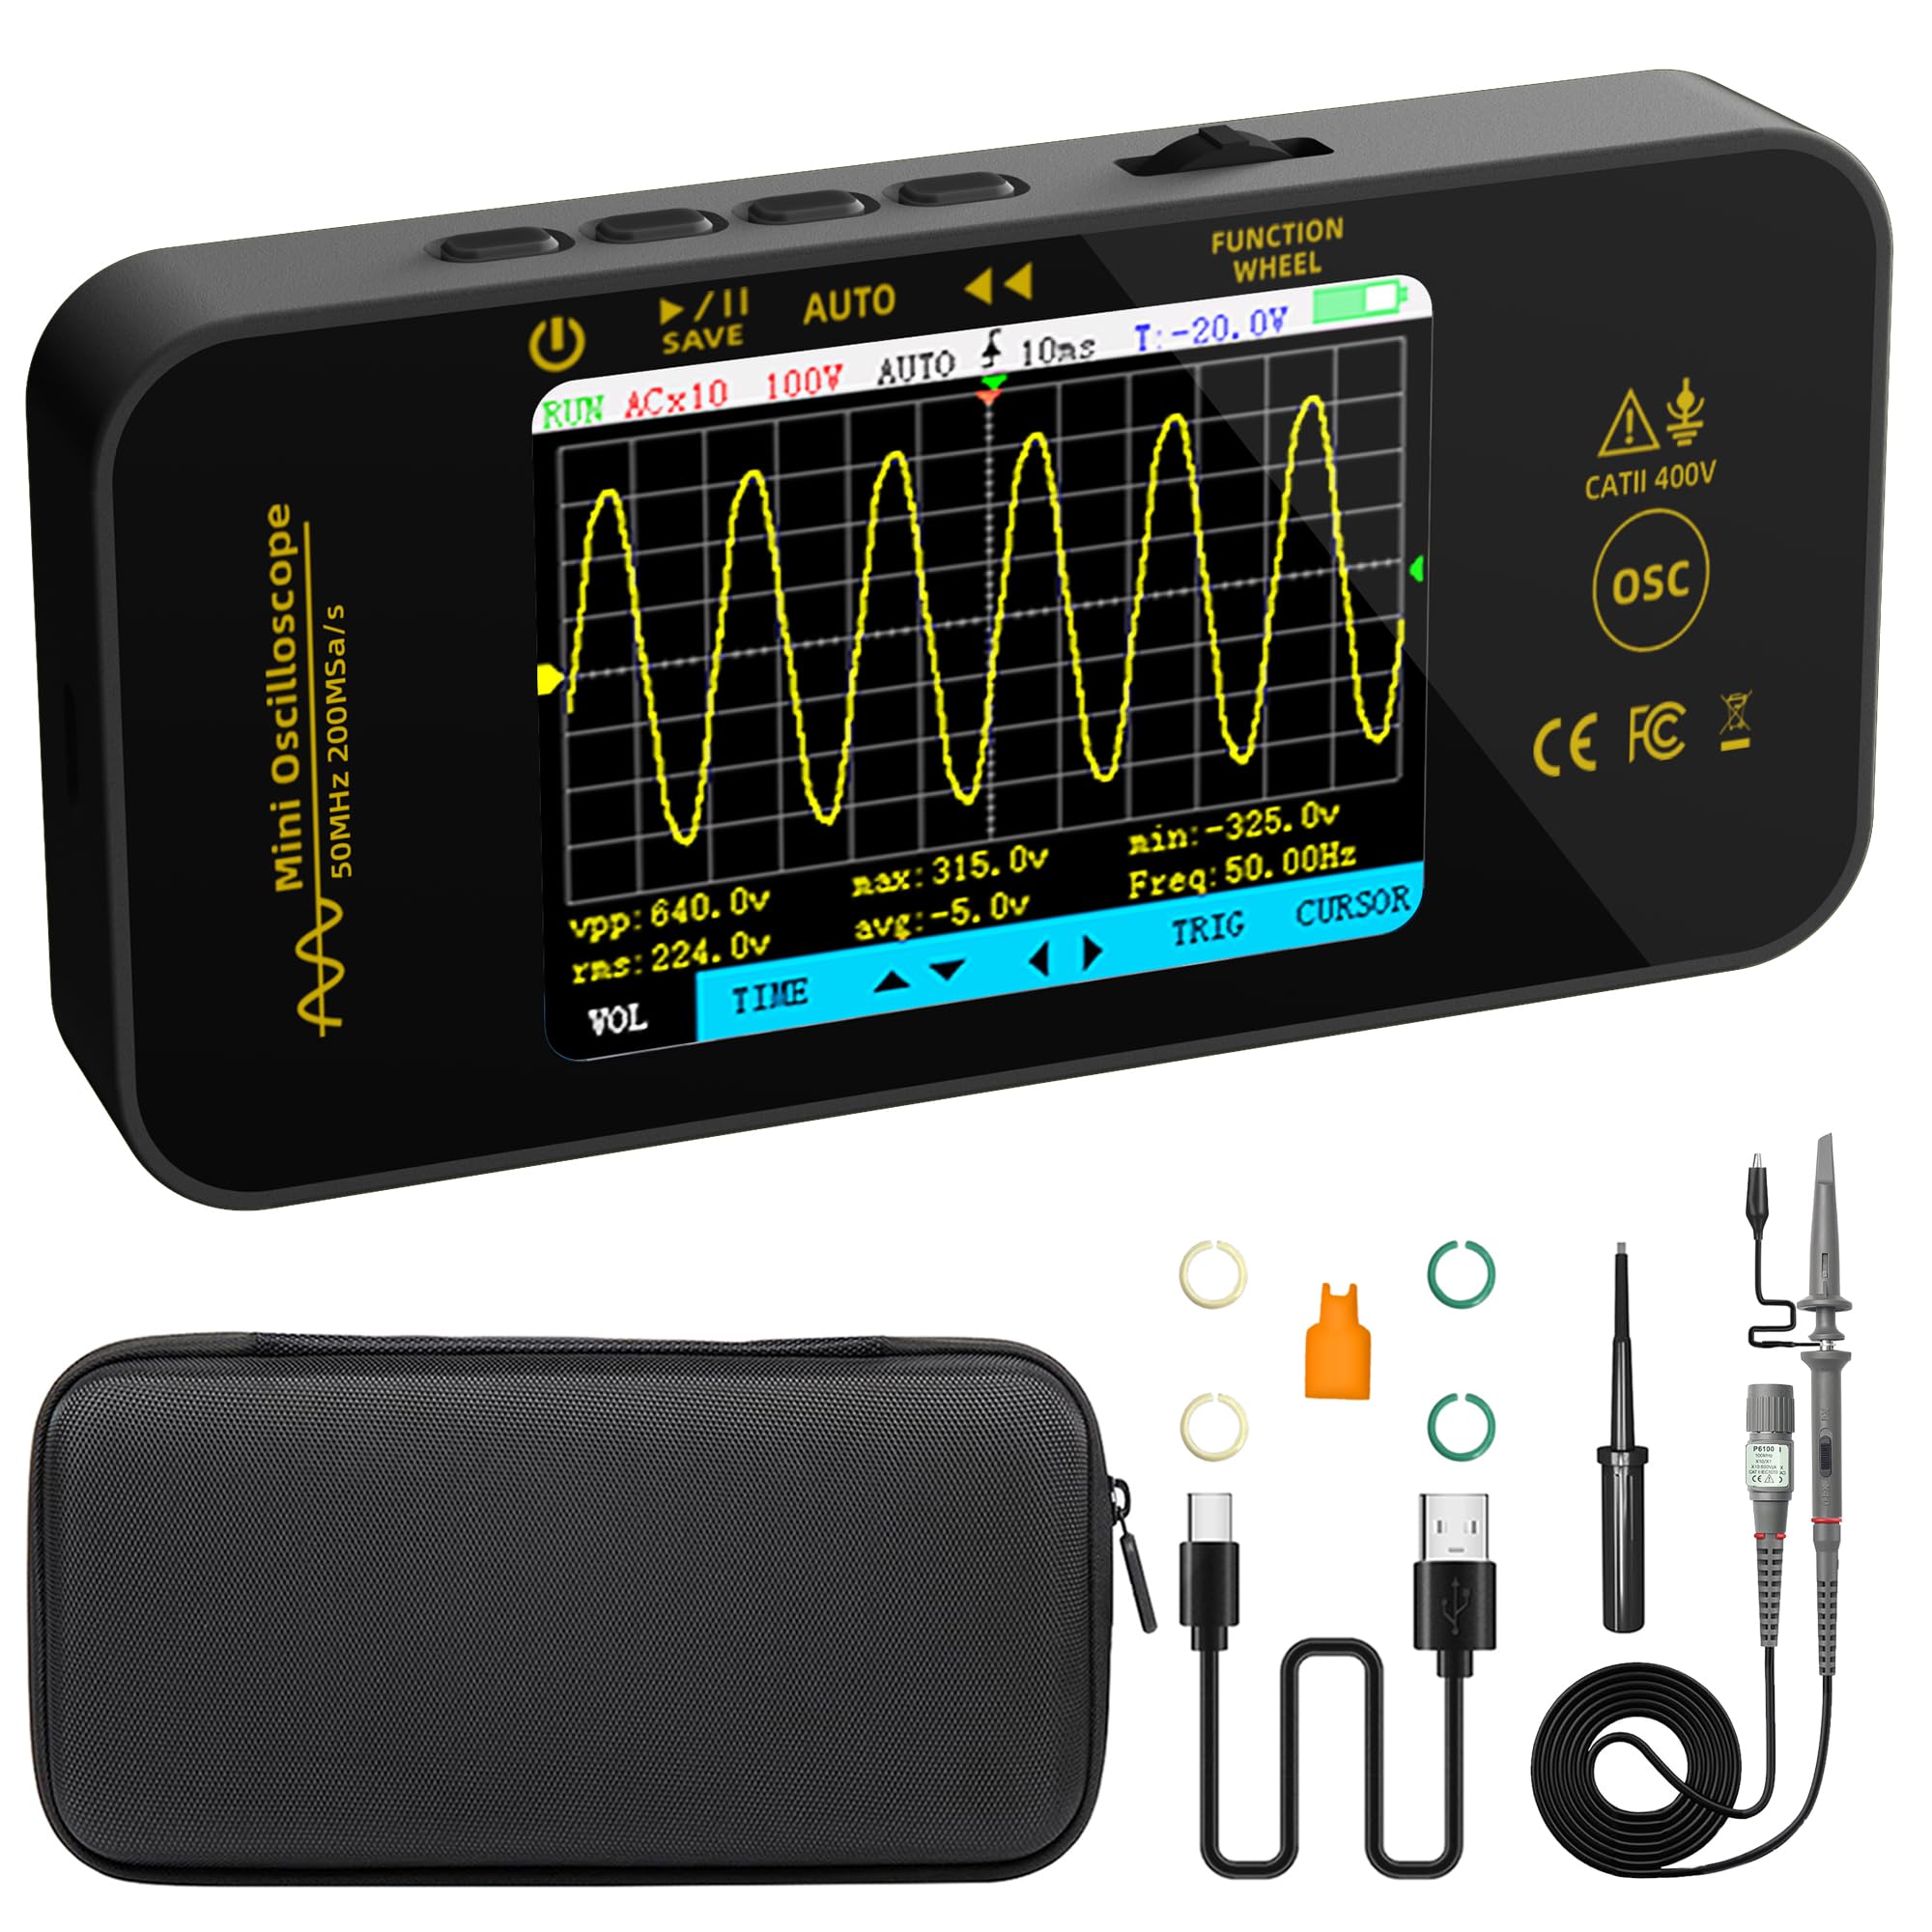
Image: The oscilloscope displaying a captured waveform with key measurement data.
Trigger Modes
Select from Automatic, Single, or Normal trigger modes to stabilize repetitive waveforms or capture single-shot events. The trigger can be set to rising or falling edge.
Time Base and Vertical Sensitivity
Adjust the horizontal time base (10 ns/div to 20 s/div) and vertical sensitivity (20 mV/div to 10 V/div) to properly scale the waveform on the screen. The device supports automatic time base and amplitude calibration.
Cursor Measurements
Utilize vertical and horizontal cursors to perform precise measurements on specific segments of the waveform, such as voltage differences or time intervals.
Mathematical Operations (FFT)
The oscilloscope supports mathematical operations, including Fast Fourier Transform (FFT), for frequency domain analysis.
Saving and Transferring Data
Waveforms can be saved with a single click and viewed directly on the unit or transferred to a PC for further analysis. The device supports data retention and transfer.

Image: Examples of various waveforms measured and displayed by the oscilloscope.
Maintenance
Battery Care
To prolong battery life, avoid fully discharging the device frequently. Recharge the battery when the low battery indicator appears. Store the device in a cool, dry place if not used for extended periods.
Cleaning
Clean the device with a soft, dry cloth. Do not use abrasive cleaners or solvents, as they may damage the casing or screen.
Firmware Updates
Firmware updates may be released periodically to improve performance or add new features. Please contact BSIDE support for information on available firmware updates and instructions on how to apply them.
Troubleshooting
If you encounter issues with your BSIDE OT5 Mini Oscilloscope, consider the following:
- Device not powering on: Ensure the battery is sufficiently charged. Connect the USB C charging cable and allow it to charge for a period before attempting to power on again.
- No waveform displayed: Check that the probe is correctly connected to both the device and the circuit under test. Verify the probe's attenuation setting matches the oscilloscope's input settings. Adjust the time base and vertical sensitivity to bring the waveform into view.
- Unstable waveform: Adjust the trigger level and trigger mode (Automatic, Single, Normal) to stabilize the waveform. Ensure the trigger edge (rising/falling) is correctly selected.
- Inaccurate measurements: Perform an auto-calibration of the time base and amplitude. Ensure the probe is properly calibrated and connected.
The device features intelligent anti-burn and overload protection to prevent damage from incorrect input. If issues persist, contact customer support.
Specifications
| Display | 3.2-inch Full-Viewing Angle TFT LCD |
| Bandwidth | 50 MHz |
| Real-time Sampling Rate | 200 MSa/s |
| Storage Depth | 128 kb |
| Input Impedance | 1 MΩ, @16 pF |
| Coupling | AC/DC |
| Horizontal Time Base | 10 ns/div - 20 s/div, Accuracy: 20 ppm |
| Vertical Sensitivity | 20 mV/div - 10 V/div |
| Maximum Input Voltage | X1: ±40 V; X10: ±400 V (AC+DC peak) |
| Automatic Test Parameters | Period, Frequency, Amplitude, Max, Min, Duty Cycle, RMS Value |
| Trigger Modes | Automatic, Single, Normal |
| Trigger Edge | Rising/Falling |
| Power Supply | 1200 mAh Rechargeable Lithium-ion Battery |
| Dimensions | 130.1 x 64.1 x 23 mm |
| Weight | 143 g |
Warranty and Support
For warranty information, technical support, or inquiries regarding firmware updates, please contact BSIDE customer service. Refer to the contact details provided with your purchase or visit the official BSIDE website for assistance.


