
1. Introduction
Thank you for choosing the KADAX 6x3m Greenhouse. This manual provides essential information for the safe assembly, operation, and maintenance of your new greenhouse. Please read these instructions carefully before beginning assembly and retain them for future reference. This greenhouse is designed to provide a protected environment for cultivating plants, offering protection from adverse weather conditions and promoting optimal growth.

Image 1.1: Overview of the KADAX 6x3m Greenhouse, showing its dimensions (600cm length, 300cm width) and features like 12 roll-up windows, 140g/m² film, and 25mm galvanized steel tubes.
2. Safety Instructions
- Assembly: Always assemble the greenhouse with at least two people. Wear appropriate safety gear, such as gloves, to prevent injuries.
- Location: Choose a level, sheltered location for installation. Avoid areas prone to strong winds or flooding. Ensure adequate clearance around the greenhouse for access and maintenance.
- Anchoring: Securely anchor the greenhouse to the ground using appropriate stakes or weights to prevent it from being lifted by wind.
- Ventilation: Ensure proper ventilation, especially during hot weather, to prevent overheating and excessive humidity inside the greenhouse. Use the integrated roll-up windows and zippered door for this purpose.
- Weight Distribution: Do not hang heavy objects from the frame. Distribute plant weight evenly.
- Snow Load: In areas with heavy snowfall, regularly remove snow from the roof to prevent structural damage.
- Children and Pets: Keep children and pets away from the assembly area. Do not allow them to play unsupervised inside or around the greenhouse.
3. Package Contents
Before beginning assembly, verify that all components are present and undamaged. If any parts are missing or damaged, please contact customer support.
- Galvanized Steel Frame Tubes (various lengths and shapes for arches, horizontal, and diagonal supports)
- Connectors and Fasteners
- Polyethylene (PE) Film Cover (green, 140g/m²)
- Roll-up Windows (12 units, integrated into the film)
- Zippered Front Door (1 unit, integrated into the film)
- Assembly Instructions (this manual)
4. Setup and Assembly
Assembly requires two people. Follow the steps below carefully.
4.1. Frame Assembly
- Unpack Components: Lay out all steel tubes and connectors on a clean, flat surface. Identify each part according to the included diagram (if provided separately).
- Construct Base Frame: Assemble the rectangular base frame using the straight tubes and corner connectors. Ensure all connections are secure.
- Install Arch Supports: Attach the curved arch tubes to the base frame using the appropriate connectors. Gradually build the arched structure, ensuring symmetry.
- Add Horizontal and Diagonal Braces: Connect the horizontal and diagonal support tubes to reinforce the structure. These braces provide stability and resistance to external forces.

Image 4.1: Detailed view of the galvanized steel frame connections and the robust mesh structure of the polyethylene film.

Image 4.2: Diagram illustrating the assembly of the greenhouse's steel frame, showing various connecting points.
4.2. Film Cover Installation
- Drape Film: Carefully drape the polyethylene film cover over the assembled steel frame. Ensure the door opening is at the desired front end.
- Align and Secure: Adjust the film so it is evenly distributed and taut over the frame. Secure the film to the frame using the provided ties or clips. Ensure the film is pulled tight to prevent flapping in the wind.
- Anchor Greenhouse: Once the film is in place, securely anchor the entire greenhouse to the ground. Use ground stakes or other suitable anchoring methods to prevent movement, especially in windy conditions.

Image 4.3: View of the greenhouse base, illustrating how the film is secured to the frame near the ground.
5. Operating Instructions
The KADAX Greenhouse is designed for optimal plant growth. Proper operation involves managing temperature, humidity, and access.
5.1. Ventilation and Climate Control
The greenhouse features 12 integrated roll-up windows for effective ventilation. These windows allow for targeted regulation of temperature and humidity, preventing mold formation and creating a healthy microclimate for sensitive crops.
- Opening Windows: To open a window, unroll the cover upwards and secure it with the attached ties or clips.
- Closing Windows: To close, unfasten the ties and carefully roll the cover down until the window is fully sealed.
- Monitoring: Regularly monitor the internal temperature and humidity. Adjust the number of open windows as needed to maintain ideal conditions for your plants.

Image 5.1: Detail of a roll-up window, demonstrating its design for ventilation and how it can be secured in an open position.
5.2. Access and Entry
A wide, roll-up front door with a zipper provides convenient access to the greenhouse. This allows for easy transport of planters, tools, or wheelbarrows.
- Opening the Door: Unzip the door completely and roll it upwards. Secure it in the open position using the provided fasteners.
- Closing the Door: Unfasten the door, roll it down, and zip it closed to maintain the internal climate.
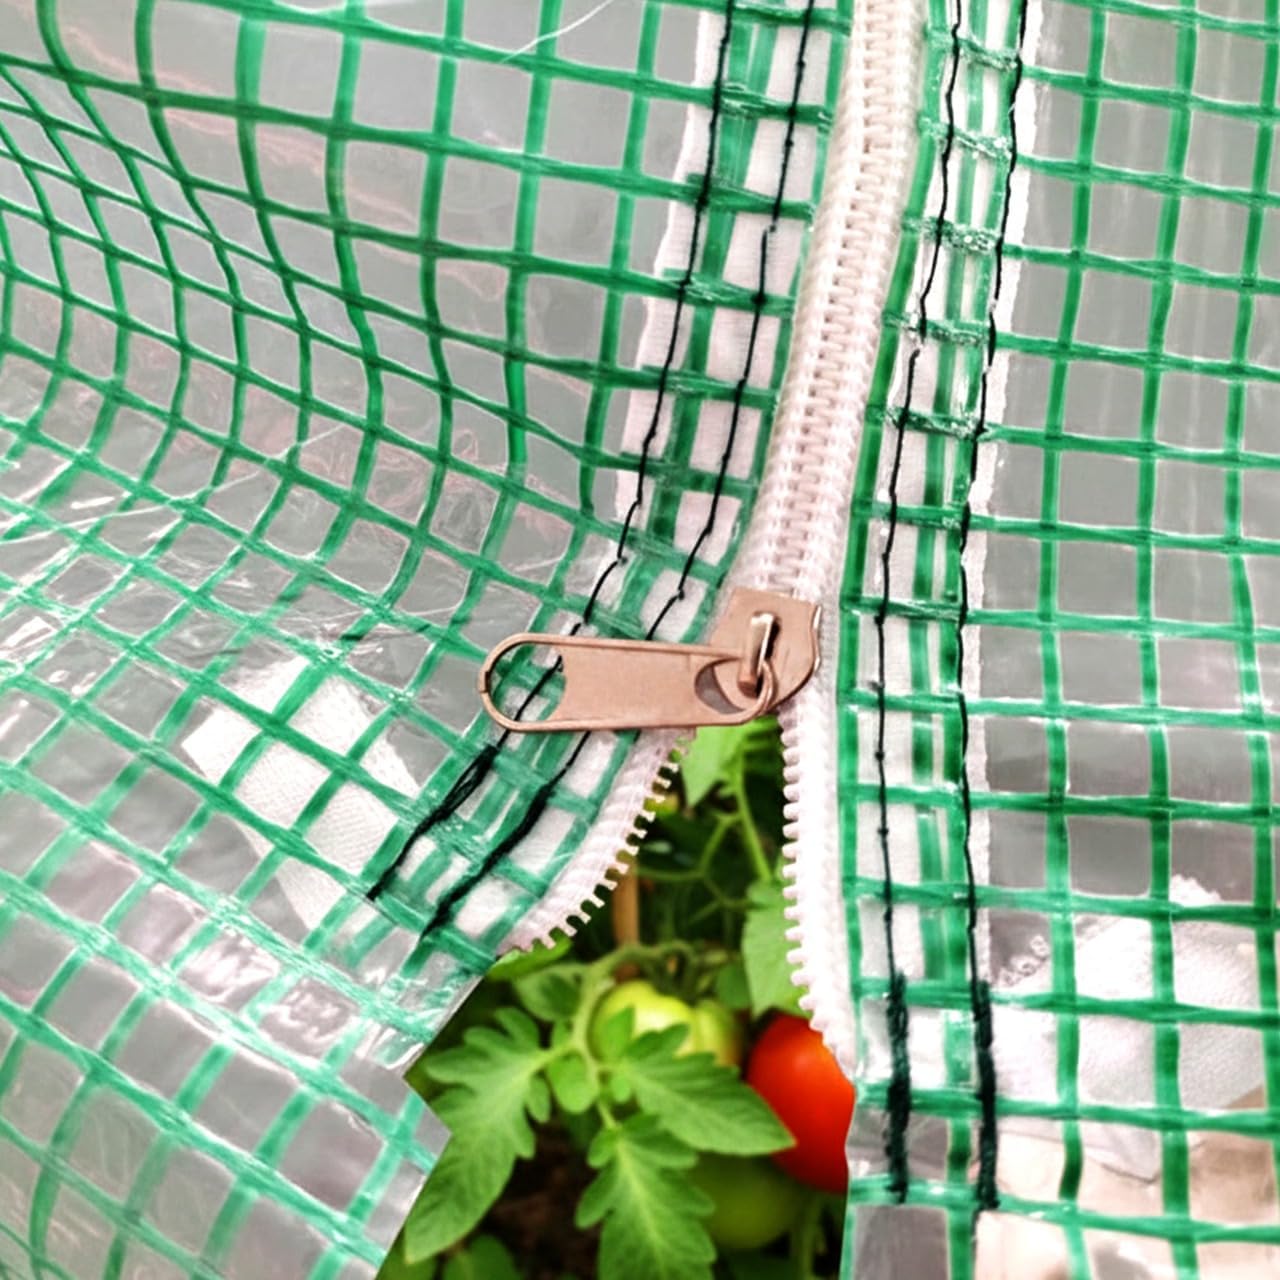
Image 5.2: Close-up of the durable zipper mechanism on the greenhouse door.

Image 5.3: The KADAX greenhouse in use, showcasing tomato plants thriving inside with the door open for access.
6. Maintenance
Regular maintenance will extend the lifespan of your KADAX Greenhouse.
- Cleaning the Film: Periodically clean the polyethylene film with mild soap and water to remove dirt, dust, and algae buildup. Avoid abrasive cleaners or brushes that could damage the film. Rinse thoroughly with clean water.
- Frame Inspection: Regularly check all frame connections and fasteners for tightness. Tighten any loose bolts or connectors to maintain structural integrity. Inspect the galvanized steel for any signs of corrosion and treat as necessary.
- Film Inspection: Inspect the film for any tears, punctures, or signs of wear. Repair small damages promptly with appropriate repair tape to prevent them from worsening.
- Anchoring Check: Ensure the ground anchors remain secure, especially after strong winds or heavy rain. Re-secure or reinforce anchoring if needed.
- Winter Preparation: In regions with heavy snow, it is advisable to remove the film cover during winter months to prevent damage from excessive snow load. Store the cleaned and dried film in a cool, dry place.
7. Troubleshooting
Here are solutions to common issues you might encounter:
- Greenhouse feels unstable:
Solution: Check all frame connections and tighten any loose bolts. Ensure the greenhouse is properly anchored to the ground. Add additional anchoring points if necessary, especially in windy areas. - Excessive condensation inside:
Solution: Increase ventilation by opening more roll-up windows and the front door. Ensure adequate air circulation. Consider adding a small fan if condensation persists. - Film is flapping in the wind:
Solution: Ensure the film is pulled taut and securely fastened to the frame at all attachment points. Check for any loose ties or clips and re-secure them. - Water pooling on the roof:
Solution: This indicates the film is not taut enough or the frame is sagging. Re-tension the film and inspect the frame for any bending or damage. Ensure the frame is assembled correctly and all supports are in place. - Zipper is stuck or difficult to operate:
Solution: Apply a silicone-based lubricant to the zipper teeth. Ensure the fabric around the zipper is not caught. Avoid forcing the zipper.
8. Specifications
| Model Number | K16230 |
| Dimensions (L x W x H) | 600 x 300 x 200 cm (6L x 3W x 2H meters) |
| Cultivation Area | 18 m² |
| Frame Material | Galvanized Alloy Steel |
| Cover Material | Polyethylene (PE) Film, 140g/m² |
| Number of Doors | 1 (Zippered, roll-up) |
| Number of Vents/Windows | 12 (Roll-up) |
| Color | Green |
| Usage | Outdoor |
9. Warranty and Support
9.1. Warranty Information
KADAX products are manufactured to high-quality standards. For specific warranty details regarding your KADAX Greenhouse Model K16230, please refer to the warranty card included with your purchase or visit the official KADAX website. The warranty typically covers manufacturing defects under normal use conditions.
9.2. Customer Support
If you have any questions about the assembly, operation, maintenance, or troubleshooting of your KADAX Greenhouse, please contact KADAX customer support. Contact information can usually be found on the product packaging, the official KADAX website, or your purchase documentation.
When contacting support, please have your model number (K16230) and purchase date ready to assist with faster service.