
1. Introduction
Thank you for choosing the Weitieke Heat Gun. This professional-grade tool is designed for a wide range of applications, offering dual temperature control for precision and efficiency. Please read this manual thoroughly before operation to ensure safe and effective use of your heat gun.

Image 1.1: The Weitieke Heat Gun, showcasing its ergonomic design and primary components.
2. Safety Instructions
Always observe basic safety precautions when using electrical appliances to reduce the risk of fire, electric shock, and personal injury.
- Read All Instructions: Familiarize yourself with the heat gun's operation and safety guidelines before use.
- Personal Protective Equipment: Wear appropriate safety glasses and gloves. Avoid direct contact with the hot nozzle or heated materials.
- Ventilation: Use the heat gun in a well-ventilated area. Some materials may emit toxic fumes when heated.
- Flammable Materials: Do not use near flammable liquids, gases, or materials. Keep a fire extinguisher nearby.
- Cool Down: Allow the heat gun to cool completely before storing. Use the integrated stand for safe hands-free cooling.
- Overload Protection: The heat gun is equipped with overload protection. If it shuts off unexpectedly, allow it to cool before restarting.
- Initial Use: During the first use, it is normal for the heat gun to produce a small amount of smoke and a burning odor. This is due to an anti-rust coating on the heating core melting at high temperatures and will dissipate after initial operation.

Image 2.1: Internal safety features including built-in overload protection, turbo fan, and copper motor for reliable operation.
3. Product Components
Your Weitieke Heat Gun package includes the following items:
- Weitieke Heat Gun Unit
- Concentrator Nozzle
- Deflector Nozzle
- Reflector Nozzle
- General Nozzle

Image 3.1: The heat gun and its four interchangeable nozzles for various applications.
4. Setup
Follow these steps to prepare your heat gun for use:
- Unpack: Carefully remove all components from the packaging.
- Inspect: Check the heat gun and accessories for any signs of damage. Do not use if damaged.
- Attach Nozzle: Select the appropriate nozzle for your task and firmly attach it to the heat gun's outlet. Ensure it is securely seated.
- Power Connection: Plug the power cord into a standard 120V AC electrical outlet.
5. Operating Instructions
The Weitieke Heat Gun features dual temperature settings for versatile use.
5.1. Temperature Control
The heat gun has a switch with three positions: OFF (0), LOW (I), and HIGH (II).
- Position 0 (OFF): Turns the heat gun off.
- Position I (LOW): Provides a temperature range of approximately 0-572℉ (0-300℃). This setting is suitable for light-duty tasks such as crafting, resin curing, candle making, and phone repair.
- Position II (HIGH): Provides a temperature range of approximately 572-1112℉ (300-600℃). This setting is ideal for heavy-duty applications like paint removal, soldering, and heat shrink tubing.
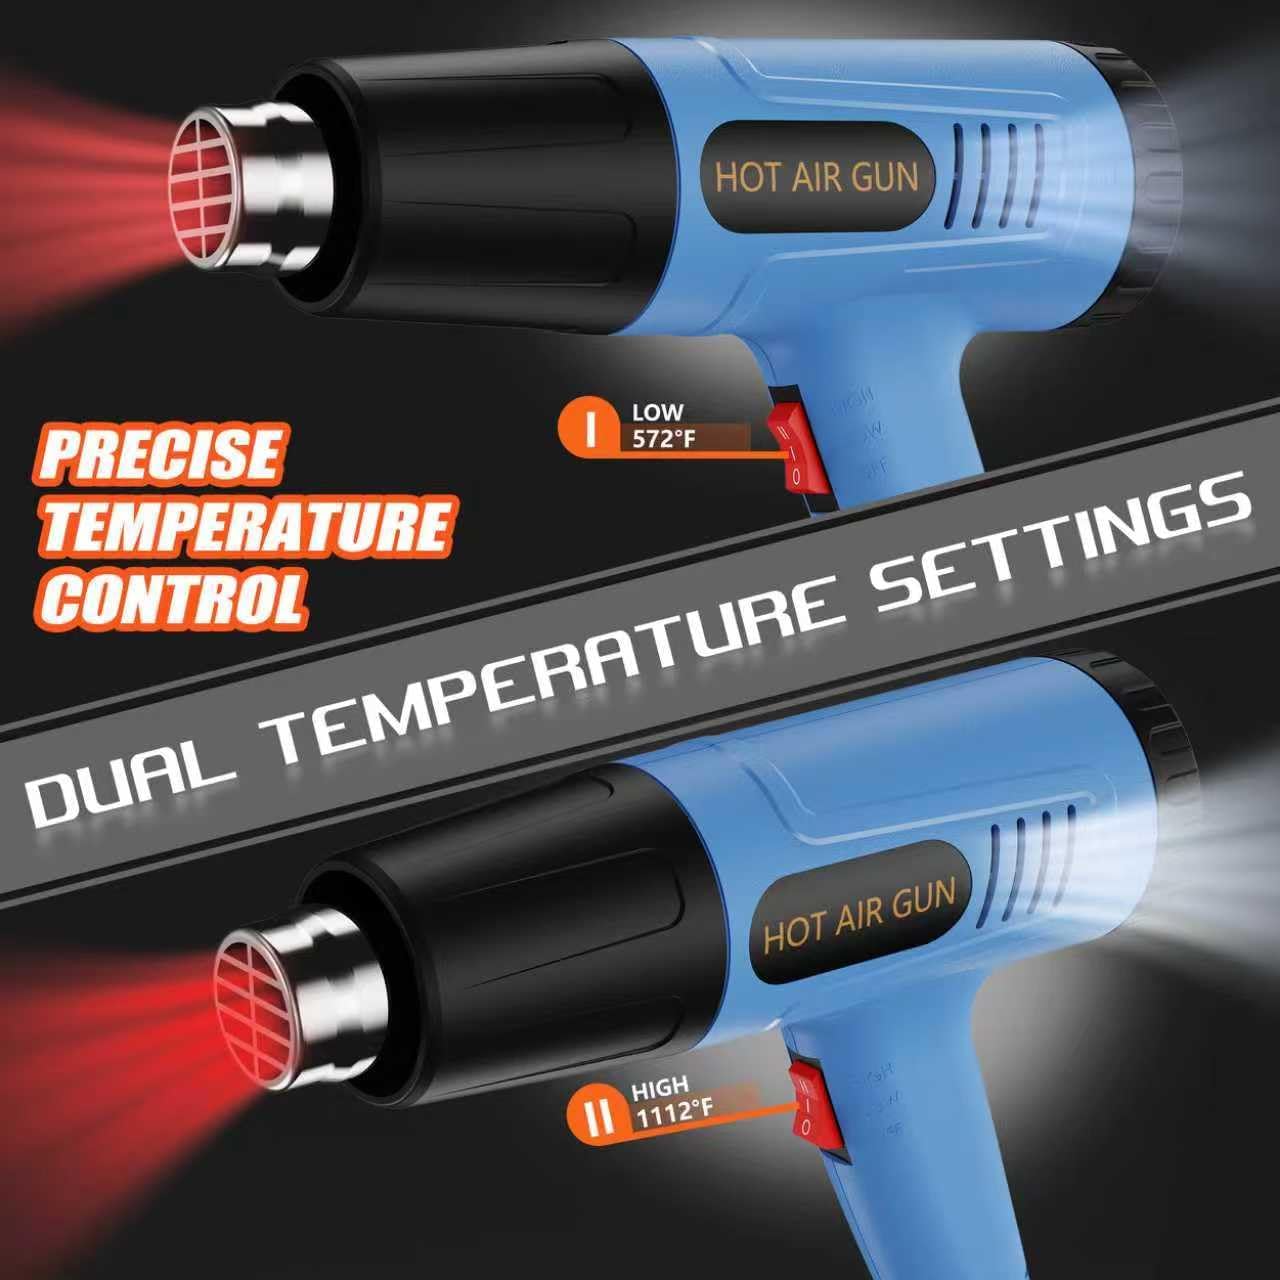
Image 5.1: Dual temperature settings for precise control over various tasks.
5.2. General Operation
- Power On: Move the switch to either Position I (LOW) or Position II (HIGH) depending on your application.
- Heating: The heat gun will heat up quickly. Direct the hot air towards the workpiece.
- Hands-Free Use: For tasks requiring both hands, utilize the integrated stand to position the heat gun safely on a stable surface.
- Power Off: Once finished, move the switch to Position 0 (OFF). Allow the heat gun to cool down completely before storing.

Image 5.2: Examples of versatile applications for the heat gun, including paint stripping and plastic bending.

Image 5.3: The heat gun's user-friendly design, highlighting hands-free operation and ergonomic handle for comfort.
6. Maintenance
Proper maintenance ensures the longevity and performance of your heat gun.
- Cleaning: After each use, ensure the heat gun is unplugged and completely cool. Wipe the exterior with a clean, damp cloth. Do not use harsh chemicals or abrasive cleaners.
- Nozzle Care: Clean any residue from the nozzles after they have cooled.
- Storage: Store the heat gun in a dry, safe place, out of reach of children. Ensure the power cord is not kinked or damaged during storage.
- Inspection: Periodically inspect the power cord and housing for any signs of wear or damage. If damage is found, discontinue use and contact customer support.
7. Troubleshooting
If you encounter issues with your Weitieke Heat Gun, refer to the following common problems and solutions:
| Problem | Possible Cause | Solution |
|---|---|---|
| Heat gun does not turn on. | No power, faulty outlet, damaged cord. | Check power connection, try a different outlet. Inspect cord for damage. |
| Heat gun turns off during use. | Overload protection activated due to overheating. | Unplug the unit and allow it to cool down for at least 15-20 minutes before restarting. Ensure proper ventilation. |
| Smoke or burning odor on first use. | Anti-rust coating on heating core burning off. | This is normal and will dissipate after initial operation. Ensure good ventilation. |
| Insufficient heat output. | Incorrect temperature setting, blocked air intake/outlet. | Ensure the switch is on the desired temperature setting (LOW or HIGH). Check for and clear any obstructions in the air vents. |
8. Specifications
Key technical specifications for the Weitieke Heat Gun (Standard Model):
| Feature | Specification |
|---|---|
| Model | Standard |
| Item Weight | 1.7 pounds |
| Package Dimensions | 10.35 x 9.33 x 3.03 inches |
| Power Source | AC |
| Voltage | 120 Volts |
| Wattage | 1200 watts |
| Temperature Modes | Low: 0-572℉ (0-300℃), High: 572-1112℉ (300-600℃) |
| Included Components | 4 Nozzles |
| Power Cord Length | 5 feet |
9. Warranty and Support
For warranty information or technical support, please refer to the product packaging or contact the manufacturer directly. Keep your purchase receipt as proof of purchase.
Manufacturer: Weitieke