
Thermalright A70 VISION
Thermalright A70 Vision ATX Gaming Case User Manual
Model: A70 VISION
Introduction
This manual provides detailed instructions for the installation, operation, and maintenance of your Thermalright A70 Vision ATX Gaming Case. Please read this manual thoroughly before use to ensure proper functionality and longevity of your product.
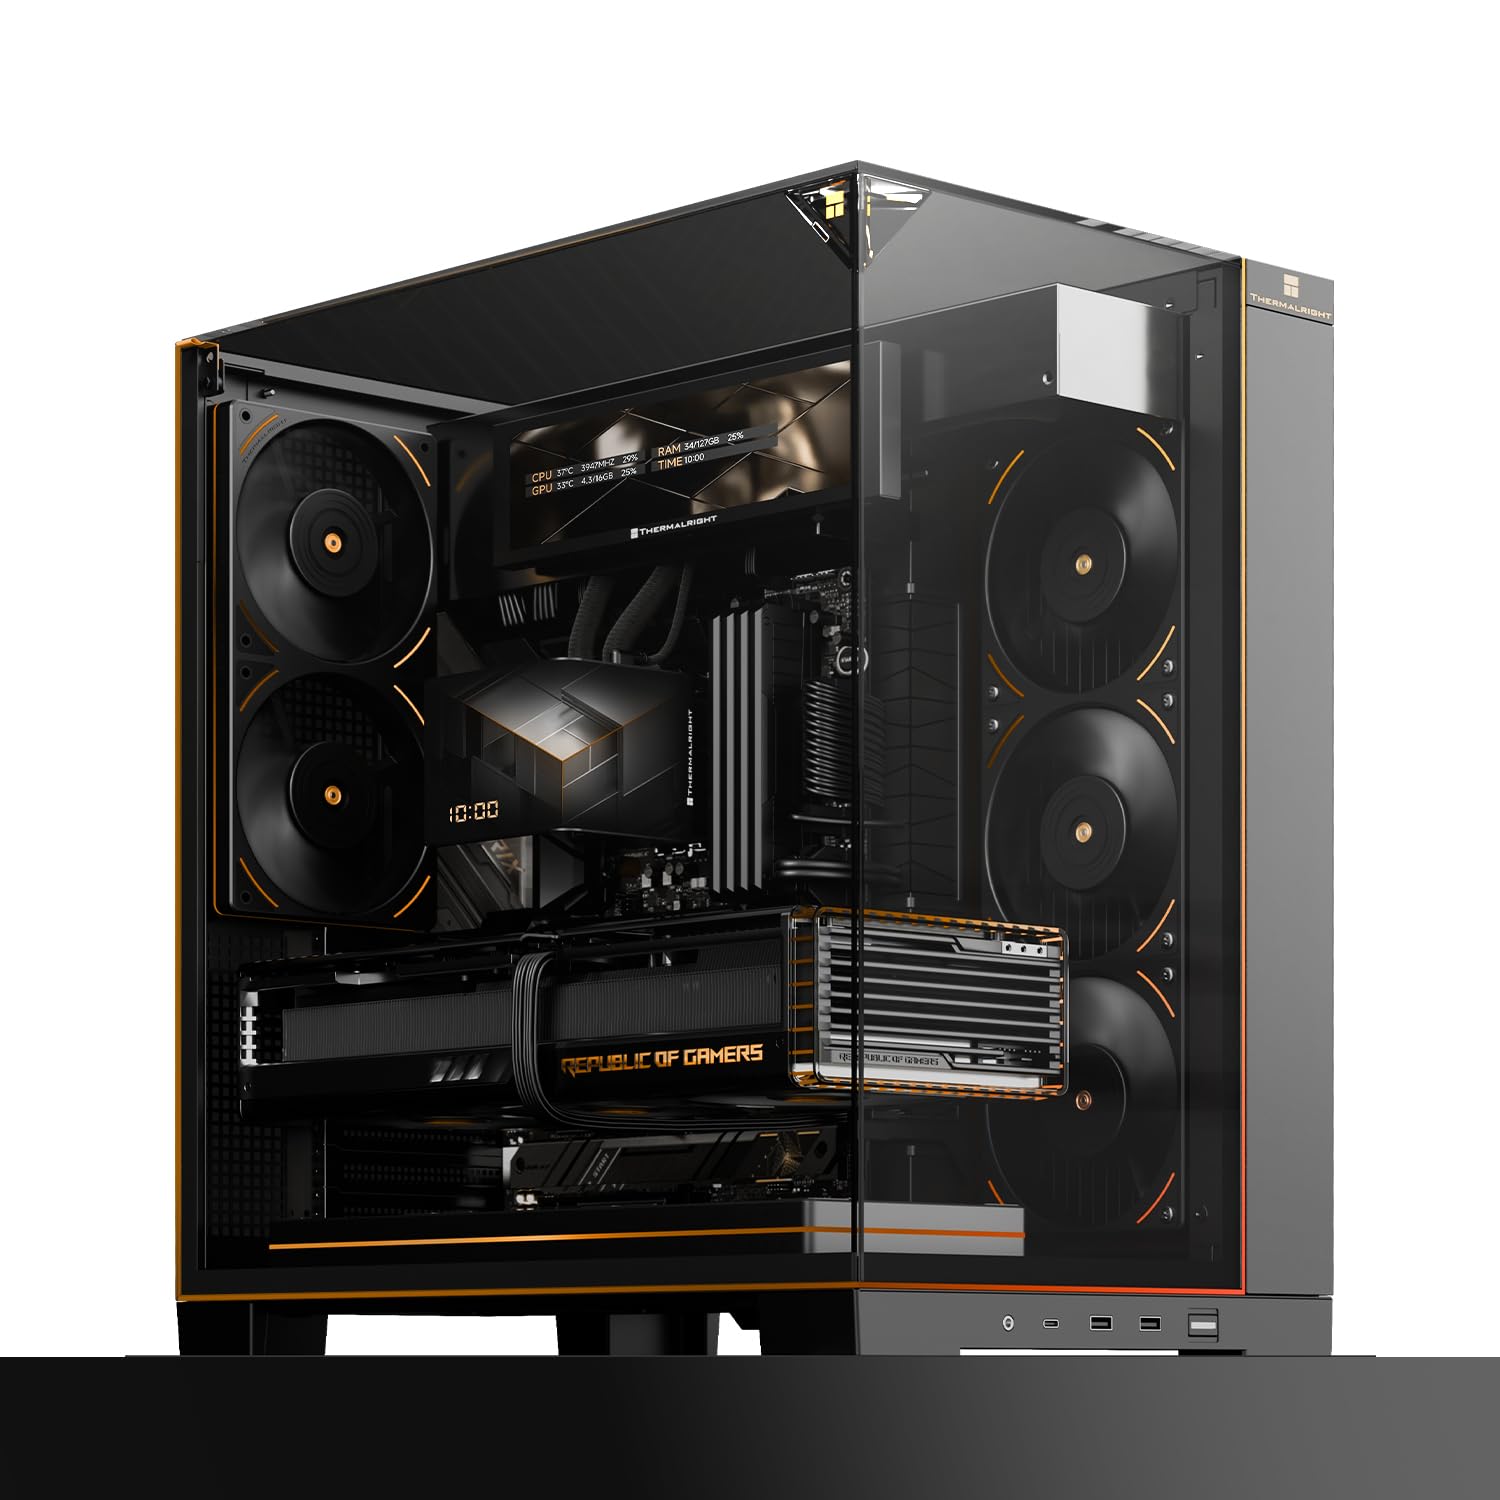
Image: Thermalright A70 Vision ATX Gaming Case showcasing its panoramic glass panel, RGB lighting, and integrated 9.16-inch magnetic display.
Setup and Installation
Follow these steps to correctly set up your Thermalright A70 Vision chassis.
1. Preparing the Chassis
Unpack the chassis and ensure all components are present. Remove side panels for easier access during installation. Refer to the video below for a visual guide on the installation process.
Video: An overview of the A70 computer case series, demonstrating various installation steps and features. This video is provided by Thermalright Direct 2.
2. Motherboard Installation
The A70 Vision supports ATX, M-ATX, and Mini-ITX motherboards. Align your motherboard with the standoffs and secure it with screws. This case is also compatible with back-connect ATX motherboards for a cleaner build.

Image: The A70 Vision chassis highlighting its compatibility with back-connect ATX motherboards, allowing for a streamlined internal appearance.
3. GPU Installation
Install your graphics processing unit (GPU) into the appropriate PCIe slot. The chassis includes a detachable GPU bracket, compatible with GPUs longer than 420mm, to prevent sagging. Adjust its height using screws behind the motherboard tray.
4. Storage Drive Installation
Install 3.5-inch and 2.5-inch drives into the designated internal bays. The chassis supports up to 4 internal bays.
5. Cooling System Setup
The chassis features 8 mounting positions for 120mm fans (excluding CPU fans) and supports CPU liquid coolers with tubing lengths up to 400mm. Install fans and radiators as desired for optimal airflow, utilizing the four-direction airflow design.

Image: Internal view of the A70 Vision chassis demonstrating support for up to 8 fans for comprehensive cooling.
6. Cable Management
Utilize the dedicated internal cable routing channels and concealed tubing pathways for liquid cooling. Pre-drilled holes are available for the screen USB cables to maintain a clean aesthetic and efficient airflow.

Image: Close-up view of the hidden water cooler tube and wire shroud design within the A70 Vision for an aesthetic appearance.

Image: Diagram illustrating the magnetic LCD module installation location and the rear pass-through USB cable design for clean cable management.
7. Connecting the 9.16-inch LCD Display
The 9.16-inch magnetic display connects via a USB cable. Route the cable through the pre-drilled holes and connect it to your motherboard's USB header.
Operating Instructions
1. Front Panel I/O
The front panel provides convenient access to the following ports:
- 1 x Audio Jack
- 1 x USB Type-C (supports data transfer rates up to 10Gbps)
- 2 x USB Type-A
- 1 x Power Button
2. 9.16-inch LCD Display Operation
The integrated 9.16-inch magnetic display boasts a resolution of 1920x480. It supports multiple customizable themes, image/video display, and screen mirroring functionalities.

Image: The 9.16-inch fully customizable display in the A70 Vision, capable of system monitoring, GIF picture playback, and video playback.
TRCC Software
To operate and customize the display, download and install the TRCC software from the official Thermalright website. The software allows for system monitoring, GIF/video playback, and theme customization.
Image: The TRCC software interface, demonstrating its full support for multimedia custom DIY, massive topics, backgrounds, multi-dimensional parameter monitoring, style fine-tuning, and screen mirroring functions.
For detailed tutorials on using the TRCC software, click the "?" symbol in the upper right corner of the application.
Maintenance
Regular cleaning helps maintain optimal performance and appearance of your PC case.
- Dust Removal: Use compressed air to remove dust from fan filters and internal components periodically. Ensure the system is powered off before cleaning.
- Exterior Cleaning: Wipe exterior surfaces, including glass panels, with a soft, damp cloth. Avoid abrasive cleaners or harsh chemicals that may damage the finish.
- Cable Management: Periodically check cable routing to ensure no cables are obstructing airflow or fan operation. Re-secure any loose cables.
Troubleshooting
Common Issues and Solutions
- Display Not Working: Ensure the USB cable for the 9.16-inch LCD display is securely connected to both the display and the motherboard's USB header. Verify that the TRCC software is installed and running correctly on your operating system.
- Poor Airflow/Overheating: Check that all installed fans are spinning and oriented correctly for optimal airflow (intake/exhaust). Ensure no cables or components are blocking air pathways. Clean dust filters regularly to prevent buildup.
- Loose Magnetic Display: If the magnetic display feels loose, ensure it is properly seated against the chassis. The magnetic attachment is designed for easy removal but should hold firmly during normal use.
- Front Panel Ports Not Functioning: Verify that all front panel I/O cables (USB, Audio) are correctly connected to the corresponding headers on your motherboard. Consult your motherboard manual for header locations.
Specifications
Detailed specifications for the Thermalright A70 Vision ATX Gaming Case:

Image: A detailed specification table for the A70 Vision V2 chassis.
| Feature | Detail |
|---|---|
| Brand | Thermalright |
| Model Name | A70 Vision |
| Chassis Dimensions (D x W x H) | 17.75" x 11.4" x 18.78" (450.8mm x 289.5mm x 477mm) |
| Case Type | Full Tower |
| Motherboard Compatibility | ATX, M-ATX, Mini-ITX |
| Material | Plastic (Enclosure) |
| Power Supply Mounting Type | Bottom Mount |
| Cooling Method | Air Cooling (8 x 120mm fan slots), Liquid Cooling (up to 360mm radiators) |
| Total USB 3.0 Ports | 3 (1x USB Type-C, 2x USB Type-A) |
| Other Special Features | Integrated 9.16-inch LCD Display, Panoramic Glass Panel, Hidden Cable Management |
| Hard Disk Form Factor | 3.5 inches |
| Internal Bays Quantity | 4 |
| Compatible Devices | ATX, Micro-ATX, Mini-ITX motherboards, GPUs up to 420mm, PSUs up to 200mm, 3.5-inch and 2.5-inch drives, CPU coolers up to 168.4mm, 120mm, 240mm, and 360mm fans and radiators |
| UPC | 756993055649 |
Warranty Information
The Thermalright A70 Vision ATX Gaming Case comes with a 2-year warranty. Please retain your proof of purchase for warranty claims. For specific terms and conditions, refer to the official Thermalright website or contact customer support.
Support
For further assistance, technical support, or to download the latest TRCC software, please visit the official Thermalright website or contact their customer service department.
Official Thermalright Store: Thermalright Store on Amazon
Related documentsA70 VISION


Ask a question about this manual
Ask about setup, troubleshooting, compatibility, parts, safety, or missing instructions. Manuals+ will review the question and use this page’s manual context to help answer it.