
1. Introduction
Thank you for purchasing the Generic Oak Fluted Sideboard Cabinet. This manual provides essential information for the safe assembly, operation, and maintenance of your new furniture. Please read these instructions carefully before beginning assembly and retain them for future reference.
This cabinet features a modern fluted design with curved edges, offering versatile storage with an adjustable interior shelf. It is constructed from durable engineered wood, designed for use in living rooms, entryways, hallways, or dining rooms.

Figure 1: Generic Oak Fluted Sideboard Cabinet in a living room setting.
2. Safety Information
To ensure safe use of this product, please adhere to the following guidelines:
- Assembly: Always assemble the cabinet on a soft, clean surface to prevent scratches. Two adults are recommended for assembly.
- Stability: Ensure all connections are securely tightened before use. If the cabinet feels unstable, recheck all fasteners.
- Weight Capacity: Do not overload shelves. Distribute weight evenly. The top surface has a maximum weight capacity of 50 lbs (22.7 kg). Each interior shelf has a maximum weight capacity of 20 lbs (9.1 kg).
- Tipping Hazard: For added safety, consider securing the cabinet to a wall using appropriate anti-tip hardware (not included) to prevent accidental tipping, especially in homes with children or pets.
- Placement: Place the cabinet on a level surface. Avoid placing it near heat sources or in direct sunlight to prevent material damage.
3. Package Contents
Before assembly, verify that all components and hardware are present. If any parts are missing or damaged, please contact customer support.
Parts List:
- Top Panel (1)
- Bottom Panel (1)
- Side Panels (2)
- Back Panel (1)
- Doors (2)
- Adjustable Shelf (1)
- Shelf Pins (4)
Hardware List:
- Cam Locks and Studs
- Wood Dowels
- Screws (various sizes)
- Hinges (4)
- Door Handles (2)
Tools Required (not included): Phillips head screwdriver, Hammer.
4. Setup and Assembly Instructions
Follow these steps carefully for proper assembly. It is recommended to have two people for assembly.
- Prepare the Area: Clear a spacious, clean, and soft area for assembly to prevent damage to the cabinet parts.
- Attach Cam Studs and Dowels: Insert cam studs and wood dowels into the pre-drilled holes on the side panels, top panel, and bottom panel as indicated in the assembly diagram (refer to the included paper manual for detailed diagrams).
- Assemble Frame: Connect the side panels to the bottom panel using cam locks. Ensure the back panel groove is aligned.
- Insert Back Panel: Slide the back panel into the grooves of the assembled frame.
- Attach Top Panel: Secure the top panel to the side panels using cam locks.
- Install Shelf Pins: Insert the four shelf pins into the desired height holes on the interior side panels.
- Place Adjustable Shelf: Carefully place the adjustable shelf onto the installed shelf pins.
- Attach Hinges to Doors: Secure the hinges to the doors using the provided screws.
- Attach Doors to Cabinet: Mount the doors to the cabinet frame by attaching the hinges to the pre-drilled holes on the side panels. Adjust hinges as needed for proper door alignment.
- Install Door Handles: Attach the door handles to the front of the doors.

Figure 2: Close-up of the cabinet's curved edges and fluted design.
5. Operating Instructions
Opening and Closing Doors:
Gently pull the integrated handles to open the doors. Push the doors firmly until they close completely. Avoid forcing the doors.
Adjusting the Shelf:
The interior shelf is adjustable to accommodate items of various heights. To adjust:
- Empty the shelf of all contents.
- Carefully lift the shelf off its pins.
- Remove the four shelf pins from their current holes.
- Insert the shelf pins into the desired new set of holes on the interior side panels. Ensure all four pins are at the same height.
- Place the shelf back onto the pins, ensuring it is level and secure.

Figure 3: Cabinet interior with doors open, highlighting the adjustable shelf.
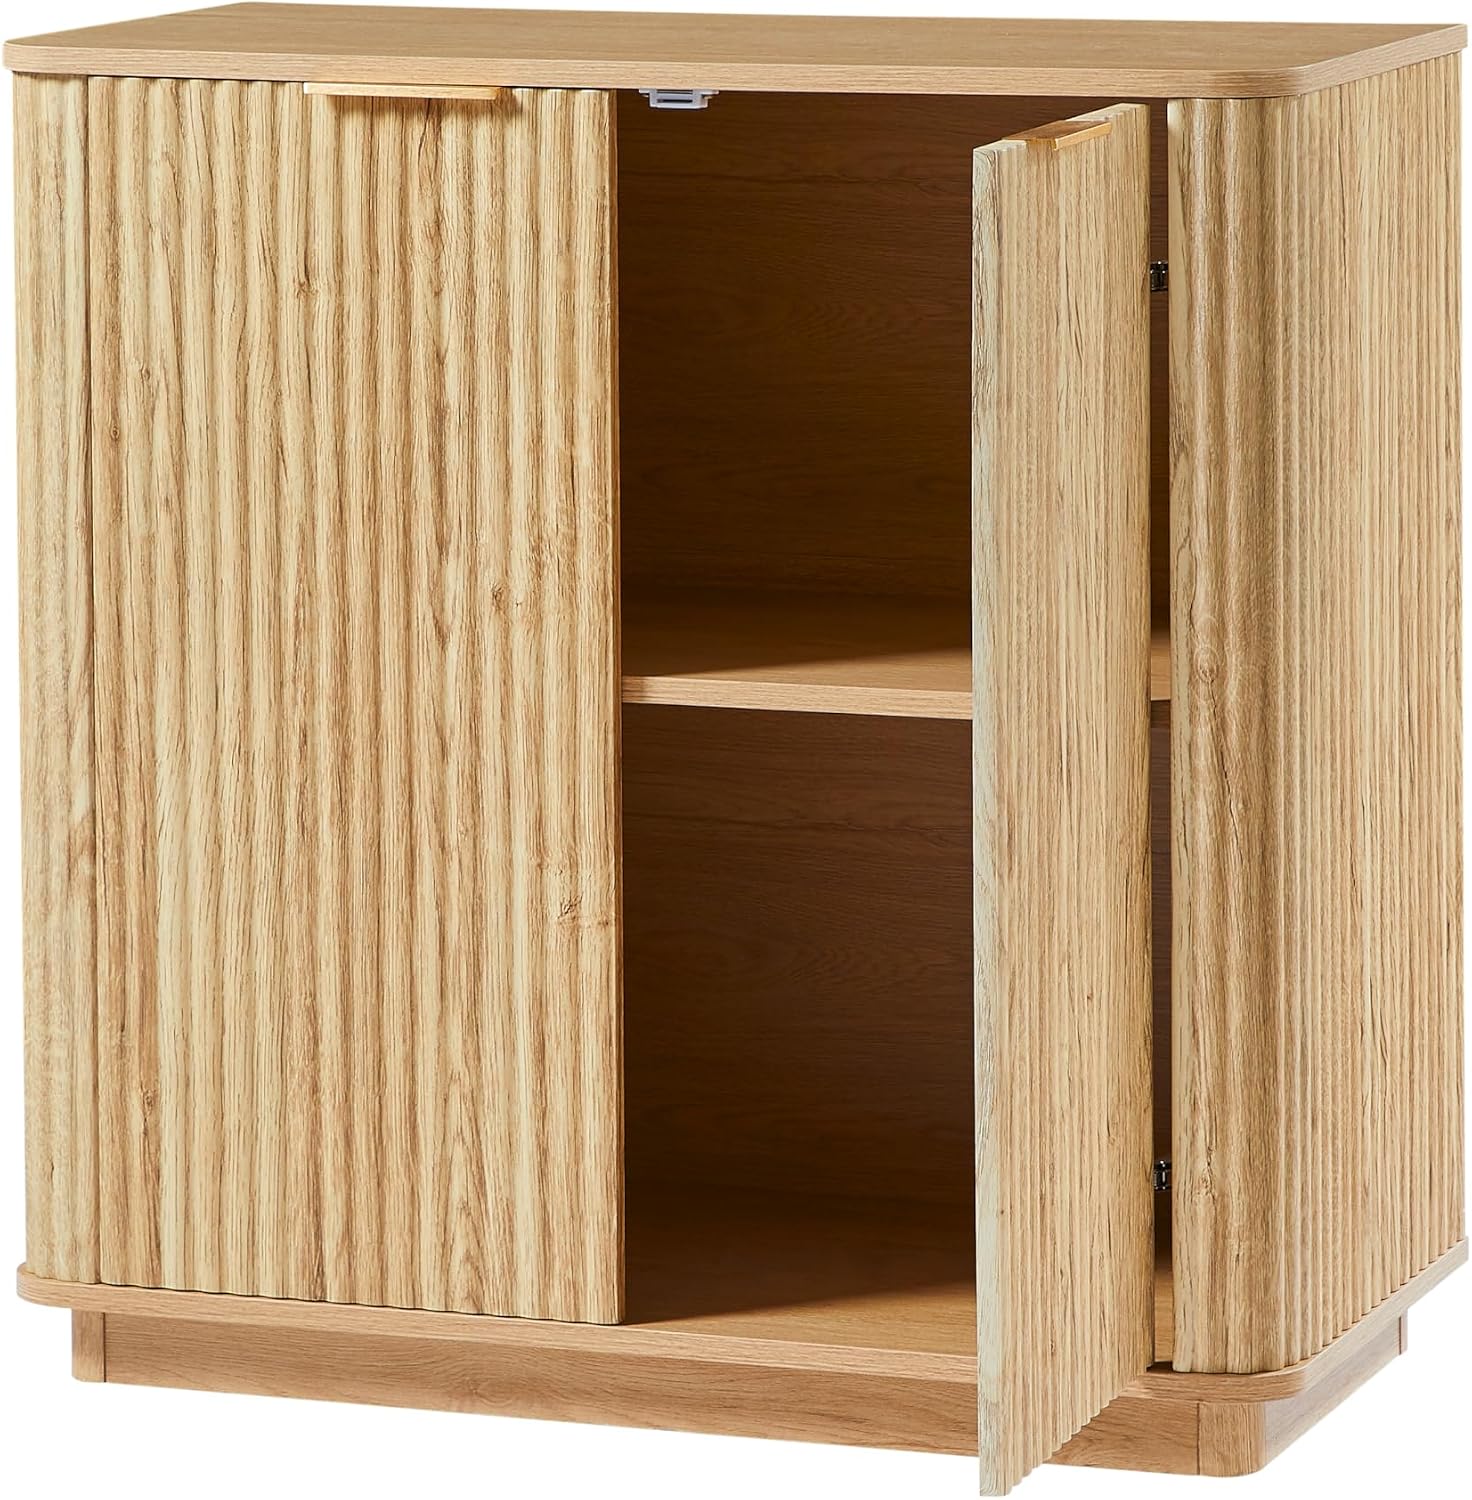
Figure 4: Example of items stored within the cabinet.
6. Maintenance
Proper care will extend the life and appearance of your cabinet:
- Cleaning: Wipe surfaces with a soft, damp cloth. Avoid using abrasive cleaners, harsh chemicals, or polishes that may damage the finish. Dry immediately with a clean cloth.
- Spills: Clean up spills immediately to prevent staining or water damage to the engineered wood.
- Hardware: Periodically check all screws, cam locks, and hinges to ensure they remain tight. Tighten any loose hardware to maintain stability.
- Environment: Maintain a stable room temperature and humidity. Extreme fluctuations can cause wood products to warp or crack.
7. Troubleshooting
If you encounter any issues with your cabinet, refer to the following common problems and solutions:
- Cabinet is Wobbly:
- Ensure the cabinet is on a level surface.
- Check and tighten all cam locks and screws.
- Doors Do Not Align Properly:
- Adjust the hinges. Most hinges have screws that allow for vertical, horizontal, and depth adjustments. Refer to the hinge manufacturer's instructions if available, or gently adjust screws until alignment is achieved.
- Ensure the cabinet frame is square and all connections are tight.
- Shelf is Not Level:
- Verify that all four shelf pins are inserted into holes at the same height.
- Ensure the shelf is fully seated on all pins.
8. Specifications
| Model Number | CBW1802001 |
| Brand | Generic |
| Material | Engineered Wood |
| Color | Oak |
| Product Dimensions (D x W x H) | 15.75" x 31.5" x 31.5" (40 cm x 80 cm x 80 cm) |
| Item Weight | 64.4 lbs (29.2 kg) |
| Number of Doors | 2 |
| Number of Shelves | 1 (Adjustable) |
| Assembly Required | Yes |

Figure 5: Product dimensions diagram.
9. Warranty and Support
For warranty information or technical support, please refer to the documentation provided at the point of purchase or contact the retailer. Keep your purchase receipt as proof of purchase.
If you have any questions or require assistance, please reach out to the manufacturer or seller directly.