
1. Introduction
Thank you for choosing the HKC G27M7Pro 27-inch Mini LED Gaming Monitor. This manual provides essential information for setting up, operating, and maintaining your monitor. Please read it carefully before use to ensure optimal performance and safety.
The HKC G27M7Pro offers flexible performance with its 27-inch Mini LED display. It supports 4K UHD resolution at 160Hz for detailed visuals and can switch to FHD resolution at 320Hz for ultra-smooth gameplay. Featuring an IPS panel, HDR1400, and 98% DCI-P3 color gamut, this monitor delivers clear images and balanced colors suitable for gaming, work, and content creation.

Figure 1.1: HKC G27M7Pro 27-inch Mini LED Gaming Monitor.
2. Setup Instructions
2.1 Package Contents
Verify that all components are present in the package:
- HKC G27M7Pro Monitor
- Monitor Stand (Base and Neck)
- Power Adapter and Cable
- HDMI Cable
- DisplayPort Cable
- USB-C Cable
- User Manual (this document)
2.2 Assembling the Stand
- Carefully place the monitor face down on a soft, clean surface to prevent scratches.
- Attach the stand neck to the back of the monitor, aligning the mounting holes. Secure with screws if provided.
- Attach the stand base to the neck, ensuring it clicks into place or is secured with the designated screw.
- Ensure the stand is firmly attached before placing the monitor upright.
2.3 VESA Mounting
The monitor supports VESA 100x100mm mounting. Remove the stand if attached, then secure the monitor to a compatible VESA mount using appropriate screws.

Figure 2.1: Monitor dimensions and stand adjustability. This image illustrates the monitor's physical dimensions and the range of motion for the stand, including pivot, tilt, height adjustment, rotation, and VESA 100x100mm compatibility.
2.4 Connecting to a Computer or Device
Connect the monitor to your computer or device using one of the available ports:
- HDMI 2.1: Use an HDMI cable to connect to an HDMI port on your computer or console. The monitor has two HDMI 2.1 ports.
- DisplayPort 1.4: Use a DisplayPort cable to connect to a DisplayPort on your computer.
- USB-C (90W): Use a USB-C cable to connect to a compatible laptop or device. This port supports video signal, data transfer, and up to 90W power delivery for charging.
- USB 3.0: Connect the upstream USB cable from your computer to the monitor's USB 3.0 upstream port to enable the monitor's USB 3.0 downstream ports for peripherals.
- Audio Out: Connect headphones or external speakers to the 3.5mm audio output jack.
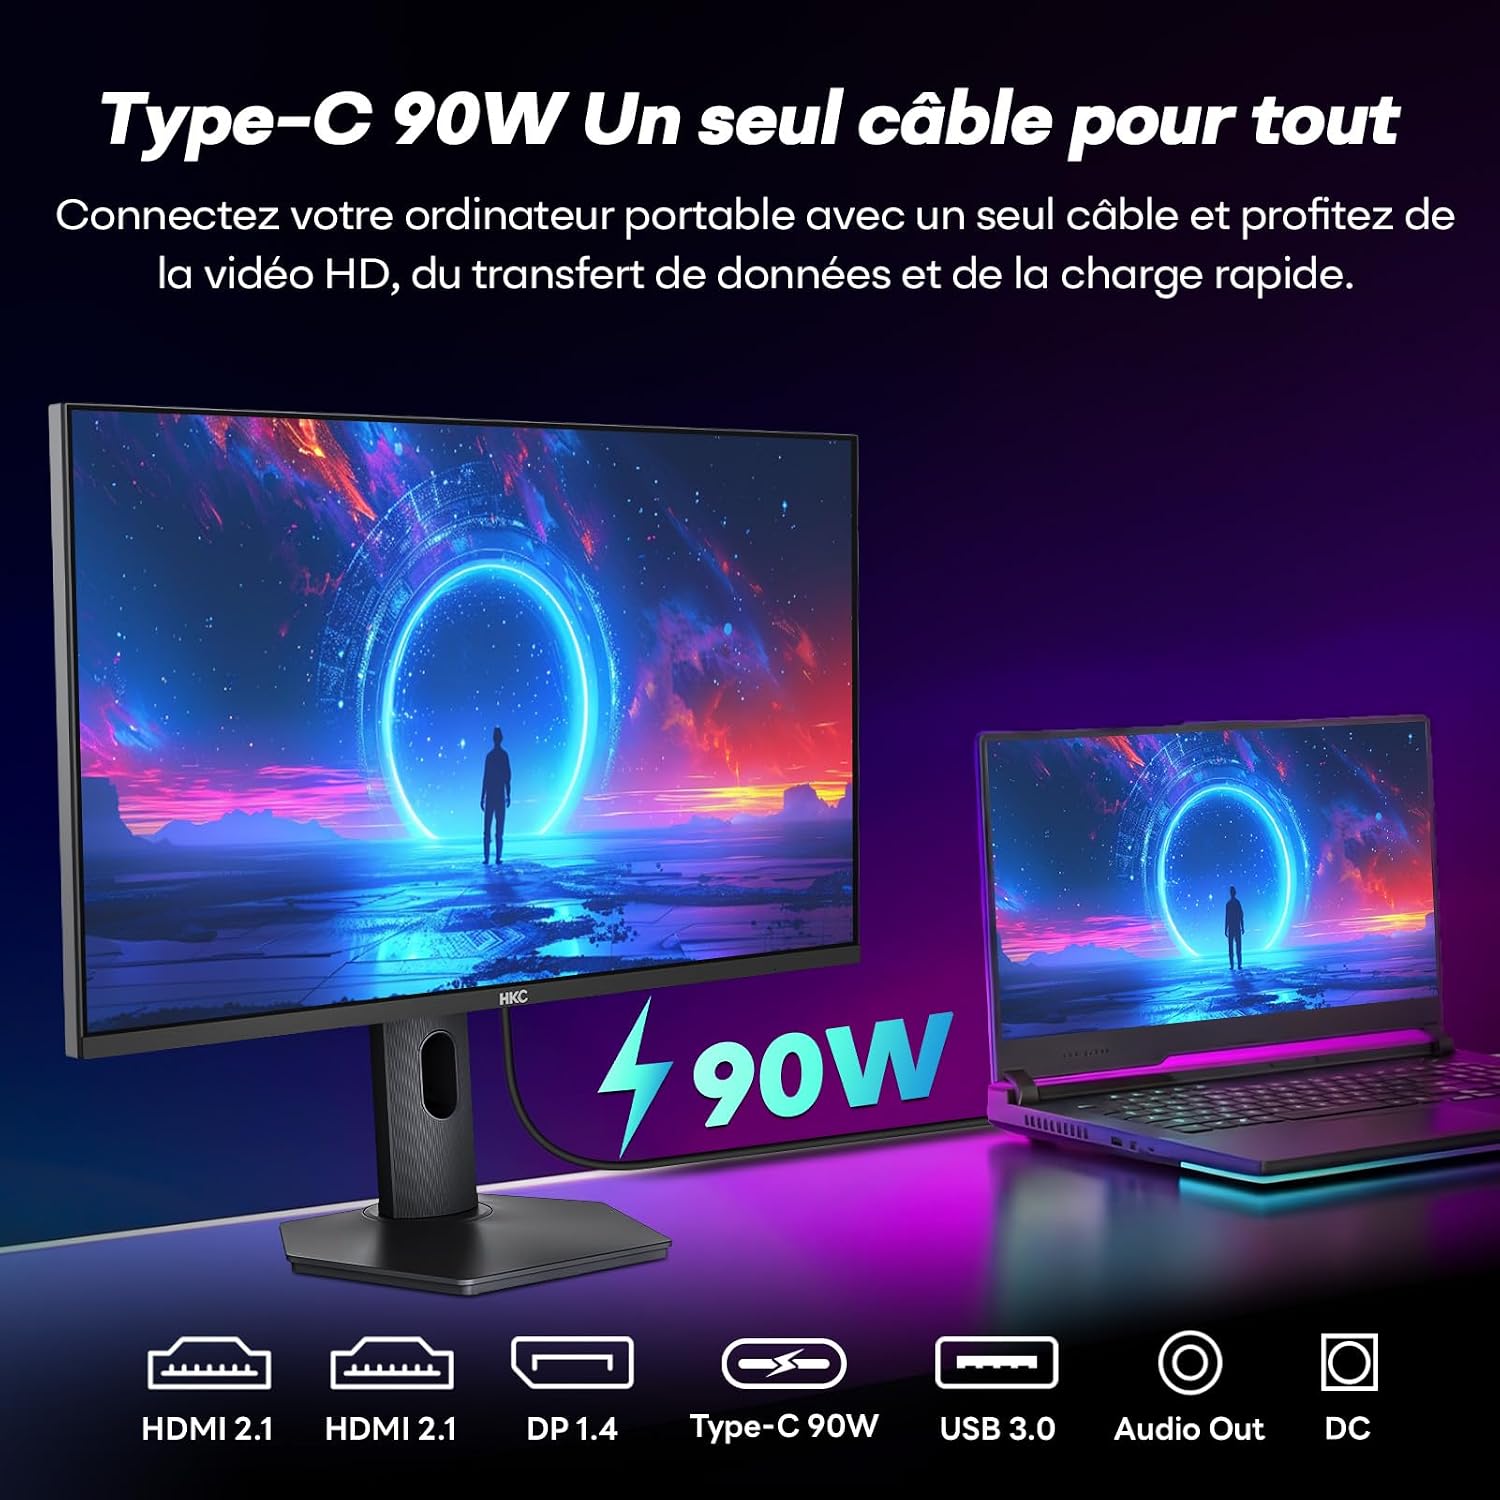
Figure 2.2: Monitor connectivity options. This image displays the various input and output ports available on the monitor, including two HDMI 2.1, one DisplayPort 1.4, one USB-C with 90W power delivery, one USB 3.0, and an Audio Out port.
2.5 Power Connection
Connect the power adapter to the monitor's power input, then plug the power cable into a wall outlet. The power LED indicator will illuminate.
3. Operating Instructions
3.1 Power On/Off
Press the power button, usually located on the back or bottom of the monitor, to turn it on or off. The power indicator light will show the monitor's status.
3.2 On-Screen Display (OSD) Menu
The OSD menu allows you to adjust various monitor settings. Access it using the joystick or buttons typically located on the back or bottom of the monitor. Navigate through the menu using the joystick/buttons and confirm selections.
3.3 Input Source Selection
Use the OSD menu or a dedicated input selection button to switch between connected devices (HDMI 1, HDMI 2, DisplayPort, USB-C).
3.4 Display Modes and Features
Dual Mode: 4K@160Hz / FHD@320Hz
The monitor supports a dual-mode operation, allowing you to switch between 4K UHD resolution at 160Hz for high-fidelity visuals and FHD resolution at 320Hz for maximum frame rates and fluidity in competitive gaming. This setting can typically be adjusted in your computer's display settings or the monitor's OSD.

Figure 3.1: Dual mode 4K@160Hz and FHD@320Hz. This image illustrates the monitor's ability to switch between a high-resolution 4K at 160Hz mode and a high-refresh-rate FHD at 320Hz mode, catering to different gaming preferences.
Mini LED Backlight and HDR1400
The Mini LED backlight with 1152 local dimming zones enhances contrast and brightness, providing deeper blacks and brighter whites. The monitor is VESA Certified DisplayHDR 1400, offering a peak brightness of 1400 nits for a dynamic and realistic visual experience.

Figure 3.2: HDR 1400 capability. This image demonstrates the visual impact of HDR 1400, highlighting improved contrast and brightness compared to standard display settings.

Figure 3.3: QD Mini LED panel structure. This image illustrates the internal structure of the QD Mini LED panel, emphasizing the precise control over screen luminosity with 1152 zones for a more three-dimensional and vibrant image.
Color Accuracy (98% DCI-P3)
With 98% DCI-P3 color gamut coverage, the monitor delivers rich, accurate, and vibrant colors, making it suitable for professional content creation and immersive gaming.

Figure 3.4: Realistic color reproduction. This image highlights the monitor's color capabilities, including 100% sRGB, 98% DCI-P3, 1.07 billion colors (8-bit+FRC), and a high contrast ratio of 300,000:1.
1ms Response Time and Adaptive Sync
The 1ms (DIC) response time minimizes motion blur, while Adaptive Sync technology (compatible with FreeSync and G-SYNC) eliminates screen tearing and stuttering, providing a smoother and more responsive gaming experience.

Figure 3.5: Adaptive Sync and 1ms DIC in action. This image compares a scene with DIC (Dynamic Image Control) off versus on, demonstrating how the technology reduces motion blur and image tearing for a smoother visual experience.
Eye Protection Mode
The monitor features an Eye Protection Mode designed to reduce eye strain during prolonged use. This includes:
- Low Blue Light: Reduces harmful blue light emissions.
- Flicker-Free: Eliminates screen flickering.
- Anti-Glare: Reduces reflections for comfortable viewing.

Figure 3.6: Eye Protection Mode. This image highlights the monitor's eye-care features: Low Blue Light, Flicker-Free technology, and an Anti-Glare screen, designed to reduce eye fatigue.
RGB Ambient Lighting
The monitor features an RGB lighting ring on the back, allowing you to customize the ambiance of your gaming or work setup. Adjust lighting effects through the OSD menu.

Figure 3.7: RGB ambient lighting. This image shows the customizable RGB lighting ring located on the back of the monitor, allowing users to personalize their setup.
4. Maintenance
4.1 Cleaning the Monitor
To clean the monitor screen and casing:
- Always unplug the monitor from the power outlet before cleaning.
- Use a soft, lint-free cloth lightly dampened with water or a non-abrasive screen cleaner.
- Do not spray cleaner directly onto the screen.
- Avoid using harsh chemicals, solvents, or abrasive materials, as they can damage the screen or casing.
4.2 Storage
If storing the monitor for an extended period, ensure it is clean, dry, and stored in a cool, well-ventilated area, preferably in its original packaging.
5. Troubleshooting
If you encounter issues with your monitor, refer to the following common problems and solutions:
5.1 No Image on Screen
- Ensure the power cable is securely connected to the monitor and a working power outlet.
- Verify that the video cable (HDMI, DisplayPort, USB-C) is properly connected to both the monitor and your computer/device.
- Check if the correct input source is selected in the monitor's OSD menu.
- Confirm that your computer/device is powered on and not in sleep mode.
5.2 Image is Blurry or Distorted
- Ensure the display resolution and refresh rate are correctly set in your computer's display settings.
- Check the video cable for damage or loose connections.
- Perform an OSD reset to factory settings.
5.3 HDR Performance Issues
If HDR content appears incorrect (e.g., dark tones are grayish, colors are off):
- Ensure HDR is enabled in both your operating system's display settings and the application/game you are using.
- Verify that your graphics card drivers are up to date.
- Adjust HDR settings within the monitor's OSD menu if available.
- Note that HDR performance can vary based on content and system configuration.
5.4 No Audio
- Ensure external speakers or headphones are properly connected to the Audio Out port.
- Check the volume settings on both the monitor (via OSD) and your computer/device.
- Verify that the correct audio output device is selected in your computer's sound settings.
6. Specifications
| Feature | Specification |
|---|---|
| Brand | HKC |
| Model Number | G27M7Pro |
| Screen Size | 27 Inches |
| Resolution | 4K UHD (3840 x 2160) |
| Panel Type | IPS |
| Backlight Technology | Mini LED |
| Refresh Rate | 160 Hz (4K UHD), 320 Hz (FHD) |
| Response Time | 1ms (DIC) |
| HDR Standard | VESA Certified DisplayHDR 1400 |
| Peak Brightness | 1400 nits (HDR), 550 nits (Typical) |
| Contrast Ratio | 300,000:1 |
| Color Gamut | 98% DCI-P3 |
| Viewing Angle | 178 Degrees (H/V) |
| Aspect Ratio | 16:9 |
| Surface Description | Brilliant (Glossy) |
| HDMI Ports | 2 (HDMI 2.1) |
| DisplayPort | 1 (DisplayPort 1.4) |
| USB-C Port | 1 (with 90W Power Delivery) |
| USB 3.0 Ports | 1 (Upstream), 3 (Downstream) |
| Audio Out | 1 (3.5mm Jack) |
| VESA Compatibility | 100x100mm |
| Adjustability | Height, Tilt, Swivel, Pivot |
| Dimensions (P x L x H) | 20P x 61L x 52H centimeters |
7. Warranty and Support
7.1 Warranty Information
This HKC monitor comes with a one-year warranty from the date of purchase. Please retain your proof of purchase for warranty claims. The warranty covers manufacturing defects under normal use conditions.

Figure 7.1: Warranty and support details. This image highlights a 365-day warranty, 24-hour customer service response, and a zero dead pixel policy.
7.2 Customer Support
For technical assistance, warranty inquiries, or further support, please contact HKC customer service through the official HKC website or your retailer's support channels. Have your monitor model number (G27M7Pro) and serial number ready when contacting support.
