
1. Safety Information
Please read and understand all instructions before assembling and using this product. Failure to follow these instructions may result in injury or damage to the product.
- Two-Person Assembly: Assembly of this bed frame requires two adults. Do not attempt to assemble alone.
- Keep Children and Pets Away: During assembly, keep children and pets away from the work area and small parts.
- Weight Capacity: Do not exceed the maximum weight recommendation of 800 pounds for this bed frame.
- Lift Mechanism Safety: Exercise caution when operating the lift-up storage mechanism. Ensure hands and fingers are clear of moving parts. Do not allow children to operate the lift mechanism unsupervised.
- Electrical Safety: Ensure the power cord for the charging station and LED lighting is properly connected to a functional power outlet. Do not overload the charging station. Disconnect power before cleaning or maintenance.
- Secure Connections: Regularly check all bolts and screws to ensure they remain tight. Loose connections can lead to instability and noise.
- Mattress Compatibility: This bed frame is designed for a Queen size mattress. No box spring is required.
2. Package Contents
Verify that all components listed below are present before beginning assembly. If any parts are missing or damaged, contact customer support.
- Headboard with integrated LED lighting and charging station
- Footboard
- Side Rails (Left and Right)
- Lift Bars / Gas Struts
- Bed Slats and Slat Holders
- Center Support Beam(s)
- Hardware Pack (bolts, screws, washers, Allen wrench)
- Power Adapter for LED and Charging Station
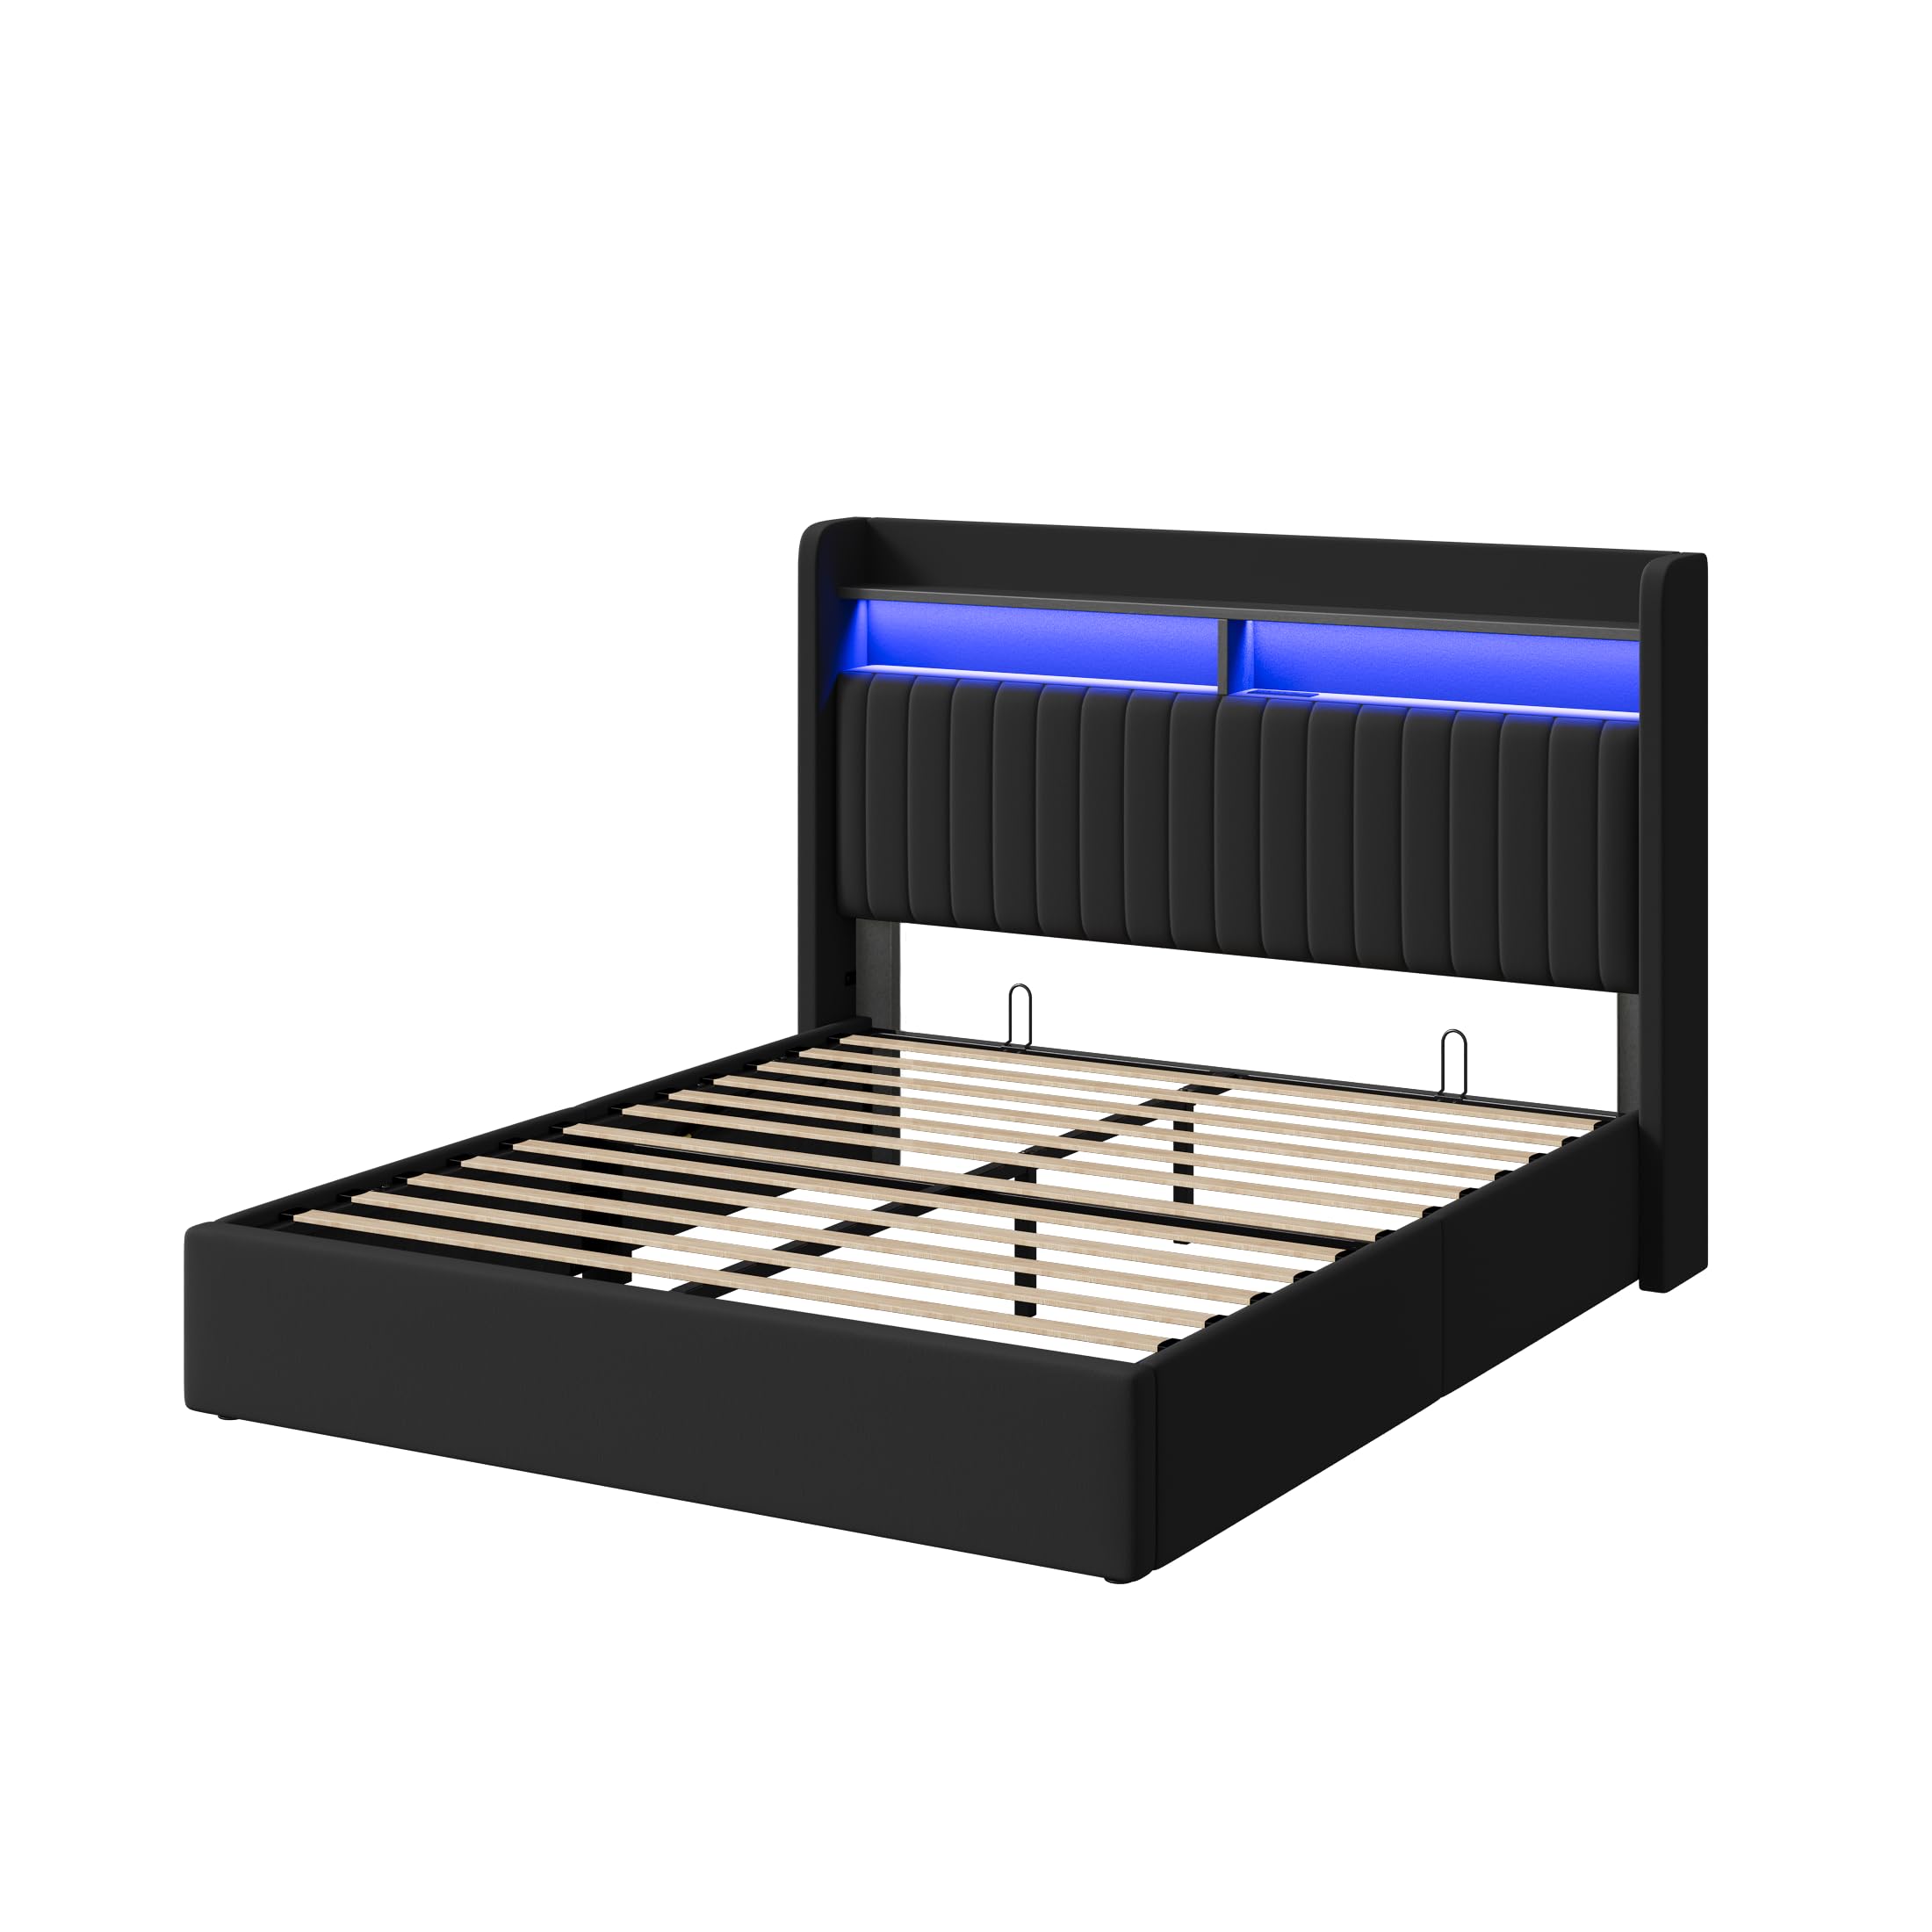
Image: HOOMIC Lift Up Storage Queen Size Bed Frame in Black Velvet. This image illustrates the complete bed frame, including the headboard with LED and charging station, the lift-up base, and the velvet upholstery.
3. Assembly Instructions
Follow these steps carefully for proper assembly. It is recommended to assemble the bed frame in the room where it will be used.
3.1 Pre-Assembly
- Clear a spacious area for assembly.
- Unpack all components and lay them out on a soft, clean surface to prevent scratches.
- Identify all parts using the provided parts list.
- Tools required: Included Allen wrench. A Phillips head screwdriver (not included) may also be needed.
3.2 Assembly Steps
- Assemble the Headboard: Attach the headboard legs to the main headboard panel. Ensure the LED strip and charging station wiring are not pinched.
- Connect Side Rails to Headboard: Attach the left and right side rails to the assembled headboard using the specified bolts and washers. Do not fully tighten bolts yet.
- Attach Footboard: Connect the footboard to the other ends of the side rails. Once all four corners are connected, tighten all bolts securely.
- Install Center Support: Place the center support beam(s) and attach them to the designated points on the side rails or headboard/footboard.
- Attach Lift Mechanism: Secure the lift bars (gas struts) to the side rails and the bed base frame according to the diagrams in your specific manual. This step often requires significant force and two people.
- Install Bed Slats: Place the bed slats into their designated holders on the frame. Ensure they are evenly spaced and securely fastened.
- Connect Power: Plug the power adapter into the designated port on the headboard, then plug the adapter into a wall outlet.
4. Operating Instructions
4.1 Lift-Up Storage Mechanism
The bed frame features a hydraulic lift mechanism for accessing under-bed storage.
- To Lift: Remove any items from the top of the mattress. Stand at the foot of the bed, grasp the designated handle or edge of the bed base, and lift upwards. The hydraulic gas struts will assist in raising the bed base. Lift until the mechanism locks into the fully open position.
- To Lower: Ensure the storage area is clear of obstructions. Grasp the handle or edge of the bed base, apply slight downward pressure to disengage the lock, and gently guide the bed base back down until it rests securely on the frame. Do not drop the bed base.
- Important: A mattress must be placed on the bed base for the lift mechanism to function correctly and safely. The weight of the mattress is necessary to counteract the force of the gas struts when lowering.
4.2 Charging Station
The headboard includes integrated USB ports and power outlets.
- To Use: Ensure the bed frame's power adapter is plugged into a live wall outlet. Connect your devices (e.g., phone, tablet, lamp) to the USB ports or power outlets as needed.
- Capacity: Do not exceed the maximum electrical load specified for the charging station. Refer to the label near the outlets for details.
4.3 LED Lighting
The headboard features integrated LED lighting.
- To Operate: Locate the control button or switch on the headboard. Press to turn the LED lights on or off. Some models may offer adjustable brightness or color settings; refer to specific controls if available.
5. Maintenance
Regular maintenance helps ensure the longevity and proper function of your bed frame.
- Cleaning Velvet Upholstery: Gently vacuum the velvet fabric regularly to remove dust and debris. For spills, blot immediately with a clean, dry cloth. For stubborn stains, use a mild fabric cleaner specifically designed for velvet, testing on an inconspicuous area first. Do not rub vigorously.
- Frame Cleaning: Wipe the metal frame components with a damp cloth and mild detergent if necessary. Dry thoroughly.
- Hardware Check: Periodically (every 3-6 months) inspect all bolts, screws, and connections. Tighten any loose hardware to prevent squeaking and ensure stability.
- Lift Mechanism Inspection: Check the hydraulic gas struts for any signs of leakage or damage. Ensure the pivot points are clean and free of obstructions. Do not lubricate the gas struts unless specifically instructed by the manufacturer.
- Electrical Components: Ensure all electrical connections for the charging station and LED lighting are secure and free from damage. Do not attempt to repair damaged wiring; contact a qualified technician.
6. Troubleshooting
Refer to the following common issues and solutions before contacting customer support.
- Bed Frame Squeaks:
Solution: Check and tighten all bolts and screws. Ensure slats are properly seated and not rubbing against the frame. - Lift Mechanism is Difficult to Operate (Too Stiff or Too Loose):
Solution: Ensure a mattress is placed on the bed base. The mechanism is designed to work with the weight of a mattress. If it's still problematic, check for obstructions or contact support for potential gas strut replacement. - Charging Station / LED Lights Not Working:
Solution: Verify the power adapter is securely plugged into the headboard and a functional wall outlet. Check if the wall outlet is receiving power (test with another device). Ensure all internal connections within the headboard are secure (if accessible). - Parts Missing or Damaged:
Solution: Do not proceed with assembly. Contact HOOMIC customer support immediately for replacement parts.
7. Specifications
| Feature | Detail |
|---|---|
| Model Number | KRQSCZW002 |
| Size | Queen |
| Material | Velvet |
| Product Dimensions (L x W x H) | 84.06" x 63.98" x 46.85" |
| Special Features | Charging Station, LED Lighting, Lift Up Storage, Squeak Resistant, Storage Headboard, USB Port |
| Included Components | Bed Frame, Headboard, Lift Bars, Slats |
| Maximum Weight Recommendation | 800 pounds |
| Item Weight | 116.8 pounds |
| Color | Black |
8. Warranty and Support
HOOMIC products are manufactured with quality and care. For specific warranty details, please refer to the warranty information provided with your purchase or visit the official HOOMIC website.
If you encounter any issues, require replacement parts, or have questions not covered in this manual, please contact HOOMIC customer support:
- Online Support: Visit the HOOMIC official website for FAQs and contact forms.
- Email Support: Refer to your purchase documentation for the customer service email address.