
Introduction
Thank you for choosing the SideKing 2.6 Gallon Battery Powered Backpack Sprayer. This manual provides essential information for the safe and effective assembly, operation, and maintenance of your sprayer. Please read these instructions thoroughly before first use and retain for future reference.
Important Safety Information
WARNING: Always wear appropriate personal protective equipment (PPE) such as gloves, eye protection, and a mask when handling chemicals and operating the sprayer. Read and follow all chemical manufacturer's instructions and safety warnings.
- Do not spray flammable liquids.
- Do not spray near open flames or ignition sources.
- Keep out of reach of children and pets.
- Ensure the battery is fully charged before use.
- Do not immerse the battery or electrical components in water.
- Always rinse the sprayer thoroughly after each use, especially when changing chemicals.
Package Contents
Verify that all components are present before assembly:
- 2.6 Gallon Tank
- Battery Handle
- Telescopic Wand
- Hose with Anti-Kinking Coil Spring
- 5 Interchangeable Nozzles (Fan, Cone, Windproof, F-Type Dual, 6-Hole Pattern)
- USB Charging Cable
- Adjustable Backpack Straps
- Measuring Cup
- Instruction Manual
Setup and Assembly
Follow these steps to assemble your SideKing backpack sprayer:
- Install the Nozzle: Select the desired nozzle and screw it onto the end of the telescopic wand until secure.
- Connect the Wand to Handle: Insert the telescopic wand into the battery handle and tighten the connection.
- Attach the Hose to Handle: Unscrew the nut on the battery handle. Insert the hosepipe into the tail end of the handle, then tighten the nut to seal the hosepipe.
- Connect the Hose to Tank: Insert the other end of the hosepipe into the spout of the tank and tighten the connection securely.
- Attach Backpack Straps: Connect the adjustable backpack straps to the designated hooks on the sprayer tank. Adjust the straps for a comfortable fit, ensuring even weight distribution.
- Charge the Battery: Before first use, fully charge the integrated lithium battery using the provided USB charging cable. The battery indicator on the handle will show charging status. A full charge typically takes 3 hours and provides 2-3 hours of continuous spraying.

Image: Step-by-step assembly guide for the sprayer components.
Video: Quick assembly guide for the 2.6 Gallon Electric Garden Sprayer, demonstrating how to connect the components.
Operating Instructions
- Prepare Solution: Use the measuring cup to accurately mix your desired liquid (water, fertilizer, weed killer) according to the manufacturer's instructions. Pour the solution into the 2.6-gallon tank. The clear tank scale allows for precise monitoring.
- Power On: Press the ON/OFF button on the battery handle to activate the sprayer. The battery indicator will illuminate, showing the remaining power.
- Adjust Spray Pressure: The sprayer offers 3 adjustable pressure levels. Press the 'Speed' button on the handle to cycle through low, medium, and high pressure settings.
- Low Pressure: Ideal for gentle misting on delicate plants.
- Medium Pressure: Suitable for regular lawn care and general watering.
- High Pressure: Recommended for stronger weed control or long-distance spraying.
- Select Nozzle: Choose from the 5 interchangeable nozzles based on your application needs. Twist the nozzle to adjust the spray pattern if applicable.
- Begin Spraying: Aim the telescopic wand at the target area and press the trigger on the handle to begin spraying. The 40-inch telescopic wand allows for reaching tall plants and hard-to-access areas.
- Power Off: Release the trigger to stop spraying. Press the ON/OFF button to turn off the sprayer when finished.

Image: Demonstrates the three adjustable spray pressure levels for various applications.

Image: Illustrates the five interchangeable nozzles and their spray patterns.
Video: Overview of the SideKing Battery Powered Backpack Sprayer, demonstrating its features and operation.
Maintenance
Proper maintenance ensures the longevity and optimal performance of your sprayer.
Cleaning
- Empty Tank: After each use, empty any remaining solution from the tank. Dispose of chemicals according to local regulations.
- Rinse Tank: Fill the tank with clean water and spray until the tank is empty to flush out the hose and wand. Repeat this process several times.
- Clean Nozzles: Remove the nozzles and rinse them thoroughly with clean water. Use a small brush or pin to clear any blockages.
- Clean Filter: The integrated filter helps prevent clogging. Periodically remove and clean the filter under running water.
Battery Care
- Recharge the battery after each use or when the battery indicator shows low power.
- Do not overcharge the battery. Disconnect the charger once fully charged.
- If storing for an extended period, charge the battery to approximately 50% and store in a cool, dry place. Recharge every 3-6 months to maintain battery health.

Image: The integrated water-resistant handle with battery indicator and control buttons.
Troubleshooting
| Problem | Possible Cause | Solution |
|---|---|---|
| Sprayer does not turn on | Battery is depleted or not connected. | Charge the battery. Ensure the battery handle is securely connected. |
| Weak or no spray | Nozzle clogged, filter clogged, low liquid level, or air in the system. | Clean the nozzle and filter. Refill the tank. Prime the pump by spraying water until a steady stream is achieved. Check for kinks in the hose. |
| Leaking from connections | Connections are loose or seals are damaged. | Tighten all connections. Inspect O-rings and seals for damage and replace if necessary. |
| Short battery life | Battery not fully charged or aging battery. | Ensure battery is fully charged before use. If battery life significantly decreases, consider replacing the battery. |
Specifications
| Feature | Detail |
|---|---|
| Brand | SideKing |
| Model Name | YX2510L-2574 |
| Tank Volume | 2.64 gallons |
| Color | Sky Blue |
| Material | Plastic (HDPE) |
| Power Source | Battery Powered (7.4V Lithium Battery) |
| Working Time | 2-3 hours (continuous spraying) |
| Charging Time | Approx. 3 hours |
| Maximum Pressure | 60 psi |
| Hose Length | 40 inches |
| Item Dimensions (W x H) | 10.5"W x 15"H |
| Included Components | 5 Nozzles, Telescopic Wand, Hose, Battery Handle, USB Charging Cable, Adjustable Backpack Strap, Measure Cup, 2.6 Gallon Tank, Anti-Kinking Coil Spring, Instruction Manual |

Image: Product dimensions and key features such as the wide-mouth lid and gallon scale.
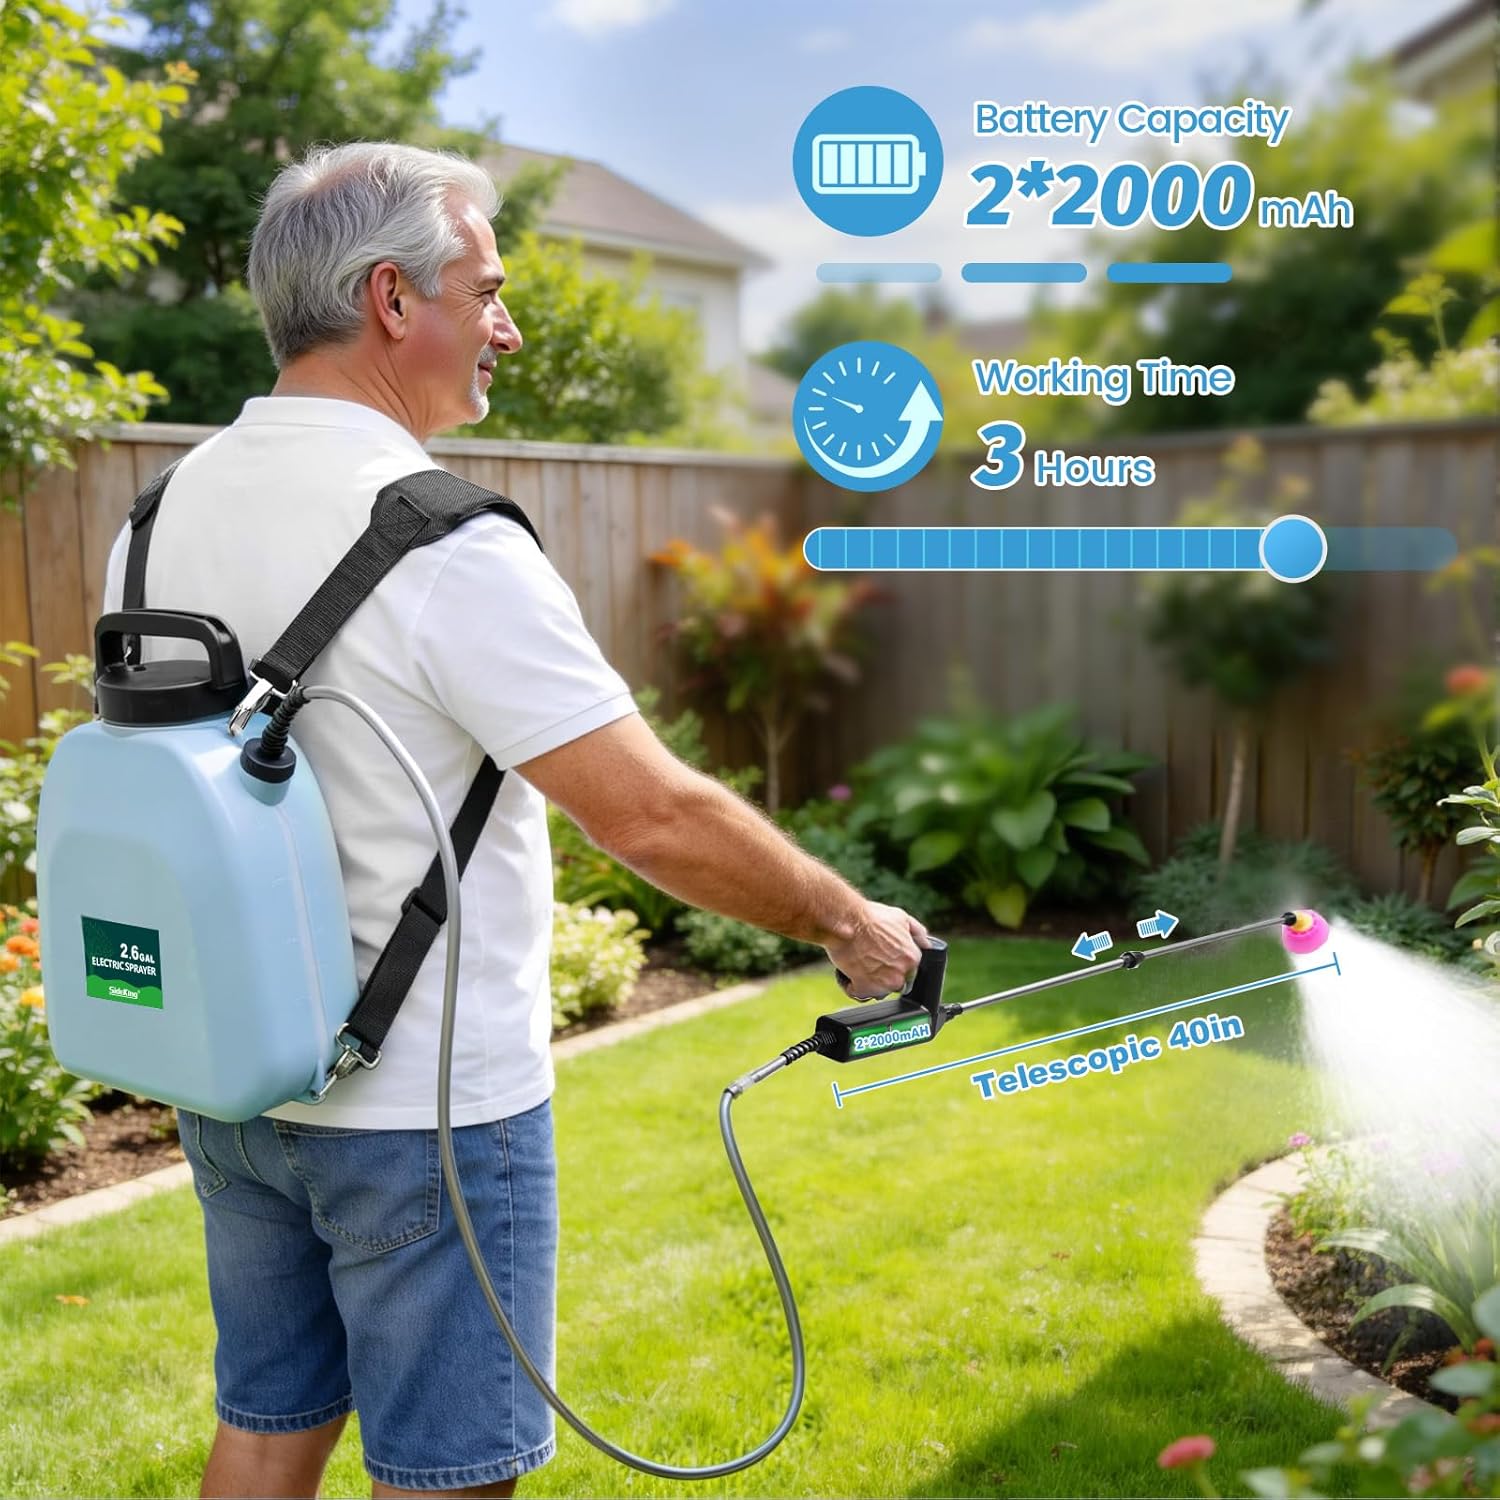
Image: Battery capacity and estimated working time on a full charge.
Warranty Information
The SideKing 2.6 Gallon Battery Powered Backpack Sprayer comes with a 1-year warranty from the date of purchase, covering manufacturing defects. This warranty does not cover damage resulting from misuse, neglect, accident, or unauthorized modifications.
Please retain your proof of purchase for warranty claims.
Customer Support
For technical assistance, warranty claims, or questions regarding your SideKing sprayer, please contact our customer support team. Refer to the contact information provided on the product packaging or the official SideKing website.