
1. Introduction
This manual provides detailed instructions for the installation, operation, and maintenance of your PHEZEN 10.1-inch Android 13 Double Din Car Stereo. Please read this manual thoroughly before using the product to ensure proper function and safety. Keep this manual for future reference.
2. Safety Information
- Ensure the vehicle is turned off and the battery is disconnected before beginning any installation or wiring procedures.
- Incorrect wiring can cause damage to the unit or the vehicle's electrical system. If you are unsure about the installation, seek professional assistance.
- Do not operate the device in a way that distracts you from driving. Always prioritize road safety.
- Avoid exposing the unit to extreme temperatures, direct sunlight for prolonged periods, or excessive moisture.
- Use only specified accessories and parts.
3. What's in the Box
Carefully unpack the contents and ensure all items are present:
- 1 x Android Stereo Radio
- 1 x Power Cable
- 1 x GPS Antenna
- 1 x Rear Camera Input Cable
- 1 x RCA Cable
- 2 x USB Cable
- 1 x AHD Camera
- 1 x Microphone
- 1 x Canbus Box
- 1 x Radio Adapter
- 1 x Instruction Manual (this document)
- Fixed bracket (2 pieces)
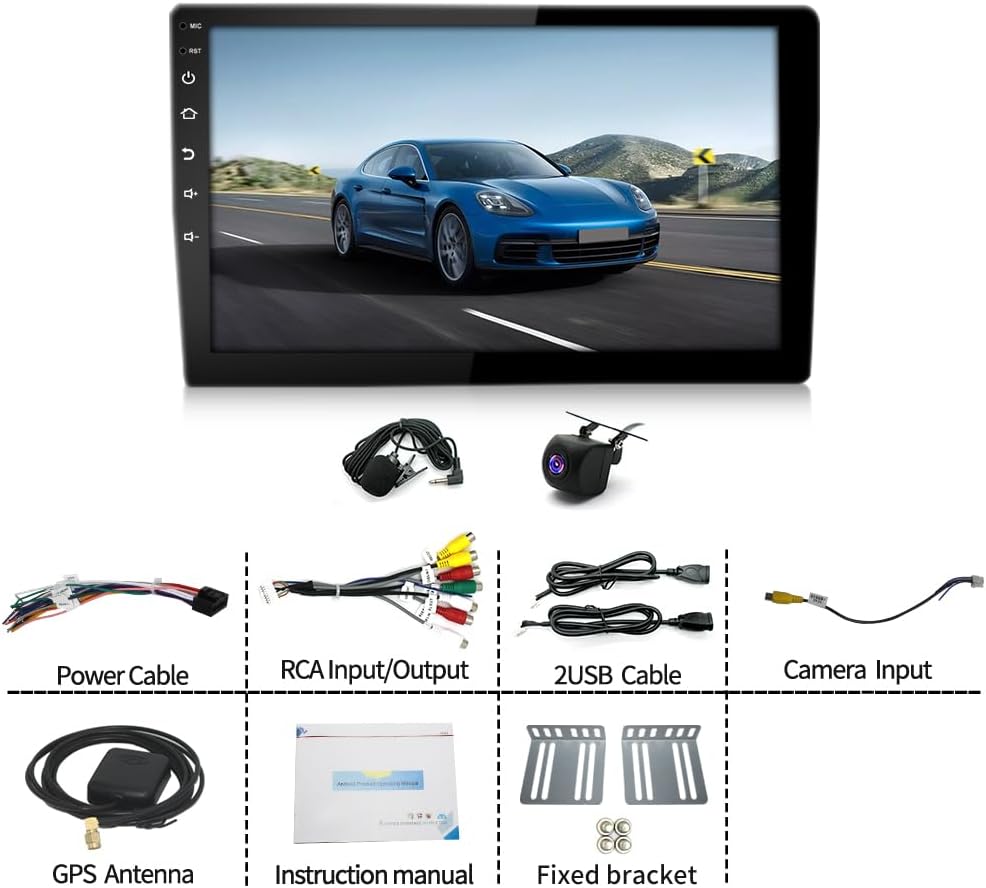
Image: All components included in the product package.
4. Setup and Installation
4.1 Compatibility Check
Before installation, verify that the shape and size of your vehicle's center console are compatible with this car radio. This unit is designed for Hino 165, 268, 308, 338 models from 2005 to 2020. An incompatible console may prevent proper fitment.

Image: Example of an incompatible dashboard layout. Ensure your vehicle's console matches the product's design.
4.2 Wiring Diagram
Refer to the following diagrams for correct wiring connections. Ensure all connections are secure to prevent malfunctions.

Image: Main wiring harness connections. Match wire colors and functions carefully.
4.3 General Installation Steps
- Disconnect Battery: Before starting, disconnect the negative terminal of your vehicle's battery.
- Remove Old Unit: Carefully remove your existing car stereo and any trim panels.
- Connect Wiring: Connect the new stereo's wiring harness to your vehicle's harness according to the wiring diagram. Pay close attention to power, ground, speaker, and accessory wires.
- Connect Peripherals: Attach the GPS antenna, USB cables, microphone, and rear camera input cable as needed.
- Test Connections: Briefly reconnect the battery to test basic functions (power on, sound, display) before fully securing the unit.
- Secure Unit: Mount the new stereo into the dashboard using the provided fixed brackets.
- Reassemble: Reinstall any removed trim panels.
- Final Check: Reconnect the battery and perform a full functional test.
4.4 Troubleshooting: No Sound Issue
If the radio FM has sound but Bluetooth and other music sources have no sound, follow these steps:
- Locate the A12 wire in the main power harness. This wire is usually blue, but colors may vary.
- Cut the A12 wire.
- Identify the red ACC wire in the main power harness.
- Peel off the insulation from the ACC wire.
- Wrap the lower part of the cut A12 wire around the exposed ACC wire.
- Ensure the upper part of the A12 wire is not connected to anything.

Image: Wiring modification for resolving the 'no sound' issue from Bluetooth or other music sources.
5. Operating Instructions
5.1 Basic Operation
- Power On/Off: Press and hold the power button on the unit or use the vehicle's ignition.
- Volume Control: Adjust the volume using the physical knob or on-screen controls.
- Touchscreen Interface: Navigate through menus and applications by touching the 10.1-inch IPS display.
5.2 Wireless CarPlay & Android Auto
Connect your iOS or Android smartphone wirelessly via Bluetooth and Wi-Fi to access CarPlay or Android Auto. This allows you to use your phone's navigation, music, calls, and messages directly on the stereo's screen.

Image: Wireless CarPlay and Android Auto functionality.
5.3 GPS Navigation & Wi-Fi Function
The unit supports online and offline maps. Connect to Wi-Fi via a hotspot from your phone or a dedicated Wi-Fi device to access online navigation and other internet-dependent applications.
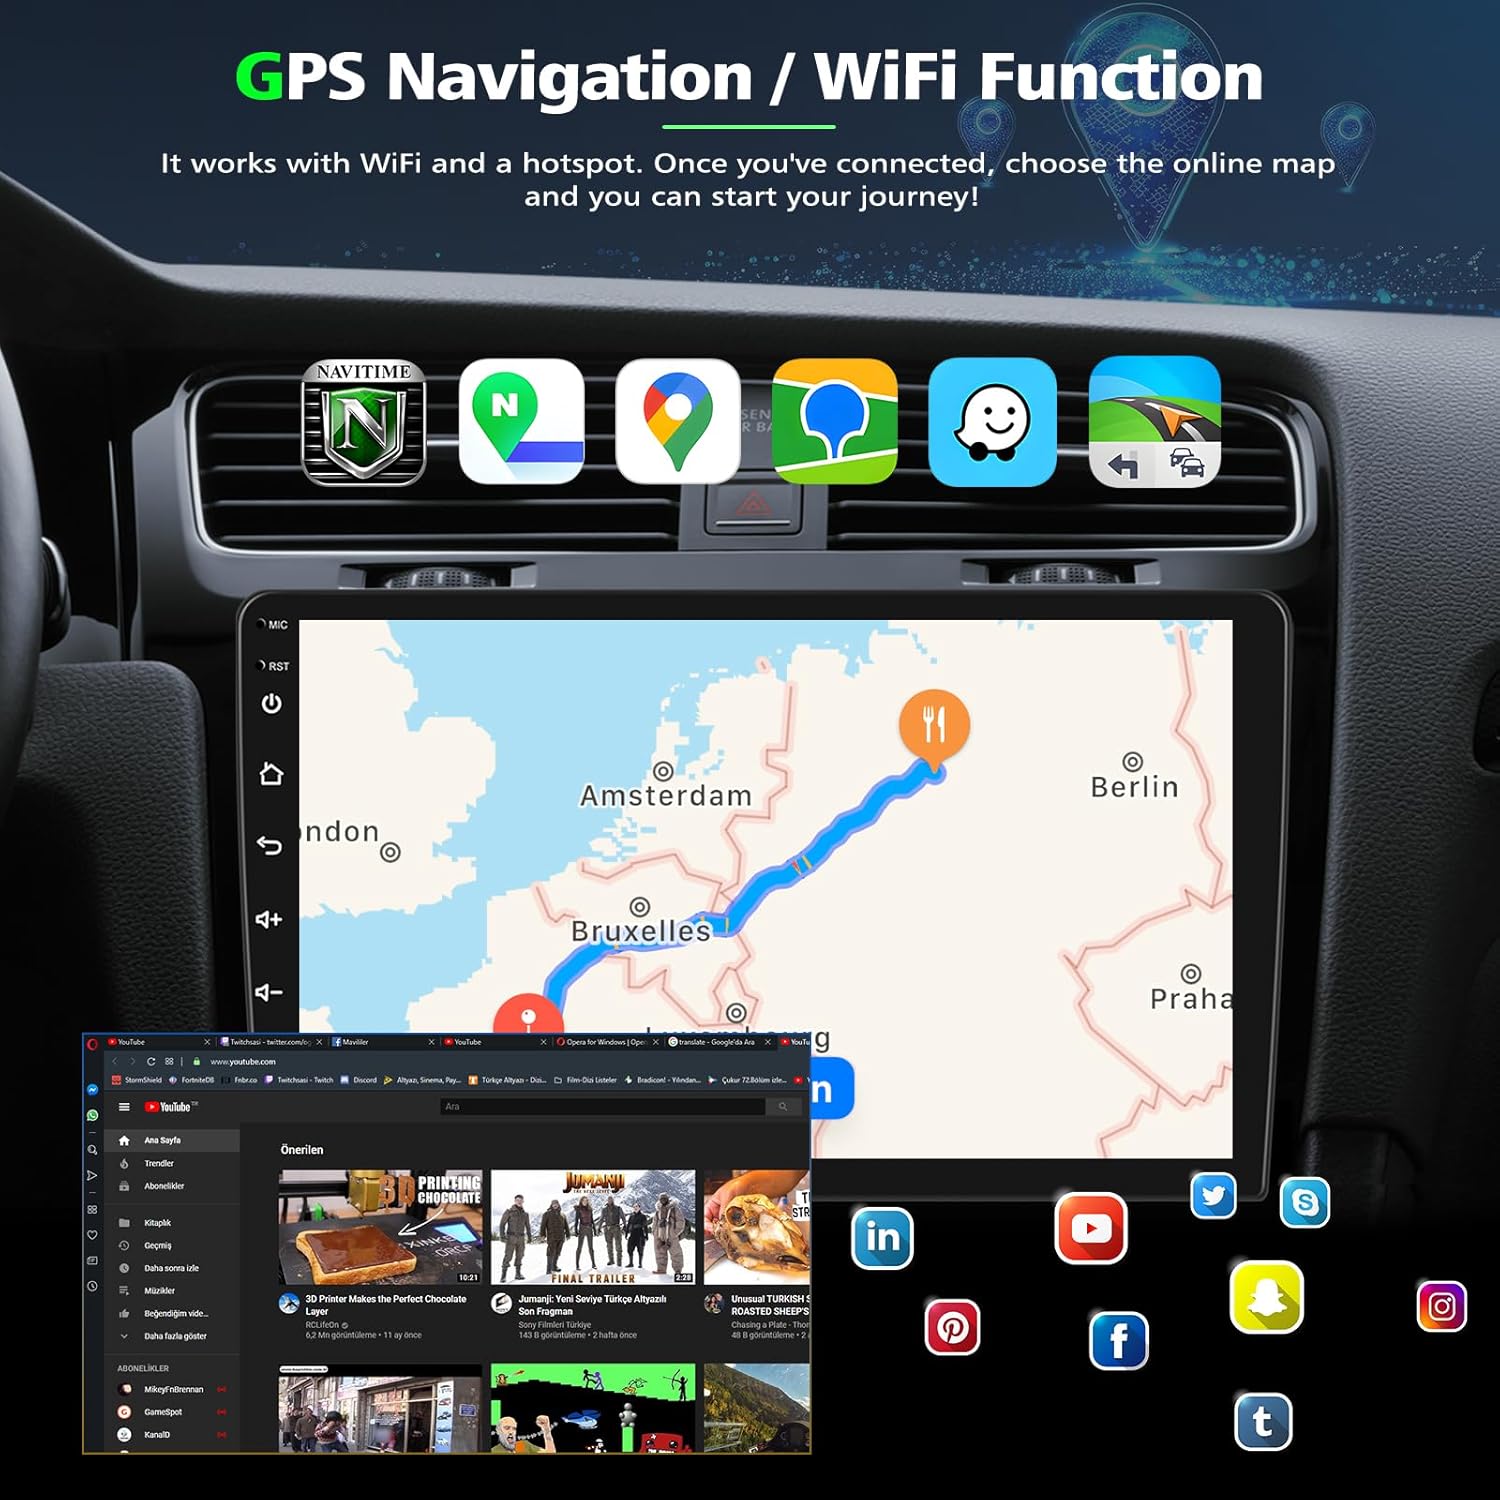
Image: GPS Navigation and Wi-Fi capabilities.
5.4 Bluetooth 5.0
Pair your smartphone via Bluetooth 5.0 for hands-free calling and audio streaming. Use the on-screen dialer or voice commands to manage calls.
5.5 Steering Wheel Control (SWC)
The unit is compatible with your vehicle's steering wheel controls. After installation, you may need to configure the SWC settings in the system menu to map the buttons correctly.

Image: Reverse Display and Steering Wheel Control setup.
5.6 Reverse Display / Backup Camera
When the vehicle is shifted into reverse, the stereo automatically displays the view from the included AHD backup camera. The camera features a 170° wide-angle lens, IP68 waterproofing, and night vision for enhanced safety.
5.7 FM/RDS Radio
Tune into your favorite FM radio stations. The RDS (Radio Data System) function provides additional information such as station name and song titles where available.
5.8 Split Screen Function
Multitask by running two applications simultaneously on the screen, such as navigation and music playback.
5.9 Voice Control
Utilize voice commands through Siri or Google Assistant (when connected via CarPlay/Android Auto) to control various functions like making calls, navigating, or playing music.

Image: Bluetooth, Split Screen, FM/RDS Radio, and Voice Control features.
5.10 Mirror Link
The unit supports Mirror Link for both iOS and Android devices, allowing you to mirror your phone's screen content onto the stereo display.
6. Maintenance
- Cleaning the Screen: Use a soft, lint-free cloth to gently wipe the touchscreen. For stubborn smudges, slightly dampen the cloth with water or a screen-safe cleaner. Avoid harsh chemicals.
- Software Updates: Periodically check for software updates from the manufacturer to ensure optimal performance and access to new features.
- General Care: Keep the unit free from dust and debris. Avoid placing heavy objects on the unit or exposing it to direct impacts.
7. Troubleshooting
- Unit Does Not Power On: Check power connections (B+, ACC, GND). Ensure the vehicle's ignition is on. Verify fuses in both the vehicle and the stereo's wiring harness.
- No Sound (from Bluetooth/USB): Refer to Section 4.4 for specific wiring instructions to resolve this issue. Also, check speaker connections and volume levels.
- GPS Signal Lost: Ensure the GPS antenna is properly connected and placed in a location with a clear view of the sky (e.g., on the dashboard).
- Bluetooth/Wi-Fi Connectivity Issues: Ensure Bluetooth/Wi-Fi is enabled on both the stereo and your phone. Try restarting both devices. For Wi-Fi, verify the hotspot is active and providing internet access.
- Backup Camera Not Displaying: Check the camera's power and video input connections. Ensure the reverse trigger wire is correctly connected to the vehicle's reverse light signal.
- Steering Wheel Controls Not Working: Verify the Key1/Key2 wires are connected. Access the SWC learning menu in the stereo settings to program the buttons.
8. Specifications
| Feature | Specification |
|---|---|
| Brand | PHEZEN |
| Operating System | Android 13 |
| Screen Size | 10.1 inches |
| Display Resolution | 1024*600p (2.5D glass touchscreen) |
| Connectivity Technology | Bluetooth 5.0, USB, Wi-Fi |
| Special Features | Android Auto, Apple CarPlay, GPS Navigation, Hands-Free Calling, Touchscreen, Split Screen, SWC, FM/RDS Radio, 1080p Video Player, Mirror Link |
| Compatible Devices | Smartphone |
| Audio Output Mode | Stereo |

Image: IPS Touchscreen resolution comparison.
9. Warranty and Support
9.1 Return Policy
This product is eligible for a 30-day refund or replacement policy from the date of purchase. Please refer to your retailer's specific return guidelines for detailed instructions.
9.2 Customer Support
For technical assistance, troubleshooting, or warranty claims, please contact the seller, UZZO-PHEZEN, directly through the platform where you purchased the product. They are committed to providing high-standard customer service.

Image: How to contact UZZO-PHEZEN for support.