
1. Product Overview
The YDSWRDN GPS Navigator 7078 is a versatile 7-inch touch screen navigation system designed for various vehicles including cars, trucks, and RVs. It comes preloaded with the latest North American maps and offers free lifetime map updates. This device provides intelligent voice turn-by-turn direction guidance, speed and red light warnings, and custom truck routing capabilities to enhance your travel experience.
Key Features:
- Latest Map Updates: Preloaded with 2026 North American maps (USA, Canada, Mexico) with free lifetime updates.
- Multi-Vehicle Support: Compatible with 12-24V vehicles, supporting navigation modes for cars, trucks, buses, taxis, bicycles, emergency vehicles, and pedestrians.
- Customized Routing: Tailors routes based on vehicle dimensions (weight, length, height, width) to avoid restricted roads.
- Intelligent Voice Guidance: Provides clear voice instructions, speed camera reminders, road name broadcasting, current speed display, and lane assistance.
- Advanced Search Functions: Supports searching by zip code, address, coordinates, favorites, and Points of Interest (POI).
- Smart Error Correction: Utilizes GPS signals for accurate navigation and route adjustments.
2. What's Included
Verify that all items listed below are present in your package:
- GPS Navigator Unit
- Car Charger
- USB Cable
- Suction Cup Bracket
- Rear Bracket
- Sunshade
- Owner's Manual (this document)
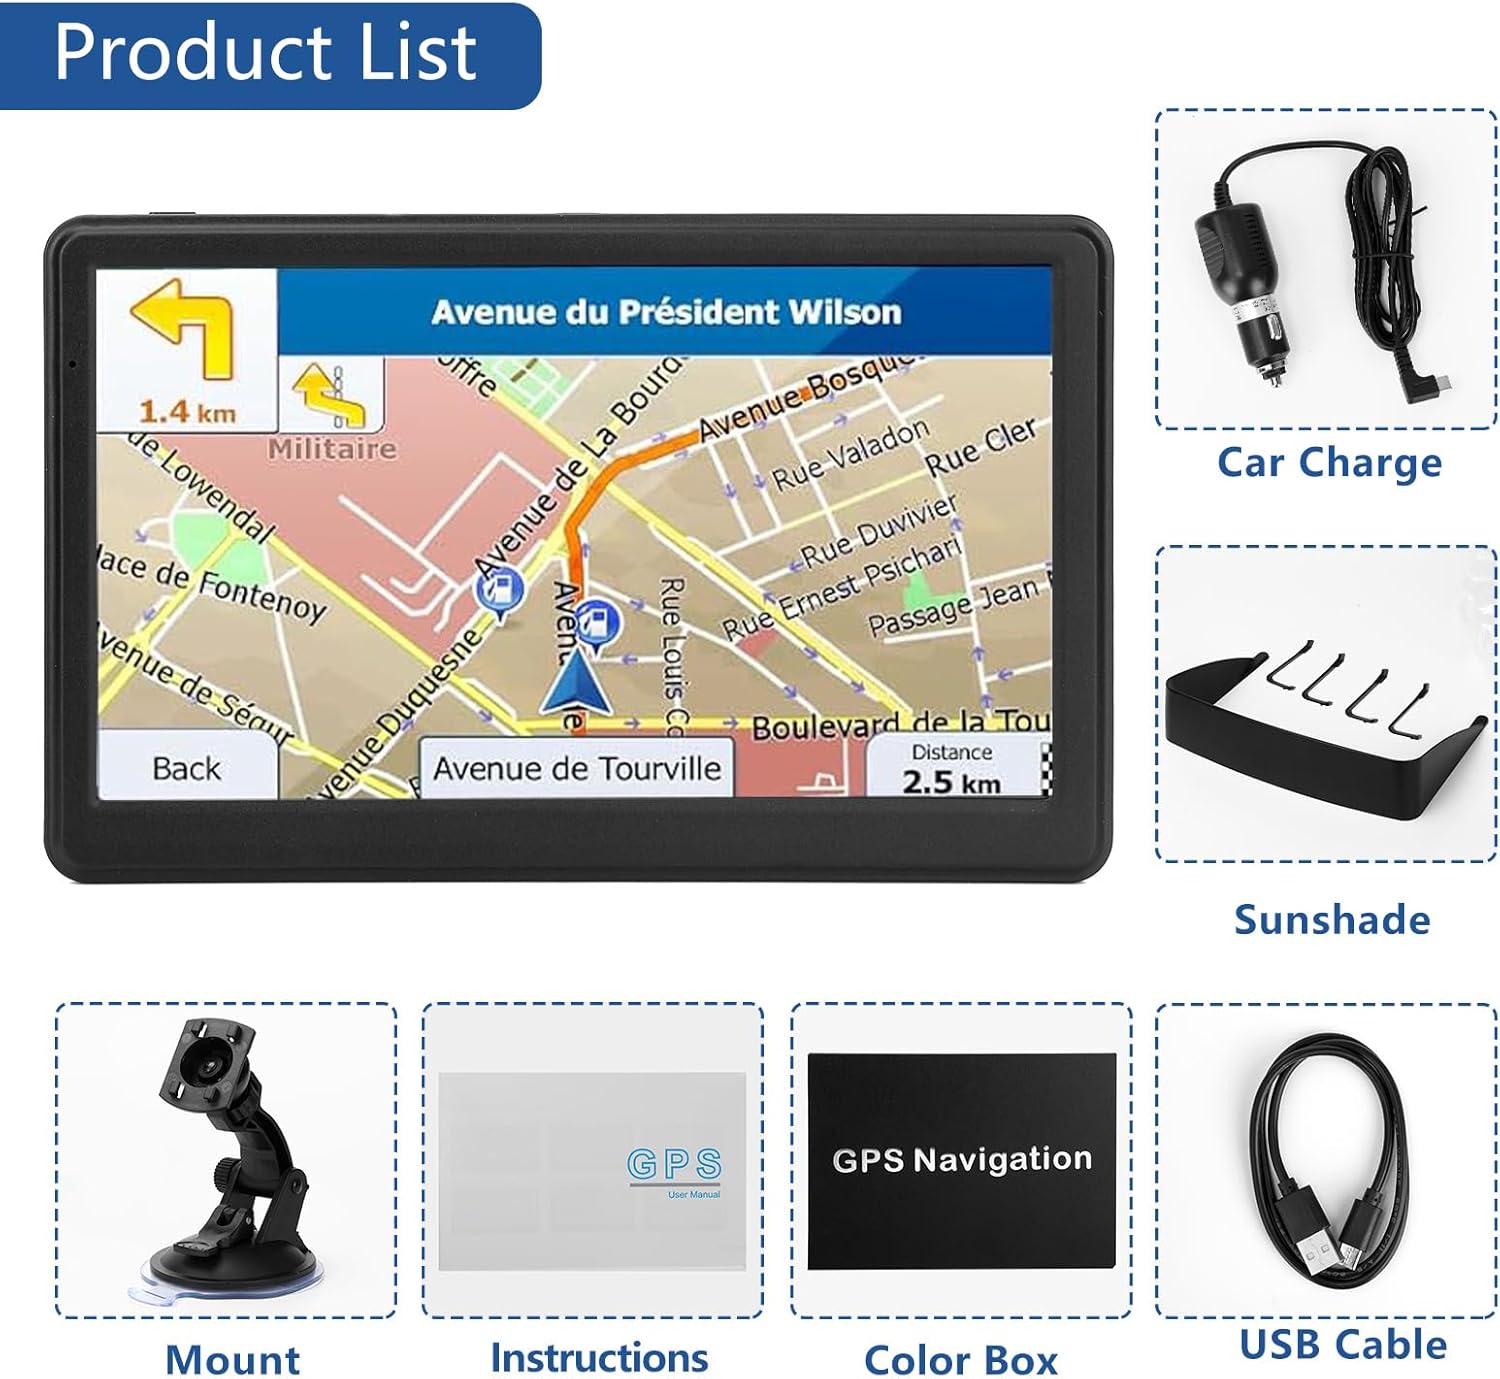
Image: Contents of the YDSWRDN GPS Navigator package, including the main unit, car charger, USB cable, mounting brackets, sunshade, and user manual.
3. Device Layout and Controls
Familiarize yourself with the physical components and ports of your GPS Navigator.

Image: A detailed view of the GPS Navigator's side and back, highlighting the ON/OFF button, headphone jack, TF card slot, USB-C port, the suction cup attachment point, and the direction adjustment mechanism.
- ON/OFF Button: Located on the top edge of the device. Press and hold to power on or off.
- Headphone Jack: Standard 3.5mm audio jack for private listening.
- TF Card Slot: For inserting a TransFlash (microSD) card, typically used for map data or media storage.
- USB-C Port: For connecting the device to the car charger or a computer for data transfer and charging.
- Suction Cup Mount Point: The designated area on the back of the device for attaching the suction cup bracket.
- Direction Adjustment: Allows for tilting and rotating the screen for optimal viewing angles.
4. Setup
4.1 Installation
The GPS Navigator can be installed using either the suction cup bracket for windshield mounting or the rear bracket for dashboard mounting. Ensure the chosen location does not obstruct your view of the road or interfere with vehicle controls.
- Attach the desired bracket (suction cup or rear bracket) to the back of the GPS unit.
- For suction cup mounting: Clean the windshield surface. Press the suction cup firmly against the glass and engage the lever to secure it.
- For dashboard mounting: Ensure the dashboard surface is clean and flat. Attach the rear bracket using its adhesive base or screws (if applicable and desired).
- Adjust the angle of the GPS unit using the direction adjustment mechanism for optimal visibility.
- Connect the car charger to the USB-C port on the GPS unit and plug the other end into your vehicle's 12-24V power outlet.

Image: Various adjustable mounting options for the GPS Navigator, demonstrating flexibility for different vehicle interiors and user preferences.
4.2 Initial Power On
After connecting the power, press and hold the ON/OFF button to power on the device. The device will boot up and display the main menu.
4.3 Map Updates
Your GPS Navigator comes with preloaded 2026 North American maps and includes free lifetime map updates. To ensure you always have the most current navigation data, it is recommended to periodically check for and install updates.
- Map updates are typically released annually, around March-April.
- New devices purchased after April will have the latest maps pre-installed.
- Refer to the user manual (page 9, if available in the physical copy) or contact customer support for detailed instructions on how to update maps.
- Maps for other regions may be available; contact support for more information.
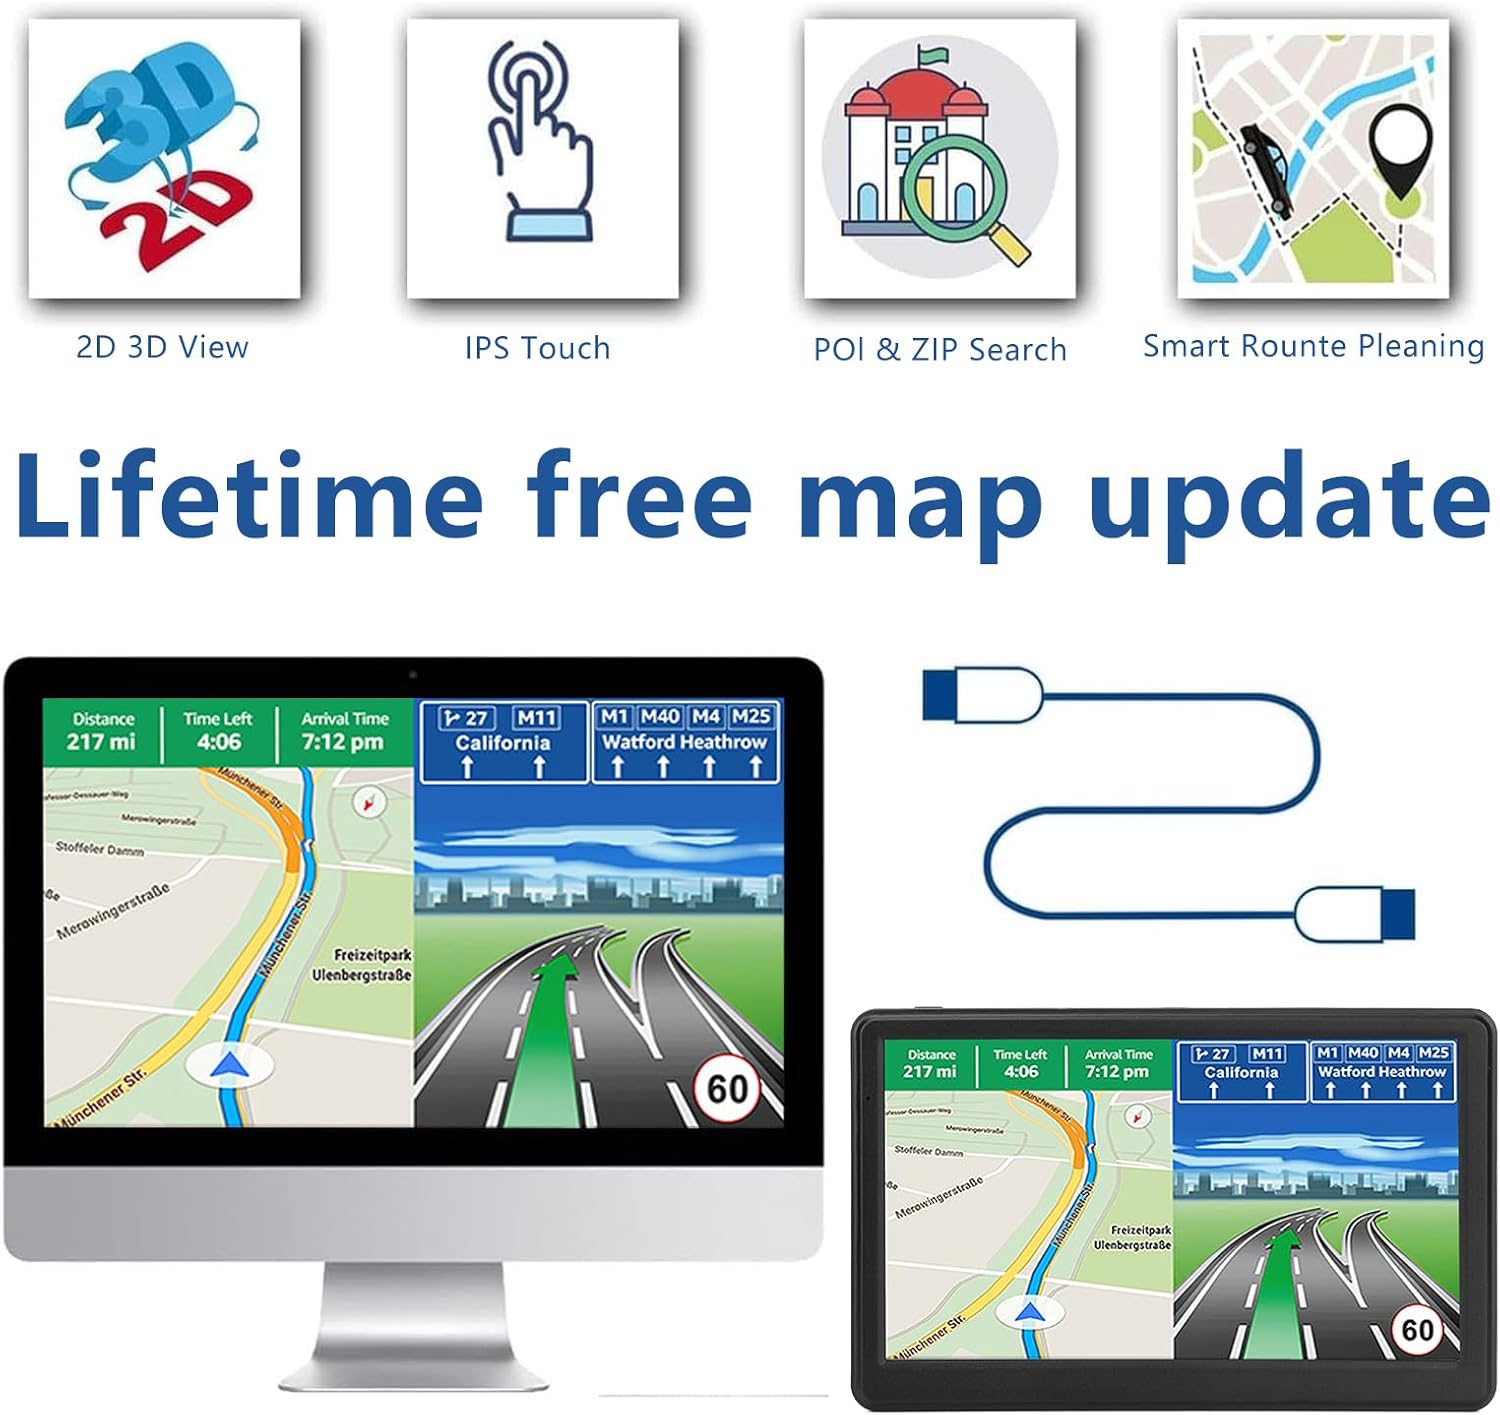
Image: The GPS Navigator connected to a computer, illustrating the process of updating maps to ensure the most current navigation data.
5. Operating Instructions
5.1 Basic Navigation
To begin navigating, select the 'GPS Navigation' option from the main menu. You can then enter your destination using various methods.
- Enter Destination: Tap the 'Destination' or 'Find Address' option.
- Input Details: Enter the address, zip code, or GPS coordinates of your desired location.
- Confirm Route: The device will calculate the best route. Confirm to start guidance.
- Voice Guidance: Follow the clear voice prompts for turn-by-turn directions.

Image: The GPS Navigator screen showing real-time intelligent voice guidance, including alerts for speed cameras, current speed, and distance to points of interest.
5.2 Customized Routes
The GPS Navigator offers specialized routing for different vehicle types, particularly useful for trucks and RVs to avoid restricted roads.
- Select Vehicle Type: In the navigation settings, choose your vehicle type (e.g., Car, Truck, RV).
- Enter Vehicle Dimensions: For trucks and RVs, input your vehicle's weight, length, height, and width.
- Route Calculation: The system will calculate a route that avoids roads with restrictions unsuitable for your vehicle.
- Route Options: Choose from Fast, Green, Short, or Convenient route options.

Image: The GPS Navigator displaying customized navigation routes, illustrating how it adapts to different vehicle types and avoids roads with specific restrictions like speed, height, or weight limits.
5.3 Points of Interest (POI) Search
Easily find nearby services and attractions using the POI search function.
- From the navigation menu, select 'Find Places' or 'POI Search'.
- Browse categories such as gas stations, restaurants, parking, or accommodations.
- Select a POI to view details and navigate to it.
5.4 Settings and Configuration
Access the 'Settings' menu to customize various aspects of your GPS Navigator.
- Volume: Adjust the master volume for voice guidance and system sounds.
- Screen Tap Sound: Enable or disable haptic feedback (a small 'tick' sound) when touching the screen.
- Date/Time: Set the correct date and time.
- FM Transmitter: If available, configure the FM transmitter to broadcast audio through your car's radio.
- GPS Information: View details about GPS signal strength and satellite connection.
6. Maintenance
6.1 General Care
- Keep the device clean using a soft, dry cloth. Avoid abrasive cleaners.
- Protect the screen from scratches.
- Avoid exposing the device to extreme temperatures or direct sunlight for prolonged periods.
- Ensure all cables are securely connected during operation.
6.2 Map Updates
Regularly updating your maps ensures optimal navigation performance and access to the latest road information. Refer to Section 4.3 for details on map updates.
7. Troubleshooting
This section addresses common issues you might encounter with your GPS Navigator.
- No GPS Signal: Ensure the device has a clear view of the sky. Move away from tall buildings or dense foliage.
- Screen Unresponsive: Try restarting the device. If the issue persists, ensure the screen is clean and free of debris.
- Device Not Powering On: Check the car charger connection and ensure your vehicle's power outlet is functioning.
- Incorrect Route Calculation: Verify that your vehicle type and dimensions are correctly entered in the settings. Ensure maps are up to date.
- Accidental Factory Reset: If you accidentally restore the factory settings, please contact our customer support team for assistance with resetting and reconfiguring your device.
For any issues not covered here, please refer to the Warranty and Support section for contact information.
8. Specifications
| Feature | Specification |
|---|---|
| Brand | YDSWRDN |
| Model Name | 7078 |
| Screen Size | 7 Inches |
| Special Feature | Touchscreen |
| Connectivity Technology | USB |
| Map Type | America (USA, Canada, Mexico) |
| Vehicle Service Type | Cars, Trucks, Ambulances, Buses, Heavy trucks |
| Mounting Type | Dashboard Mount, Windshield Mount |
| Item Weight | 0.7 Kilograms |
| Display Type | Touch Screen |
| Control Method | Touch, Voice |
| Batteries Included | Yes |
| Supported Satellite Navigation System | GPS |
| Model Year | 2026 |
9. Warranty and Support
9.1 Manufacturer's Warranty
The YDSWRDN GPS Navigator 7078 comes with a manufacturer's warranty. Please refer to the warranty card included in your package for specific terms and conditions.
9.2 Customer Support
Our professional team is dedicated to providing high-quality after-sales service. If you require any assistance, have questions, or encounter issues with your GPS Navigator, please do not hesitate to contact us.
Contact information can typically be found on the product packaging, warranty card, or the official YDSWRDN website.