
1. Introduction
The Portta VD20 VHS to Digital Converter is designed to help you preserve your analog video memories by converting them into digital MP4 files. This device features a 5-inch HD screen for real-time preview and playback, supporting various analog sources such as VHS, VCR, DVR, DVD, Hi8, Mini DV, and camcorders. It records directly to USB flash drives or TF cards, offering a convenient solution for digitizing your video collection.
2. Safety Information
- Do not expose the device to water or moisture.
- Avoid placing the device near heat sources or in direct sunlight.
- Use only the provided power adapter to prevent damage.
- Do not attempt to open or repair the device yourself. Refer all servicing to qualified personnel.
- Keep the device out of reach of children.
- Ensure proper ventilation around the device during operation.
3. Package Contents
Please check the package contents upon opening. If any items are missing or damaged, contact customer support.
- Portta VD20 VHS to Digital Converter
- Power Adapter
- AV Cable
- User Manual
4. Product Overview
Familiarize yourself with the various parts and connections of your Portta VD20 converter.
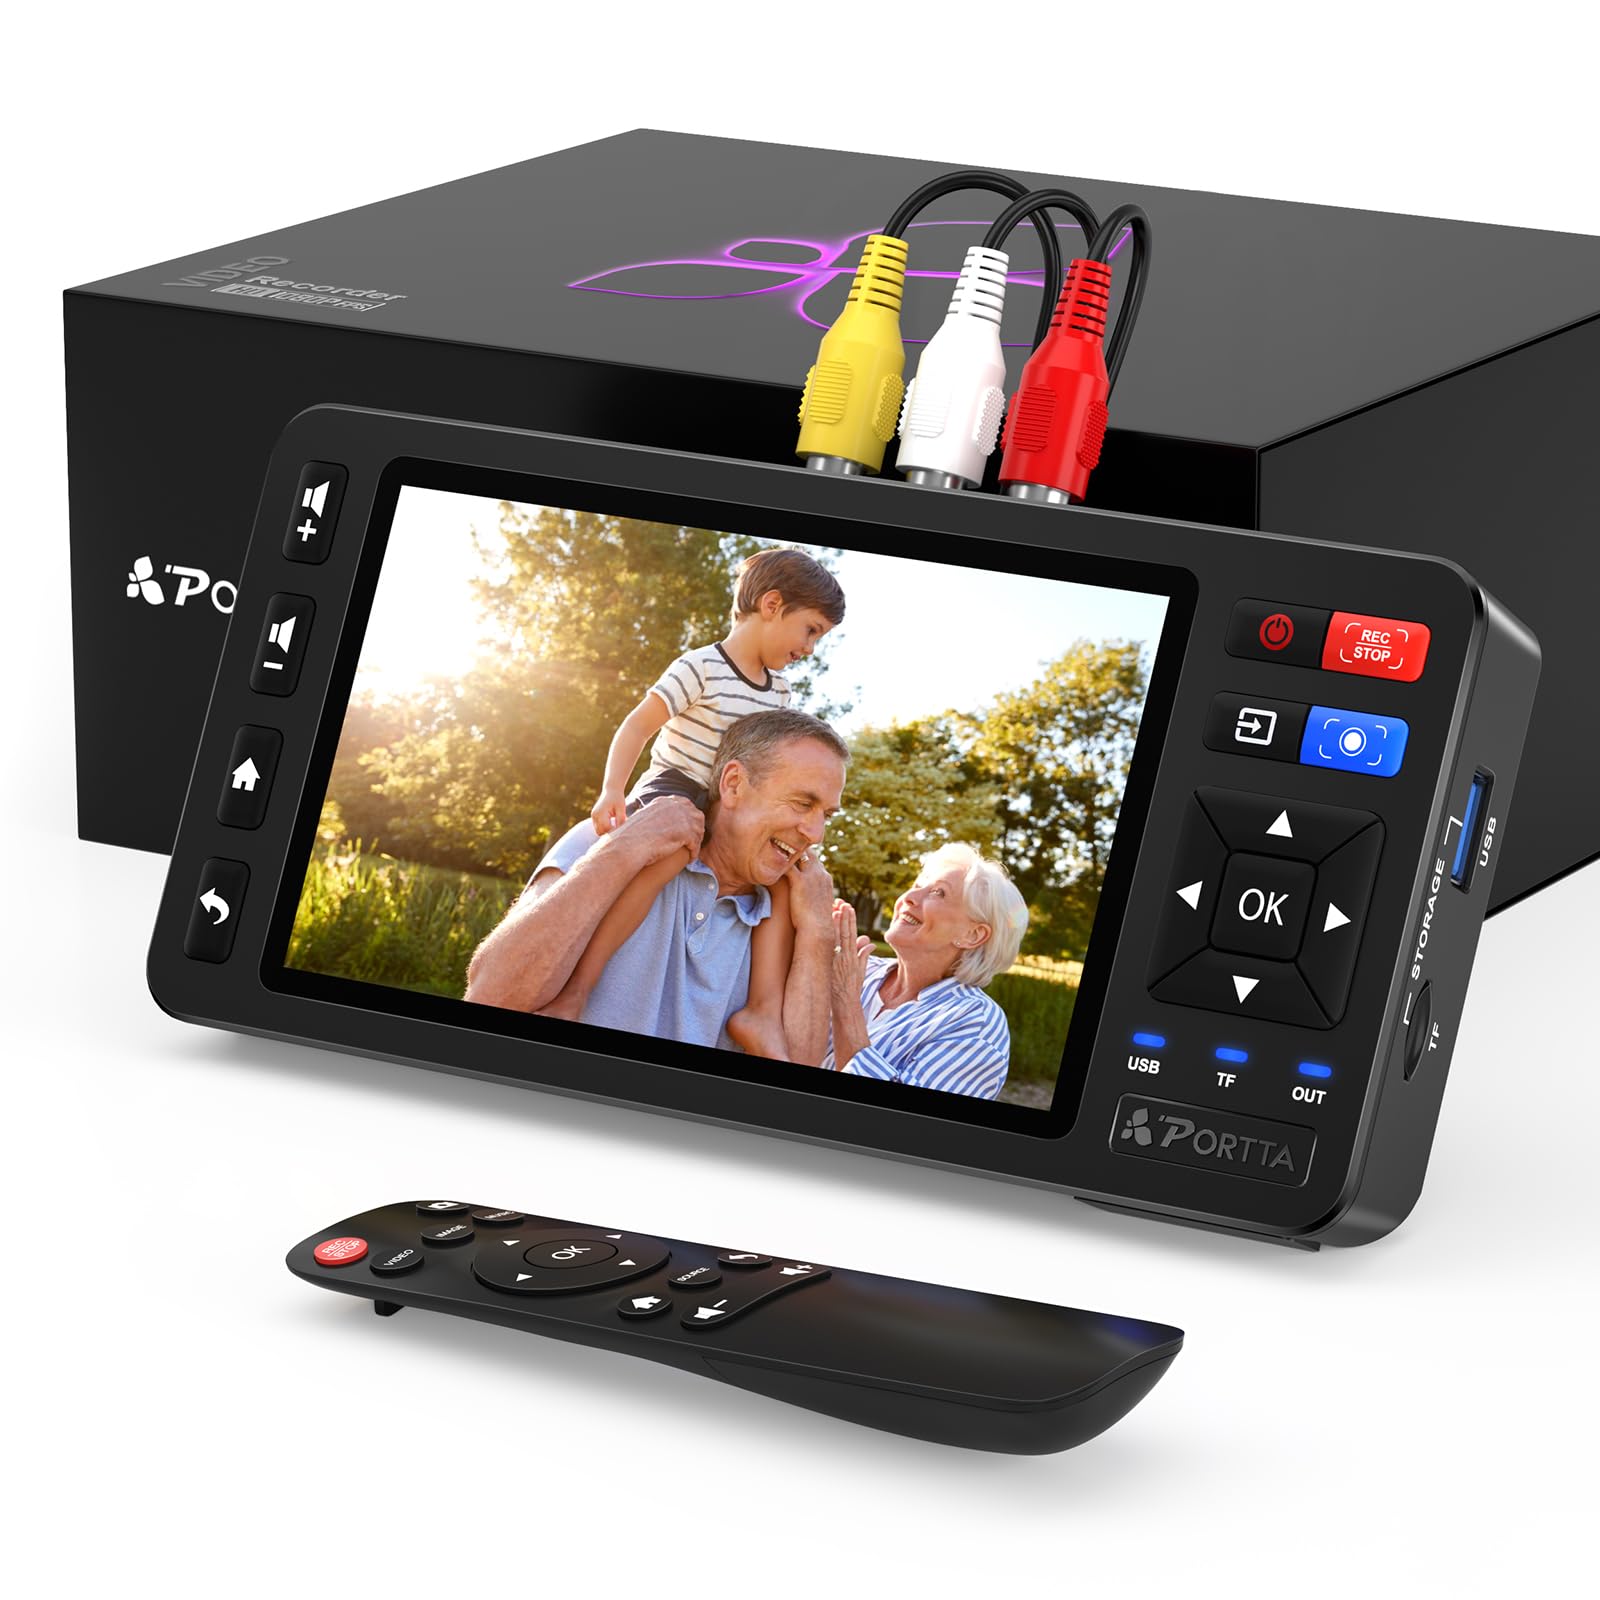
Image 1: Front view of the Portta VD20 VHS to Digital Converter. This image displays the device's 5-inch HD screen, control buttons for recording and navigation, and various input/output ports on its sides.
Front Panel
- 5-inch HD LCD Screen: Displays video input, recorded content, and menu options.
- Control Buttons: For power, menu navigation, record/stop, and playback.
Side/Rear Panel
- AV Input (RCA): Connects to analog video sources using composite video (yellow) and stereo audio (red/white) cables.
- S-Video Input: Connects to analog video sources using an S-Video cable for potentially higher quality video.
- USB Port: For connecting USB flash drives or portable HDDs/SSDs for storage.
- TF Card Slot: For inserting TF (MicroSD) cards for storage.
- Power Input (DC 5V): Connects to the power adapter.
5. Setup
5.1 Connecting Power
- Connect the power adapter to the DC 5V input port on the Portta VD20.
- Plug the power adapter into a wall outlet.
5.2 Connecting Source Devices
The VD20 supports both AV (RCA) and S-Video inputs. Choose the appropriate connection based on your source device (VCR, DVD player, camcorder, etc.).
Using AV (RCA) Cables:
- Connect the yellow RCA cable to the video output (yellow) of your source device and to the AV video input (yellow) on the VD20.
- Connect the red and white RCA cables to the audio outputs (red for right, white for left) of your source device and to the AV audio inputs (red/white) on the VD20.
Using S-Video Cable:
- Connect the S-Video cable to the S-Video output of your source device and to the S-Video input on the VD20.
- For audio, you will still need to use the red and white RCA audio cables as described above, connecting them to the audio outputs of your source device and the AV audio inputs on the VD20.
5.3 Connecting Storage Device
The VD20 supports USB flash drives, portable HDDs/SSDs, and TF (MicroSD) cards.
- For USB Storage: Insert your USB flash drive or portable HDD/SSD into the USB port on the VD20.
- For TF Card Storage: Insert your TF card into the TF card slot on the VD20. Ensure it is inserted correctly until it clicks into place.
Note: Ensure your storage device is formatted to FAT32 or exFAT for optimal compatibility. NTFS may also be supported but FAT32/exFAT is recommended.
6. Operating Instructions
6.1 Powering On/Off
- Power On: Press and hold the Power button until the screen illuminates.
- Power Off: Press and hold the Power button until the screen turns off.
6.2 Using the 5-inch HD LCD Screen
The built-in screen provides a real-time preview of the video input and allows you to navigate menus and playback recorded files.
6.3 Recording Video
- Ensure your source device is connected and playing the content you wish to record.
- On the VD20, select the correct input source (AV or S-Video) if prompted, or if there's a dedicated input selection button.
- Verify the video is displayed correctly on the 5-inch screen.
- Press the Record button (usually indicated by a red dot or 'REC'). The recording indicator will light up, and a timer will appear on the screen, indicating that recording has started.
- To stop recording, press the Record button again. The recording indicator will turn off, and the file will be saved to your connected storage device.
6.4 Playback
- Navigate to the 'Playback' or 'Files' menu using the control buttons.
- Select the desired video file from the list.
- Press the 'Play' button to start playback.
- Use the navigation buttons to pause, fast forward, or rewind during playback.
6.5 Format Settings
The VD20 supports MP4 video and MP3 audio formats, compatible with PAL, NTSC, and SECAM video standards. These settings can typically be adjusted in the device's menu.
- Video Format: MP4 (H.264 encoding).
- Audio Format: MP3 (for audio-only recordings) or LPCM (for video recordings).
- Video Standard: Ensure the device's video standard setting (PAL/NTSC/SECAM) matches your source device's output for correct display and recording.
7. Maintenance
7.1 Cleaning
- Use a soft, dry cloth to clean the exterior of the device.
- For the screen, use a screen-specific cleaning solution and a microfiber cloth.
- Do not use abrasive cleaners or solvents.
7.2 Storage
- Store the device in a cool, dry place away from direct sunlight and extreme temperatures.
- If storing for an extended period, disconnect the power adapter.
8. Troubleshooting
| Problem | Possible Cause | Solution |
|---|---|---|
| No power | Power adapter not connected; faulty outlet. | Ensure power adapter is securely connected and plugged into a working outlet. |
| No video on screen | Incorrect input source selected; cables not connected properly; source device not playing. | Check all AV/S-Video connections. Ensure source device is powered on and playing. Select correct input on VD20. |
| No audio | Audio cables not connected; volume too low on source or VD20. | Verify red/white audio RCA cables are connected. Adjust volume on source device and VD20. |
| Recording fails or stops | Storage device full; incompatible format; storage device not detected. | Check available space on USB/TF card. Ensure storage device is formatted to FAT32/exFAT. Reinsert storage device. |
| Poor video quality | Poor quality source; dirty cables/ports; incorrect video standard. | Ensure source video is clean. Clean cables and ports. Verify VD20 video standard (PAL/NTSC/SECAM) matches source. |
9. Specifications
- Model: VD20
- Screen: 5-inch HD LCD
- Video Input: AV (CVBS), S-Video
- Audio Input: R/L Stereo Audio (RCA)
- Video Format: MP4 (H.264)
- Audio Format: MP3, LPCM (for video)
- Video Standards: PAL, NTSC, SECAM
- Recording Resolution: Up to 1080p @ 60fps (input resolution)
- Storage Media: USB Flash Drive, TF Card, Portable HDD/SSD
- Power Supply: DC 5V
- Dimensions (L x W x H): 6.85 x 3.23 x 0.91 inches
- Compatible Devices: VHS players, VCRs, DVRs, DVD players, Hi8, Mini DV, Camcorders, Retro Gaming Consoles
10. Warranty & Support
10.1 Warranty Information
The Portta VD20 VHS to Digital Converter comes with a 2-year warranty from the date of purchase. This warranty covers manufacturing defects and malfunctions under normal use. It does not cover damage caused by misuse, accidents, unauthorized modifications, or natural disasters.
10.2 Customer Support
For technical assistance, troubleshooting, or warranty claims, please contact Portta customer support. Refer to the contact information provided on the Portta website or your purchase documentation.
Online Support: Visit the official Portta website for FAQs, driver downloads, and support contact details.
