
1. Introduction
This manual provides essential information for the safe and efficient operation of your Bonvoisin Spot Welder. Please read this manual thoroughly before using the device to ensure proper setup, operation, and maintenance. This spot welder is designed for continuous operation, offering precise control over current and pulse duration for welding nickel-plated and pure nickel strips to cylindrical lithium batteries (18650, 26650, 32650).
2. Safety Instructions
Always observe the following safety precautions to prevent injury or damage to the equipment:
- Electrical Safety: Ensure the power supply matches the welder's requirements (220V ±10%). Do not operate with wet hands or in damp environments. Always disconnect power before performing maintenance or adjustments.
- Eye Protection: Always wear appropriate eye protection (welding goggles or shield) to protect against sparks and intense light during welding.
- Ventilation: Use the welder in a well-ventilated area to avoid inhaling fumes.
- Flammable Materials: Keep flammable materials away from the welding area.
- Proper Use: This device is designed for welding nickel-plated strips (up to 0.2mm) and pure nickel strips (up to 0.15mm) to lithium batteries. Do not use for welding copper or aluminum.
- Children and Pets: Keep children and pets away from the work area.
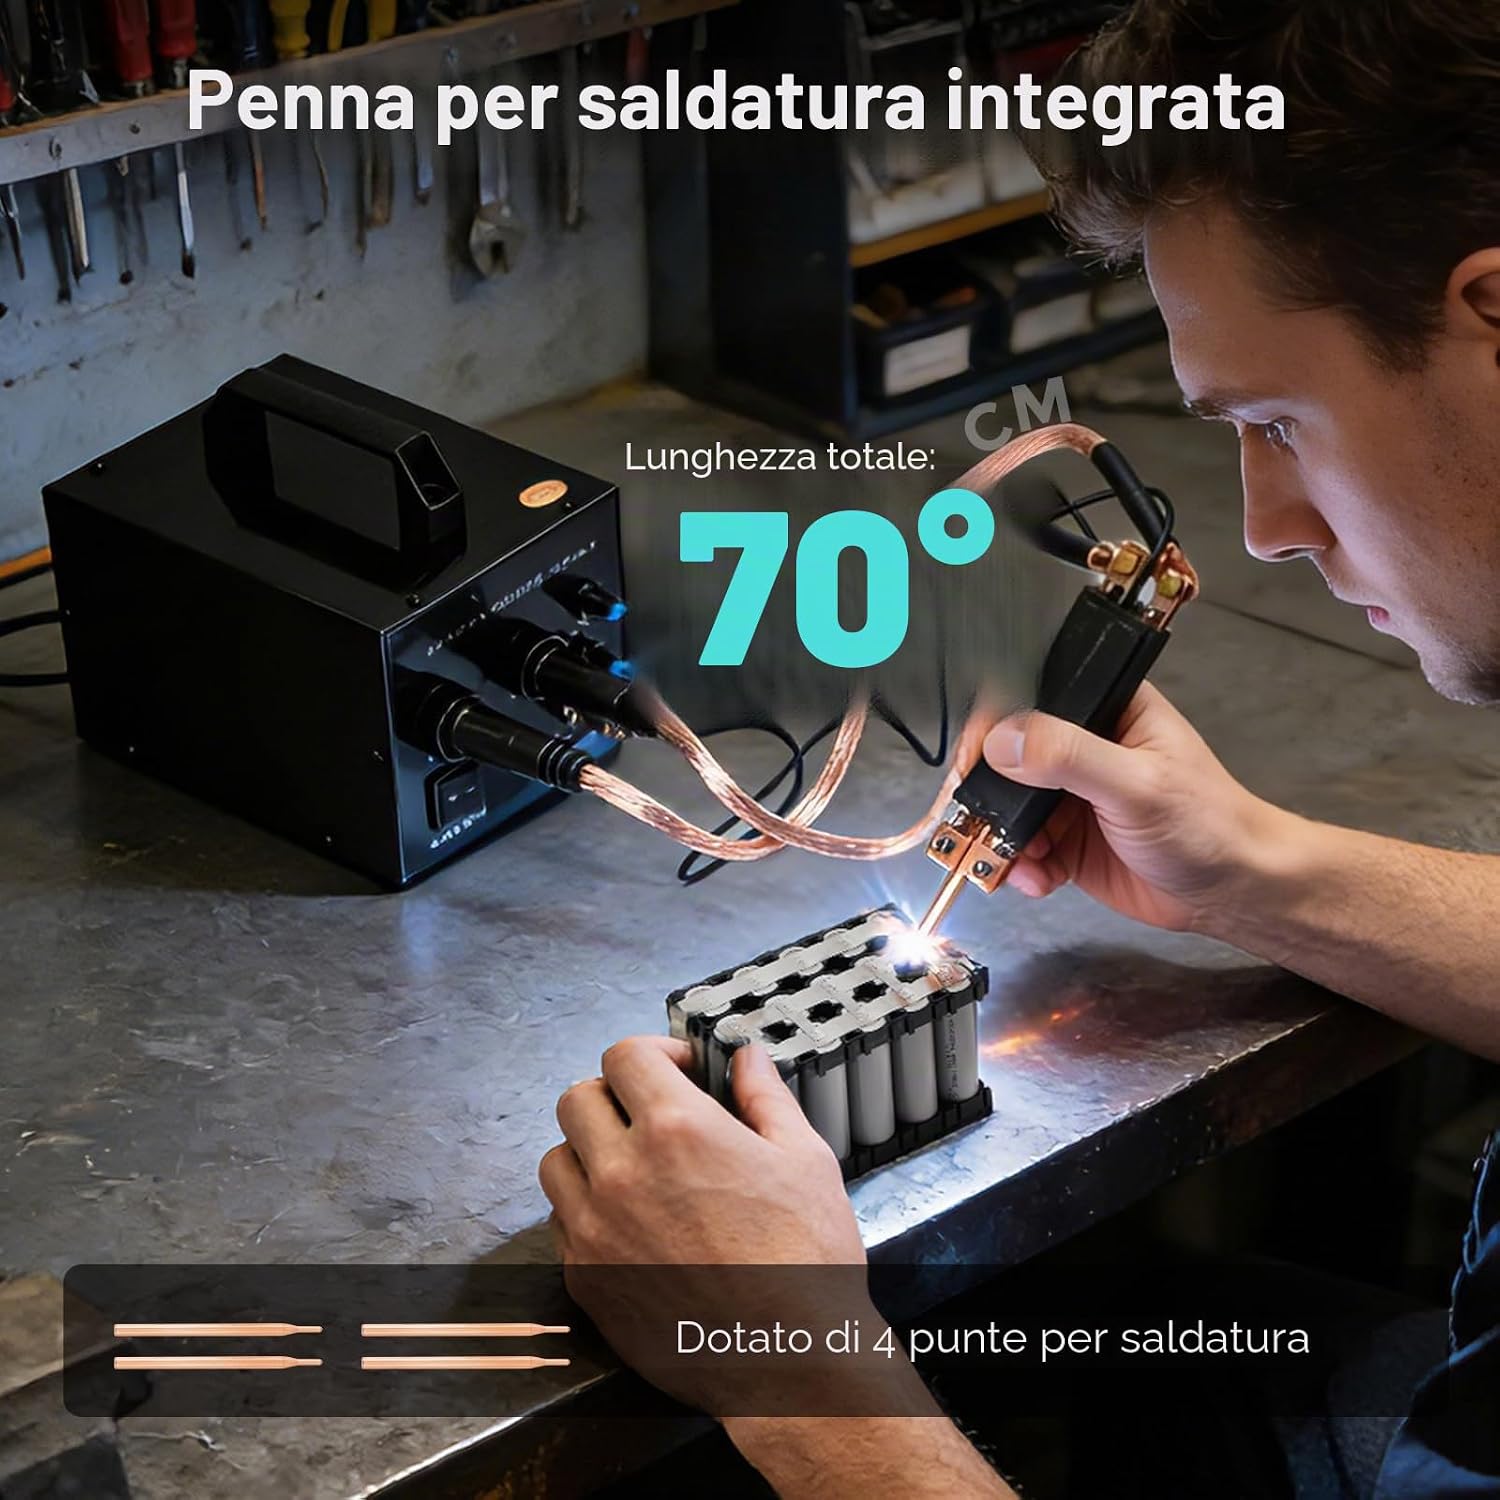
- Integrated Welding Pen: Handle the welding pen with care. Ensure tips are clean and properly seated.
3. Package Contents
Verify that all items are present in the package:
- Spot Welder Main Unit
- Integrated Welding Pen (70 cm)
- Replacement Welding Tips (4 pieces)
- 18650 Battery Holder (6-hole)
- Nickel Strip Roll (2 meters)
- Power Cable

4. Setup Instructions
Follow these steps to set up your spot welder:
- Placement: Place the spot welder on a stable, non-flammable surface in a well-ventilated area.
- Connect Welding Pen: Insert the integrated welding pen cables into the designated ports on the front of the main unit. Ensure a secure connection.
- Connect Power: Connect the power cable to the power input socket on the rear of the unit, then plug it into a compatible 220V AC outlet.
- Initial Settings: Before turning on, set the current (CUR) and time (TIME) knobs to their lowest settings.

5. Operating Instructions
This section details how to operate your Bonvoisin Spot Welder for optimal results.
5.1 Powering On and Basic Controls
- Turn On: Flip the "POWER SWITCH" to the ON position. The operating indicator light will illuminate.
- Current Adjustment (CUR): Use the "CUR" knob to adjust the welding current from 400A to 1000A. Higher current is generally needed for thicker nickel strips.
- Pulse Duration Adjustment (TIME): Use the "TIME" knob to adjust the pulse duration from 20ms to 5 seconds. This controls how long the welding current is applied. Shorter pulses are for thinner materials, longer for thicker.


5.2 Welding Process
- Prepare Materials: Ensure the battery terminals and nickel strips are clean and free of oxidation or debris.
- Position Nickel Strip: Place the nickel strip firmly against the battery terminal where the weld is desired.
- Position Welding Pen: Hold the integrated welding pen comfortably. Press the two welding tips firmly onto the nickel strip, ensuring good contact with both the strip and the battery terminal underneath. The tips should be parallel and apply even pressure.
- Initiate Weld: Press the button on the welding pen to initiate the weld. The machine will deliver the set current and pulse duration.
- Inspect Weld: After welding, carefully lift the pen and inspect the weld spot. It should be strong and clean. Adjust current and pulse duration as needed for optimal results.
This spot welder is suitable for 0.1-0.2mm nickel-plated strips and 0.15mm pure nickel strips, ideal for 18650, 26650, and 32650 cylindrical lithium batteries.


6. Maintenance
Regular maintenance ensures the longevity and performance of your spot welder.
- Cleaning: Keep the unit and welding pen clean and free of dust and debris. Use a dry cloth for cleaning. Do not use solvents or abrasive cleaners.
- Welding Tips: Inspect welding tips regularly for wear and tear. Replace them when they become dull or pitted to ensure consistent weld quality. The package includes 4 replacement tips.
- Cable Inspection: Periodically check all cables for damage, fraying, or loose connections. Replace damaged cables immediately.
- Storage: Store the spot welder in a dry, cool place away from direct sunlight and moisture when not in use.
7. Troubleshooting
Refer to this section for common issues and their solutions.
| Problem | Possible Cause | Solution |
|---|---|---|
| No power when switched on | Power cable not connected; Power outlet faulty; Power switch off | Ensure power cable is securely plugged in; Test power outlet; Ensure power switch is ON |
| Weak or inconsistent welds | Insufficient current/pulse duration; Dirty welding tips; Poor contact with material; Material too thick | Increase CUR and/or TIME settings; Clean or replace welding tips; Ensure firm, even pressure; Verify material thickness is within specifications (0.1-0.2mm nickel-plated, 0.15mm pure nickel) |
| Excessive sparks or burning | Too high current/pulse duration; Tips not making proper contact | Decrease CUR and/or TIME settings; Ensure firm, even pressure with tips |
| Welding pen feels loose | Cables not securely fastened to unit | Tighten connections for welding pen cables |
8. Specifications
| Feature | Specification |
|---|---|
| Input Voltage | 220V ±10% |
| Output Voltage | 4.2V |
| Maximum Power | 5000W |
| Pulse Duration | 20ms - 5s |
| Dimensions (L x W x H) | 200 x 150 x 135 mm |
| Welding Current | 400-1000A |
| Weight | 6.5 kg |
| Compatible Materials | Nickel-plated strips (0.1-0.2mm), Pure nickel strips (0.15mm) |
| Compatible Batteries | 18650, 26650, 32650 cylindrical lithium batteries |

9. Warranty and Support
For warranty information or technical support, please contact Bonvoisin customer service through the retailer where the product was purchased or visit the official Bonvoisin website. Please have your model number (Poste à Souder par Points) and purchase date available when contacting support.
You can visit the Bonvoisin store on Amazon for more information: Bonvoisin Store