
Introduction
This manual provides detailed instructions for the operation and maintenance of your FUXGZ Mini Body Camera, Model VD2. Please read this manual thoroughly before using the device to ensure proper functionality and to maximize its lifespan. This camera is designed for portable video recording in various scenarios, including law enforcement, sports, and personal security.
Package Contents
Verify that all items are present in the package:
- FUXGZ Mini Body Camera (Model VD2)
- USB-C Charging Cable
- User Manual (this document)
- 32GB Micro SD Card (pre-installed or included separately)
Product Overview
Familiarize yourself with the components and controls of your body camera.

Figure 1: Front and side view of the FUXGZ Mini Body Camera with labels for screen, lens, buttons, and ports.
- Camera Lens: 180° rotatable lens for flexible recording angles.
- Display Screen: 1.3-inch screen for live view, playback, and menu navigation.
- Mode Setting Button: To switch between video recording and photo shooting modes.
- Reset Button: For restarting the device if it becomes unresponsive.
- Type-C Port: For charging and data transfer.
- Infrared Night Vision Bulbs: 6 built-in IR bulbs for low-light recording.
- Night Vision Light Switch: To activate or deactivate night vision.
- Play Button: To start/pause video playback.
- Previous/Next Track Buttons: For navigating through recorded files during playback.
- TF Card Slot: Supports Micro SD cards up to 128GB.
- Back Clip: Magnetic clip for attaching the camera to clothing or other surfaces.
Setup
1. Charging the Camera
Before first use, fully charge the camera. Connect the camera to a power source using the provided USB-C cable. The charging indicator light will show the charging status. A full charge typically takes approximately 3 hours and provides up to 3 hours of recording time.

Figure 2: Charging the FUXGZ Mini Body Camera.
2. Inserting the Micro SD Card
The camera requires a Micro SD card (up to 128GB) for storing recordings. A 32GB card is included. Insert the Micro SD card into the TF card slot with the gold contacts facing the front of the camera until it clicks into place.
3. Setting Date and Time
To ensure accurate timestamps on your recordings, set the date and time:
- Connect the camera to a computer using the USB-C cable.
- The camera will appear as a removable disk. Open the disk.
- Locate the
userConfig.txtfile. - Open this file with a text editor (e.g., Notepad).
- Edit the date and time parameters to the current date and time in the specified format (e.g.,
2024.04.04 14:48:00). - Save the
userConfig.txtfile. - Safely eject the camera from your computer. The date and time will now be set.
Note: This file also allows modification of other parameters like video resolution (1080P/720P), loop recording, and motion detection settings. Refer to the comments within the userConfig.txt file for detailed instructions on each setting.
Operating Instructions
1. Power On/Off
- Power On: Press and hold the Power button until the screen turns on.
- Power Off: Press and hold the Power button until the screen turns off.
2. Video Recording
The camera supports 1080P and 720P video resolutions. The default setting can be adjusted via the userConfig.txt file.
- Ensure the camera is powered on.
- Press the Mode Setting button to select video recording mode.
- Press the Play button to start recording. A recording indicator (e.g., "REC" icon) will appear on the screen.
- To stop recording, press the Play button again. The recording will be saved to the Micro SD card.

Figure 3: Rotatable lens and display showing video resolution options.
3. Photo Shooting
- Ensure the camera is powered on.
- Press the Mode Setting button to select photo shooting mode.
- Press the Play button to take a photo. The photo will be saved to the Micro SD card.
4. Night Vision
The camera is equipped with 6 infrared bulbs for recording in low-light conditions.
- To activate night vision, slide the Night Vision Light Switch.
- To deactivate night vision, slide the Night Vision Light Switch again.
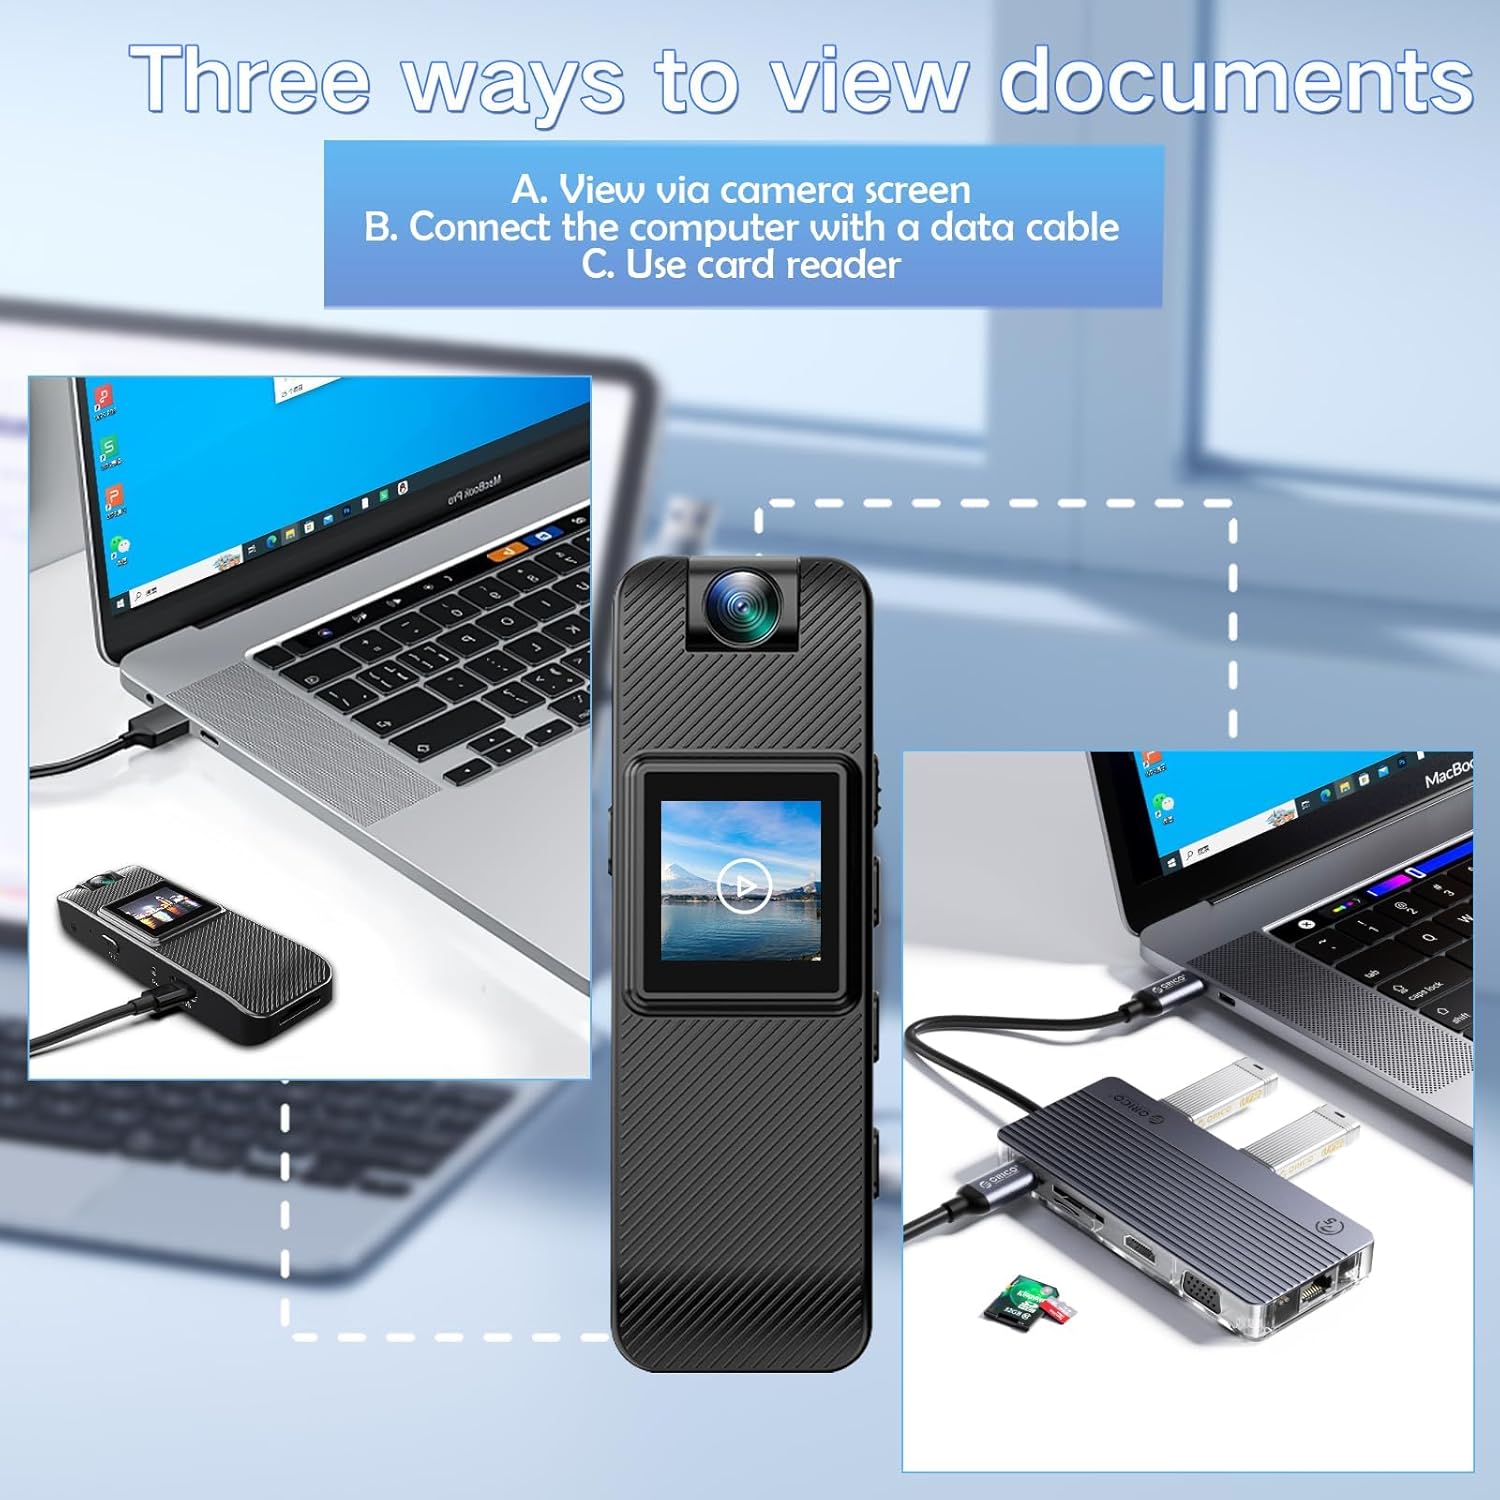
Figure 4: Night Vision capability of the camera.
5. Motion Detection
When motion detection is enabled, the camera will automatically start recording when it detects movement.
- Motion detection must be enabled and configured via the
userConfig.txtfile. Refer to the file for specific instructions on modifying this setting. - Once enabled, the camera will enter standby mode and begin recording upon detecting motion.
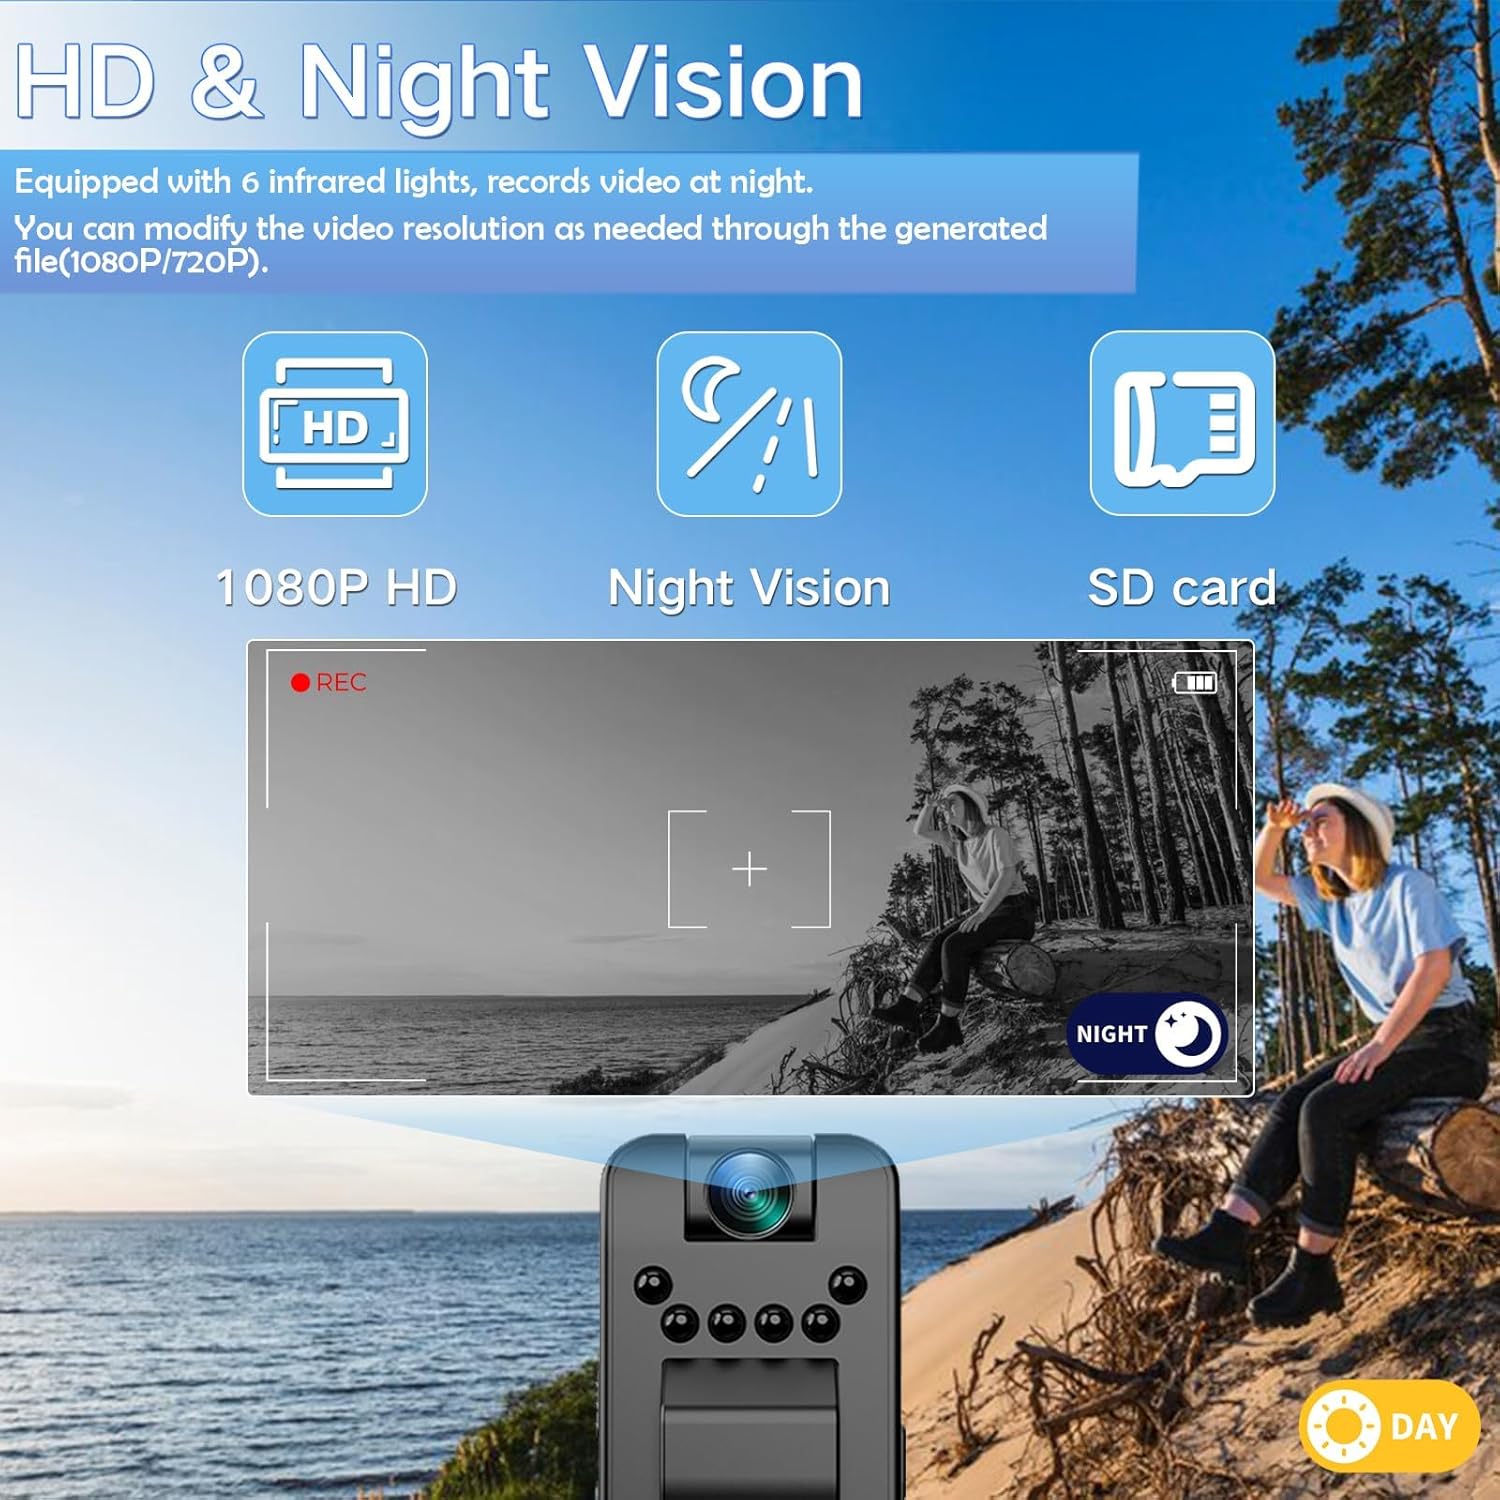
Figure 5: Motion Detection and Loop Recording features.
6. Loop Recording
The camera supports loop recording, which means that when the Micro SD card is full, the oldest video files will be overwritten by new recordings.
- Loop recording is typically enabled by default. You can adjust or disable this feature through the
userConfig.txtfile if desired.
7. Viewing Files
There are three primary methods to view your recorded videos and photos:
- Via Camera Screen: Power on the camera and navigate to playback mode using the Mode Setting button. Use the Previous/Next Track buttons to browse files and the Play button to view them on the 1.3-inch display.
- Connect to Computer: Connect the camera to your computer using the USB-C cable. The camera will appear as a removable disk, allowing you to access and transfer files directly.
- Using a Card Reader: Remove the Micro SD card from the camera and insert it into a compatible card reader connected to your computer. This allows direct access to the files on the card.
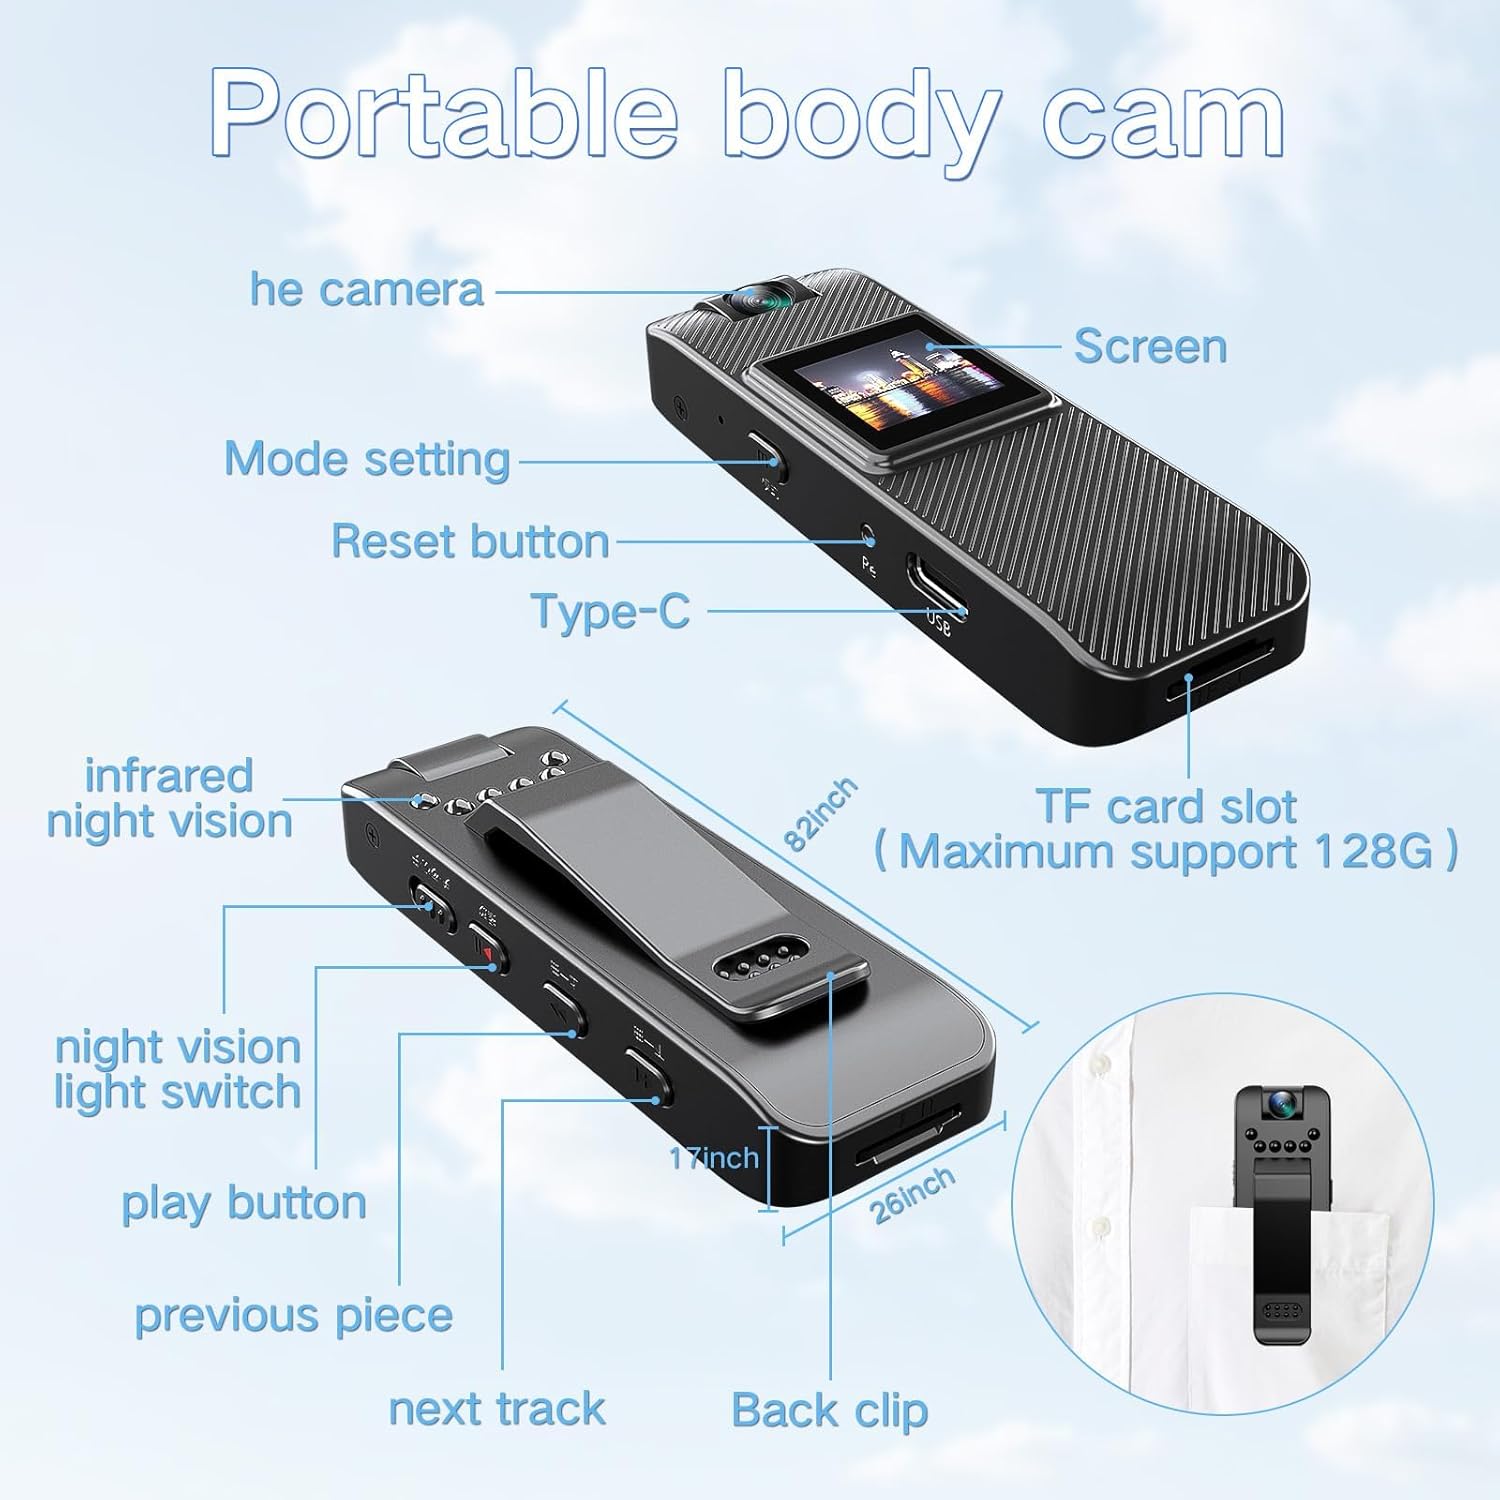
Figure 6: Methods for accessing recorded files.
Maintenance
- Cleaning: Use a soft, dry cloth to clean the camera body and lens. Avoid using liquid cleaners or abrasive materials.
- Storage: Store the camera in a cool, dry place away from direct sunlight and extreme temperatures.
- Battery Care: To prolong battery life, avoid fully discharging the battery frequently. Charge the camera regularly, even if not in use for extended periods.
- SD Card Management: Regularly back up important recordings from the Micro SD card to a computer or other storage device. Periodically format the Micro SD card (after backing up data) to maintain optimal performance.
Troubleshooting
- Camera not turning on: Ensure the battery is charged. Connect to a power source and try again. If unresponsive, press the Reset button with a thin tool.
- Recording issues (e.g., not saving, corrupted files):
- Check if the Micro SD card is properly inserted.
- Ensure the Micro SD card has sufficient free space.
- Try formatting the Micro SD card (Note: This will erase all data on the card, back up first).
- Ensure the Micro SD card is not damaged or faulty.
- Incorrect date/time stamp: Re-check the
userConfig.txtfile on the Micro SD card and ensure the date and time are correctly set and saved. - Cannot hear audio during playback on camera: The camera does not have an internal speaker for audio playback. Audio can be heard when files are played back on a computer.
- Difficulty navigating files during playback: The camera's playback function allows sequential viewing. Fast-forward or rewind functions are not available directly on the device. For advanced playback controls, transfer files to a computer.
- Motion detection not working: Verify that motion detection is enabled and configured correctly in the
userConfig.txtfile.
Specifications
| Brand | FUXGZ |
| Model Name | Body Camera (VD2) |
| Video Capture Resolution | 1080p / 720p |
| Video Capture Format | AVI |
| Photo Sensor Resolution | 2 MP |
| Photo Sensor Technology | CMOS |
| Flash Memory Type | Micro SD (up to 128GB, 32GB included) |
| Connectivity Technology | USB (Type-C) |
| Power Source | Battery Powered |
| Item Dimensions (L x W x H) | 0.9 x 0.7 x 3 inches |
| Special Features | HD Video, Night Vision, Motion Detection, 180° Rotatable Lens, 1.3-inch Display, Loop Recording |
| Recommended Uses | Law Enforcement, Cycling, Vlogging, Sports, Delivery, Security |
Warranty and Support
The FUXGZ Mini Body Camera comes with a 30-day manufacturer warranty from the date of purchase. This warranty covers defects in materials and workmanship under normal use. It does not cover damage caused by misuse, accidents, unauthorized modifications, or improper maintenance.
For technical support, warranty claims, or further assistance, please contact FUXGZ customer service through the retailer where the product was purchased.