
Introduction
Thank you for choosing MANSNIX Smart Motorized Blackout Roller Shades. This manual provides detailed instructions for the safe and efficient installation, operation, and maintenance of your new roller shades. Please read this manual thoroughly before installation and keep it for future reference.
Safety Information
- Ensure all components are securely installed before operating the shades.
- Keep the remote control out of reach of children to prevent unintended operation.
- Do not attempt to manually force the shades up or down, as this may damage the motor.
- Use only the specified AA batteries for the motor.
Package Contents
Verify that all items are present in your package:
- Motorized Roller Shade
- Valance (Cover)
- 1-Channel Remote Control
- AA Batteries (4 pieces)
- Mounting Hardware (for optional drilling installation)
- User Manual
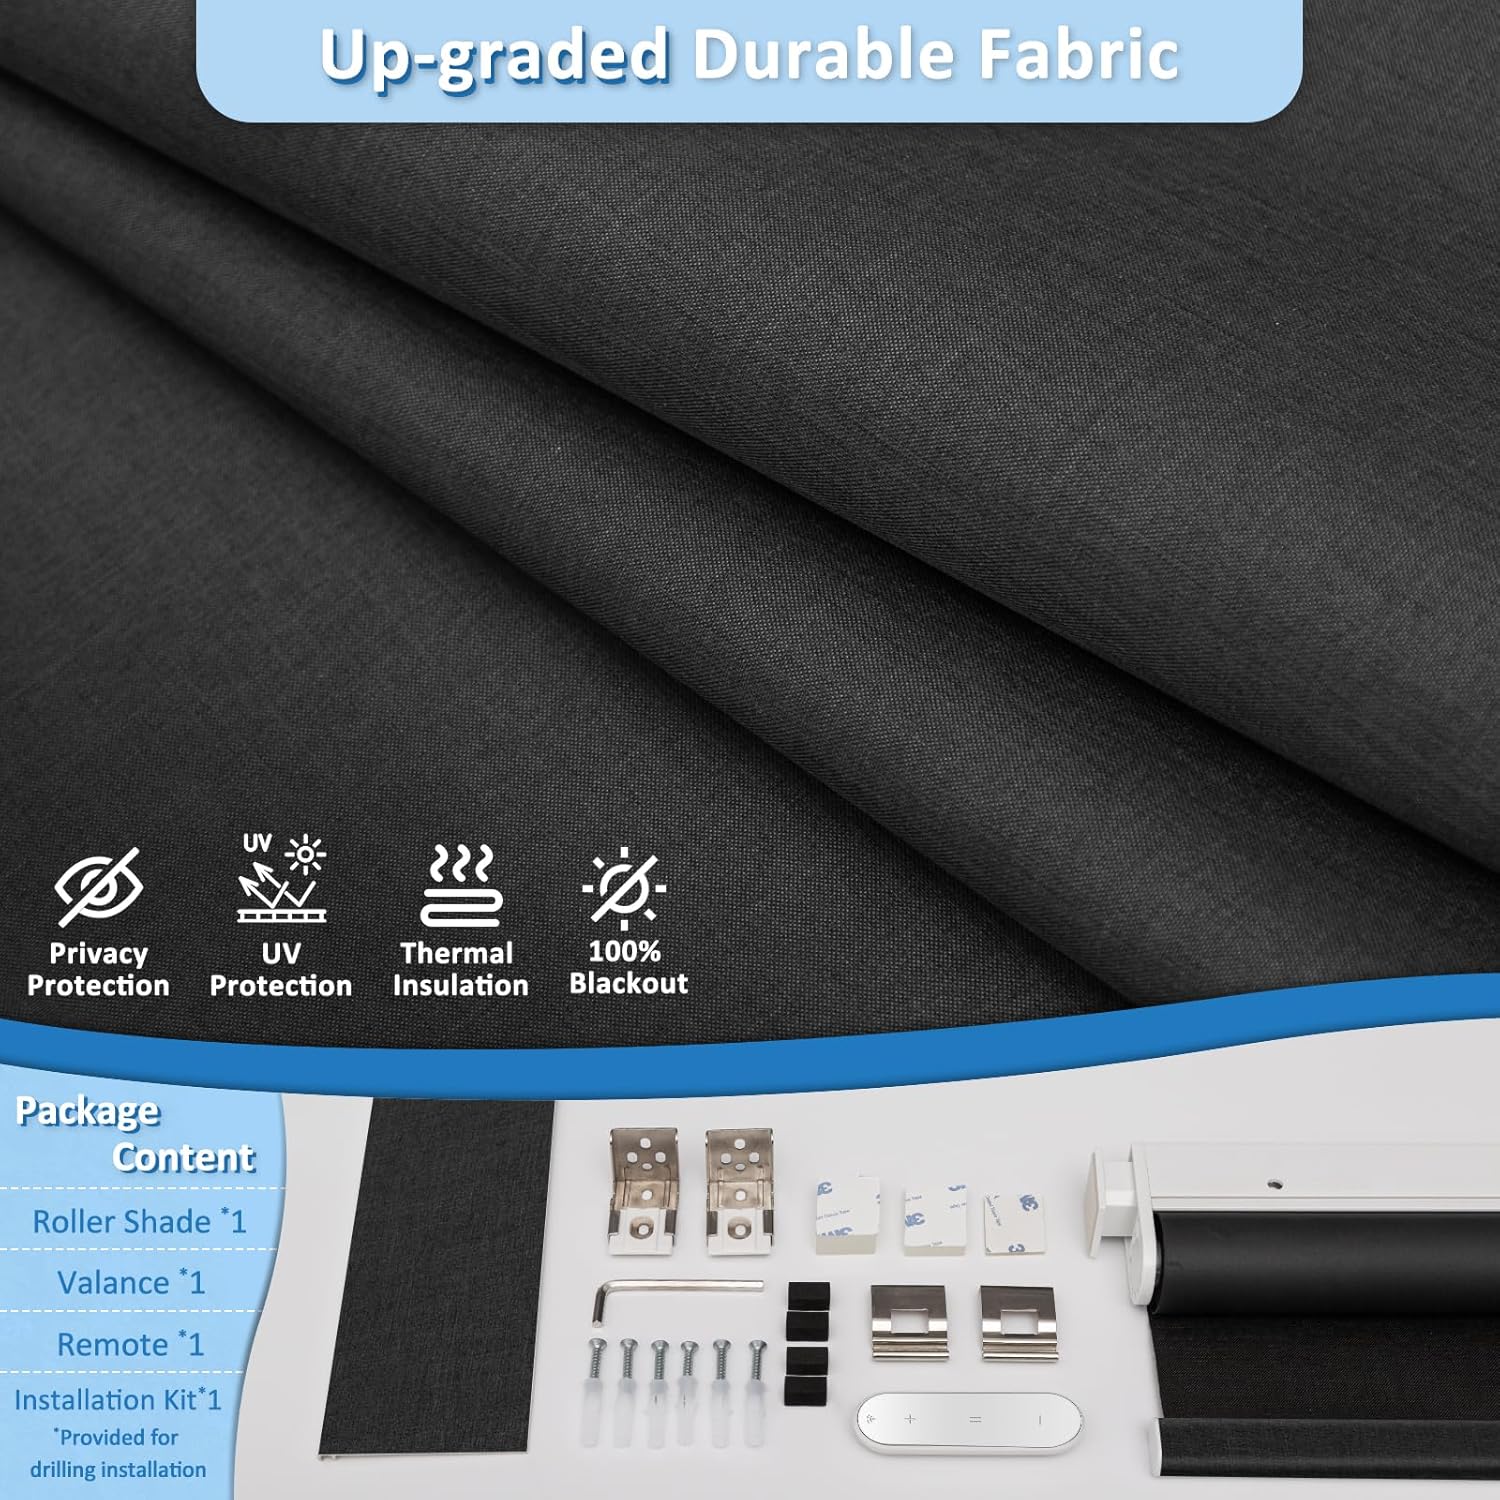
Image: Package contents including the roller shade, remote, and mounting hardware.
Setup & Installation
Your MANSNIX Smart Motorized Blinds feature an easy no-drill installation method. Optional drilling hardware is also included if preferred.
1. Measuring Guide (for Inside Mount)
For optimal fit, ensure your window frame is deeper than 1.5 inches. The motorized blinds can be lowered to a maximum of 72 inches. The default height can be adjusted using the remote control.
- Window Depth: Must be ≥ 1.5 inches.
- Window Width: Minimum of the inner frame widths (W1, W2, W3).
- Window Height: Minimum of the inner frame heights (H1, H2, H3).
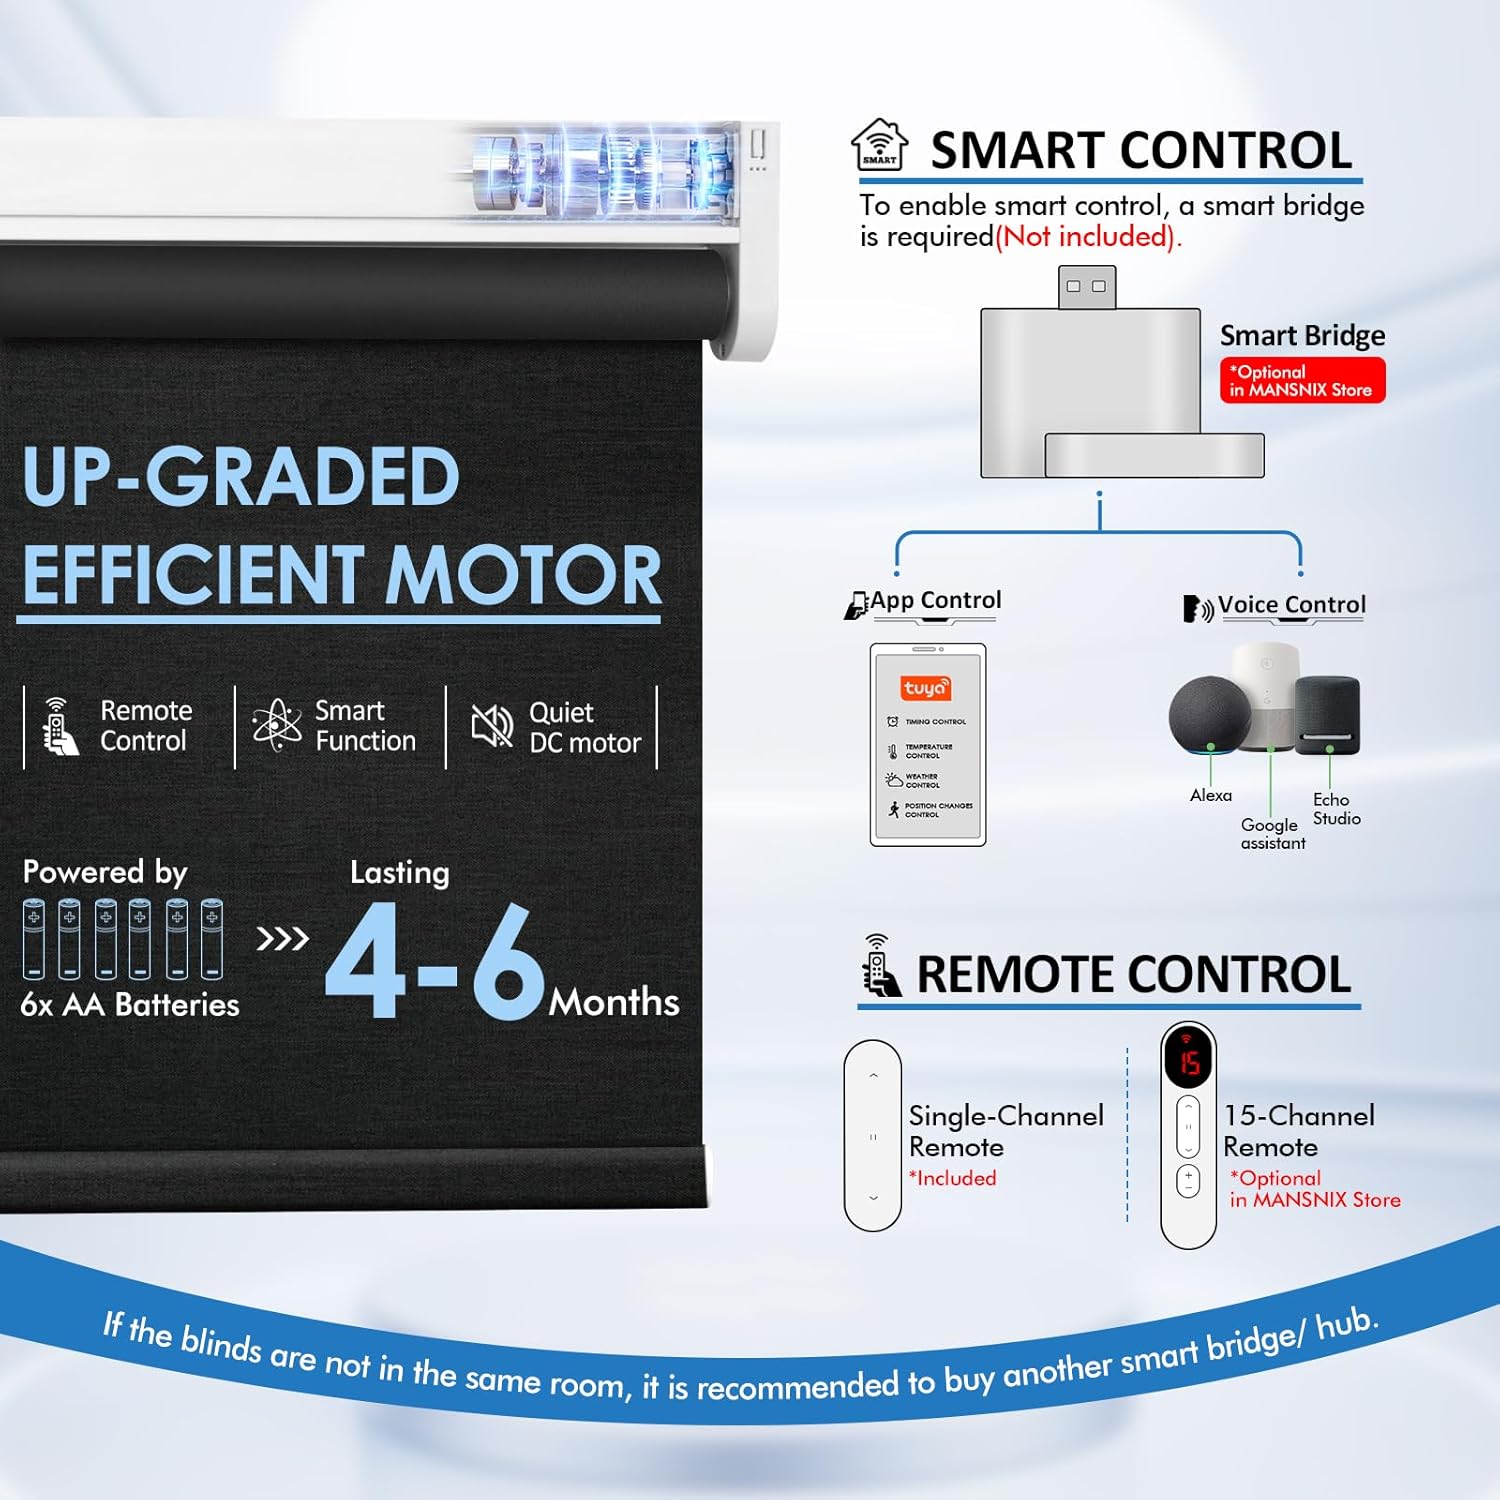
Image: Detailed measuring guide for inside mount installation.

Image: Size selection recommendation table.
2. No-Drill Installation Steps
- Unlock: Rotate the no-drill device counterclockwise and push it tightly against the wall.
- Adjust: Push up the other side until the rod is even and the shade is level.
- Lock: Ensure the blinds are fixed and stable, then lock the no-drill device clockwise.
- Attach Cover: Secure the valance (cover) over the top rail.
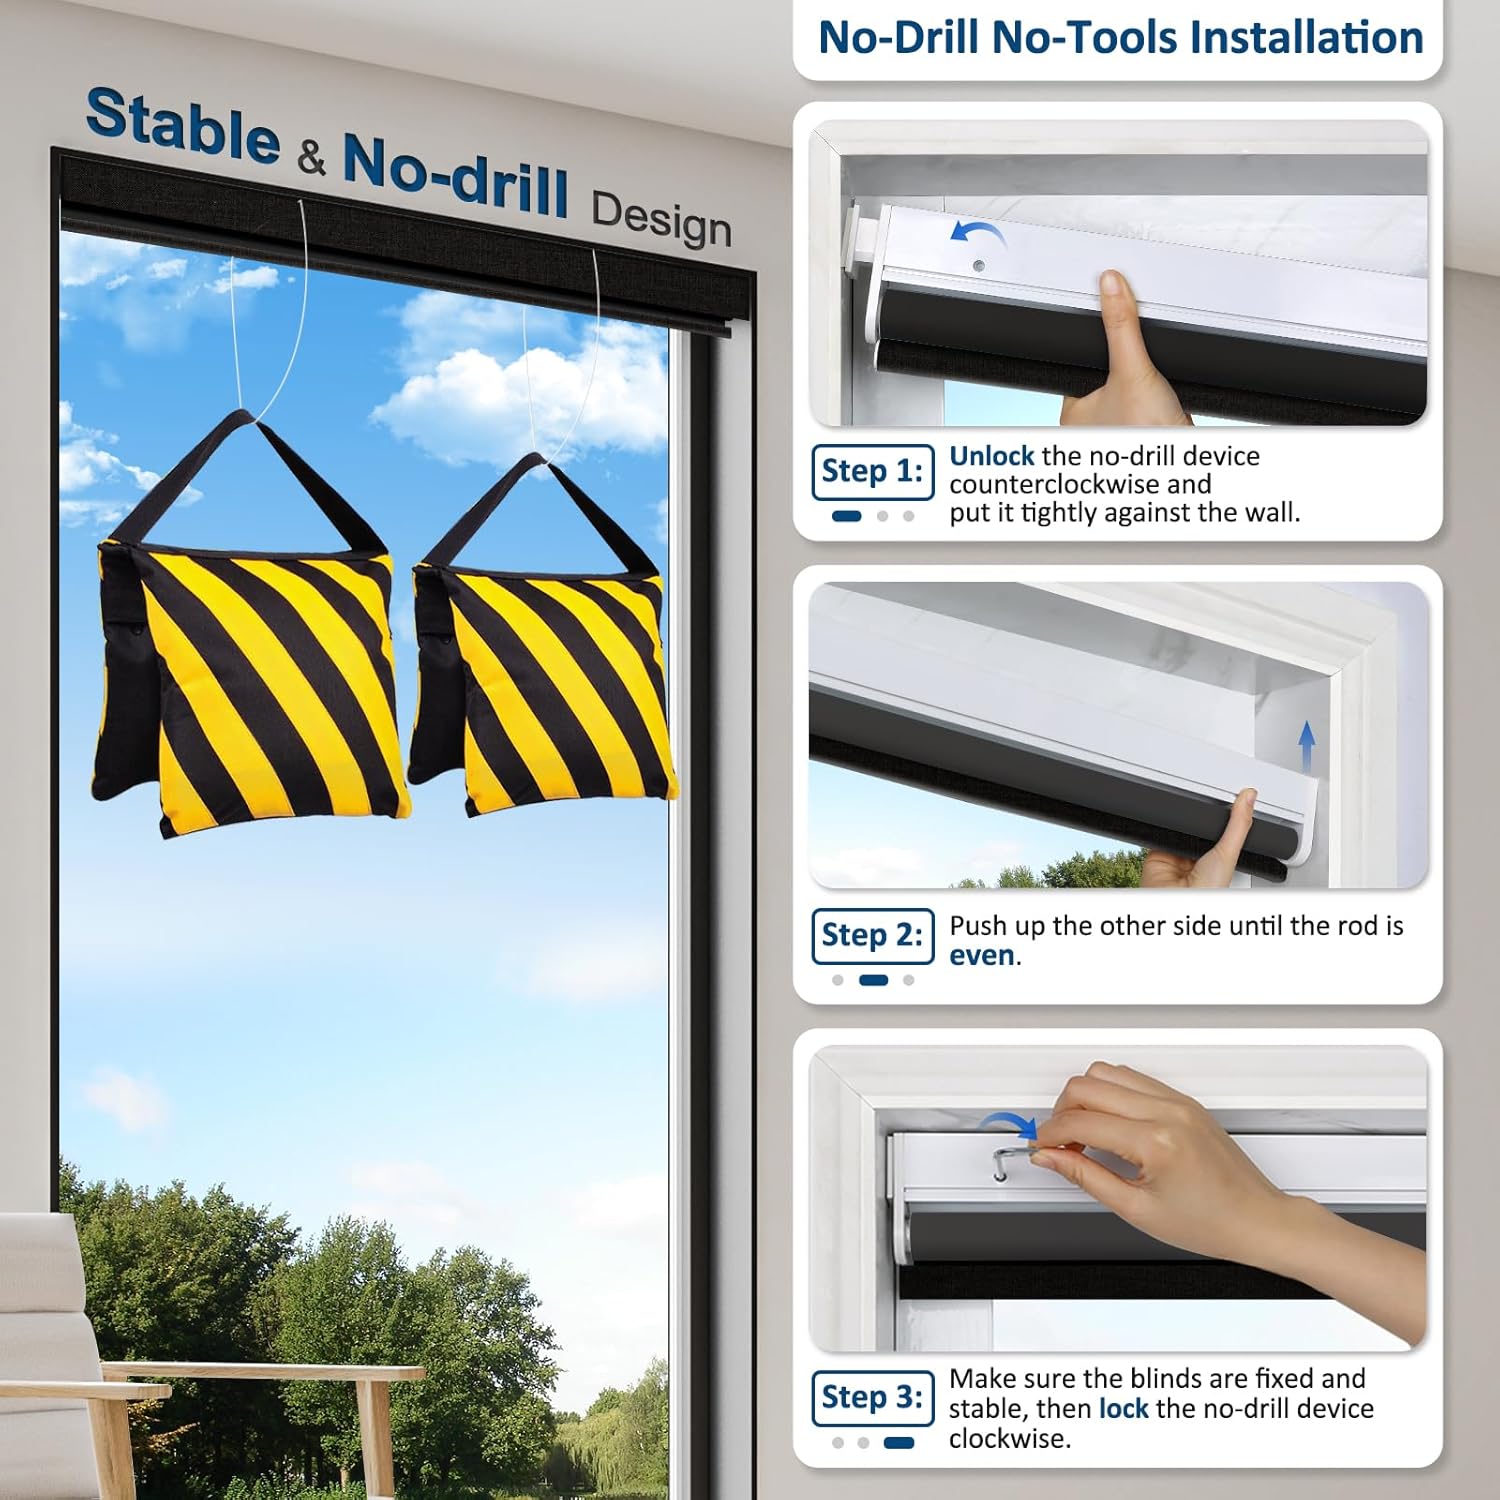
Image: Visual guide for the 3-step no-drill installation process.
Installation Video
Video: MANSNIX No-drill Smart Shades Presentation and Installation. This video demonstrates the installation process for the smart shades.
Operating Instructions
1. Battery Installation
The shades are powered by 4 AA batteries (included). The battery compartment is located on the top rail for easy access. Replace batteries every 4-6 months for optimal performance.
2. Remote Control Operation
Your shades come with a 1-channel remote for basic up, down, and stop functions. The remote provides cord-free and child-safe operation.
- Press the Up arrow to raise the shades.
- Press the Down arrow to lower the shades.
- Press the Pause/Stop button to halt the shades at any desired position.

Image: The included 1-channel remote control.
3. Smart Control (Optional)
For advanced control, you can upgrade your system:
- 15-Channel Remote: Available separately, allows for group control of multiple shades.
- Smart Hub: An optional smart hub (available in MANSNIX Store) enables app control and voice control via platforms like Amazon Alexa, Google Home, Apple HomeKit, and SmartThings.
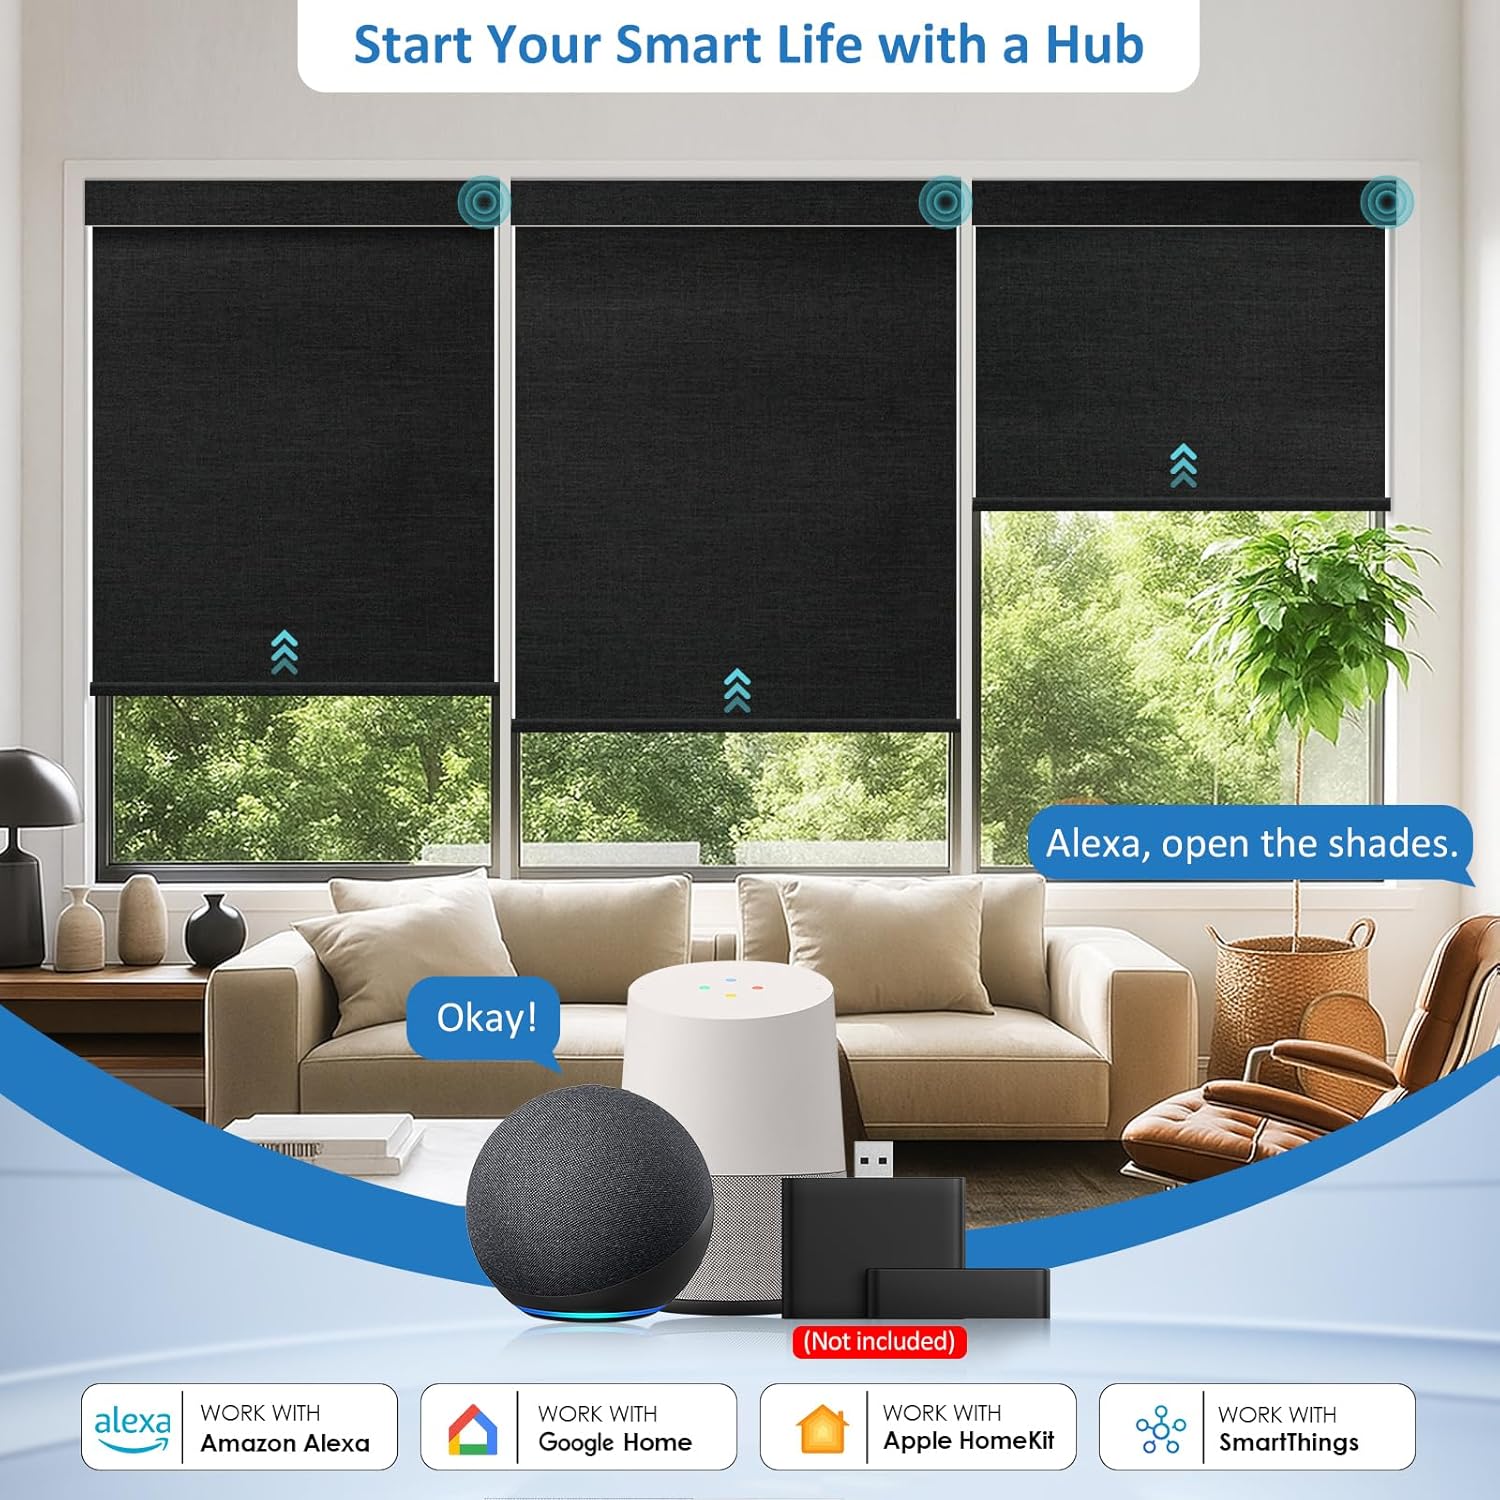
Image: Smart home integration with a hub for app and voice control.
Product Overview Video
Video: Meet M500 Pro Lux Series Shades. This video provides an overview of the smart shades and their features.
Maintenance
1. Cleaning
To clean the blackout fabric, gently wipe with a soft, damp cloth. Avoid harsh chemicals or abrasive cleaners that could damage the material.
2. Battery Replacement
When the shades respond slowly or stop functioning, it's time to replace the AA batteries. Open the battery compartment on the top rail, remove old batteries, and insert new ones, ensuring correct polarity.
Troubleshooting
- Shades not responding to remote: Check battery levels in both the remote and the shades. Ensure the remote is paired correctly.
- Shades not moving smoothly: Inspect the installation for any obstructions or misalignment. Ensure the no-drill mechanism is securely locked.
- Smart control issues: Verify your smart hub is properly connected to your network and the shades are paired with the hub. Consult the smart hub's manual for specific troubleshooting.
Specifications
| Feature | Detail |
|---|---|
| Product Dimensions | 72"L x 34"W |
| Brand | MANSNIX |
| Color | Black |
| Recommended Uses | Indoor, Window |
| Room Type | Bathroom, Bedroom, Home Office, Kitchen, Living Room |
| Special Features | Eco-Friendly, Motorized, Thermal Insulation, Tool Free Installation, UV Protection |
| Included Components | AA Batteries (4 pieces), Mounting Hardware, User Manual |
| Size | 34"W x 72"H |
| Mounting Type | Inside Mount |
| Control Type | Motorized, Wireless, Smart Control |
| Item Weight | 4.4 pounds |
| Model Number | B0G5PX97LJ |
Warranty and Support
MANSNIX provides comprehensive customer support for your motorized roller shades:
- 60-Day Repair and Replacement Policy: Covers initial issues and defects.
- 2-Year Warranty: Protects your investment against manufacturing defects.
For any questions, troubleshooting assistance, or warranty claims, please contact MANSNIX customer service through the retailer where you purchased the product.