
1. Introduction
The EPOMAKER TH108 PRO is a full-size mechanical keyboard designed for versatility and performance. It features a 104-key layout, tri-mode connectivity (USB-C, 2.4GHz wireless, Bluetooth), a customizable smart screen with a multi-function knob, hot-swappable switches, and vibrant RGB backlighting. This manual provides comprehensive instructions to help you set up, operate, and maintain your keyboard.
2. Package Contents
- EPOMAKER TH108 PRO Full-Size Gaming Keyboard x 1
- USB A-to-C Cable x 1
- Wireless 2.4Ghz Receiver x 1 (stored under the left kickstand)
- Spare Switches x 2
- 2-in-1 Switch & Keycap Puller x 1
- Multi-language Manual x 1
3. Setup
3.1 Initial Charging
Before first use, connect the keyboard to a USB power source using the provided USB A-to-C cable to fully charge the 10000mAh battery. The screen will indicate charging status.
3.2 Connectivity Modes
The TH108 PRO supports three connection modes: Wired (USB-C), 2.4GHz Wireless, and Bluetooth. Use the switch located on the back of the keyboard to select your desired mode.

Image: Tri-mode connectivity options (USB-C, 2.4GHz, Bluetooth) and compatible devices (Tablets, Laptops, PC, Phone).
3.2.1 Wired Connection (USB-C)
- Set the mode switch on the back of the keyboard to 'USB'.
- Connect the USB-C cable to the keyboard and the USB-A end to your computer.
- The keyboard will be recognized automatically.
3.2.2 2.4GHz Wireless Connection
- Locate the 2.4GHz receiver stored under the left kickstand of the keyboard.
- Set the mode switch on the back of the keyboard to '2.4G'.
- Plug the 2.4GHz receiver into an available USB port on your computer.
- The keyboard should connect automatically.

Image: The 2.4GHz dongle storage slot located on the back of the keyboard.
3.2.3 Bluetooth Connection
- Set the mode switch on the back of the keyboard to 'BT'.
- Press and hold FN + 1, FN + 2, or FN + 3 for 3 seconds to enter pairing mode. The corresponding key's backlight will flash rapidly.
- On your device (PC, Mac, Android), search for Bluetooth devices and select 'TH108 PRO'.
- Once paired, the backlight will stop flashing. You can pair up to 3 Bluetooth devices.
- Switch between paired Bluetooth devices by pressing FN + 1/2/3.
3.3 Kickstand Adjustment
The TH108 PRO features 2-stage adjustable kickstands, allowing you to choose from 3 typing angles for ergonomic comfort.
3.4 Software Installation
For advanced customization, including key remapping, macro recording, and screen customization, download the web-based driver from the official EPOMAKER website. The software is compatible with Mac and Windows operating systems.

Image: The customizable software interface for TFT Screen, Macro Manager, Lighting Settings, System Settings, and Custom Keys.
4. Operating Instructions
4.1 Basic Key Functions
The TH108 PRO is a standard 104-key full-size keyboard. All keys function as labeled in their default state.
4.2 Smart Screen & Knob Functions
The integrated smart screen displays important information such as time, battery level, and connectivity mode. The multi-function knob allows for quick adjustments.
- Knob Rotation: Adjusts volume by default.
- Knob Press: Mutes/unmutes audio by default.
- FN + Knob Press: Switches the knob's function between volume control and screen control (e.g., RGB brightness, speed).
- Customization: Use the software to upload custom GIFs or images to the screen.
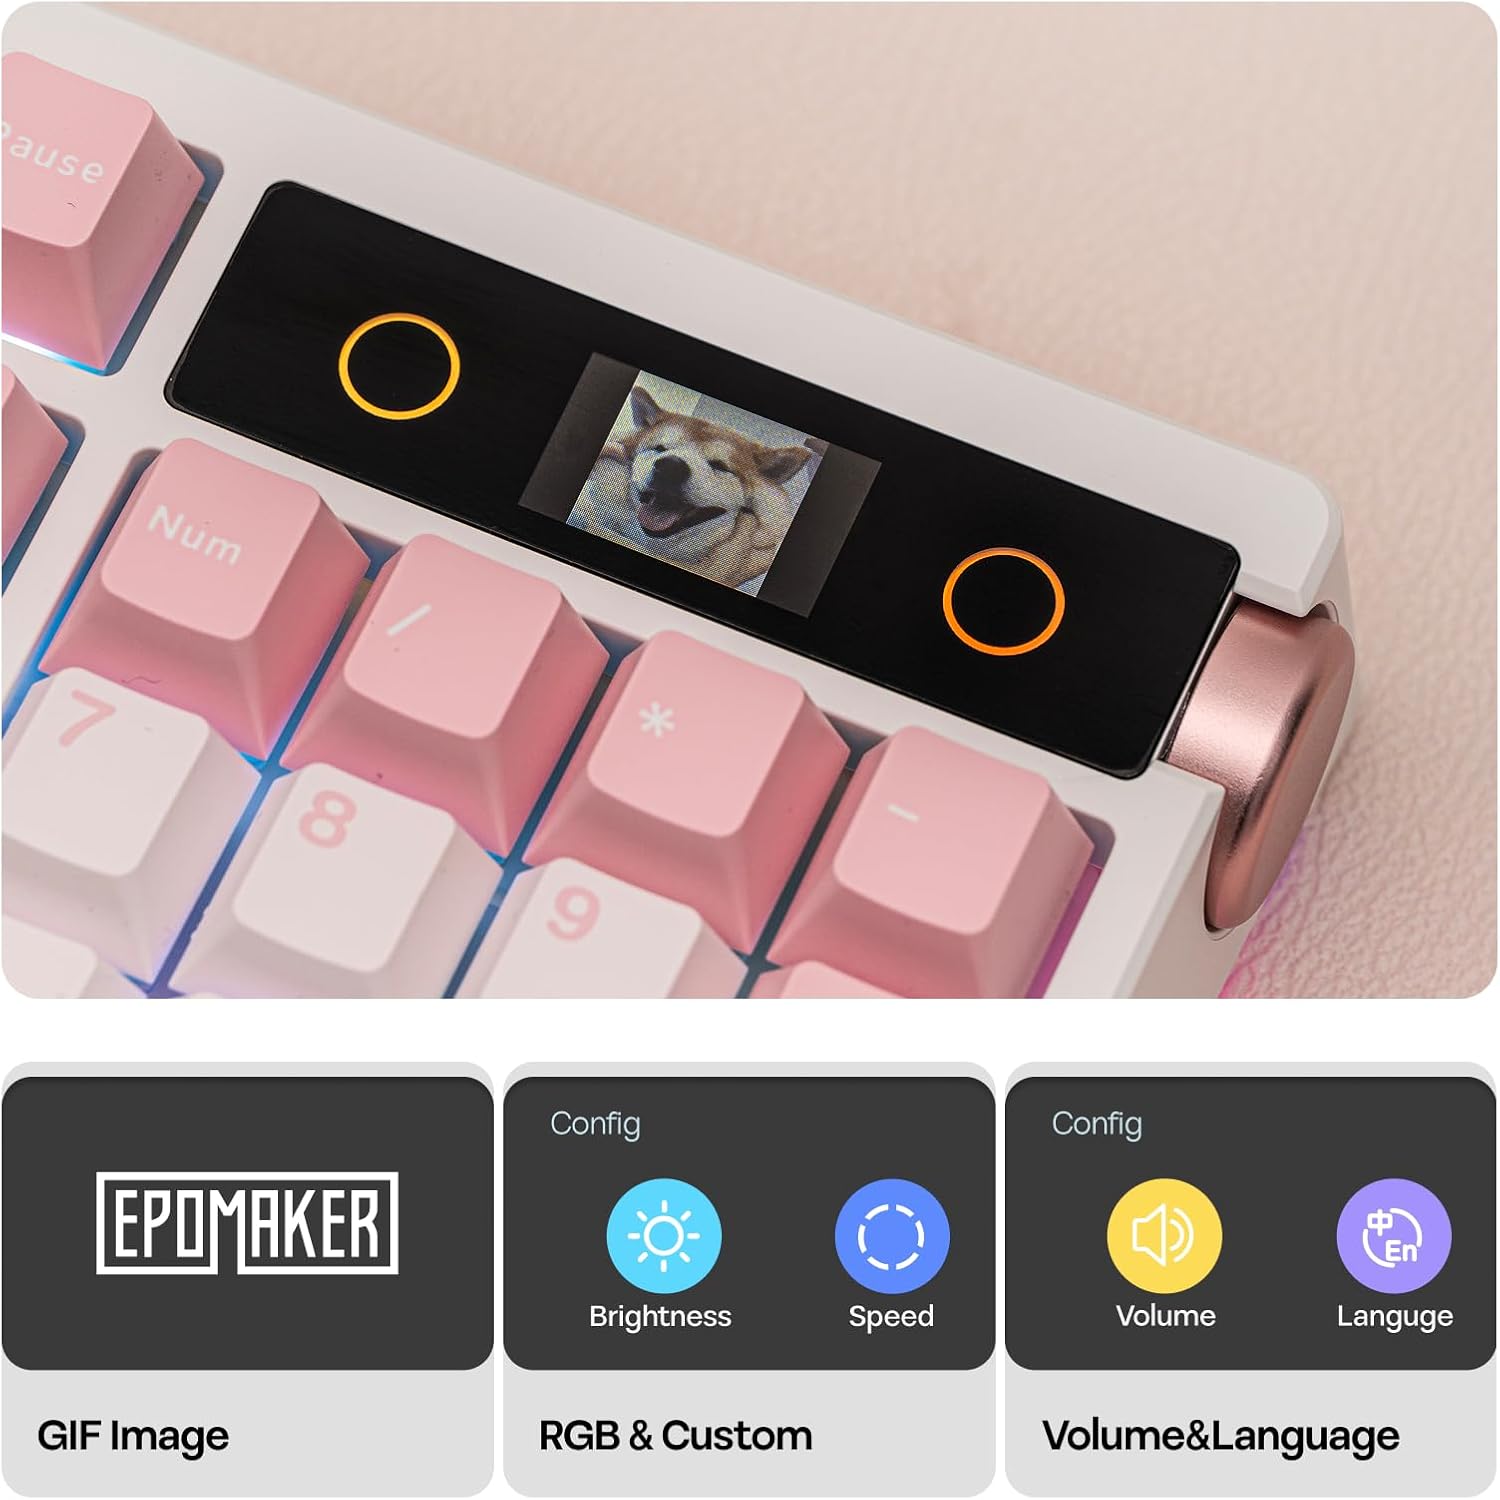
Image: The smart screen and knob offer customization for GIF images, RGB settings, volume, and language.
4.3 RGB Backlighting
The keyboard features south-facing, per-key RGB LEDs. You can adjust lighting effects, colors, brightness, and speed using the keyboard's function keys or the customization software.
- FN + \|: Change lighting effect.
- FN + Arrow Keys: Adjust brightness and speed.
- Software: For advanced RGB customization and dynamic effects.
4.4 Mac/Windows Compatibility
The TH108 PRO is compatible with both Mac and Windows operating systems. Use the dedicated switch or key combination (if available) to switch between layouts. The customization software also supports both OS.
Image: The keyboard features a switch for Win/Mac compatibility.
5. Maintenance
5.1 Cleaning the Keyboard
- Disconnect the keyboard from all power sources.
- Use a soft, lint-free cloth slightly dampened with water or a mild cleaning solution to wipe the keycaps and case.
- For dust and debris between keys, use compressed air or a small brush.
- Avoid harsh chemicals or abrasive materials.
5.2 Keycap and Switch Replacement (Hot-Swappable)
The TH108 PRO features a hot-swappable PCB, allowing you to change switches without soldering. It is compatible with 5-pin mechanical switches.

Image: A switch being removed from the hot-swappable socket, showing south-facing LEDs and finely-tuned stabilizers.
- Removing Keycaps: Use the provided keycap puller to gently remove keycaps by pulling straight up.
- Removing Switches: Use the provided switch puller to carefully grip the top and bottom clips of the switch and pull it straight out.
- Installing Switches: Align the pins of the new switch with the holes on the PCB. Gently push the switch down until it clicks into place. Ensure pins are not bent.
- Installing Keycaps: Align the keycap with the switch stem and push down firmly.
5.3 Battery Care
- Avoid exposing the keyboard to extreme temperatures.
- Charge the battery regularly, but avoid leaving it fully discharged for extended periods.
- For optimal battery life, consider turning off RGB lighting when not needed.

Image: The keyboard offers up to 42 hours of battery life with RGB on and 200 hours with RGB off.
6. Troubleshooting
6.1 Keyboard Not Responding
- Ensure the keyboard is charged.
- Check the connection mode switch (USB, 2.4G, BT) is set correctly.
- For wired mode, try a different USB port or cable.
- For 2.4GHz, ensure the receiver is securely plugged in and try a different USB port.
- For Bluetooth, re-pair the device or try connecting to a different Bluetooth slot (FN+1/2/3).
- Restart your computer.
6.2 RGB Lighting Issues
- Ensure RGB is enabled via FN key combinations or software.
- Check brightness settings.
- If specific keys are not lighting up, check if the switch is properly seated or if the LED is damaged (requires switch replacement).
6.3 Smart Screen Not Displaying
- Ensure the keyboard is powered on.
- Check if the screen brightness is set too low.
- If custom content was uploaded, ensure it is in a compatible format.
- Try resetting the keyboard (refer to software or manufacturer's website for specific instructions).
6.4 Software Not Detecting Keyboard
- Ensure the keyboard is connected via USB-C.
- Close and reopen the software.
- Reinstall the software from the official EPOMAKER website.
- Update your operating system drivers.
7. Specifications
| Feature | Description |
|---|---|
| Brand | EPOMAKER |
| Model | TH108 PRO |
| Layout | 100% Full-Size (104 keys) |
| Connectivity | USB-C Wired, 2.4GHz Wireless, Bluetooth (up to 3 devices) |
| Compatibility | Mac, Windows, Android |
| Battery | 10000mAh Rechargeable |
| Polling Rate | 1000Hz (USB, 2.4GHz), 125Hz (Bluetooth) |
| Latency | 2ms (USB), 5ms (2.4GHz), 11ms (Bluetooth) |
| Mounting Structure | Gasket Mount |
| Case Material | Thick ABS Plastic |
| Plate Material | PC Plastic (Flex-cut) |
| Stabilizers | Plate-mount, finely tuned |
| Sound Dampening | 5 layers (PORON sandwich foam, IXPE switch pad, PET, PORON switch socket foam, bottom silicone) |
| Keycap Profile | Cherry Profile |
| Keycap Material | Double-shot PBT Plastic |
| Switches | Hot-swappable (5-pin mechanical switches) |
| RGB | South-facing, per-key LED |
| Anti-Ghosting | N-key rollover (NKRO) |
7.1 EPOMAKER Sea Salt Silent V2 Switch Specifications
| Parameter | Value |
|---|---|
| Switch Type | 5-pin Mechanical, Silent, Linear, Pre-lubed |
| Trigger Force | 45 ± 5gf |
| Bottom-out Force | 51 ± 5gf |
| Pre-travel | 1.8 ± 0.4mm |
| Total Travel | 3.5 ± 0.4mm |
| Top Case | Transparent PC |
| Bottom Case | Light Blue PA66 |
| Stem | Yellow POM |
| Special Feature | Dustproof |
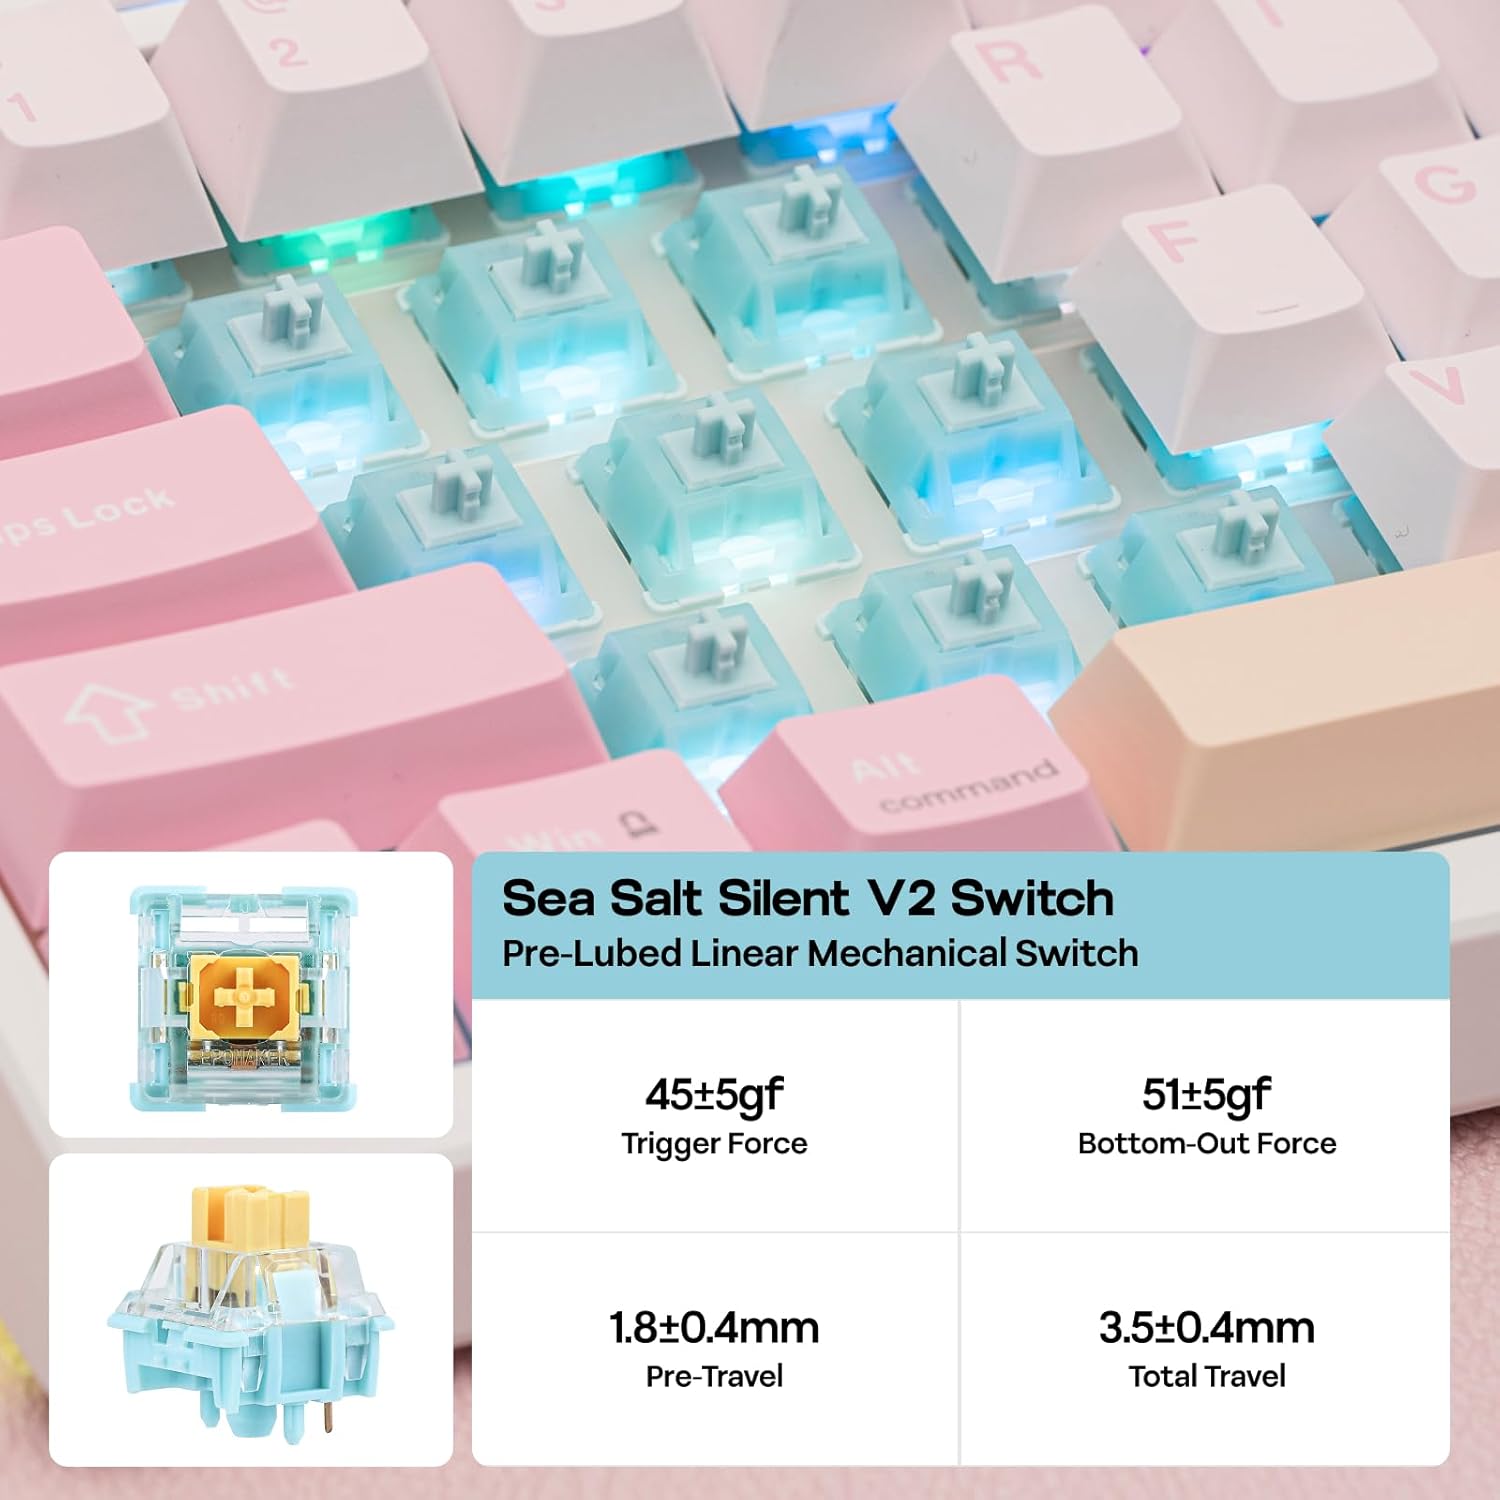
Image: Detailed specifications for the Sea Salt Silent V2 Switch.
8. Warranty
EPOMAKER products typically come with a standard manufacturer's warranty. For detailed information regarding warranty periods, coverage, and claims, please refer to the official EPOMAKER website or contact their customer support directly. Keep your proof of purchase for warranty validation.
9. Support
If you encounter any issues or have questions not covered in this manual, please visit the official EPOMAKER support page or contact their customer service team. You can usually find contact information and FAQs on their website:


