
1. Introduction
Thank you for choosing the Ollygrin Conical Burr Coffee Grinder Electric. This manual provides essential information for the safe operation, maintenance, and troubleshooting of your new coffee grinder. Please read it thoroughly before first use and retain it for future reference.
This electric coffee grinder is designed to provide uniform and consistent grinding for various brewing methods, preserving the aroma and flavor of your coffee beans. It features 30 precise grind settings, a touch panel for easy control, and removable parts for convenient cleaning.

Image: The Ollygrin Conical Burr Coffee Grinder Electric, showcasing its sleek design and components.
2. Safety Instructions
To ensure safe operation and prevent damage, please observe the following safety precautions:
- Read all instructions before using the appliance.
- Do not immerse the motor base, cord, or plug in water or other liquids.
- Close supervision is necessary when the appliance is used by or near children.
- Unplug from outlet when not in use, before assembling or disassembling parts, and before cleaning.
- Avoid contact with moving parts.
- Do not operate any appliance with a damaged cord or plug, or after the appliance malfunctions or has been damaged in any manner.
- Use only attachments recommended or sold by the manufacturer.
- Do not use outdoors.
- Do not let the cord hang over the edge of a table or counter, or touch hot surfaces.
- Ensure the bean hopper lid and ground coffee container are properly in place before operating.
3. Package Contents
Please check the package for the following items:
- Ollygrin Conical Burr Coffee Grinder Electric (Main Unit)
- Bean Hopper with Lid
- Ground Coffee Container with Lid
- Cleaning Brush
- User Manual
4. Product Diagram
Familiarize yourself with the components of your coffee grinder:
- Bean Hopper
- Bean Hopper Lid
- Grind Size Selector Dial
- Upper Burr (Removable)
- Lower Burr
- Motor Base
- Touch Control Panel (Power, Cup/Time Selection)
- Ground Coffee Container
- Ground Coffee Container Lid
Image: A detailed view of the Ollygrin coffee grinder, illustrating its main parts.
5. Setup
Follow these steps to set up your coffee grinder for first use:
- Unpack: Carefully remove all components from the packaging.
- Clean: Wash the bean hopper, bean hopper lid, ground coffee container, and its lid in warm, soapy water. Rinse thoroughly and dry completely. Wipe the motor base with a damp cloth.
- Assemble Hopper: Place the bean hopper onto the motor base. Rotate it clockwise until it locks securely into position. Ensure the safety lock mechanism is engaged.
- Position Container: Slide the ground coffee container into its designated slot on the front of the grinder.
- Power Connection: Place the grinder on a stable, flat, and dry surface. Plug the power cord into a standard 120V AC electrical outlet.

Image: A close-up view demonstrating the safety lock mechanism for the bean hopper.
6. Operating Instructions
6.1 Adding Coffee Beans
- Remove the bean hopper lid.
- Pour whole roasted coffee beans into the hopper. Do not overfill.
- Replace the bean hopper lid securely.
6.2 Selecting Grind Size
Your grinder offers 30 precise grind settings, suitable for various brewing methods. Rotate the grind size selector dial to choose your desired fineness:
- Fine (1-8): Ideal for Espresso.
- Medium (9-21): Suitable for Pour Over, Siphon, and Mocca pots.
- Coarse (22-30): Recommended for French Press.

Image: The grind size selector dial showing 30 settings and recommended ranges for different brewing methods.
6.3 Setting Grinding Quantity/Time
Use the intuitive touch panel to select your desired grinding quantity or time:
- Cups Selection: Press the '+' or '-' buttons to select the number of cups (1-12 cups). The grinder will automatically grind for the appropriate duration.
- Time Selection: Alternatively, you can set the grinding time manually from 1 to 60 seconds.

Image: The touch control panel displaying options for time and cup selection.
6.4 Starting and Stopping Grinding
- After selecting the grind size and quantity/time, press the Power button on the touch panel to start grinding.
- The grinder will automatically stop once the selected time or quantity is reached.
- To stop grinding manually at any time, press the Power button again.
7. Maintenance and Cleaning
Regular cleaning ensures optimal performance and extends the lifespan of your grinder.
7.1 Daily Cleaning
- After each use, remove the ground coffee container and empty it. Wash with warm, soapy water, rinse, and dry.
- Wipe the exterior of the motor base with a damp cloth. Do not use abrasive cleaners.
7.2 Deep Cleaning (Burrs)
For thorough cleaning of the burrs:
- Unplug: Always unplug the grinder from the power outlet before cleaning.
- Remove Hopper: Rotate the bean hopper counter-clockwise to unlock and remove it from the motor base.
- Remove Upper Burr: Grasp the metal handle of the upper burr and lift it out.
- Clean Burrs: Use the provided cleaning brush to remove any coffee grounds from both the upper and lower burrs. Ensure no residue remains.
- Reassemble: Place the upper burr back into position, ensuring it clicks into place. Reattach the bean hopper by aligning it and rotating clockwise until locked.
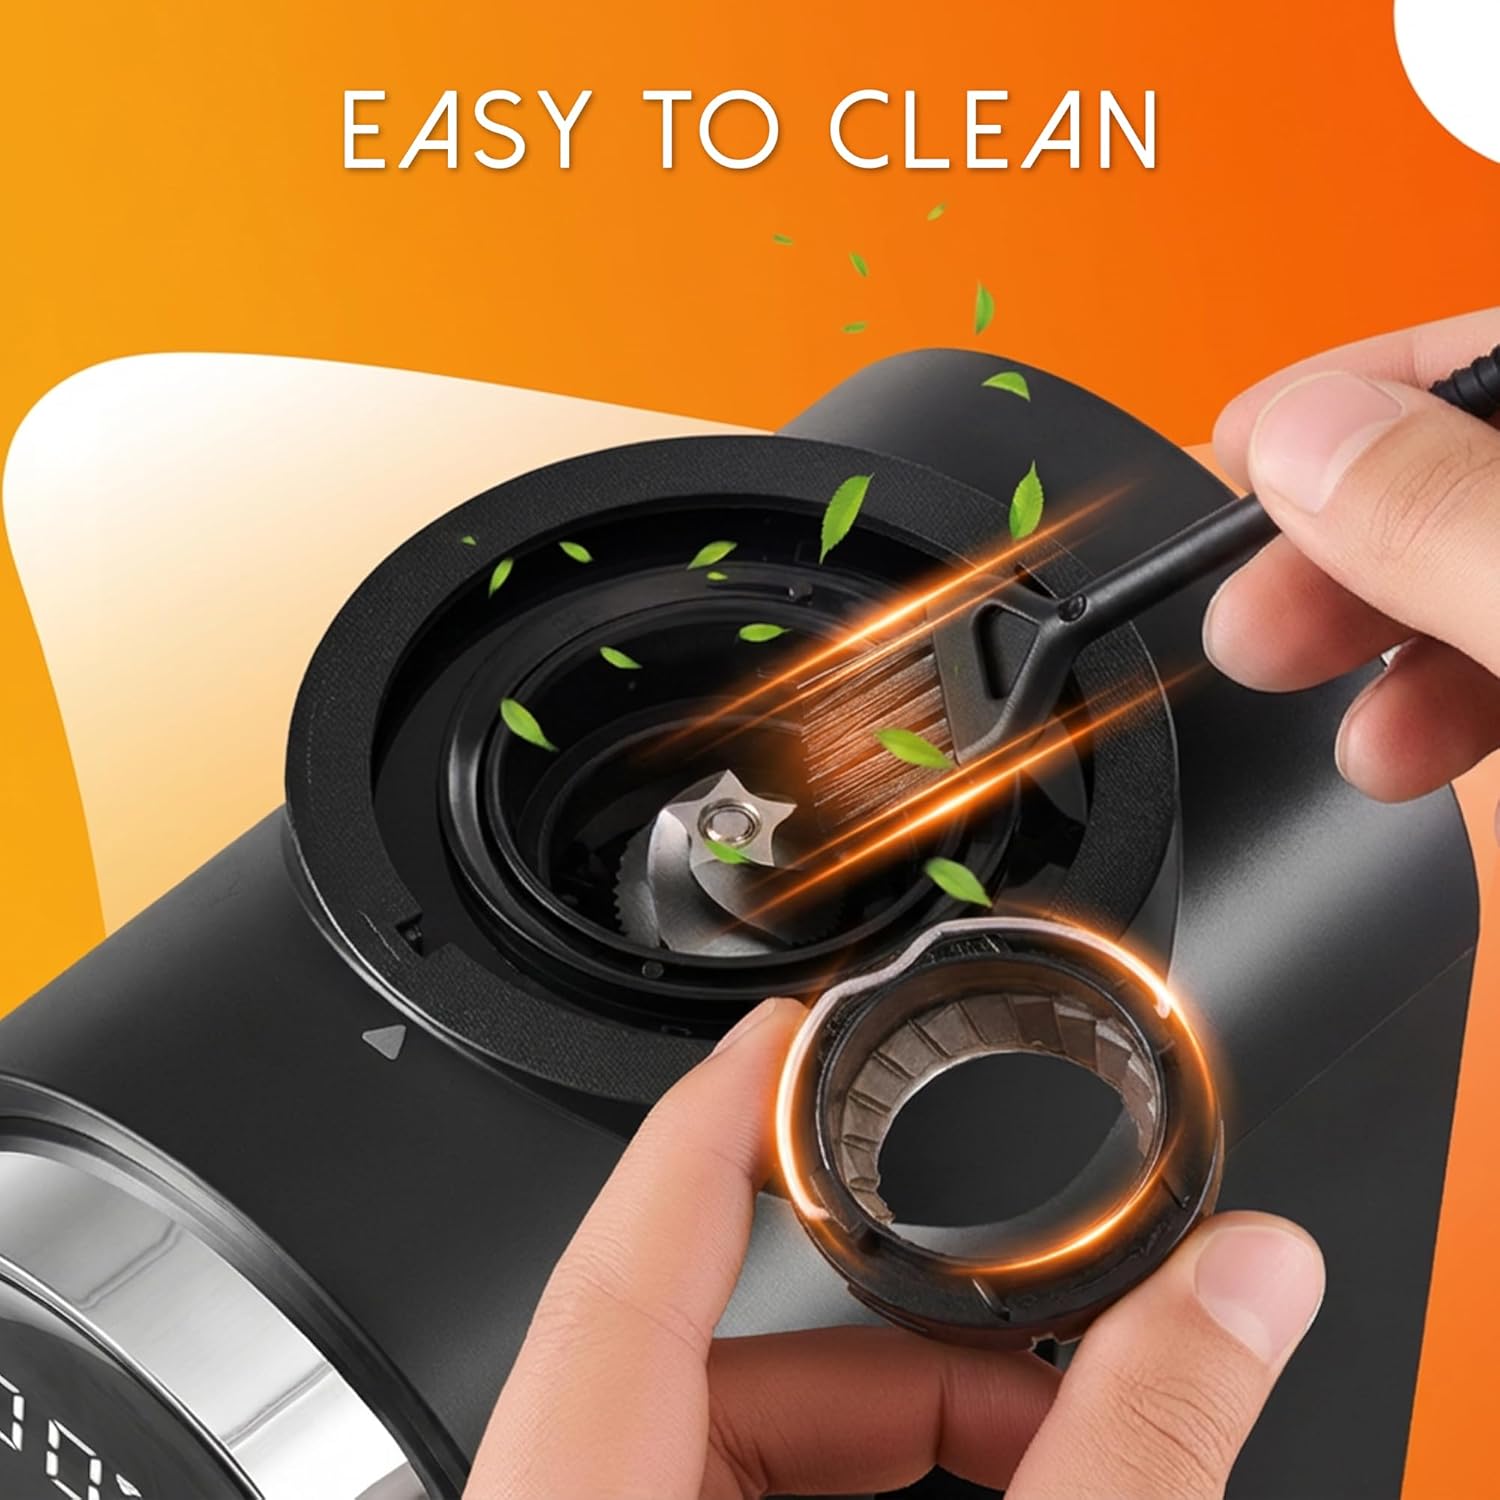
Image: A user cleaning the removable upper burr with the included brush.

Image: A close-up view of the stainless steel conical burr, highlighting its design for uniform grinding.
8. Troubleshooting
If you encounter issues with your grinder, refer to the following table:
| Problem | Possible Cause | Solution |
|---|---|---|
| Grinder does not start. | Not plugged in; Bean hopper not locked; Power button not pressed. | Ensure power cord is securely plugged in. Rotate bean hopper clockwise until it locks. Press the Power button. |
| Inconsistent grind. | Burrs are dirty or clogged; Incorrect grind setting for bean type. | Clean the burrs thoroughly using the cleaning brush. Adjust grind setting as needed. |
| Coffee grounds stick to container (static). | Static electricity buildup. | Lightly dampen the inside of the ground coffee container with a few drops of water before grinding. This can help reduce static. |
| Grinder stops unexpectedly. | Overheating; Bean hopper empty; Ground coffee container full. | Unplug and let cool for 30 minutes. Refill bean hopper. Empty ground coffee container. |
9. Specifications
- Model: BG713
- Brand: Ollygrin
- Color: Black
- Wattage: 150 Watts
- Voltage: 120 Volts
- Capacity: Up to 12 cups (coffee beans)
- Grind Settings: 30 Precise Settings
- Burr Type: Stainless Steel Conical Burr

Image: The Ollygrin coffee grinder with its approximate dimensions indicated.
10. Warranty and Support
Ollygrin products are manufactured to high-quality standards. For warranty information or technical support, please refer to the warranty card included with your purchase or contact Ollygrin customer service through the retailer where the product was purchased. Please have your model number (BG713) and purchase date available when contacting support.

