
1. Introduction
This manual provides comprehensive instructions for the ACEMAGIC K1 Mini PC. The K1 is a compact and powerful computing solution, ideal for a range of tasks from daily office work and home entertainment to video conferencing and educational applications. It features an AMD Ryzen Embedded R2544 processor, flexible memory and storage expansion options, and support for triple 4K displays. Please read this manual thoroughly to ensure proper setup, operation, and maintenance of your device.
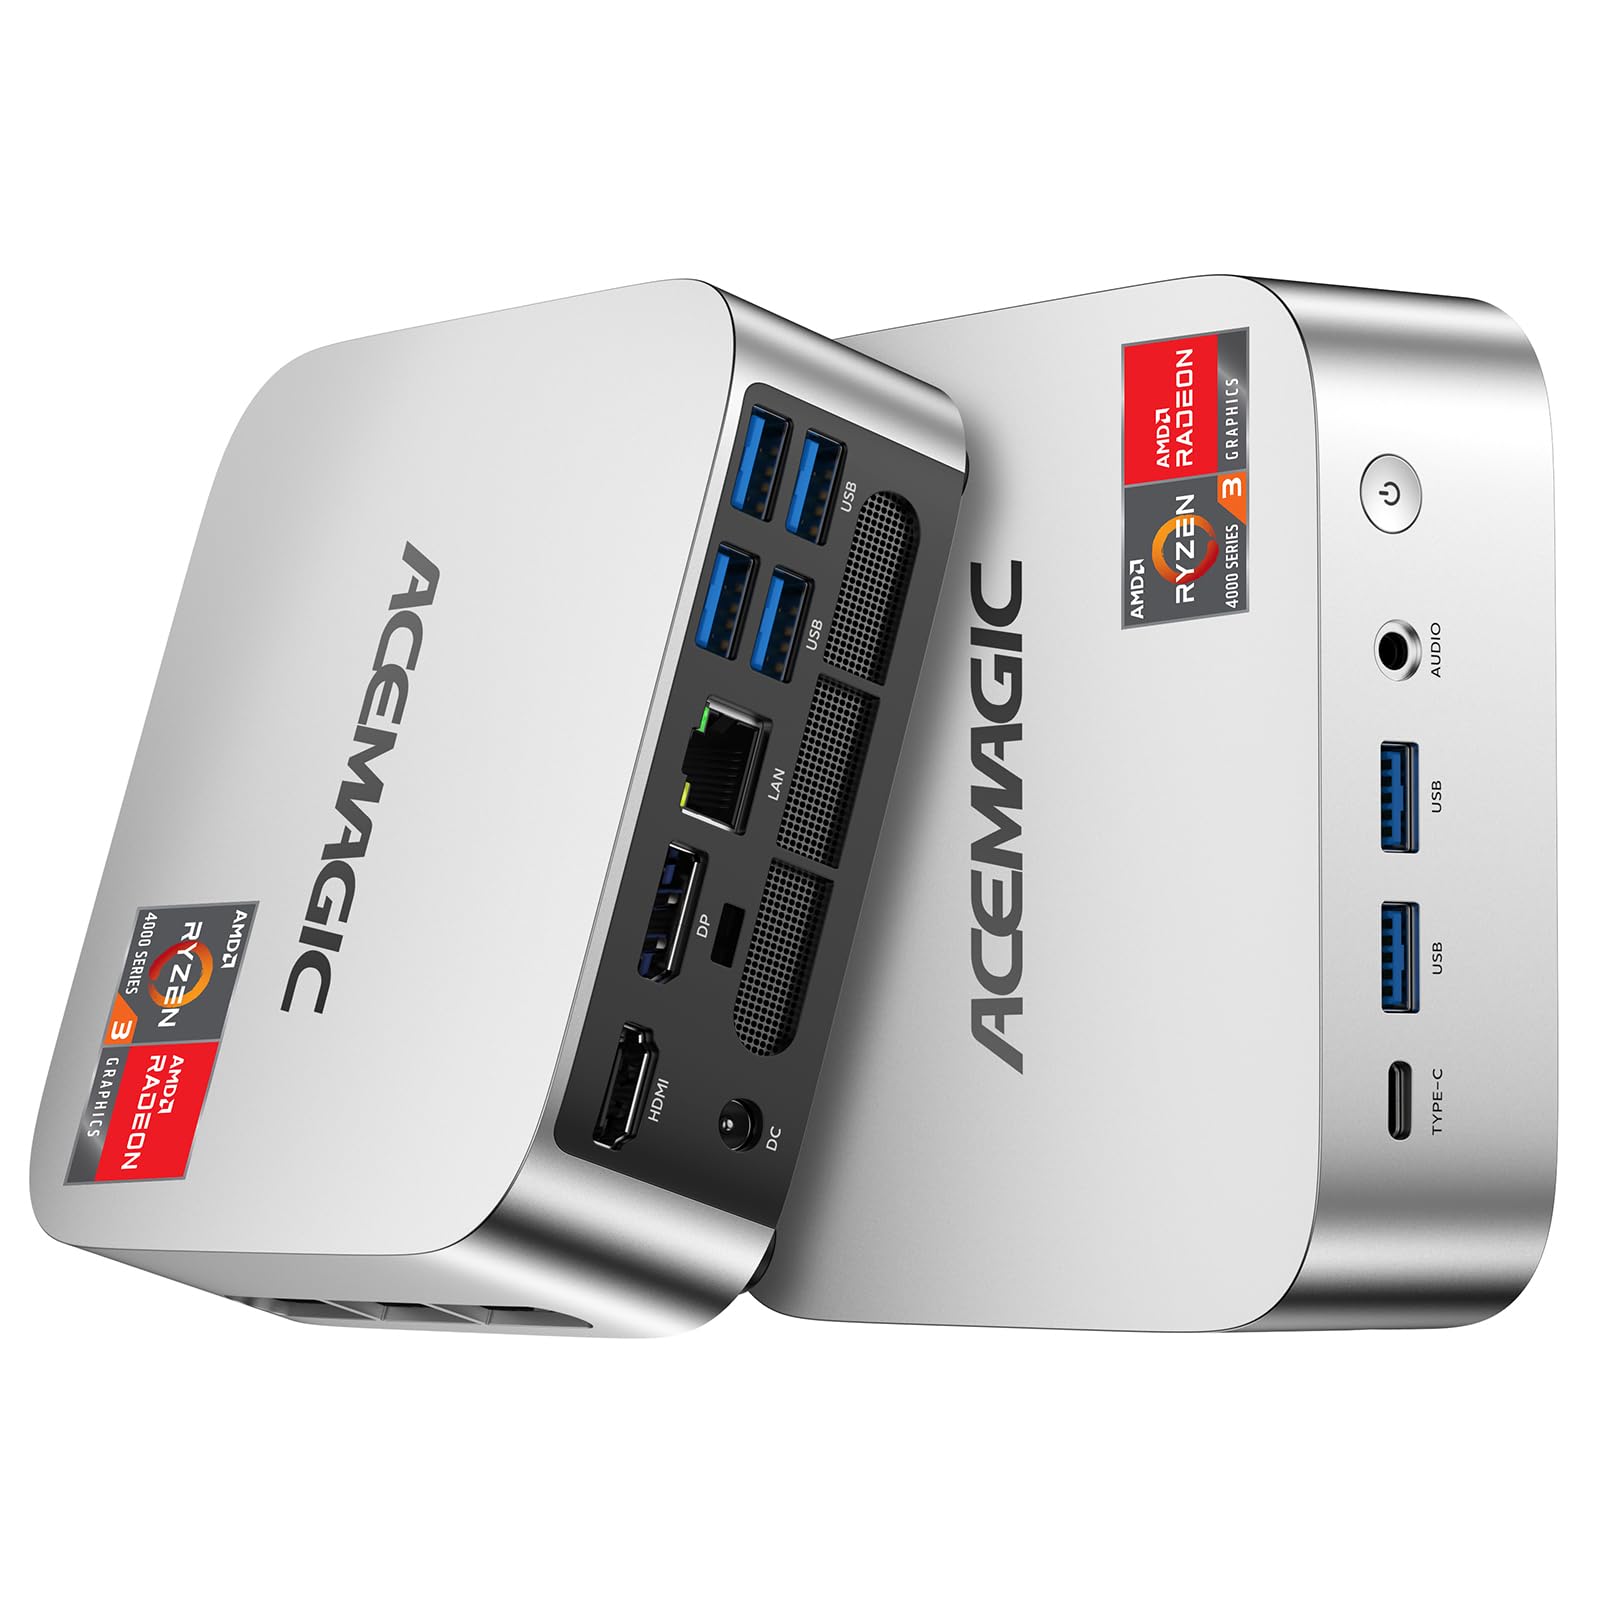
Image 1.1: Front view of the ACEMAGIC K1 Mini PC.
2. Package Contents
Verify that all items are present in the package before proceeding with the setup.
- 1 x ACEMAGIC K1 Mini PC
- 1 x Power Adapter
- 1 x HDMI Cable
- 1 x Mounting Bracket
- 1 x User Manual (this document)
3. Product Features
3.1. High-Performance Processor
The ACEMAGIC K1 Mini PC is powered by an AMD Ryzen Embedded R2544 processor, featuring 4 cores and 8 threads with a maximum turbo frequency of 3.7GHz. This processor is designed for efficient handling of demanding applications, HD video editing, and multitasking.

Image 3.1: Overview of the AMD Ryzen Embedded R2544 CPU capabilities.
3.2. Flexible Expandability
The K1 Mini PC comes with 16GB DDR4 memory and a 256GB M.2 SSD. It supports up to 32GB DDR4 memory via two SO-DIMM slots and up to 4TB storage capacity with two M.2 2280 slots (one SATA/NVMe PCIe 3.0 and one SATA). This allows for significant upgrades to meet future needs.

Image 3.2: Illustration of memory and SSD expansion capabilities.
3.3. Triple 4K Display Support
Equipped with HDMI 2.0, DisplayPort 1.4, and a Type-C port with DP video output, the K1 supports simultaneous connection of up to three 4K displays. This feature enhances productivity for multitasking, multimedia, and casual gaming.

Image 3.3: Example setup with three 4K monitors connected to the Mini PC.
3.4. Connectivity and Interfaces
The Mini PC includes a Gigabit Ethernet port (10/100/1000Mbps), WiFi 5, and Bluetooth 4.2 for versatile network connections. It offers six USB 3.2 Gen 1 Type-A ports and one USB 3.2 Gen 1 Type-C port (with DisplayPort 1.4 video output) for peripheral connectivity. Additional features include network wake-up, PSTN wake-up, and auto power-on.

Image 3.4: Detailed view of the ACEMAGIC K1 Mini PC's ports and interfaces.
3.5. Efficient Cooling and Compact Design
The K1 Mini PC features a large heatsink and a professional air duct structure for efficient heat dissipation, ensuring quiet operation even under full load. Its compact design saves desk space and is easily portable.

Image 3.5: Illustration of the efficient cooling system and quiet operation.

Image 3.6: The compact size of the ACEMAGIC K1 Mini PC, demonstrating space-saving benefits.
4. Setup Guide
4.1. Connecting Peripherals
- Connect Monitor(s): Use the HDMI, DisplayPort, or USB-C (DP Alt Mode) ports to connect your monitor(s). For triple display, use a combination of these ports.
- Connect Keyboard and Mouse: Plug your USB keyboard and mouse into any of the available USB 3.2 Gen 1 Type-A ports. Alternatively, connect Bluetooth peripherals after initial setup.
- Connect Network: For a wired connection, plug an Ethernet cable into the Gigabit Ethernet port. For wireless, connect to a Wi-Fi network during the initial Windows setup.
- Connect Power Adapter: Plug the power adapter into the DC Jack on the Mini PC, then connect it to a power outlet.

Image 4.1: Rear view of the ACEMAGIC K1 Mini PC, highlighting various ports for peripheral connections.
4.2. Initial Power On and Windows Setup
- Press the power button located on the front of the Mini PC.
- The device will boot into Windows 11 Pro. Follow the on-screen instructions to complete the initial setup, including language selection, region, network connection, and user account creation.
- Ensure your internet connection is active for Windows updates and driver installations.
5. Operating Instructions
5.1. Power Management
- Power On: Press the power button.
- Shut Down: Click the Start button in Windows, then select Power > Shut down.
- Restart: Click the Start button in Windows, then select Power > Restart.
- Sleep: Click the Start button in Windows, then select Power > Sleep.
5.2. Connecting Multiple Displays
To utilize the triple 4K display feature, connect your monitors to the HDMI 2.0, DisplayPort 1.4, and USB-C (DP Alt Mode) ports. Windows will automatically detect the displays. You can configure display settings (extend, duplicate, or show only on one) via Settings > System > Display.
5.3. Expanding Memory and Storage
The ACEMAGIC K1 Mini PC allows for memory and storage upgrades.
- Memory (RAM): The device has two SO-DIMM slots supporting up to 32GB DDR4 RAM. To upgrade, carefully open the chassis, locate the SO-DIMM slots, and install compatible DDR4 modules.
- Storage (SSD): Two M.2 2280 slots are available, supporting up to 4TB total storage. One slot supports SATA/NVMe PCIe 3.0, and the other supports SATA. To upgrade, open the chassis, locate the M.2 slots, and install compatible M.2 2280 SSDs.
Note: Opening the chassis for upgrades should be done carefully to avoid damaging components. Refer to online resources or professional assistance if unsure.

Image 5.1: Internal view of the ACEMAGIC K1 Mini PC, indicating locations for RAM and SSD upgrades.
6. Maintenance
- Cleaning: Regularly clean the exterior of the Mini PC with a soft, dry cloth. Use compressed air to clear dust from ventilation openings to maintain optimal airflow.
- Ventilation: Ensure the Mini PC is placed in a well-ventilated area, away from direct sunlight or heat sources. Do not block the air vents.
- Software Updates: Keep your Windows operating system and drivers updated to ensure system stability and security. Check for updates regularly through Windows Settings.
- Data Backup: Periodically back up important data to an external drive or cloud storage to prevent data loss.
7. Troubleshooting
| Problem | Possible Cause | Solution |
|---|---|---|
| No power | Power adapter not connected, power outlet issue. | Ensure power adapter is securely connected to the Mini PC and a working power outlet. Check power button. |
| No display on monitor | Monitor not connected, incorrect input source, faulty cable. | Verify monitor cable connections (HDMI, DP, USB-C). Select correct input source on monitor. Test with a different cable or monitor. |
| No internet connection (Wi-Fi) | Wi-Fi disabled, incorrect password, router issue. | Check Wi-Fi settings in Windows. Ensure correct password. Restart router. Try wired Ethernet connection. |
| System slow or unresponsive | Too many applications running, low disk space, outdated drivers. | Close unnecessary applications. Free up disk space. Update Windows and drivers. Consider memory/storage upgrade. |
For further assistance, please refer to the Warranty and Support section.
8. Specifications
| Feature | Detail |
|---|---|
| Model Name | K1 |
| Processor | AMD Ryzen Embedded R2544 (4 Cores, 8 Threads, up to 3.7 GHz) |
| Operating System | Windows 11 Pro |
| Memory (RAM) | 16 GB DDR4 (Expandable up to 32 GB) |
| Storage | 256 GB M.2 SSD (Expandable up to 4 TB) |
| Graphics | Integrated AMD Radeon Graphics |
| Video Output | HDMI 2.0, DisplayPort 1.4, USB-C (DP Alt Mode) - Triple 4K Display Support |
| Connectivity | Gigabit Ethernet (10/100/1000Mbps), WiFi 5, Bluetooth 4.2 |
| USB Ports | 6 x USB 3.2 Gen 1 Type-A, 1 x USB 3.2 Gen 1 Type-C |
| Audio | 3.5mm Phone Jack (External speakers required) |
| Power Consumption | 65 watts |
| Dimensions | 16.4 x 16.3 x 11.4 cm (approximate parcel dimensions) |
| Weight | 500 g |
| Additional Features | Network Wake-up, PSTN Wake-up, Auto Power-on, VESA Mount Compatible |
9. Warranty and Support
The ACEMAGIC K1 Mini PC comes with a 2-Year quality assurance from the manufacturer. ACEMAGIC also provides lifetime technical support.
If you encounter any issues or have questions regarding your product, please contact ACEMAGIC customer support. Refer to the contact information provided with your purchase or visit the official ACEMAGIC website for support options.


