1. Introduction
This manual provides essential instructions for the safe and effective operation, setup, and maintenance of your Reboot RBM2000 5-in-1 Multi-Process Welder. Please read this manual thoroughly before using the equipment to ensure proper function and safety.
2. Safety Information
Welding can be dangerous. Always follow safety precautions to prevent injury or damage. Keep this manual for future reference.
- Electric Shock Can Kill: Ensure proper grounding. Do not touch live electrical parts. Wear dry gloves.
- Fumes and Gases Can Be Dangerous: Keep your head out of the fumes. Use ventilation or exhaust to remove fumes from the breathing zone.
- Welding Can Cause Fire or Explosion: Keep flammables away from the welding area. Have a fire extinguisher nearby.
- Arc Rays Can Burn Eyes and Skin: Wear a welding helmet with appropriate shade. Wear protective clothing.
- Noise Can Damage Hearing: Wear ear protection.
- Hot Parts Can Cause Severe Burns: Allow equipment to cool before touching.
- Magnetic Fields: Pacemaker wearers should consult their doctor before welding.
3. Product Overview
The Reboot RBM2000 is a versatile 5-in-1 multi-process welding machine designed for various applications. It supports:
- MIG (Gas Metal Arc Welding): For welding with shielding gas.
- Flux Core (Gasless Flux-Cored Arc Welding): For welding without external shielding gas.
- Stick (Shielded Metal Arc Welding): For welding with coated electrodes (MMA).
- Lift TIG (Gas Tungsten Arc Welding): For precise welding with a tungsten electrode.
- Aluminum Spool Gun Welding: Specialized for aluminum welding.
This machine is suitable for welding steel, stainless steel, and aluminum projects, offering flexibility for various tasks.
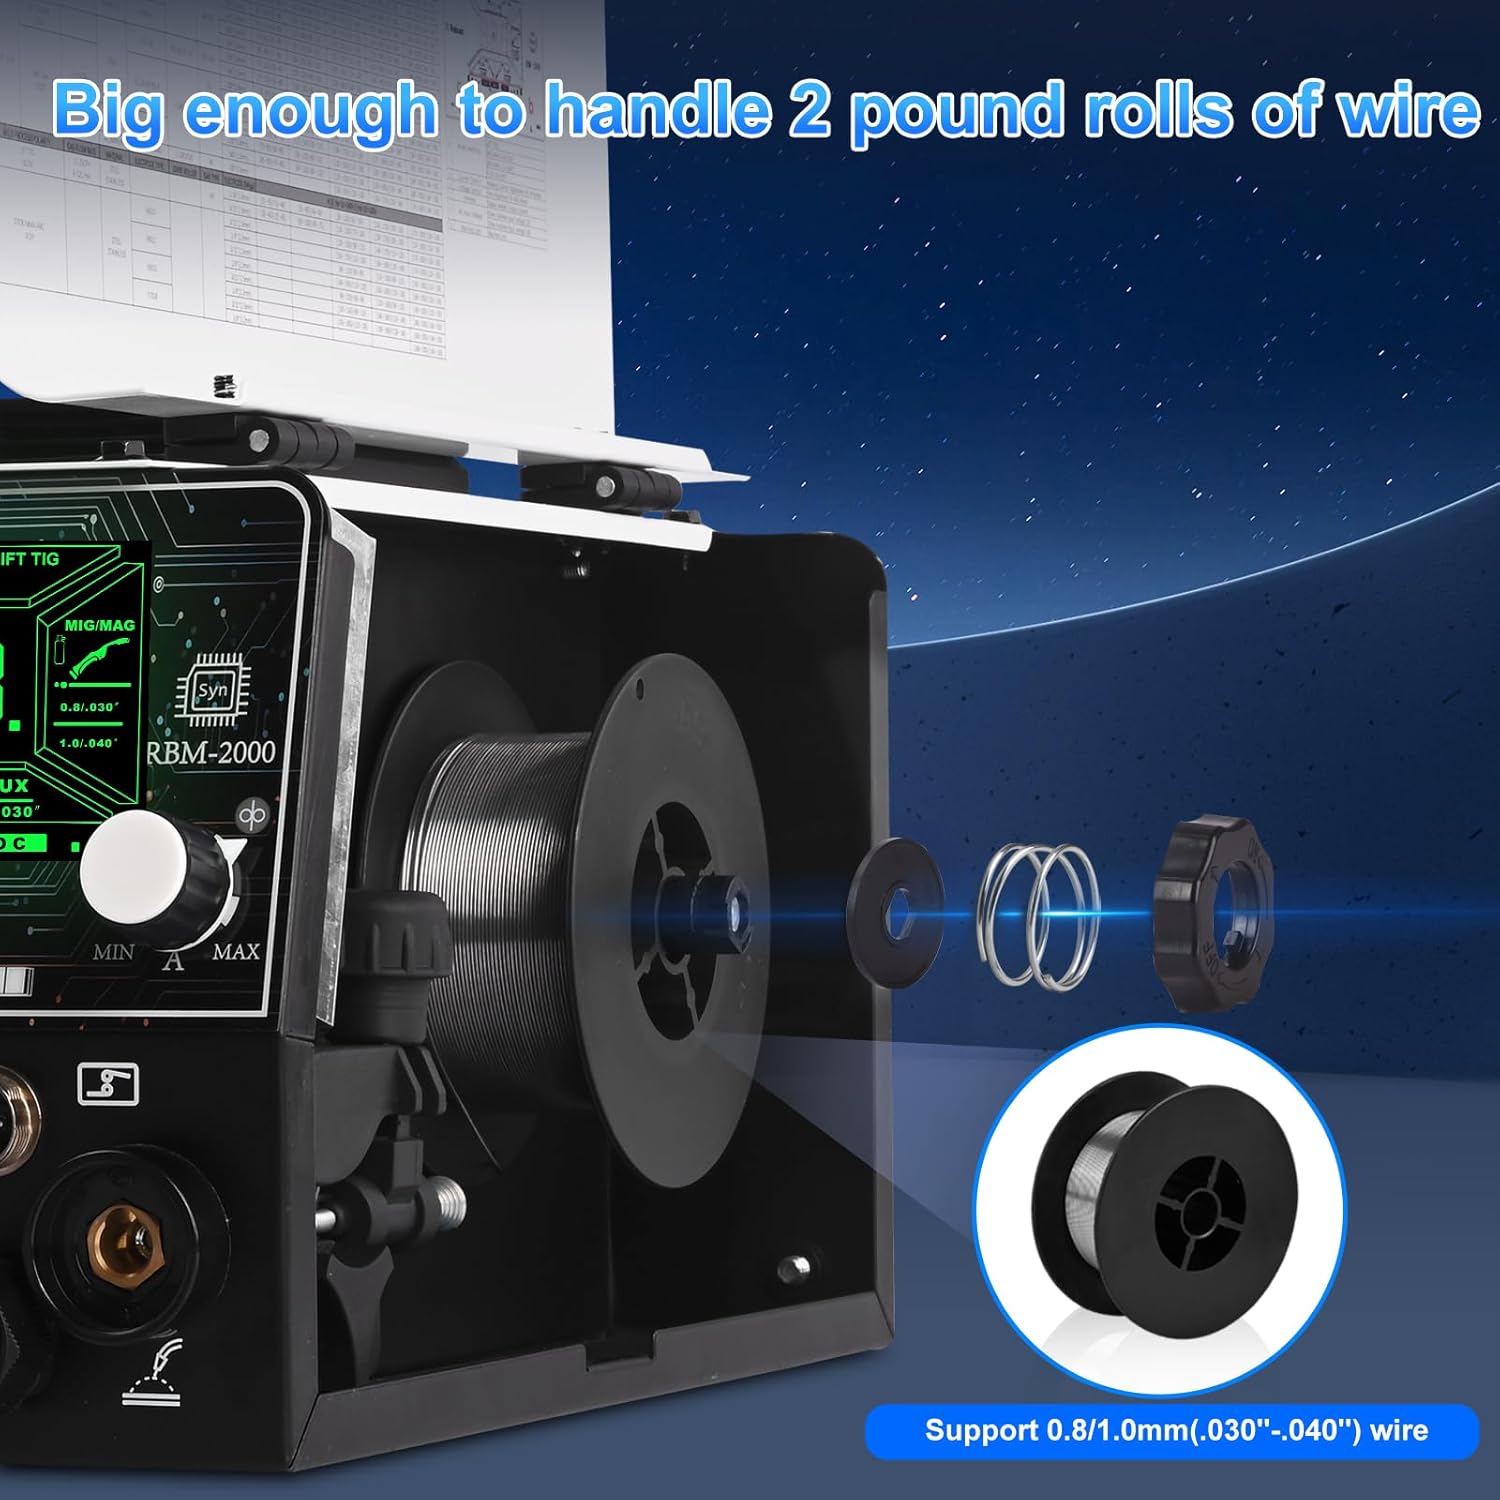
Figure 3.1: Overview of the Reboot RBM2000 5-in-1 Multi-Function Welding Machine, highlighting its various welding processes.
4. Setup
4.1 CO2 Gas Regulator Setup
The included CO2 gas regulator is designed for professional MIG/MAG welding applications. It features a flowmeter for reliable readings.
- Ensure the gas cylinder valve is closed.
- Connect the CGA-320 inlet of the regulator to the CO2 gas cylinder. Ensure a secure, leak-free connection.
- Attach the 9/16-18 RH fitting to the gas hose.
- Connect the gas hose to the "GAS IN" port on the welding machine.
- Slowly open the gas cylinder valve and check for leaks using a leak detection solution.
- Adjust the flowmeter to the desired gas flow rate (e.g., 25 LPM).

Figure 4.1: Detailed view of the CO2 Gas Regulator, showing the flow meter, high pressure gauge, CGA-320 inlet, and 9/16-18 RH fitting.

Figure 4.2: Diagram illustrating the connection of the CO2 Gas Regulator to a gas cylinder and the welding machine via a gas hose and hose clamp.
4.2 Welder Connections
Ensure the machine is powered off before making any connections.
- Connect the power cord to a suitable 120V or 240V power outlet. The machine automatically detects the voltage.
- Connect the ground clamp to the workpiece. Ensure a clean, secure connection for proper electrical contact.
- Connect the appropriate welding torch (MIG, TIG, or Stick electrode holder) to the corresponding terminals on the front panel.
- For MIG welding, connect the gas hose from the regulator to the "GAS IN" port.

Figure 4.3: Close-up of the welder's front panel connections, showing the cable and gas hose connections, emphasizing internal copper components and hose durability.
4.3 Wire Installation (MIG/Flux Core)
The RBM2000 supports 0.8mm (.030") and 1.0mm (.040") welding wire and can accommodate 2-pound rolls.
- Open the wire feed compartment.
- Place the wire spool onto the spindle, ensuring it rotates freely.
- Thread the wire through the guide tube and into the drive roller mechanism.
- Close the drive roller tension arm and adjust tension as needed.
- Feed the wire through the MIG torch liner until it exits the contact tip.

Figure 4.4: Illustration of installing a 2-pound roll of welding wire into the RBM2000 welder, showing support for 0.8mm (.030") and 1.0mm (.040") wire.
5. Operation
5.1 Control Panel and Display
The RBM2000 features a green screen display for clear visibility, even outdoors. It allows for synergistic control and adjustment of welding parameters.

Figure 5.1: The welder's control panel and display, showing settings for MMA/Stick, Lift TIG, MIG/MAG, and Flux welding modes. Note that Pulse mode is not available.
5.2 Selecting Welding Mode
Use the control knob to navigate and select the desired welding process (MIG, Flux Core, Stick, Lift TIG, or Spool Gun) on the display.
5.3 Adjusting Parameters
Once a mode is selected, adjust parameters such as amperage, voltage, and wire feed speed according to your material and welding requirements. The synergistic control helps in setting optimal parameters.
Recommended Settings for Aluminum (2-4mm):
- Mode: CO2/0.8mm
- Voltage Adjustment: -3
- Power: 120V (150A) / 240V (200A)
5.4 Spool Gun Configuration
When using a spool gun for aluminum welding, refer to the following recommended settings:

Figure 5.2: Table showing recommended settings for spool gun welding, including wire diameter, material thickness, and voltage adjustments for 120V and 240V operation with ER5356/ER4043 aluminum wire.
| Mode | Wire Type | Wire Diameter | Material Thickness | 120V Setting | 240V Setting |
|---|---|---|---|---|---|
| MIG/MAG | ER5356/ER4043 Aluminum | 0.8/.030" | 14ga (2mm) | [-3/150] | [-3/200] |
| MIG/MAG | ER5356/ER4043 Aluminum | 0.8/.030" | .118" (3mm) | [-2/150] | [-2/200] |
6. Maintenance
Regular maintenance ensures the longevity and safe operation of your welding machine.
- Clean Regularly: Use compressed air to blow out dust and debris from the machine's interior and vents. Ensure power is disconnected.
- Inspect Cables and Connections: Check all welding cables, power cords, and gas hoses for damage, fraying, or loose connections before each use. Replace damaged components immediately.
- Torch Maintenance: Clean the MIG gun liner, contact tip, and nozzle regularly. Replace worn contact tips and nozzles.
- Wire Feed System: Keep the drive rollers clean and ensure proper tension. Check for wear on the drive rollers.
- Gas Regulator: Inspect the regulator for leaks and ensure gauges are functioning correctly.
7. Troubleshooting
This section provides solutions to common issues. For problems not listed here, contact customer support.
| Problem | Possible Cause | Solution |
|---|---|---|
| No Power | Power cord unplugged, circuit breaker tripped, machine switch off. | Check power connections, reset breaker, turn machine on. |
| No Arc | Poor ground connection, incorrect settings, worn contact tip, faulty torch. | Ensure clean ground connection, verify settings, replace contact tip, inspect torch. |
| Poor Weld Quality | Incorrect parameters, contaminated workpiece, improper gas flow, wrong wire. | Adjust settings, clean workpiece, check gas flow/regulator, use correct wire. |
| Wire Feeding Issues | Incorrect drive roller tension, clogged liner, wrong drive rollers, tangled wire. | Adjust tension, clean/replace liner, ensure correct rollers, untangle wire. |
8. Specifications
| Feature | Detail |
|---|---|
| Model | RBM2000 |
| Input Voltage | 120V/240V (Automatic Detection) |
| Welding Processes | MIG (Gas), Flux Core (Gasless), Stick (MMA), Lift TIG, Aluminum Spool Gun |
| CO2 Gas Regulator | Included, with flowmeter (25 LPM) and CGA-320 inlet |
| Wire Support | 0.8mm (.030") - 1.0mm (.040") |
| Max Wire Spool Size | 2 lbs |
| ASIN | B0G4LY9VCW |
| Date First Available | August 19, 2025 |
9. Warranty & Support
For detailed warranty information, please refer to the warranty card included with your product or visit the official Reboot website. For technical support, troubleshooting assistance, or spare parts, please contact Reboot customer service through their official channels.
Reboot Official Website: Visit the Reboot Store on Amazon


