
1. Introduction
This manual provides essential information for the safe and efficient operation of your Temank 4000W 24V to 110V Hybrid Solar Inverter. This device integrates a solar charge controller, inverter, and AC charger into one unit, offering uninterruptible power support. Please read this manual thoroughly before installation and use, and retain it for future reference.
2. Safety Information
Adhering to these safety guidelines is crucial for preventing injury and damage to the inverter. Failure to follow these instructions may result in electric shock, fire, or severe damage to the unit.
- Installation Environment: This unit is NOT waterproof. It must be installed indoors with good ventilation or in a sheltered area protected from rain, moisture, and direct sunlight.
- Ventilation: Ensure adequate airflow around the inverter to prevent overheating. Do not block ventilation openings.
- PV Voltage Guidance: The maximum solar input voltage is 350VDC. For safe and stable operation, the connected solar panels' maximum open-circuit voltage should not exceed 280VDC. The PV start-up voltage must be greater than 90VDC to ensure proper initial battery charging.
- Parallel Operation: This inverter does NOT support parallel operation with other inverters.
- Qualified Personnel: Installation and maintenance should only be performed by qualified personnel.
- Electrical Safety: Always disconnect all power sources (solar, battery, utility) before performing any wiring or maintenance. Use appropriate personal protective equipment.
3. Product Features
- Battery-Less Operation & Hybrid Energy Management: Supports direct load operation from solar power during the day without a battery. Configurable charging and output priority between solar, battery, and utility grid.
- Powerful Pure Sine Wave Output: 4000W rated, 8000W peak power output with stable and clean pure sine wave for sensitive electronics.
- 140A High-Current MPPT Fast Charging: Built-in high-efficiency MPPT solar charge controller (max PV input 5600W, up to 98% conversion efficiency). Compatible with 24V AGM, Gel, Lead-Acid, Lithium-ion, and LiFePO4 batteries.
- Smart Glass Panel & Intuitive Operation: Features a 6.25-inch LCD touch display for clear data visibility and easy parameter configuration.
- Multiple Protections: Includes three cooling fans and comprehensive protections against overload, overheat, over-current, and short circuits. Smart battery charging algorithm optimizes battery performance.
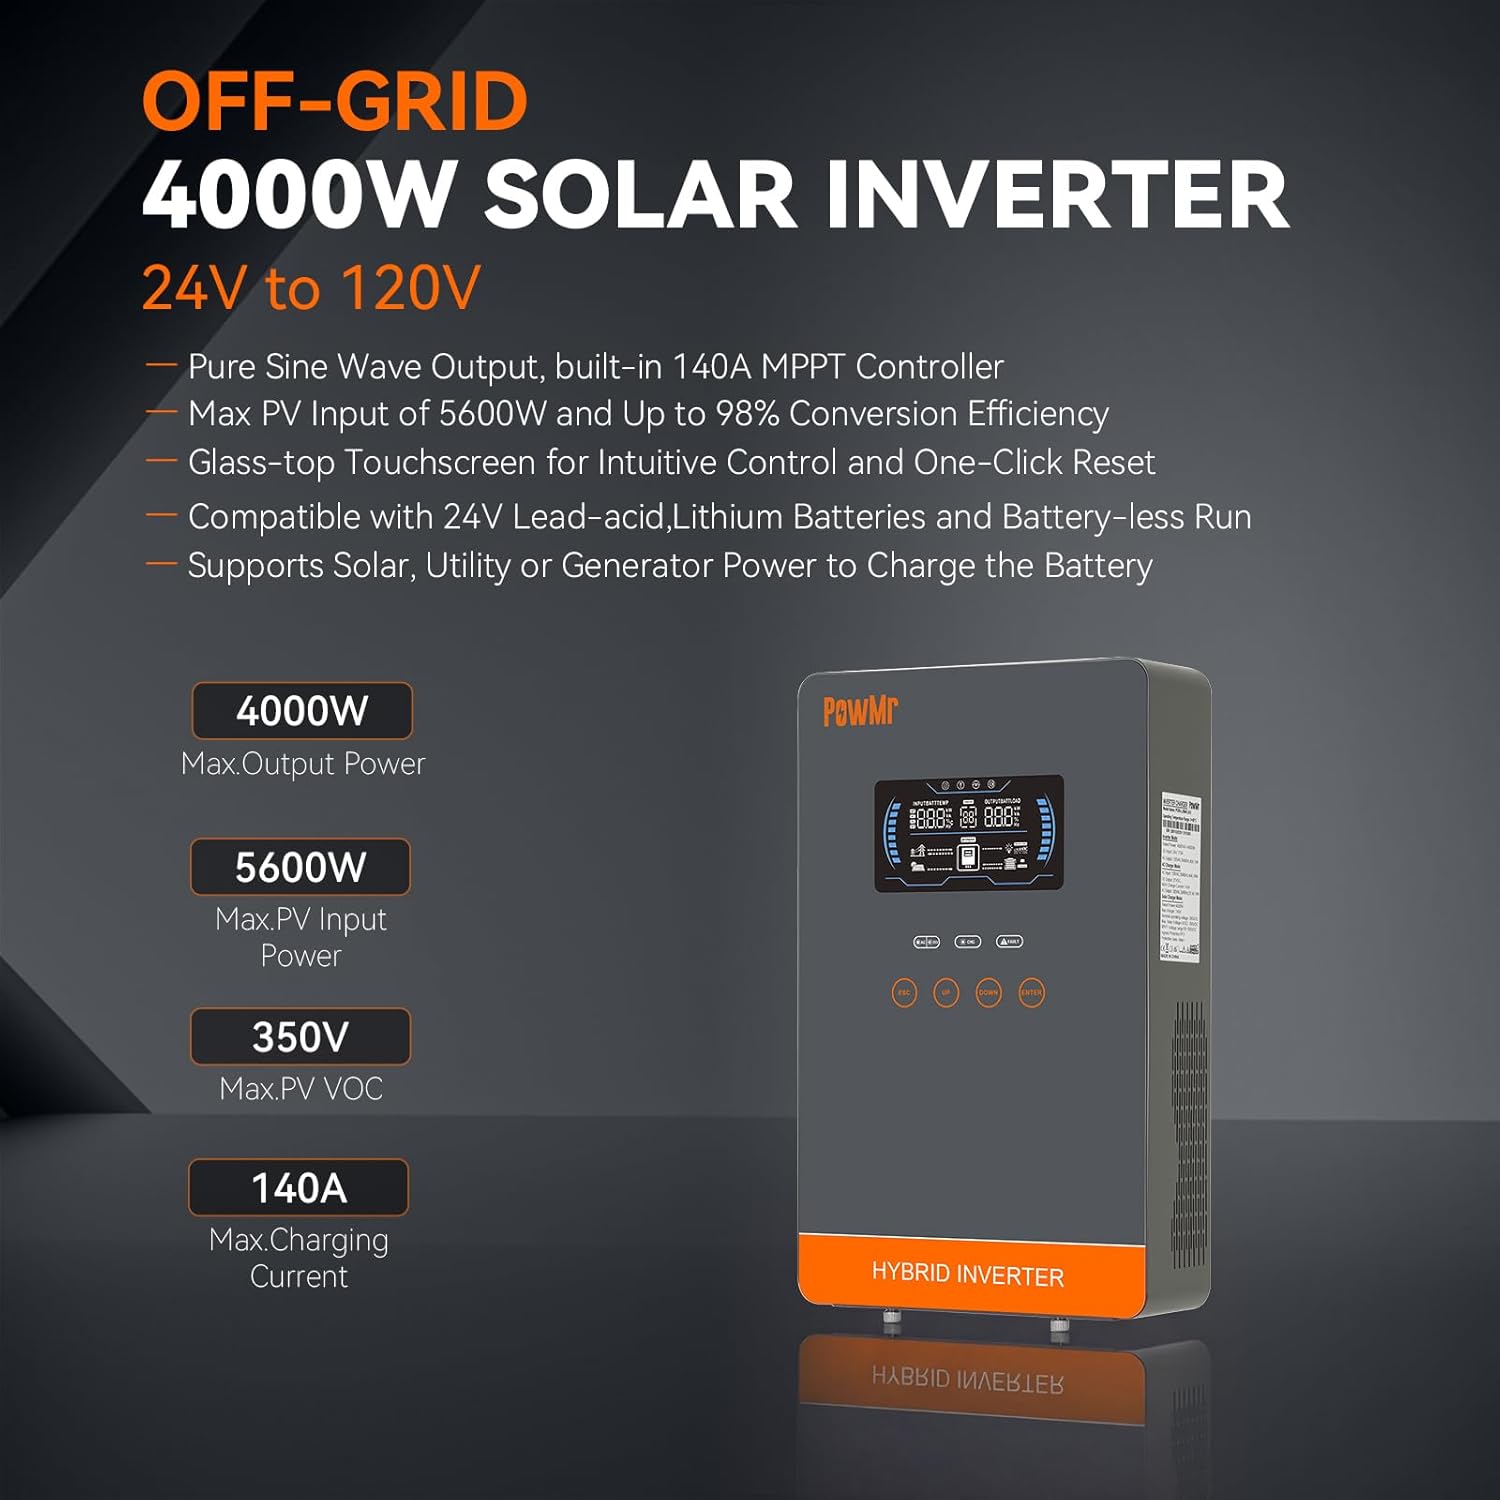
Image: Overview of the Temank 4000W Hybrid Solar Inverter highlighting its main features.
4. Setup and Installation
Proper installation is critical for the inverter's performance and safety. Ensure all connections are secure and correctly polarized.
4.1 Site Selection
- Install indoors or in a sheltered, well-ventilated area.
- Avoid areas with excessive dust, moisture, or corrosive gases.
- Ensure sufficient clearance around the unit for cooling.
4.2 Wiring Connections
Follow the wiring diagram carefully. All wiring should comply with local electrical codes.

Image: Solar panel specifications and connection diagram.
- PV Input: Connect solar panels to the PV input terminals. Ensure the total open-circuit voltage of the solar array does not exceed 280VDC.
- Battery Connection: Connect the 24V battery bank to the battery terminals. Observe correct polarity (+ to + and - to -).
- AC Input: Connect the utility grid or generator AC power to the AC input terminals.
- AC Output: Connect your loads to the AC output terminals.
4.3 Recommended Cable Sizing and Breakers
| Terminal | Recommended Cable Size | Recommended Breaker |
|---|---|---|
| Battery | 2AWG (within 6ft/2m) | 200A |
| AC input | 8AWG (within 6ft/2m) | 63A |
| AC output | 10AWG (within 6ft/2m) | 40A |
| PV | 8AWG (within 16ft/5m) | 63A |
Note: Generator AC and Utility power AC cannot be used simultaneously as primary input sources.

Image: Recommended cable sizing and breaker information.
5. Operating Instructions
The inverter features a glass-top LCD display and function buttons for monitoring and configuration.
5.1 LCD Display and Buttons
The LCD displays real-time system status, input/output voltages, charging current, and battery status. Use the function buttons to navigate menus and adjust settings.
5.2 Energy Source Priority Configuration
You can configure the inverter's energy source priority via the LCD. Common settings include:
- Solar First: Solar energy charges the battery as the first priority. Utility power charges the battery only when solar energy is unavailable.
- Solar and Utility: Solar energy and utility power charge the battery simultaneously.
- Only Solar Charging: Solar energy is the only charger source, regardless of utility availability.

Image: Smart energy hub illustrating different power priority settings.
5.3 Battery-Less Operation
During the day, with sufficient solar power, the inverter can directly power connected loads from PV/AC without a battery connected. This feature helps save on battery costs.
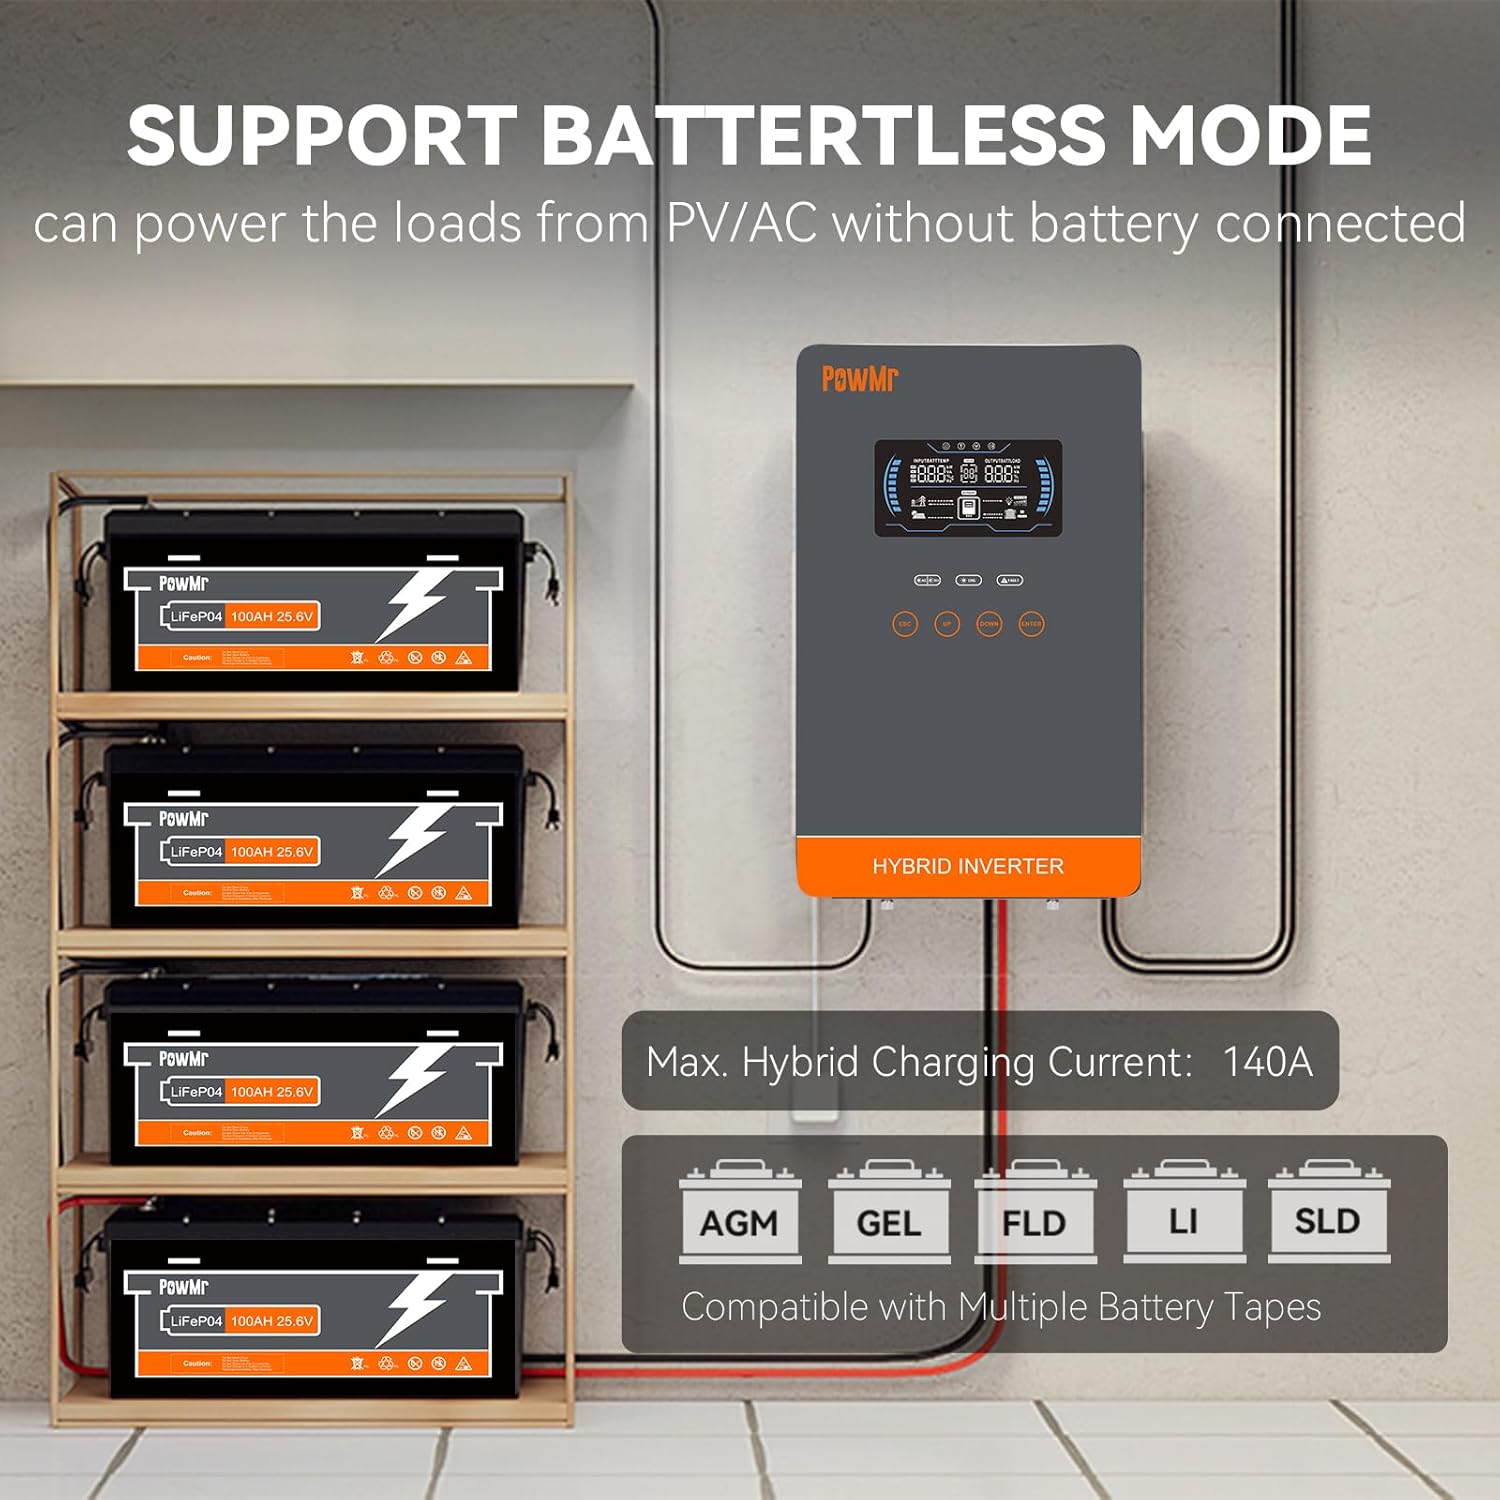
Image: Inverter operating in battery-less mode and compatible battery types.
6. Maintenance
Regular maintenance ensures the longevity and optimal performance of your inverter.
- Cleaning: Keep the inverter's exterior clean and free from dust. Use a dry, soft cloth. Do not use liquid cleaners.
- Ventilation: Periodically check that the cooling fans and ventilation openings are clear of obstructions.
- Connections: Annually inspect all electrical connections (PV, battery, AC input/output) for tightness and signs of corrosion. Tighten as necessary.
- Environment: Ensure the installation environment remains within specified temperature and humidity ranges.
7. Troubleshooting
If you encounter issues with your inverter, perform the following basic checks:
- No Power/Display Off: Check all power connections (battery, PV, AC input). Ensure the battery is charged and the main power switch is on.
- No AC Output: Verify that the inverter is turned on and not in an error state. Check for overload conditions or short circuits on the output.
- Error Codes: Refer to the LCD display for any error codes. Consult the full product manual (if available) for specific error code meanings.
- Overheating: Ensure adequate ventilation and that cooling fans are operating. Clear any obstructions around the unit.
If problems persist after performing these checks, contact customer support for assistance.
8. Specifications
| Specification | Value |
|---|---|
| Brand | Temank |
| Recommended Uses | Boat, Home, Office, Vehicle |
| Power Source | Solar and Battery Powered |
| Wattage | 4000 watts |
| Battery Capacity | 200 Amp Hours (recommended) |
| Input Voltage | 24 Volts (DC) |
| Output Power | 4000 Watts |
| Output Voltage | 110 Volts (AC) |
| Display Type | LCD+LED |
| Peak Output Power | 8000 Watts |
| Electrical Output Waveform | Pure Sine Wave |
| Item Dimensions (L x W x H) | 17.32"L x 9.84"W x 3.5"H |
| Model Number | B0G4LFY12K |

Image: Inverter dimensions and detailed specifications table.
9. Warranty and Support
9.1 Warranty Information
The product comes with a free replacement within 30 days of purchase. Free repair and replacement of parts are provided within 1 year. Shipping costs incurred for warranty service after 30 days must be borne by the customer.
9.2 Customer Support
For technical assistance, troubleshooting beyond basic steps, or warranty claims, please contact the manufacturer or your point of purchase. Have your model number (B0G4LFY12K) and purchase date ready when contacting support.