
1. Product Overview
The wheelfun LESU 1/14 RC Hydraulic Excavator MC15 is a high-fidelity, hobby-grade remote control model designed for enthusiasts aged 14 and above. This model features a robust metal construction, advanced hydraulic systems, and realistic operational capabilities, providing an immersive experience for remote control construction vehicle operation.
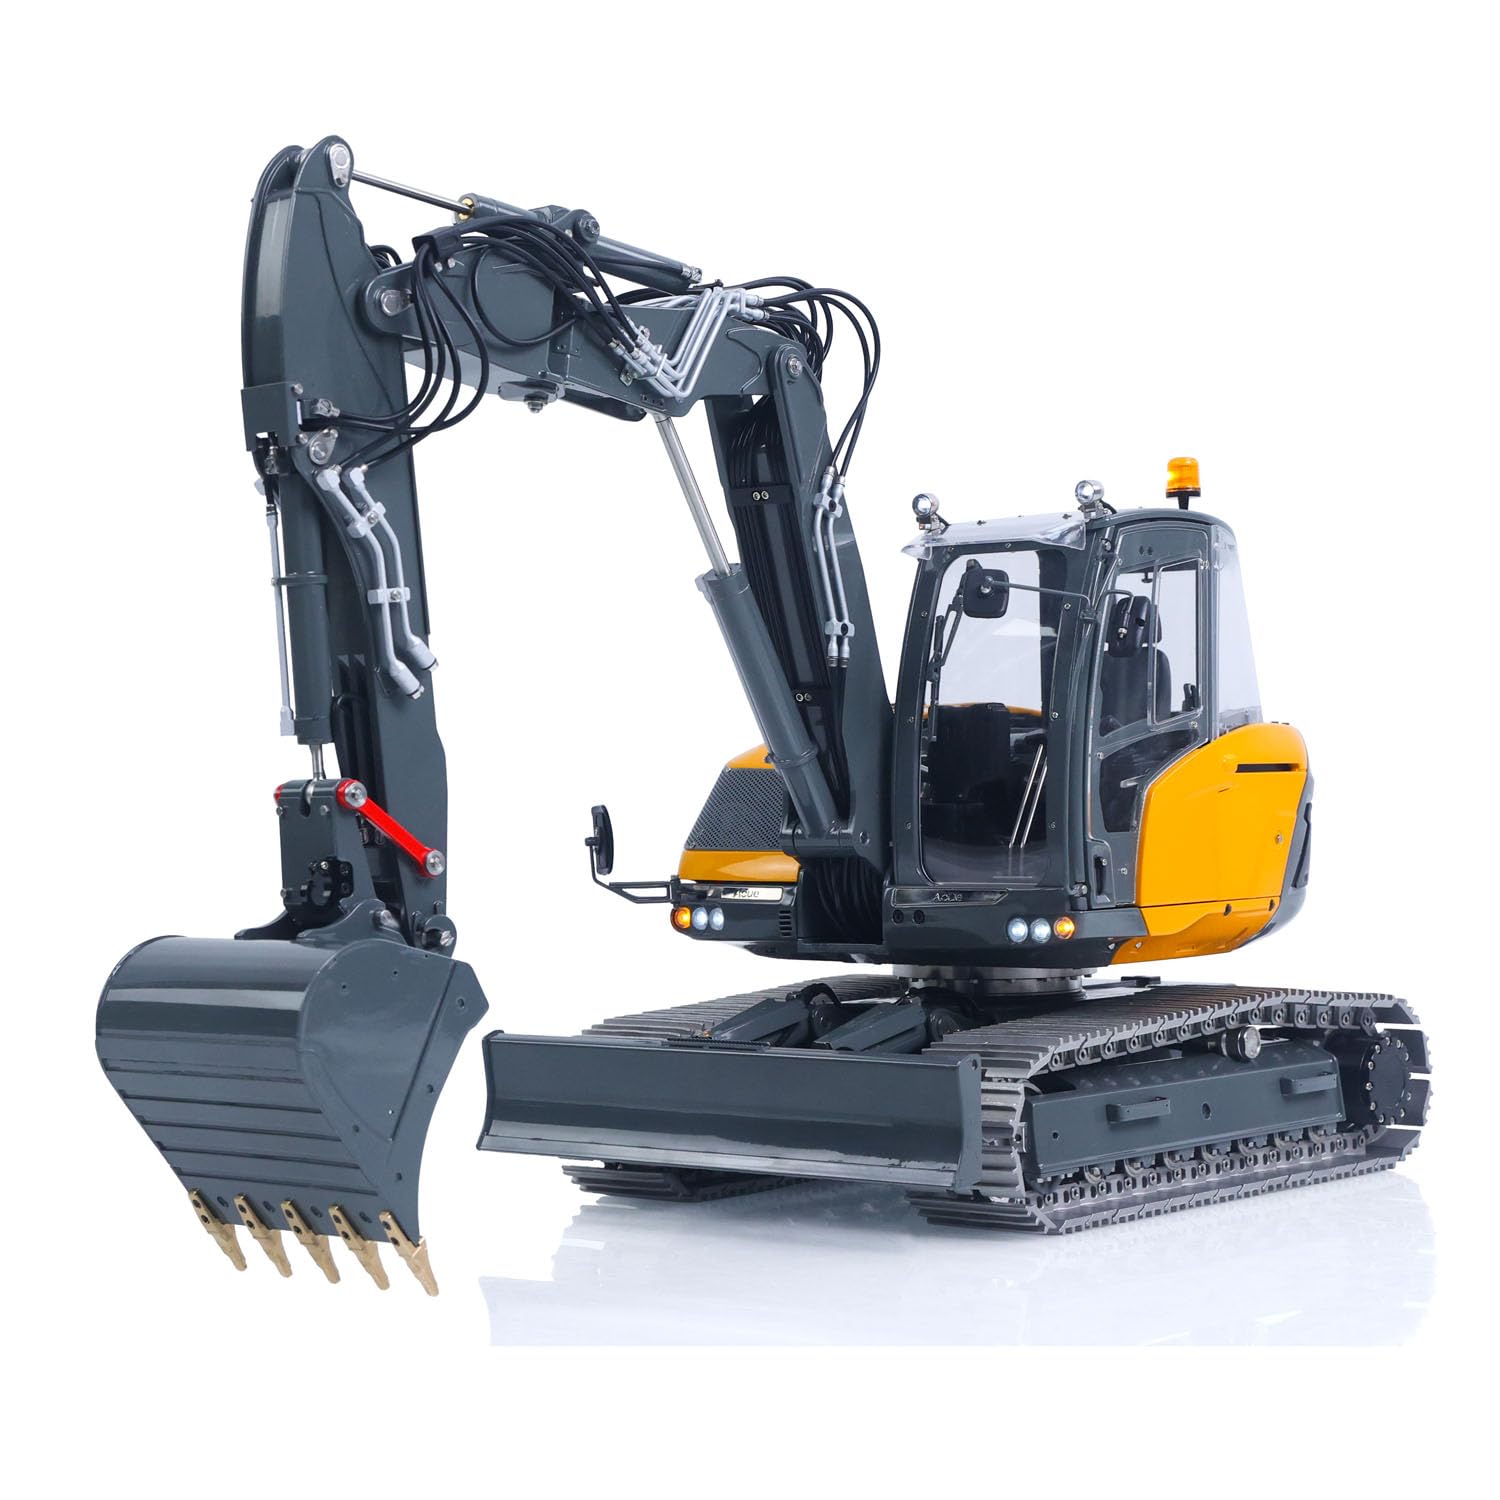
Figure 1: Overall view of the wheelfun LESU 1/14 RC Hydraulic Excavator MC15.
2. Safety Information
WARNING: This product is not suitable for children under 14 years of age. Adult supervision is required during operation.
- Always read and understand the entire instruction manual before operating the excavator.
- Ensure all connections are secure and batteries are properly installed before use.
- Operate the model in a safe, open area, away from people, pets, and obstacles.
- Do not operate in wet conditions or near water to prevent electrical damage.
- Handle Lithium-Ion Polymer batteries with care. Follow all charging and storage guidelines to prevent fire or injury.
- Keep fingers and loose clothing away from moving parts, such as tracks and hydraulic arms.
3. Product Features
- Brushless Drive System: The drive system incorporates a brushless motor paired with a large-reduction planetary gear module, ensuring high efficiency, low heat generation, strong low-speed torque, and smooth operation.
- Reliable Slewing System: A brushed motor with a high-reduction-ratio reducer powers the slewing system, providing reliable output torque for rotation.
- Dual Hydraulic Pumps: The hydraulic workstation is equipped with dual pumps, offering dual power sources and two independent hydraulic systems. This balanced power distribution ensures coordinated, smooth, and linear movements.
- 9-Way Directional Valve: The hydraulic system features a 9-way directional valve, providing rich and powerful functions. The excavator has 6 hydraulic circuits, 2 auxiliary hydraulic circuits, and 1 dedicated circuit for the slewing push blade, allowing for flexible arm operation and compatibility with various attachments.
- CNC Machined Aluminum Alloy Shell: The body shell is crafted from aluminum alloy using CNC machining, offering a metallic texture and highly restoring real vehicle details. Approximately 95% of parts, including full-metal tracks, walking frames, and counterweights, are made of metal, ensuring a stable and sturdy body.
- Realistic Cab Design: Equipped with slidable aluminum alloy cab doors, supported by CNC-machined pulleys for realistic appearance and durability. The cab glass is made of colorless transparent acrylic sheets for transparency and sturdiness. Interior parts feature a full-coverage design made of ABS with a sandblasted surface. The seat angle is adjustable to fit various realistic or simulated figure models.

Figure 2: Detailed view of the excavator's cab with an open door.
- Easy Battery Access: A large flip-up hatch on the right side of the working platform allows for easy replacement of batteries and remote control receivers.
- Full-Body Lighting: The entire machine features a modular design with comprehensive lighting, including 1 warning light, 3 top spotlights, and a total of 13 LED beads. Front and rear lights utilize an integrated lamp panel design for neat wiring.

Figure 3: Front view showcasing the integrated lighting system.
4. Setup Guide
4.1 Battery Installation
- Locate the battery compartment hatch on the right side of the excavator's working platform.
- Open the hatch carefully.
- Insert the Lithium-Ion Polymer battery into the compartment, ensuring correct polarity.
- Connect the battery to the excavator's power connector.
- Close the hatch securely.

Figure 4: Accessing the battery compartment for installation.
4.2 Remote Control Preparation
- Install the required batteries into your remote control unit (refer to your remote control's specific manual for battery type and installation).
- Power on the remote control.
- Power on the excavator. The remote control and excavator should automatically pair. If not, refer to the remote control's manual for pairing instructions.
4.3 Hydraulic System Check
Before initial operation, ensure the hydraulic fluid levels are adequate. The excavator is pre-filled, but occasional checks are recommended.
- Locate the hydraulic fluid reservoir (refer to the diagram in your remote control's manual).
- Check the fluid level. If low, carefully add appropriate hydraulic oil for RC models.
- Avoid overfilling.
5. Operating Instructions
Familiarize yourself with the remote control layout and functions before operating the excavator. The 9-way valve system allows for precise control over various movements.
5.1 Basic Movements
- Forward/Backward: Use the designated joystick to move the excavator forward or backward.
- Turning: Use the designated joystick to turn the excavator left or right.
- Slewing (Rotation): Use the slewing control to rotate the excavator's upper structure 360 degrees.
5.2 Arm and Bucket Control
The hydraulic system provides realistic and powerful control over the arm and bucket.
- Main Arm (Boom): Control the raising and lowering of the main arm.
- Secondary Arm (Stick): Control the extension and retraction of the secondary arm.
- Bucket: Control the curling and dumping action of the bucket.

Figure 5: Close-up of the excavator bucket and its hydraulic connections.
5.3 Blade Operation
The front blade can be raised and lowered for leveling or stabilization.
- Use the dedicated control on your remote for blade movement.
5.4 Lights and Sound
Activate the realistic lights and sound features using the corresponding buttons on your remote control.
Video 1: Demonstration of the wheelfun LESU 1/14 RC Hydraulic Excavator MC15 in operation, showcasing its movements, lights, and sound features.
6. Maintenance
Regular maintenance ensures the longevity and optimal performance of your RC excavator.
- Cleaning: After each use, clean the excavator to remove dirt, dust, and debris. Use a soft brush or cloth. Avoid using water directly on electronic components.
- Lubrication: Periodically lubricate moving parts, such as hydraulic cylinders and track mechanisms, with appropriate RC-grade lubricant.
- Battery Care: Always disconnect and remove batteries when not in use. Store batteries in a cool, dry place. Follow manufacturer guidelines for charging and discharging Lithium-Ion Polymer batteries.
- Hydraulic System: Regularly check for leaks in the hydraulic lines and cylinders. Ensure fluid levels are correct.
- Inspections: Periodically inspect all screws, connections, and moving parts for looseness or damage. Tighten or replace as necessary.
7. Troubleshooting
If you encounter issues with your excavator, refer to the following common problems and solutions:
| Problem | Possible Cause | Solution |
|---|---|---|
| Excavator does not power on. | Battery not connected or discharged. | Ensure battery is connected and fully charged. |
| Remote control unresponsive. | Remote control batteries low or not paired. | Replace remote control batteries. Re-pair remote control with excavator. |
| Hydraulic arm/bucket movement is weak or slow. | Low hydraulic fluid, air in system, or battery low. | Check hydraulic fluid level and top up if necessary. Bleed air from the system (refer to advanced manual). Charge excavator battery. |
| Tracks not moving. | Obstruction in tracks, motor issue, or battery low. | Clear any obstructions. Check track tension. Charge excavator battery. |
If the problem persists after attempting these solutions, please contact customer support.
8. Specifications
| Specification | Detail |
|---|---|
| Brand Name | wheelfun |
| Model Name | TH25921-AMZUS2-S |
| Age Range Description | Adult (Manufacturer Minimum Age: 256 months / 14+ years) |
| Number of Items | 1 |
| Battery Description | Lithium-Ion Polymer |
| Number of Batteries Required | 1 D battery (for excavator, remote control may vary) |
| Toy Vehicle Form | Excavator |
| Color | Yellow and Dark Gray |
| Item Weight | 26.4 Pounds |
| Item Dimensions (L x W x H) | 27.2 x 13.99 x 13.2 inches |
| Material Type | Metal |
9. Warranty and Support
For warranty information, please refer to the documentation provided with your purchase or contact the seller directly. If you require technical assistance or have questions not covered in this manual, please reach out to wheelfun customer support through the retailer's platform or their official website.
Please retain your proof of purchase for any warranty claims.