
Introduction
This manual provides comprehensive instructions for the installation, operation, and maintenance of your Comfort Direct MENA Ceiling Fan Remote Control, Model CDTX028C-S-1. Please read this manual thoroughly before use to ensure proper functionality and safety. This remote control is designed as a direct replacement for specific Hampton Bay MENA ceiling fan models.
Important Compatibility Note
This remote control is NOT universal. It is specifically designed for Hampton Bay MENA ceiling fans. Please confirm your fan model before attempting to use this remote.
Compatible Hampton Bay MENA Ceiling Fan Models include: 99919, 58913, 92216, 92217, 99918, 92211.
What's Included
- 1 x Remote Control
- 1 x Wall Mount Holder
- 1 x Programming Manual (this document)
- 2 x Screws for wall mount installation
Note: One 12V 23A battery is required for operation and is NOT included.
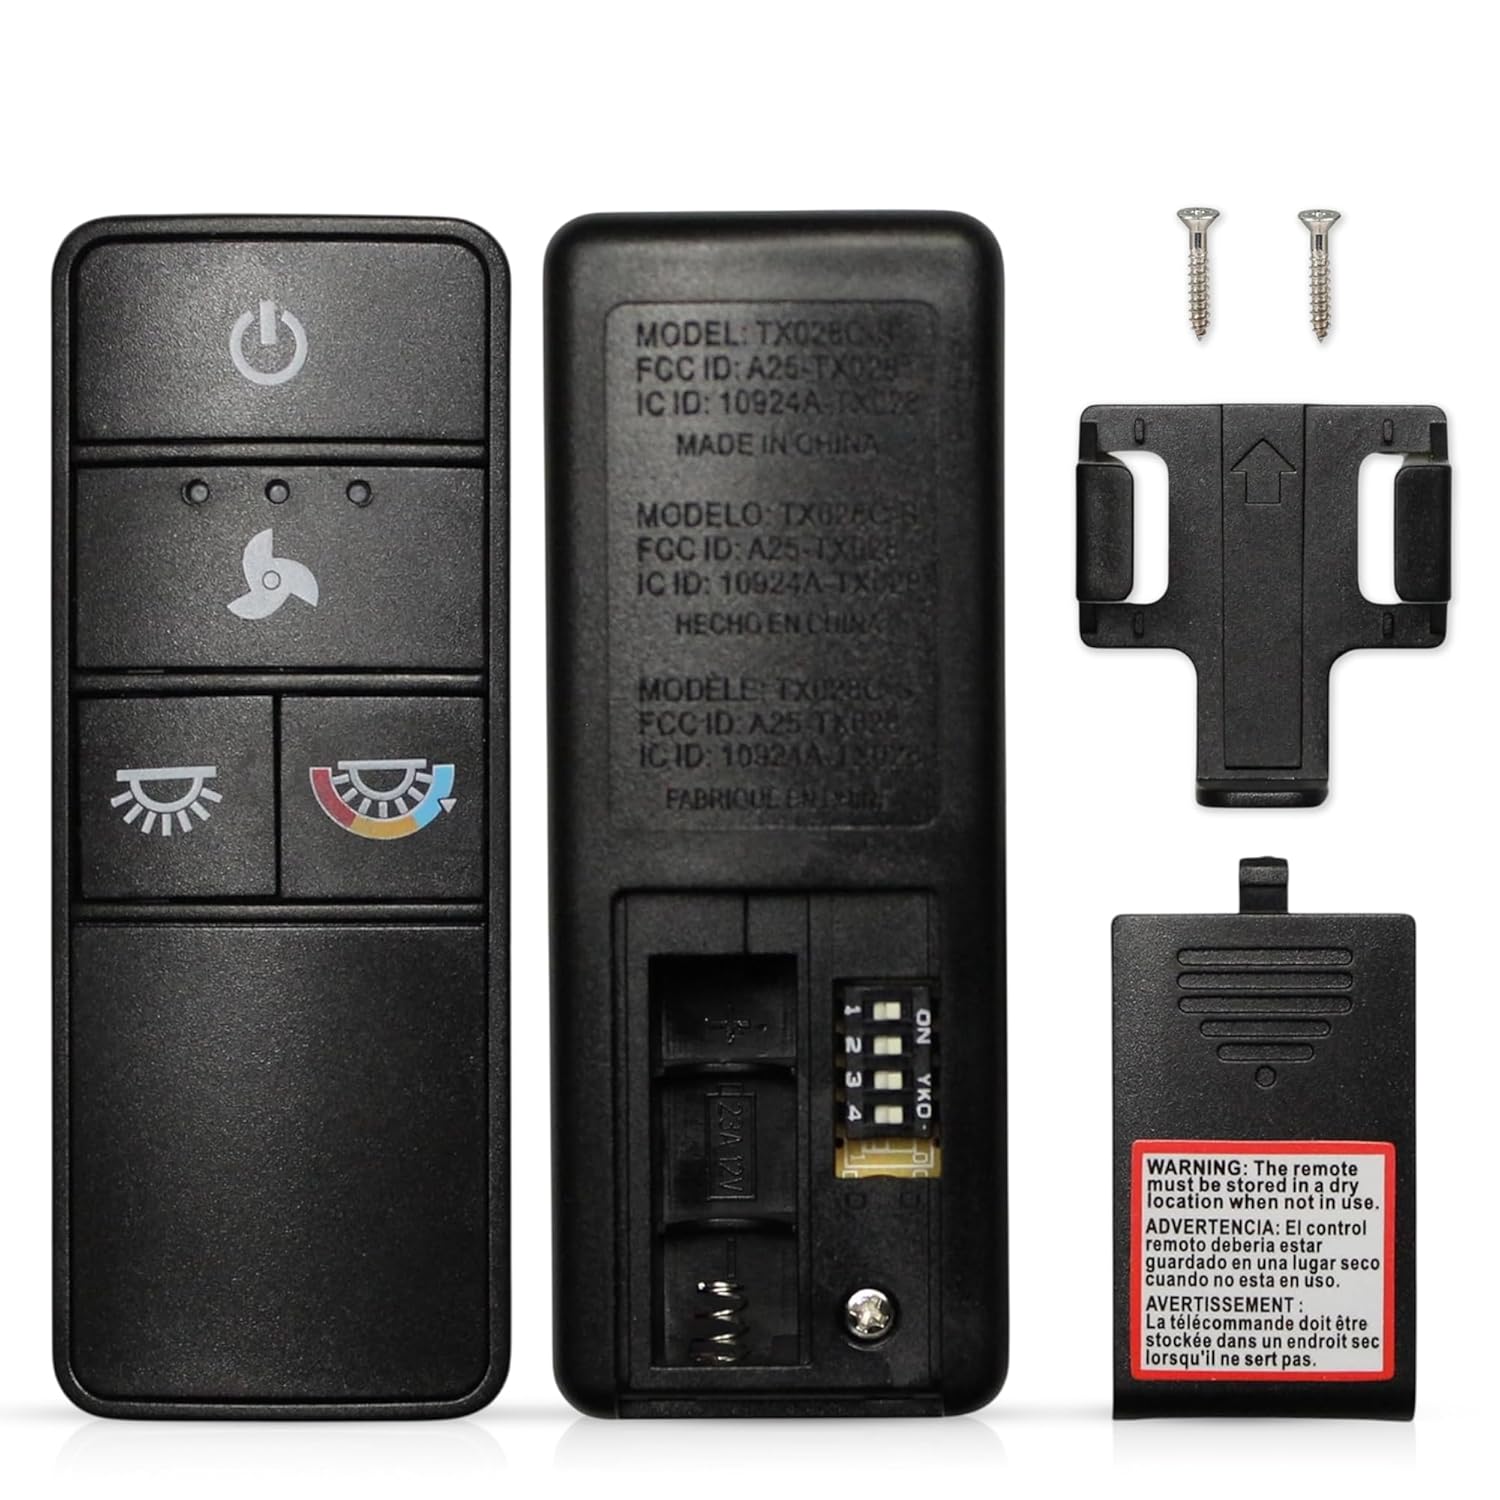
Image: The remote control, its back panel with DIP switches, the wall mount holder, and two mounting screws.
Setup and Pairing
1. Battery Installation
The remote control requires one 12V 23A battery (not included). To install:
- Open the battery compartment cover on the back of the remote control.
- Insert one 12V 23A battery, ensuring the correct polarity (+/-).
- Close the battery compartment cover securely.
2. DIP Switch Pairing
The remote control uses a 4-position DIP switch system to communicate with your ceiling fan receiver. You must match the DIP switch settings on the new remote to those on your existing fan receiver (or old remote) for proper operation.
- Locate the DIP switches on your ceiling fan's receiver (usually found in the canopy above the fan motor) or on your old remote control.
- Open the battery compartment of your new Comfort Direct remote control to access its 4-position DIP switches.
- Carefully adjust the switches on the new remote to exactly match the ON/OFF positions of the switches on your fan's receiver or old remote. There are 16 possible combinations.
- Once the DIP switches are matched, close the battery compartment.
If your old remote is lost, you may need to try different DIP switch combinations until the remote successfully pairs with your fan. Ensure the power to the fan is cycled off and on after changing DIP switch settings for the fan receiver to recognize the new code.

Image: Illustration of the remote control's back panel with DIP switches, highlighting the 304 MHz RF system and DIP-pairing for compatibility with existing receivers.
3. Wall Mount Holder Installation
The included wall mount holder allows for convenient storage and access to your remote control.
- Choose a suitable location on a wall, away from moisture and direct sunlight.
- Use the two provided screws to securely attach the wall mount holder to the wall.
- Place the remote control into the holder for easy access.

Image: The remote control securely placed in its wall-mounted holder, demonstrating convenient storage.
Operating Instructions
The Comfort Direct remote control provides full control over your Hampton Bay MENA ceiling fan's fan speeds and lighting functions.

Image: The remote control highlighting its key functions: 3-speed fan control, independent light ON/OFF, dimmer, and color temperature adjustment.
Fan Control
- Power Button (⏻): Press to turn the fan ON or OFF.
- Fan Speed Buttons:
- Press the ⌂ button to cycle through High, Medium, and Low fan speeds.
- Press the ⏻ button to turn the fan OFF.
Light Control
- Light ON/OFF Button (💡): Press to independently turn the light ON or OFF.
- Dimmer Function (Hold to Dim): When the light is ON, press and hold the 💡 button to adjust the brightness. Release when the desired brightness is reached.
- Color Temperature (CCT) Adjustment Button (🌈): Press this button to cycle through different light color temperatures (e.g., warm white, cool white, daylight). The default setting is typically soft-white (3000K).
Maintenance
Battery Replacement
When the remote control's range decreases or it becomes unresponsive, it's time to replace the battery. Follow the battery installation steps in the "Setup and Pairing" section.
Cleaning
To clean the remote control, wipe it with a soft, dry cloth. Do not use abrasive cleaners, solvents, or expose it to excessive moisture.
Troubleshooting
- Remote not responding:
- Check if the battery is installed correctly and has sufficient charge. Replace if necessary.
- Verify that the DIP switch settings on the remote match those on the fan receiver.
- Ensure the fan's power supply is ON at the wall switch or circuit breaker.
- Fan operates but light does not:
- Check the light bulb in the fan for proper installation and functionality.
- Ensure the light ON/OFF button on the remote is pressed.
- Light does not dim or change color temperature:
- Confirm that your fan's light fixture supports dimming and color temperature adjustment (CCT).
- Ensure you are pressing and holding the light button for dimming, and pressing the CCT button for color changes.
- Limited range:
- Replace the battery.
- Ensure there are no obstructions between the remote and the fan receiver.
Specifications
| Feature | Detail |
|---|---|
| Model Name | CDTX028C-S-1 |
| Brand | Comfort Direct |
| Connectivity Technology | Radio Frequency (RF) |
| Operating Frequency | 304 MHz |
| Controller Type | Button Control |
| Max Number of Supported Devices | 1 (one fan receiver) |
| Compatible Devices | Hampton Bay MENA Ceiling Fans (specific models) |
| Maximum Range | 30 Feet (approx.) |
| Battery Type | 1 x 12V 23A Alkaline Battery (not included) |
| Dimensions (L x W x H) | 4.57" x 1.8" x 2.76" (approx.) |
| Smart Home Compatibility | Not Smart Home Compatible |
Warranty
This Comfort Direct product is backed by a 1-Year Manufacturer Warranty from the date of purchase. This warranty covers defects in materials and workmanship under normal use. For warranty claims or further details, please refer to the manufacturer's official warranty policy or contact customer support.
Customer Support
If you encounter any issues or have questions not addressed in this manual, please contact Comfort Direct customer support. Refer to your product packaging or the retailer's website for contact information.
