
Introduction
The Miller Multimatic 215 PRO is a professional-grade multiprocess welding machine designed for various welding applications. This versatile welder supports MIG, Pulsed MIG, TIG, Pulsed TIG, and Stick welding processes. It features Auto-Set technology for simplified setup, BeadVision for real-time bead monitoring, and Program Memory for saving weld parameters. The Multi-Voltage Plug (MVP) allows connection to 120V or 240V power sources, making it suitable for diverse work environments.
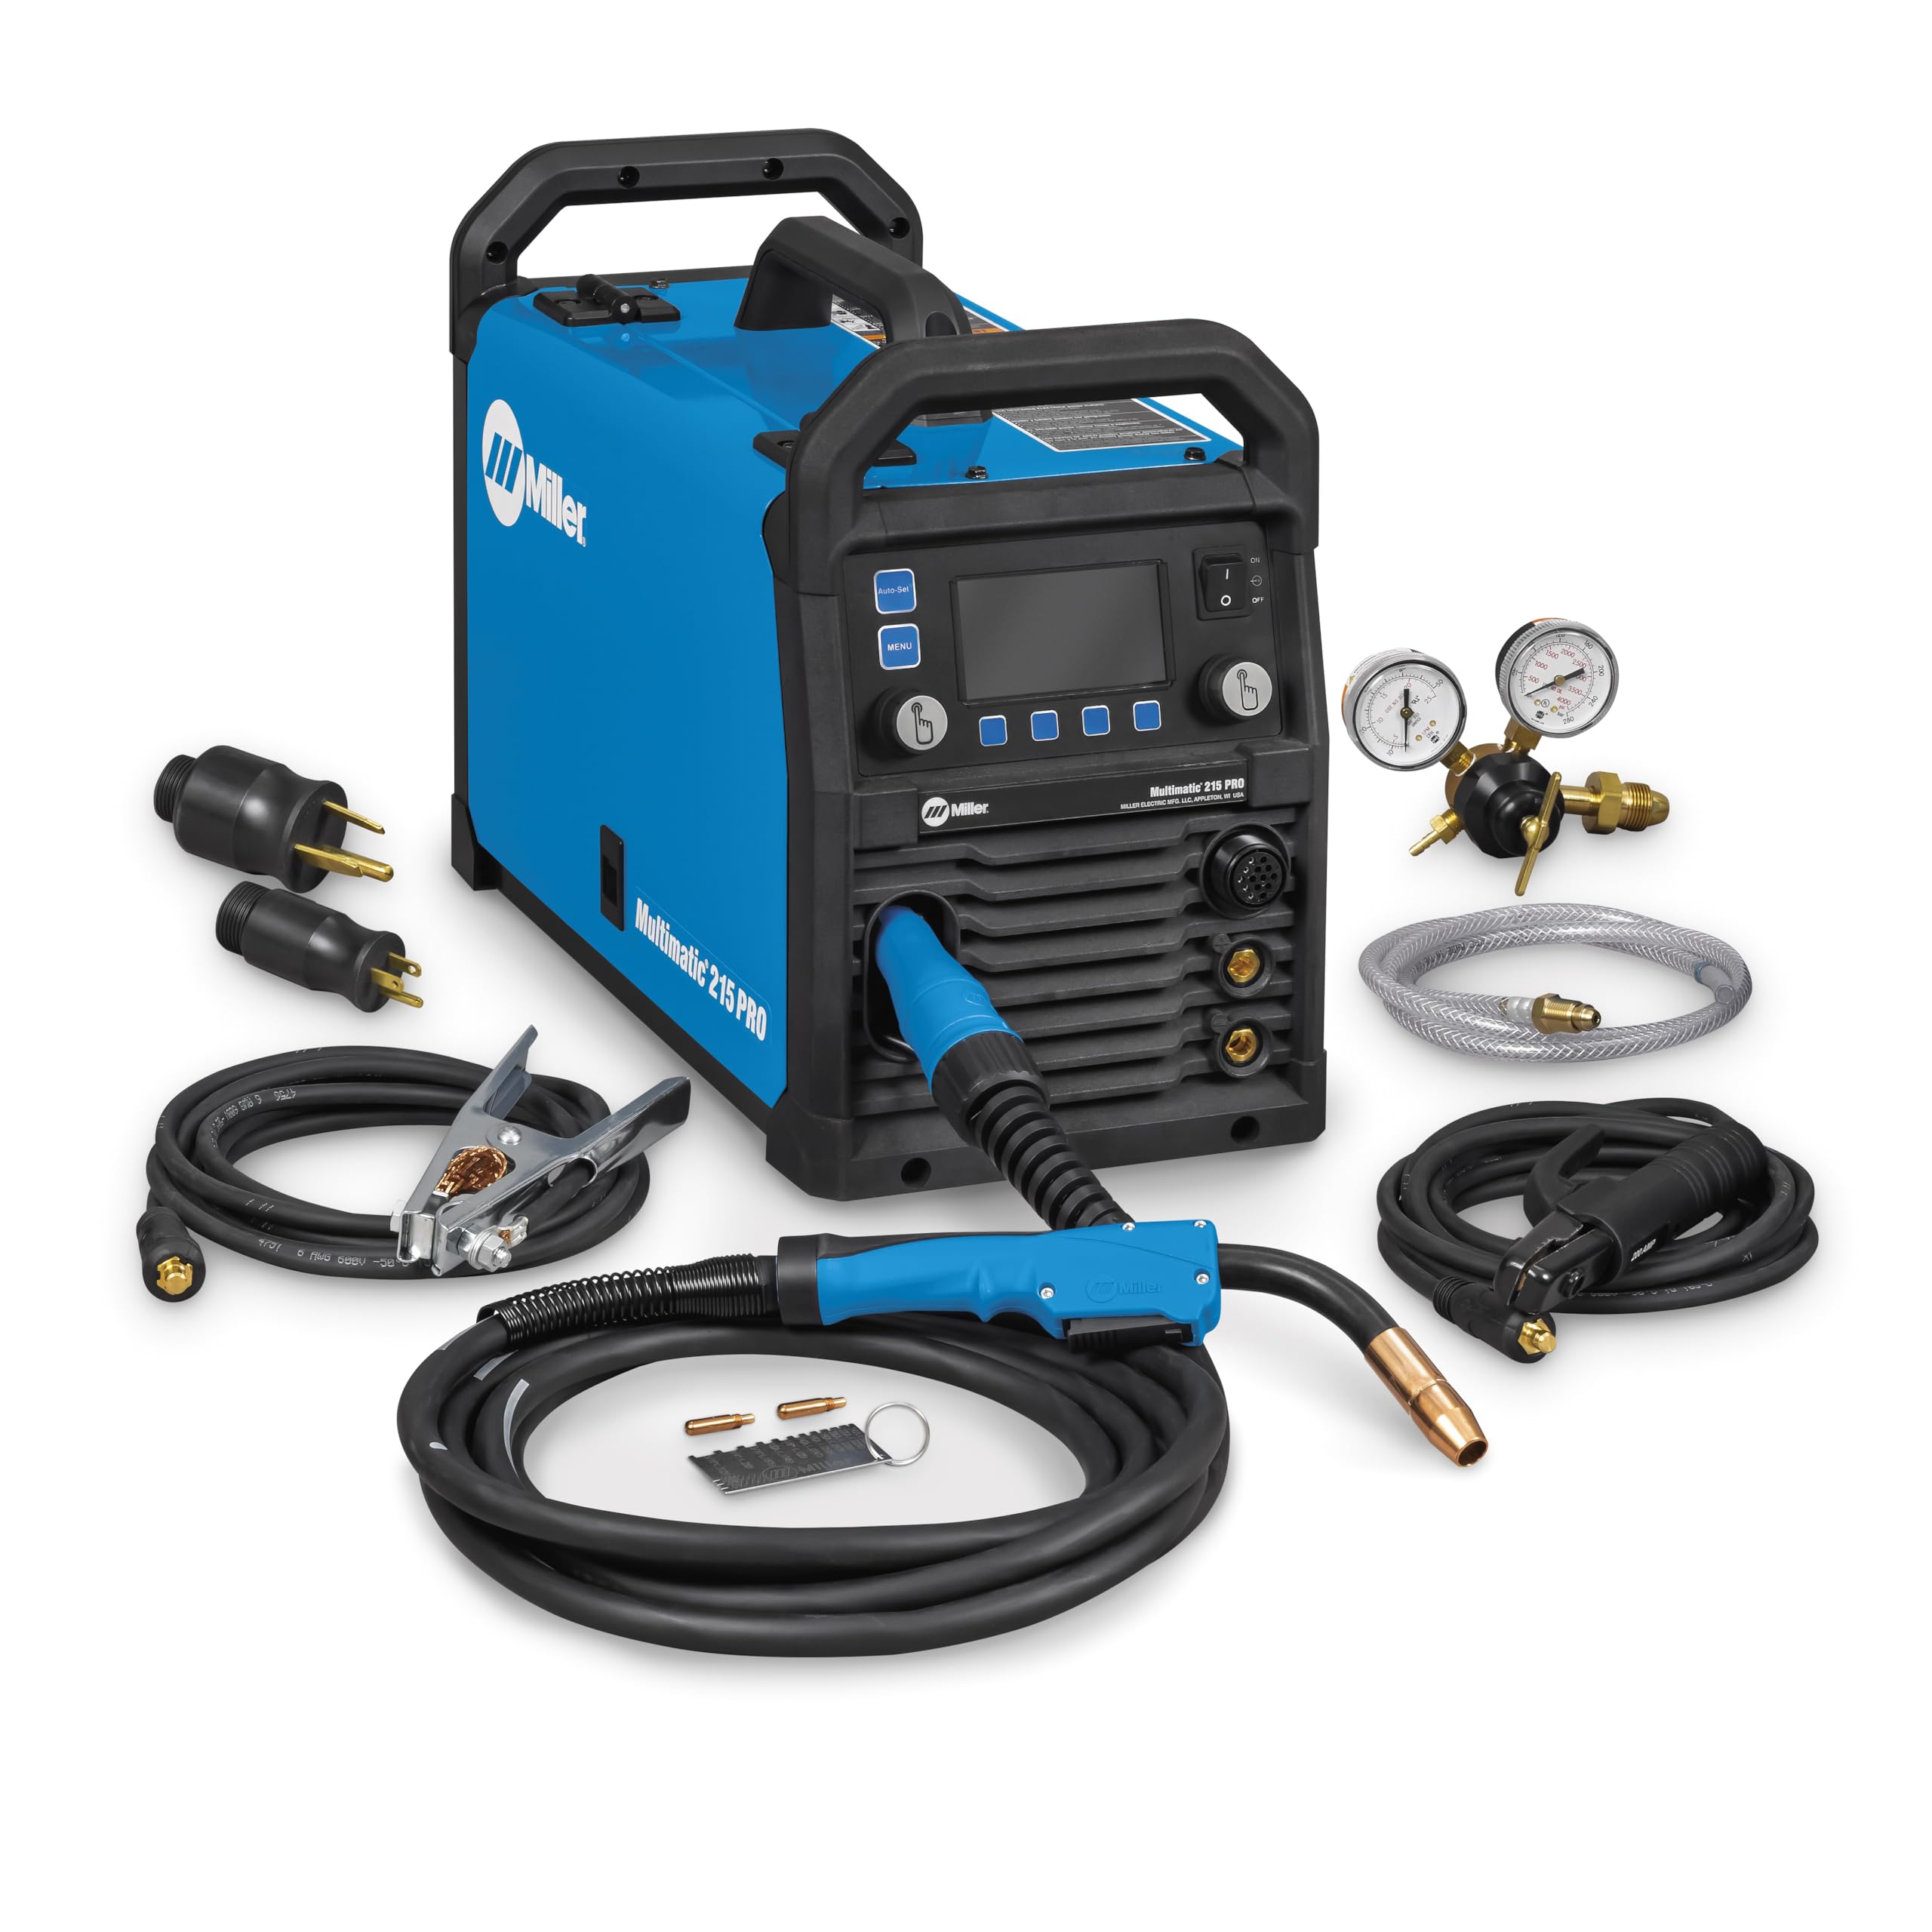
Figure 1: Miller Multimatic 215 PRO Multiprocess Welder, showing the overall unit design.
Setup
1. Unpacking and Inspection
Carefully remove the welder and all accessories from the packaging. Inspect the unit for any signs of damage during transit. Report any damage to the carrier and supplier immediately.
2. Power Connection
The Multimatic 215 PRO features a Multi-Voltage Plug (MVP) for connection to either 120V or 240V power sources. Select the appropriate plug for your power supply and connect the 6.5 ft. (2 m) power cord to a grounded outlet. Ensure the power source meets the welder's requirements.
3. Gas Connection (MIG/TIG)
For MIG and TIG welding, connect the provided flow gauge regulator and gas hose to your argon or AR/CO2 mix gas cylinder. Secure all connections to prevent leaks. Refer to the gas cylinder instructions for proper handling and safety.
4. Wire Installation (MIG)
- Open the wire compartment.
- Install a 4-inch or 8-inch spool of welding wire.
- Thread the wire through the Quick Select drive roll, ensuring it is seated correctly for the wire size (0.024–0.035 in. solid or 0.030–0.045 in. flux-cored).
- Adjust the calibrated tension knob for consistent wire feeding.
5. MIG Gun and Work Cable Connection
Connect the 15 ft. (4.6 m) MDX-100 MIG gun to the appropriate receptacle on the front panel. Attach the 15 ft. (4.6 m) work cable with clamp to the work terminal. Ensure a good electrical connection to the workpiece.
6. TIG/Stick Setup
For Stick welding, connect the 15 ft. (4.6 m) cable electrode holder to the 25 mm Dinse-style connector. For TIG welding, connect your TIG torch (sold separately) to the appropriate connections.

Figure 2: Front panel of the Multimatic 215 PRO, illustrating connection points for MIG gun, work cable, and other accessories.
Operating Instructions
1. Powering On/Off
Locate the ON/OFF switch on the front panel and toggle it to the 'ON' position to power on the unit. To power off, toggle the switch to 'OFF'.
2. Interface Overview
The Multimatic 215 PRO features a clear display and intuitive control buttons for setting welding parameters. Use the 'MENU' button to navigate through options and the adjustment knobs to modify values.
3. Process Selection
Select your desired welding process (MIG, Pulsed MIG, TIG, Pulsed TIG, or Stick) using the interface. The machine will guide you through the necessary parameter adjustments for the chosen process.
4. Auto-Set Technology
Utilize the Auto-Set feature for quick and predefined settings. This technology simplifies setup by automatically recommending parameters based on material type, thickness, and wire size, helping achieve professional results faster.
5. BeadVision
BeadVision provides real-time bead monitoring, offering enhanced control and feedback during the welding process. Observe the display for visual cues to optimize your weld.
6. Program Memory
The Program Memory feature allows you to save and recall your most frequently used weld parameters. This is useful for repetitive tasks, ensuring consistent results without manual re-entry of settings.
7. Smooth-Start
The Smooth-Start technology helps eliminate spatter at the beginning of a weld, promoting clean arc starts and improved bead appearance.
8. Auto Spool Gun Detect
When using a spool gun (sold separately), the Auto Spool Gun Detect feature automatically senses its connection, eliminating the need for manual switching and streamlining your workflow.

Figure 3: Close-up view of the Multimatic 215 PRO display panel, showing welding parameters and controls.
Maintenance
Regular maintenance ensures the longevity and optimal performance of your Multimatic 215 PRO welder.
1. General Cleaning
Keep the welder clean and free from dust, metal particles, and debris. Use a dry, clean cloth to wipe down the exterior. Periodically use compressed air to clear ventilation openings, ensuring proper airflow for the Fan-On-Demand cooling system.
2. Drive Roll Inspection
Regularly inspect the Quick Select drive rolls for wear or damage. Replace them if they show signs of excessive wear to ensure consistent wire feeding.
3. Consumables
Inspect and replace MIG gun contact tips, nozzles, and TIG electrodes as needed. Worn or damaged consumables can negatively impact weld quality and performance.
4. Cable and Hose Inspection
Check all cables, hoses, and connections for cuts, abrasions, or loose fittings. Repair or replace any damaged components to maintain safety and performance.
Troubleshooting
This section provides solutions to common issues you might encounter. For problems not listed here, contact Miller Electric customer support.
- No Power: Ensure the power cord is securely plugged into a functional outlet. Check the circuit breaker for the power supply. Verify the ON/OFF switch is in the 'ON' position.
- Poor Weld Quality: Verify that the Auto-Set parameters are correctly selected for your material type, thickness, and wire size. Check gas flow and ensure the gas cylinder is not empty. Clean the workpiece thoroughly before welding.
- Wire Feeding Issues: Inspect the drive roll tension; it should be firm but not overly tight. Check the MIG gun liner for blockages or kinks. Ensure the wire spool is installed correctly and unwinds smoothly.
- Overheating: The Fan-On-Demand system manages internal temperature. If the unit indicates overheating, allow it to cool down. Ensure ventilation openings are clear and not obstructed. Check that the duty cycle for your welding process is not being exceeded.
Specifications
| Feature | Specification |
|---|---|
| Manufacturer | Miller Electric |
| Model Number | 907840 |
| Item Weight | 55 pounds |
| Product Dimensions | 24 x 14 x 19 inches |
| Power Source | DC |
| Input Voltage | 120V / 240V (Multi-Voltage Plug) |
| MIG Welding Capacity (240V) | Up to 3/8 inch steel and aluminum |
| MIG Welding Capacity (120V) | Up to 3/16 inch steel and 1/8 inch aluminum |
| Wire Sizes (Solid) | 0.024 – 0.035 inches |
| Wire Sizes (Flux-Cored) | 0.030 – 0.045 inches |
| Included Components | 15 ft. MDX-100 MIG gun, 15 ft. work cable with clamp, 6.5 ft. power cord with MVP plugs, flow gauge regulator and gas hose, contact tips, hook-and-loop cord wraps, material thickness gauge, 15 ft. cable electrode holder, Quick Select drive rolls |
Warranty and Support
The Miller Multimatic 215 PRO is manufactured by Miller Electric. For detailed warranty information, technical assistance, or service, please contact Miller Electric directly through their official website or customer service channels. Keep your purchase receipt for warranty claims.


