
1. Introduction
This manual provides essential instructions for the assembly, operation, and maintenance of your AECOJOY 84" Large Chicken Coop. Please read this manual thoroughly before assembly and use to ensure proper function and safety for your poultry.
The AECOJOY chicken coop is designed to provide a safe and comfortable habitat for 8-10 chickens. It features a two-layer design with a main sleeping house and a wire-fenced run, two nesting boxes, and a waterproof roof.
2. Safety Information
- Always assemble the coop on a flat, stable surface.
- Ensure all screws and fasteners are securely tightened during assembly and checked periodically.
- Keep small children and pets away from the assembly area to prevent injury.
- Regularly inspect the coop for any damaged parts, sharp edges, or loose components that could harm your animals.
- Position the coop in a sheltered area to protect against extreme weather conditions.
- Consider adding ground spikes (not included) to firmly fix the coop, especially in windy conditions, to prevent tipping.
3. Product Components and Features
The AECOJOY chicken coop includes several key features designed for the comfort and safety of your chickens:
- Natural Fir Wood Construction: Made from high-quality natural fir wood with a pet-safe, waterproof finish.
- Two-Layer Design: An elevated main house for sleeping and a spacious ground-level run.
- Waterproof PVC Roof: Provides protection from rain and sun.
- Galvanized Pull-out Tray: For easy cleaning of the main house.
- Two Large Nesting Boxes: Located on each side for egg laying, with partitions.
- Built-in Ramp: Connects the sleeping area to the run.
- Durable Galvanized Gridding Fence: Secures the run area.
- Multiple Entrances: Lockable doors for easy access to all areas of the coop.
- Polished Perches: Three perches provided, two in the sleeping area and one in the active run area.

Figure 3.1: Overview of the AECOJOY 84" Large Chicken Coop.
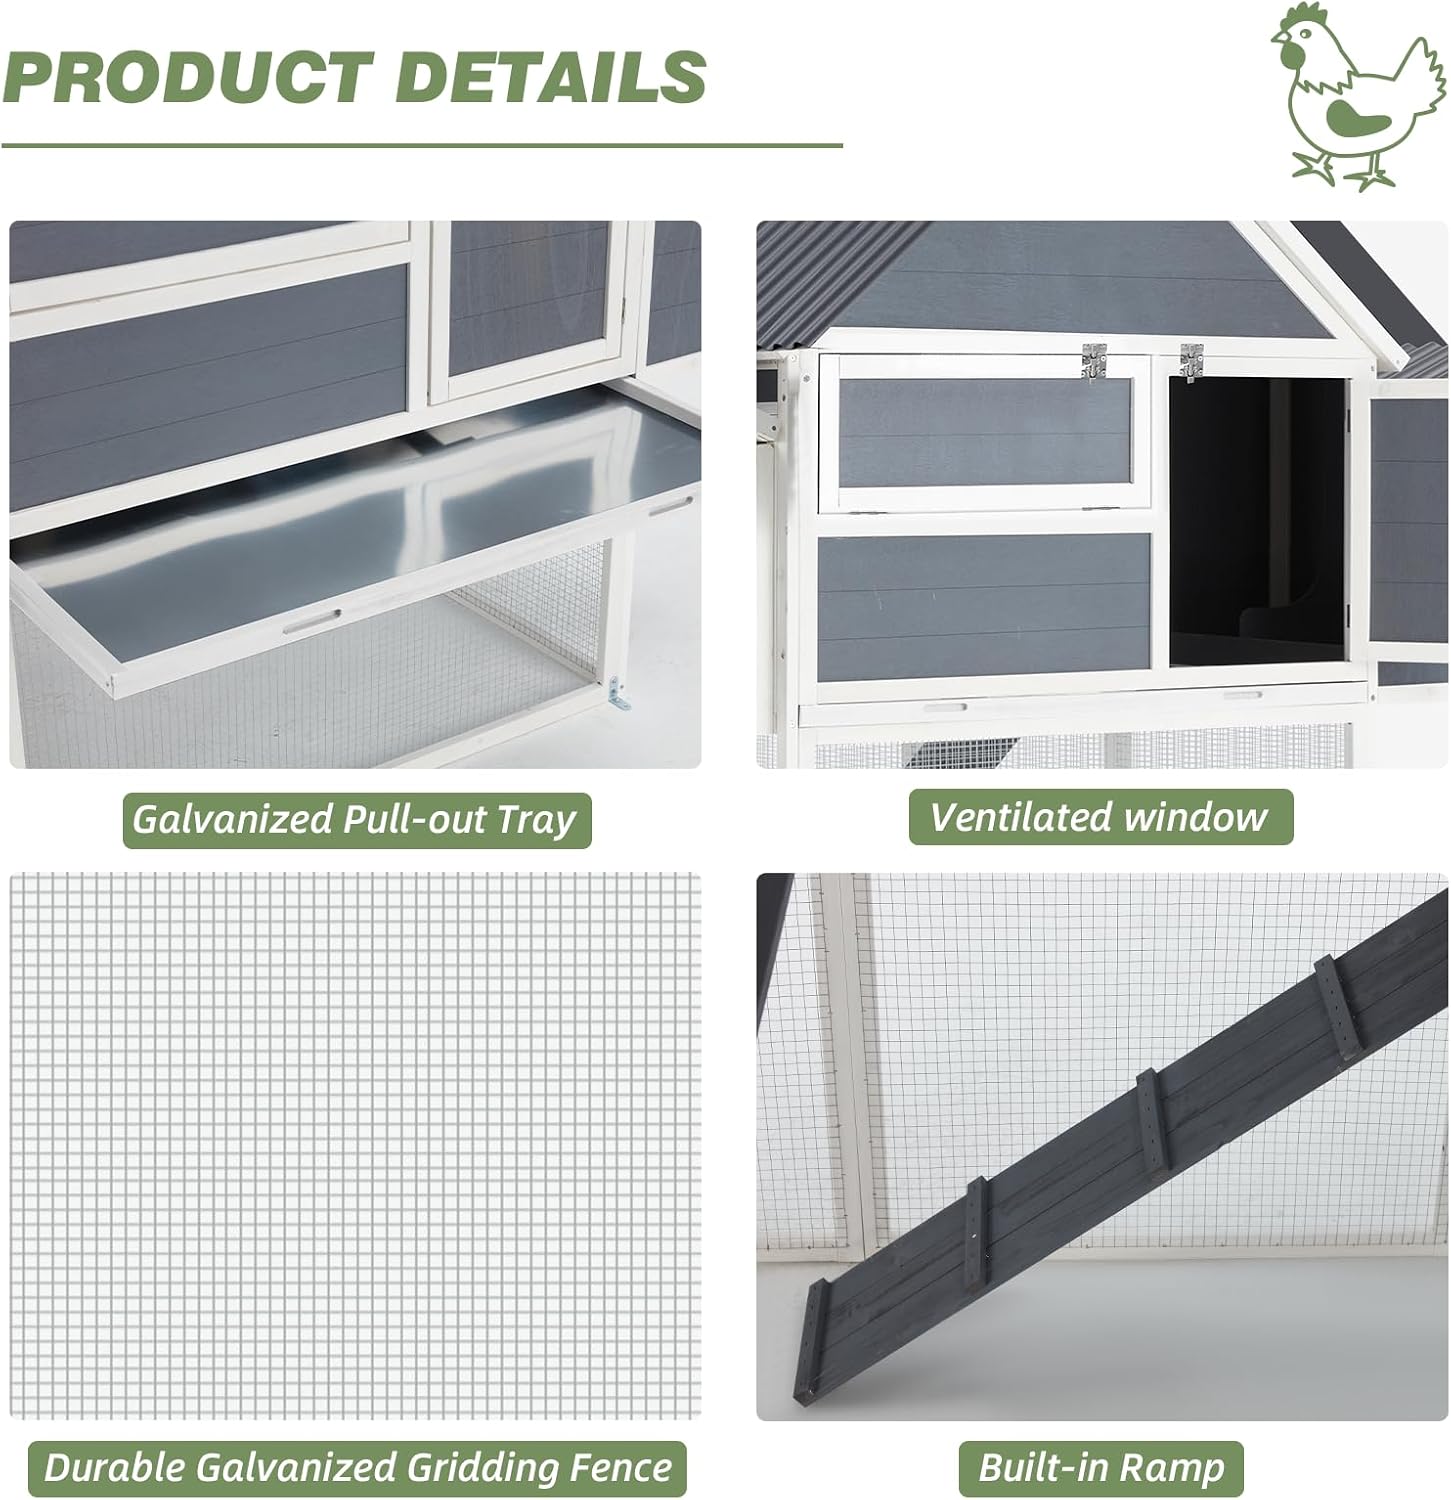
Figure 3.2: Detailed view of the galvanized pull-out tray, ventilated window, durable galvanized gridding fence, and built-in ramp.
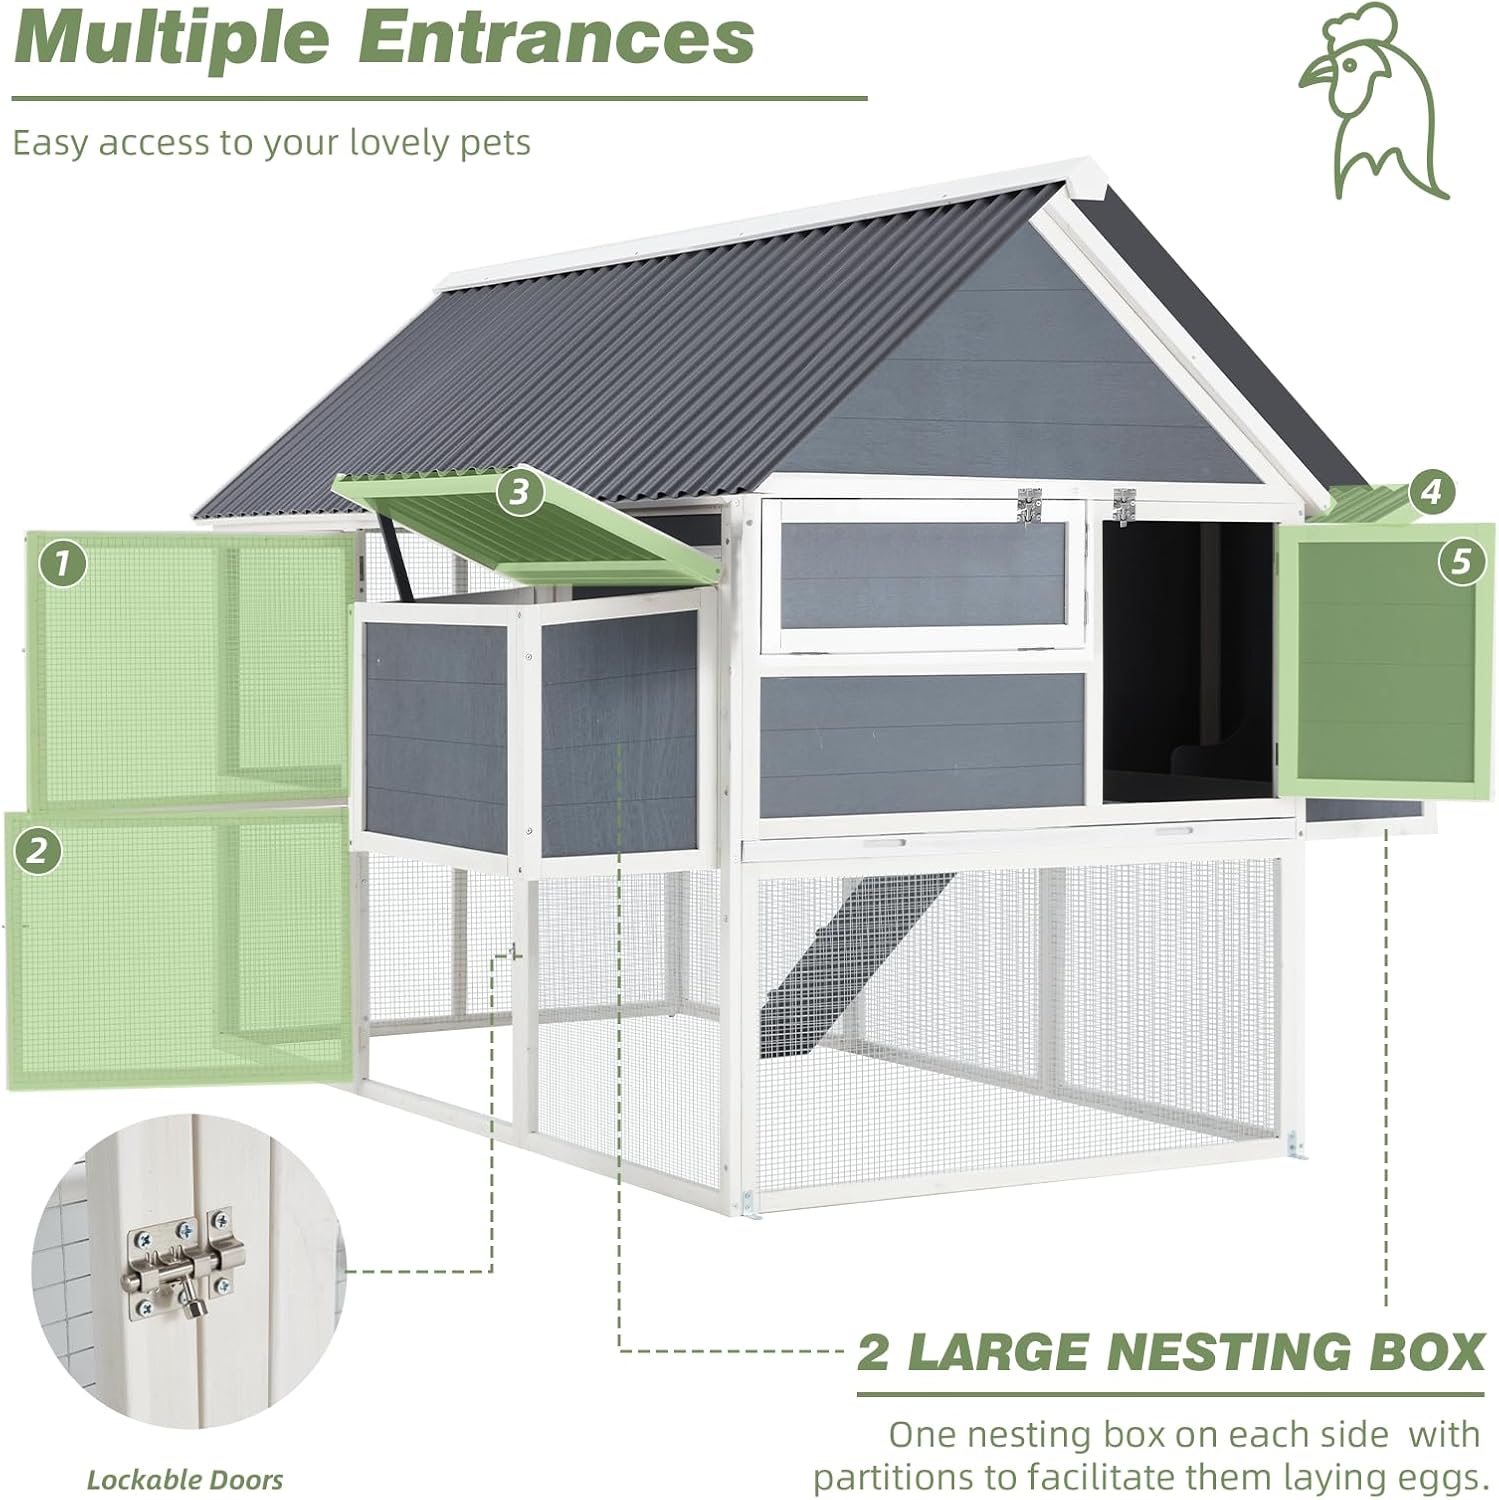
Figure 3.3: Illustration of multiple lockable entrances and the two large nesting boxes for egg collection.
4. Setup and Assembly
The AECOJOY chicken coop requires assembly. Please follow the detailed instructions provided in the separate assembly guide included with your product. Ensure all parts are present before beginning assembly.
- Unpack all components and verify against the parts list in the assembly guide.
- Assemble the main frame and housing sections first.
- Attach the wire run sections, ensuring they are securely fastened.
- Install the nesting boxes, ramp, and pull-out tray.
- Secure the waterproof PVC roof.
- Double-check all connections and ensure all doors and latches operate smoothly and securely.

Figure 4.1: Structural diagram of the chicken coop, illustrating its various sections for assembly reference.
5. Operating Instructions
- Accessing the Coop: Use the multiple lockable doors to access different sections of the coop for feeding, cleaning, and interacting with your chickens.
- Egg Collection: Eggs can be collected from the two large nesting boxes. Ensure the nesting box lids are securely closed after collection.
- Ventilation: The coop features ventilated windows. Adjust these as needed to ensure adequate airflow, especially during warmer weather, while protecting against drafts in colder conditions.
- Ramp Usage: The built-in ramp allows chickens to move between the elevated sleeping area and the ground-level run. Ensure the ramp is clear of obstructions.
6. Maintenance
Regular maintenance will extend the lifespan of your chicken coop and ensure a healthy environment for your poultry.
- Daily Cleaning: Remove droppings and soiled bedding from the main house and run.
- Weekly Cleaning:
- Pull out the galvanized tray for thorough cleaning. Wash with mild soap and water, then dry completely before returning.
- Clean nesting boxes and replace bedding.
- Inspect the wire fence for any damage or weak points.
- Monthly Inspection:
- Check all screws, latches, and hinges for tightness and security. Tighten as necessary.
- Inspect the wooden structure for any signs of wear, rot, or damage. Address any issues promptly.
- Examine the PVC roof for cracks or leaks. Repair as needed to maintain its waterproof integrity.
- Seasonal Care: Apply a pet-safe wood sealant annually to protect the fir wood from weather elements and prolong its life.

Figure 6.1: The galvanized pull-out tray, designed for convenient cleaning of the main coop area.

Figure 6.2: Detail of the waterproof PVC roof, highlighting its corrugated design for weather protection.
7. Troubleshooting
| Problem | Possible Cause | Solution |
|---|---|---|
| Coop feels flimsy or unstable. | Loose fasteners; soft wood construction. | Ensure all screws and bolts are tightened. Consider reinforcing with additional hardware or bracing if needed. Use ground spikes for stability. |
| Ramp breaks or detaches easily. | Wear and tear; insufficient support. | Inspect ramp connections. Reinforce attachment points if necessary. Replace ramp if severely damaged. |
| Nesting boxes get wet during rain. | Water ingress around hinges or seams. | Apply waterproof sealant around nesting box hinges and seams. Consider adding flashing or an overhang to divert water. |
| Doors are hard to open/close or latches are insecure. | Misalignment; loose hinges; inadequate latches. | Check door alignment and adjust hinges. Tighten hinge screws. Consider replacing or adding sturdier latches for improved security. |
8. Specifications
| Feature | Detail |
|---|---|
| Product Dimensions | 83.8" L x 69.2" W x 59.8" H (Overall) |
| Sleeping Area | Approximately 6.7 sq ft |
| Ground Activity Area | Approximately 23.3 sq ft |
| Total Inner Space | Approximately 30 sq ft |
| Material | Natural Fir Wood, Galvanized Wire, PVC Roof |
| Color | Grey & White |
| Model Number | 12090 (Manufacturer Part Number: SS12090) |
| Capacity | 8-10 Chickens (depending on breed and size) |
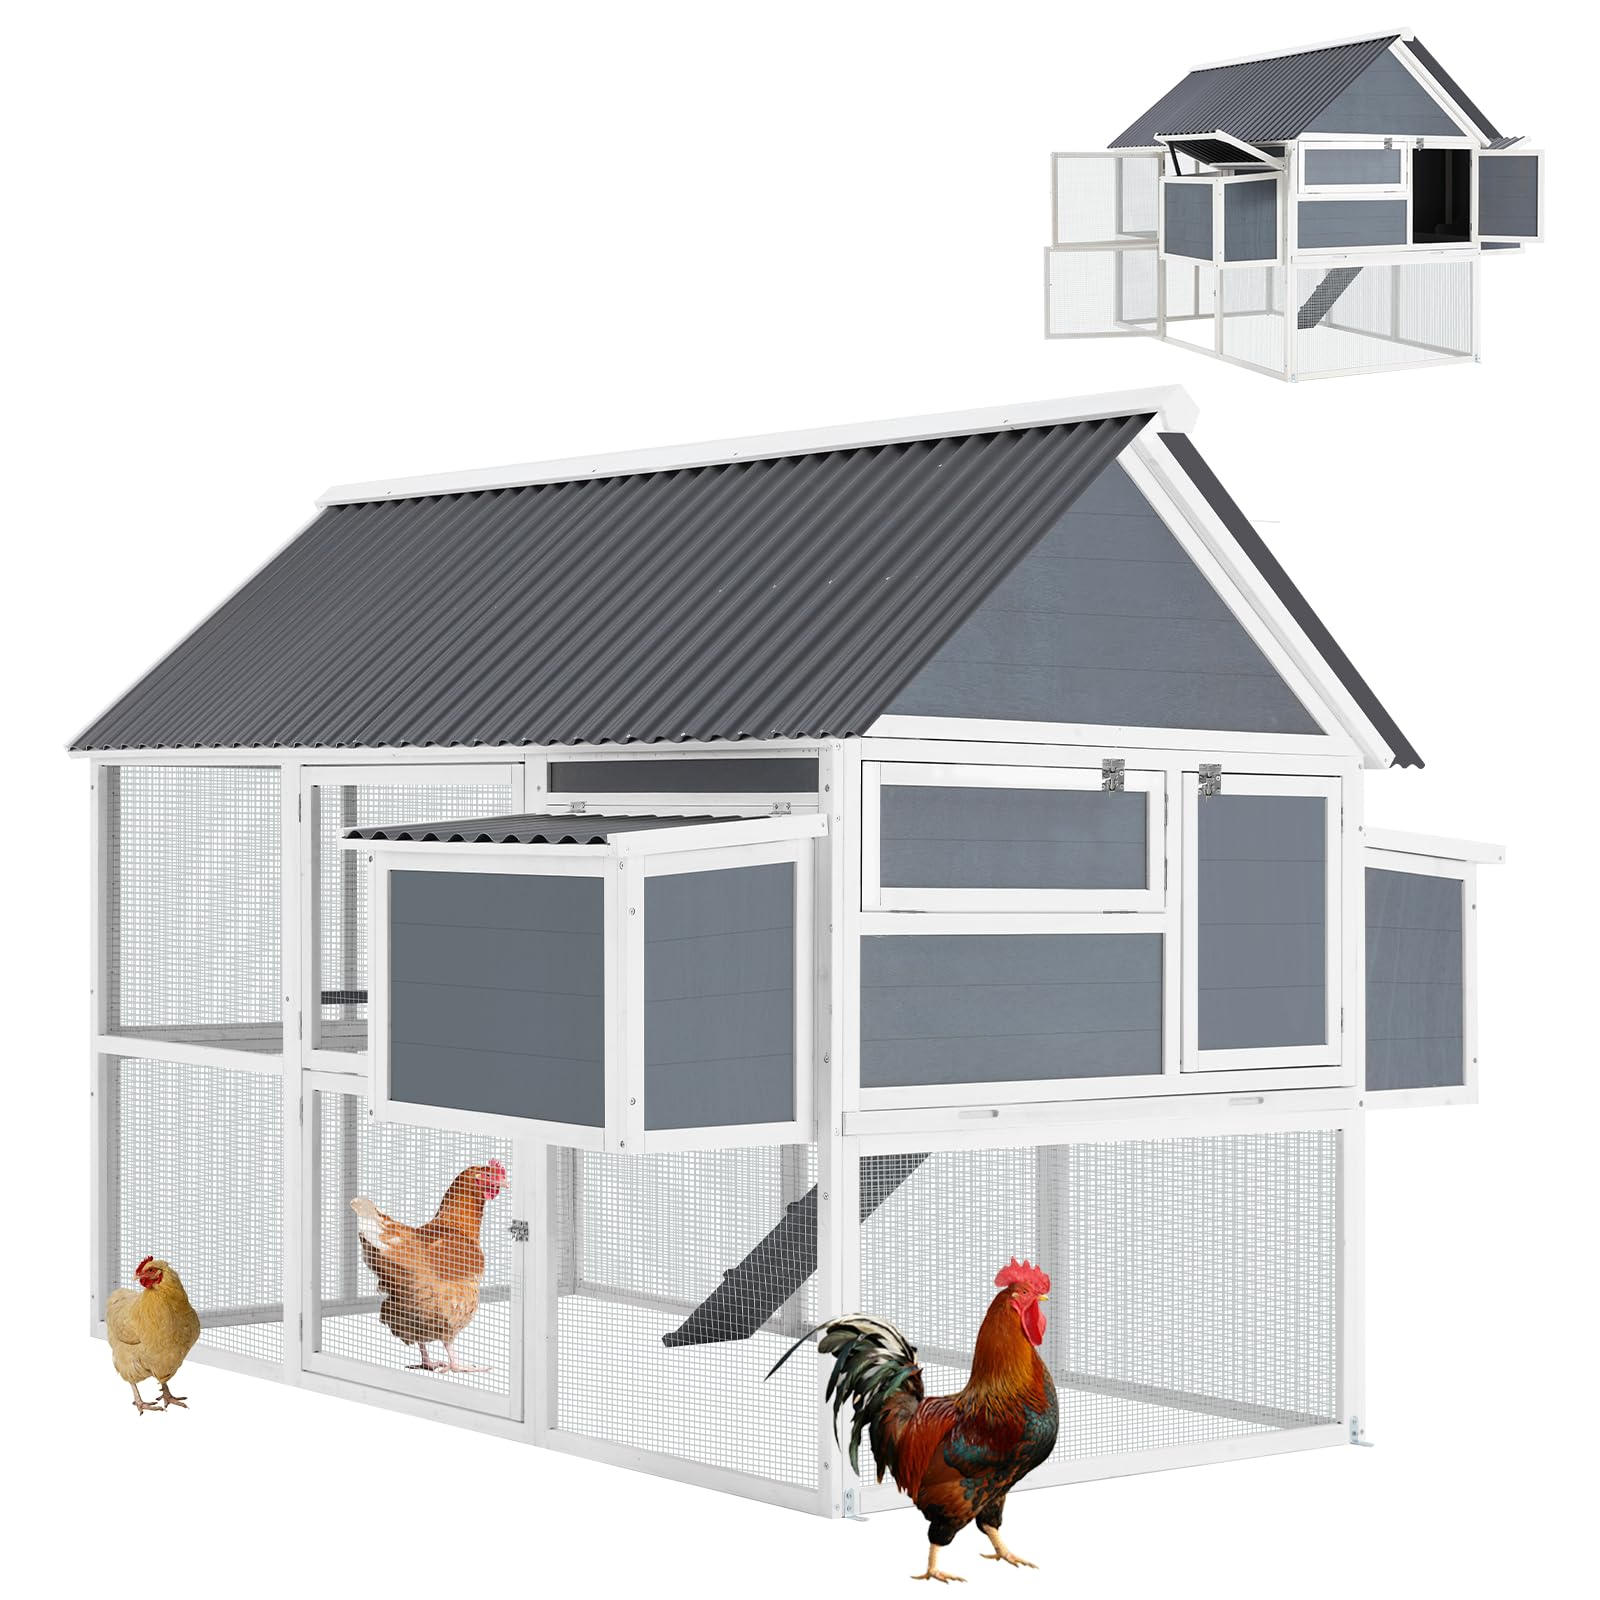
Figure 8.1: Detailed product dimensions of the AECOJOY chicken coop, including height, length, and width measurements.

Figure 8.2: Breakdown of the coop's inner space, indicating sleeping area and ground activity area square footage.
9. Warranty and Support
For warranty information or technical support, please refer to the documentation included with your purchase or contact AECOJOY customer service directly. Keep your purchase receipt for warranty claims.
For further assistance, please visit the AECOJOY store on Amazon: AECOJOY Store
