
Introduction
This manual provides detailed instructions for setting up, operating, maintaining, and troubleshooting your ASUS ROG PG34WCDN 34-inch curved QD-OLED gaming monitor. Please read this manual thoroughly before using the product to ensure proper functionality and longevity.
The ASUS ROG PG34WCDN is a 34-inch curved 1800R monitor featuring a 3440x1440 resolution, 360Hz refresh rate, and 0.03ms GTG response time. It incorporates RGB Stripe Pixel OLED Technology for clear text and accurate color, and BlackShield Film Protection for enhanced scratch resistance and black levels. Advanced features include ASUS OLED Care Pro for burn-in prevention and comprehensive connectivity options.

Image: Visual comparison demonstrating improved text clarity with RGB Stripe Pixel OLED technology.
Package Contents
Verify that all items listed below are present in your product package. If any items are missing or damaged, contact your retailer.
- PG34WCDN Gaming monitor
- Color pre-calibration report
- DisplayPort cable
- HDMI Ultra High Speed Cable
- Power adapter
- Power cord
- Quick start guide
- ROG pouch
- ROG sticker
- USB 3.2 cable
- USB-C cable
- VESA mount kit
- Warranty Card
Setup Instructions
1. Monitor Assembly
Carefully remove the monitor and its components from the packaging. Attach the stand base to the stand neck, then secure the assembled stand to the monitor panel. Ensure all screws are tightened appropriately.

Image: Front view of the ASUS ROG PG34WCDN monitor assembled with its stand.
Image: The ASUS ROG PG34WCDN monitor integrated into a gaming desktop setup.
2. Connecting Cables
Connect the necessary cables to the monitor's input ports and your computer or other devices. The monitor supports various connectivity options:
- DisplayPort 2.1a: For high-bandwidth video and audio transmission (80Gbps). Use the included DisplayPort cable.
- HDMI 2.1: Two ports available for video and audio (48Gbps). Use the included HDMI Ultra High Speed Cable.
- USB-C: One port with DisplayPort Alt Mode and 90W Power Delivery.
- USB Hub: Three USB 3.2 Gen 1 Type-A ports for connecting peripherals.
- Earphone Jack: For audio output.
- SPDIF out: Optical Digital Audio Out.
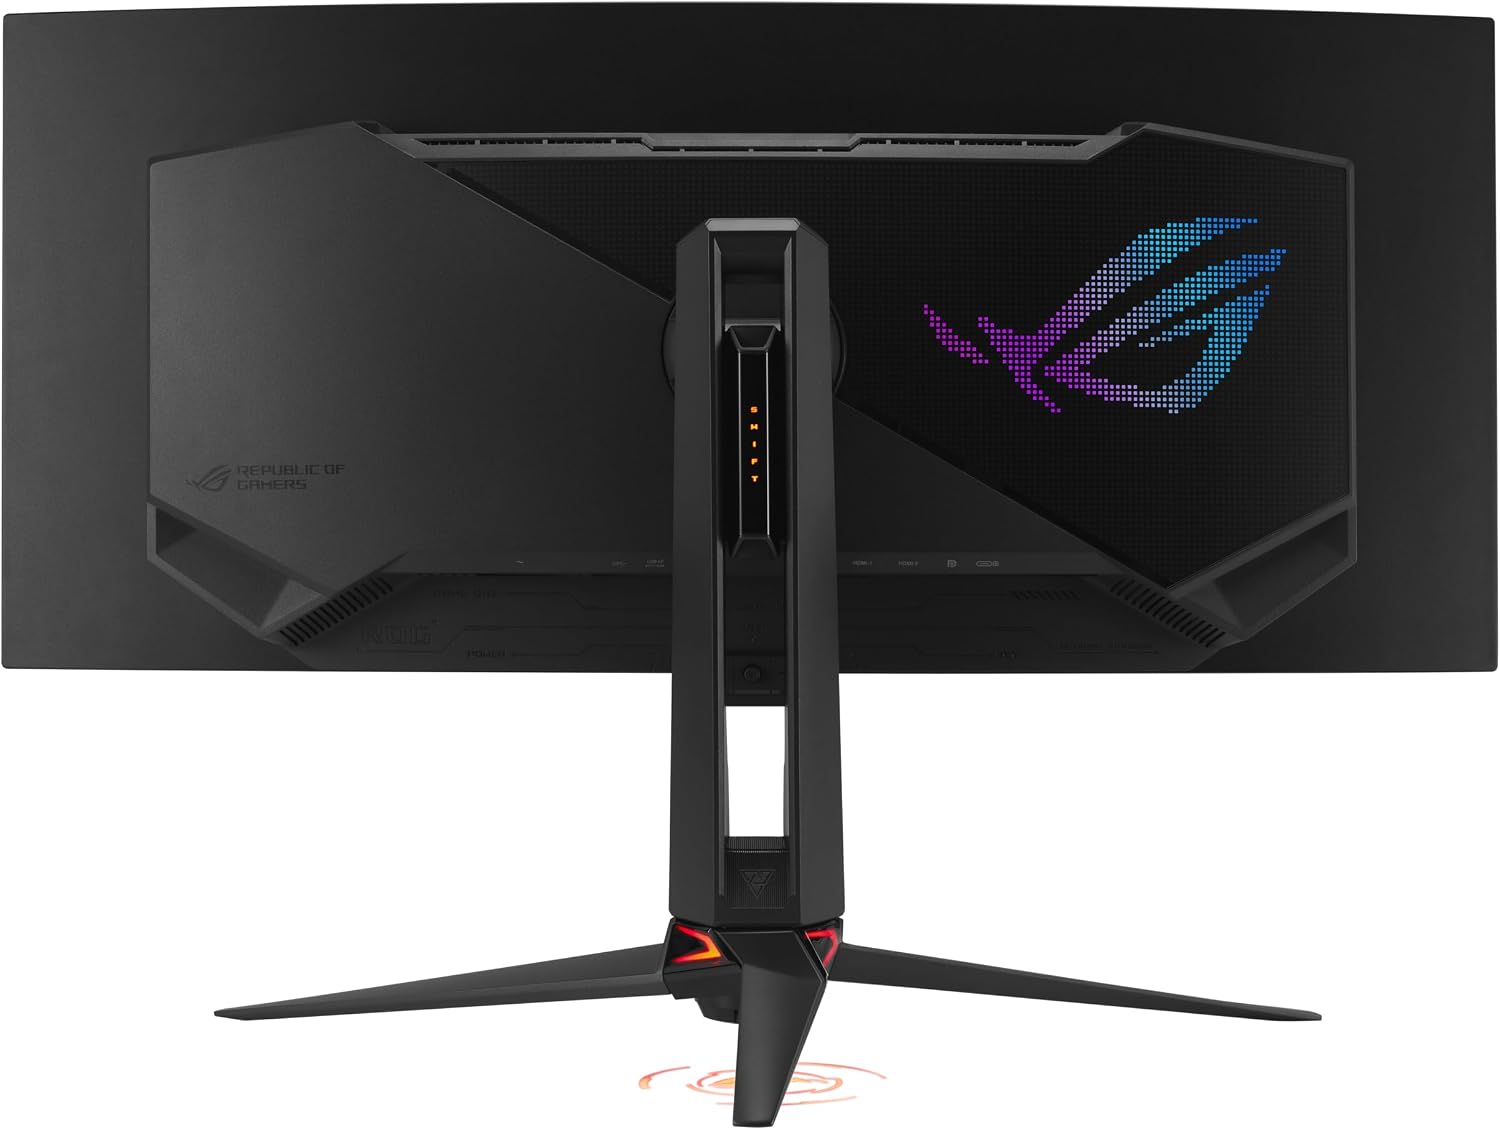
Image: Rear view of the monitor displaying the various input and output ports.

Image: Diagram illustrating the bandwidth capabilities of HDMI 2.1, DisplayPort 2.1a, and USB-C connections.
3. Power Connection
Connect the power adapter to the monitor's power input, then plug the power cord into a wall outlet. The monitor operates on 240 volts and consumes approximately 85 watts.
Operating Instructions
Basic Operation
Press the power button, typically located on the bottom right or rear of the monitor, to turn it on or off. Use the OSD (On-Screen Display) joystick or buttons to navigate the monitor's settings menu.
Display Settings
- Resolution: The native resolution is 3440x1440 (WQHD Ultrawide). Ensure your graphics card is configured to output this resolution for optimal clarity.
- Refresh Rate: The monitor supports up to 360Hz. Adjust your system's display settings to utilize the maximum refresh rate for smoother visuals.
- Response Time: Features a 0.03ms GTG response time.
- HDR: VESA DisplayHDR 500 True Black compliant for enhanced contrast and color. Adjustable HDR settings are available in the OSD.
- Color Accuracy: Offers 99% DCI-P3 gamut and true 10-bit color with Delta E<2 color difference for professional-grade color reproduction.
- Adaptive Sync: Compatible with AMD FreeSync Premium Pro and NVIDIA G-SYNC for tear-free gaming. Enable this feature in your graphics card control panel and the monitor's OSD.
- Aspect Ratio Control: Adjust the display aspect ratio through the OSD to suit different content types.

Image: A vibrant scene showcasing the monitor's HDR performance.

Image: Visual comparison demonstrating the effect of G-SYNC on reducing screen tearing.

Image: Comparison showing the effect of uniform brightness settings on the display.
Gaming Features
- Extreme Low Motion Blur (ELMB): Reduces motion blur for clearer fast-paced scenes.
- AI Assistant: Provides in-game enhancements such as dynamic crosshairs and shadow boost.

Image: Comparison illustrating the improved motion clarity with ELMB Sync enabled.

Image: Demonstration of the AI Assistant's crosshair feature, showing it off and on.

Image: Demonstration of the AI Assistant's shadow boost feature, showing it off and on.
ASUS DisplayWidget Center Software
Install the DisplayWidget Center Software on your computer to access advanced monitor settings, auto firmware updates, and the ability to export/import settings. This software allows for convenient management of display configurations.
Ergonomic Adjustments
The monitor stand allows for various adjustments to optimize your viewing experience:
- Height Adjustment: 0~110mm range.
- Swivel: Up to ±30° left or right.
- Tilt: From -3° to +20°.

Image: Illustrations of the monitor's adjustable height, swivel, and tilt capabilities.
Maintenance
ASUS OLED Care Pro
The ASUS OLED Care Pro suite is designed to protect your OLED panel from potential burn-in and ensure its longevity. Key features include:
- Neo Proximity Sensor: Automatically detects user presence and switches to a black screen when you step away, reducing static image display time.
- Pixel Cleaning: A utility to refresh pixels and prevent image retention. It is recommended to run this periodically.
- Screen Save: Activates a screen saver to prevent static images from remaining on the display for extended periods.
- Pixel Move: Slightly shifts pixels to prevent static image burn-in.
- Boundary Detection: Identifies and adjusts display areas to minimize burn-in risk.
- Logo Brightness Adjustment: Reduces the brightness of static logos to protect the panel.
- Taskbar Detection: Automatically dims the taskbar area to prevent burn-in.
- Outer Dimming Control: Manages brightness in outer display regions.
- Global Dimming Control: Adjusts overall screen brightness to protect the panel.

Image: Overview of ASUS OLED Care Pro features, highlighting burn-in prevention mechanisms.

Image: Screenshot of the Pixel Cleaning utility interface.

Image: Illustration of the Neo Proximity Sensor detecting user presence to prevent burn-in.

Image: Visuals demonstrating the Screen Move and Boundary Detection features of OLED Care Pro.

Image: Visuals demonstrating the Screen Saver and Logo Brightness Adjustment features of OLED Care Pro.

Image: Visuals demonstrating the Taskbar Detection and Target Mode features of OLED Care Pro.

Image: Visuals demonstrating the Outer Dimming Control and Global Dimming Control features of OLED Care Pro.
BlackShield Film Protection
The monitor features BlackShield Film Protection, which increases the panel's hardness for 2.5 times better scratch resistance compared to previous-generation QD-OLED panels. This film also boosts the perceived black level by up to 40%.

Image: Visual comparison showing the improved black levels with BlackShield Film Protection.
Cleaning the Monitor
To clean the monitor screen, gently wipe it with a soft, lint-free cloth. For stubborn marks, slightly dampen the cloth with water or a mild, non-abrasive screen cleaner. Avoid using alcohol-based cleaners or harsh chemicals, as these can damage the screen surface. Ensure the monitor is powered off and unplugged before cleaning.
Troubleshooting
If you encounter issues with your monitor, refer to the following common troubleshooting steps:
- No Power: Ensure the power cord is securely connected to both the monitor and a working power outlet. Check the power adapter for any damage.
- No Signal: Verify that the video cables (DisplayPort, HDMI, USB-C) are correctly connected to both the monitor and your computer. Ensure the correct input source is selected on the monitor's OSD.
- Flickering Screen: Check the video cable connections. Try a different cable or port. Ensure your graphics card drivers are up to date.
- Image Retention/Burn-in: Utilize the ASUS OLED Care Pro features, such as Pixel Cleaning, to mitigate image retention. Avoid displaying static images for prolonged periods.
- Poor Image Quality: Adjust resolution, refresh rate, and color settings in your computer's display settings and the monitor's OSD. Ensure the monitor is set to its native resolution (3440x1440).
- Software Issues: If using DisplayWidget Center, ensure it is the latest version. Try reinstalling the software if problems persist.
For further assistance, consult the ASUS support website or contact customer service.
Specifications
| Feature | Detail |
|---|---|
| Brand | ASUS |
| Model Number | PG34WCDN |
| Screen Size | 34 inches |
| Resolution | 3440 x 1440 (WQHD Ultrawide) |
| Aspect Ratio | 21:9 |
| Curvature | 1800R |
| Display Type | QD-OLED |
| Refresh Rate | 360 Hz |
| Response Time | 0.03 ms (GTG) |
| Brightness | 500 cd/m² (peak) |
| Contrast Ratio | 1,500,000:1 |
| Color Gamut | 99% DCI-P3 |
| HDR Support | VESA DisplayHDR 500 True Black |
| Adaptive Sync | AMD FreeSync Premium Pro, G-SYNC Compatible |
| Connectivity | 1x DisplayPort 2.1a (80Gbps), 2x HDMI 2.1 (48Gbps), 1x USB-C (DP Alt Mode, 90W PD), 3x USB 3.2 Gen 1 Type-A, 1x Earphone Jack, 1x SPDIF Out |
| Power Consumption | 85 watts |
| Item Dimensions (D x W x H) | 10.9"D x 32"W x 22.2"H |
| Item Weight | 18.3 pounds |
| Mounting Type | Desk Mount (VESA compatible) |
Warranty and Support
Your ASUS ROG PG34WCDN monitor comes with a 3-year warranty, which includes coverage for accidental damage and burn-in. Please retain your proof of purchase for warranty claims.
For technical support, driver downloads, or further information, please visit the official ASUS support website. You may also consider purchasing additional protection plans for extended coverage:
- 4-Year Protection Plan: Extends coverage for 48 months.
- Complete Protect: A monthly renewal plan covering eligible past and future purchases.
For warranty service or support, refer to the contact information provided in your warranty card or on the ASUS official website.


