1. Introduction
Thank you for choosing the DEWENWILS Wireless Remote Control Outlet with 8-Hour Timer. This device provides convenient wireless control and timed shut-off for your indoor appliances, enhancing both comfort and energy efficiency. Please read this manual thoroughly before use to ensure proper operation and safety.
2. Safety Information
- For indoor use only. Do not expose to water or damp conditions.
- Do not exceed the maximum load rating of 15A / 1875W.
- Ensure the appliance plugged into the outlet is in good working condition.
- Do not disassemble or modify the device.
- Keep out of reach of children.
- Unplug from the wall outlet when not in use for extended periods.
3. Package Contents
- 1 x Wireless Remote Control Outlet
- 1 x Remote Control
- 1 x CR2032 Battery (pre-installed in remote)
- 1 x Remote Holder
4. Product Overview
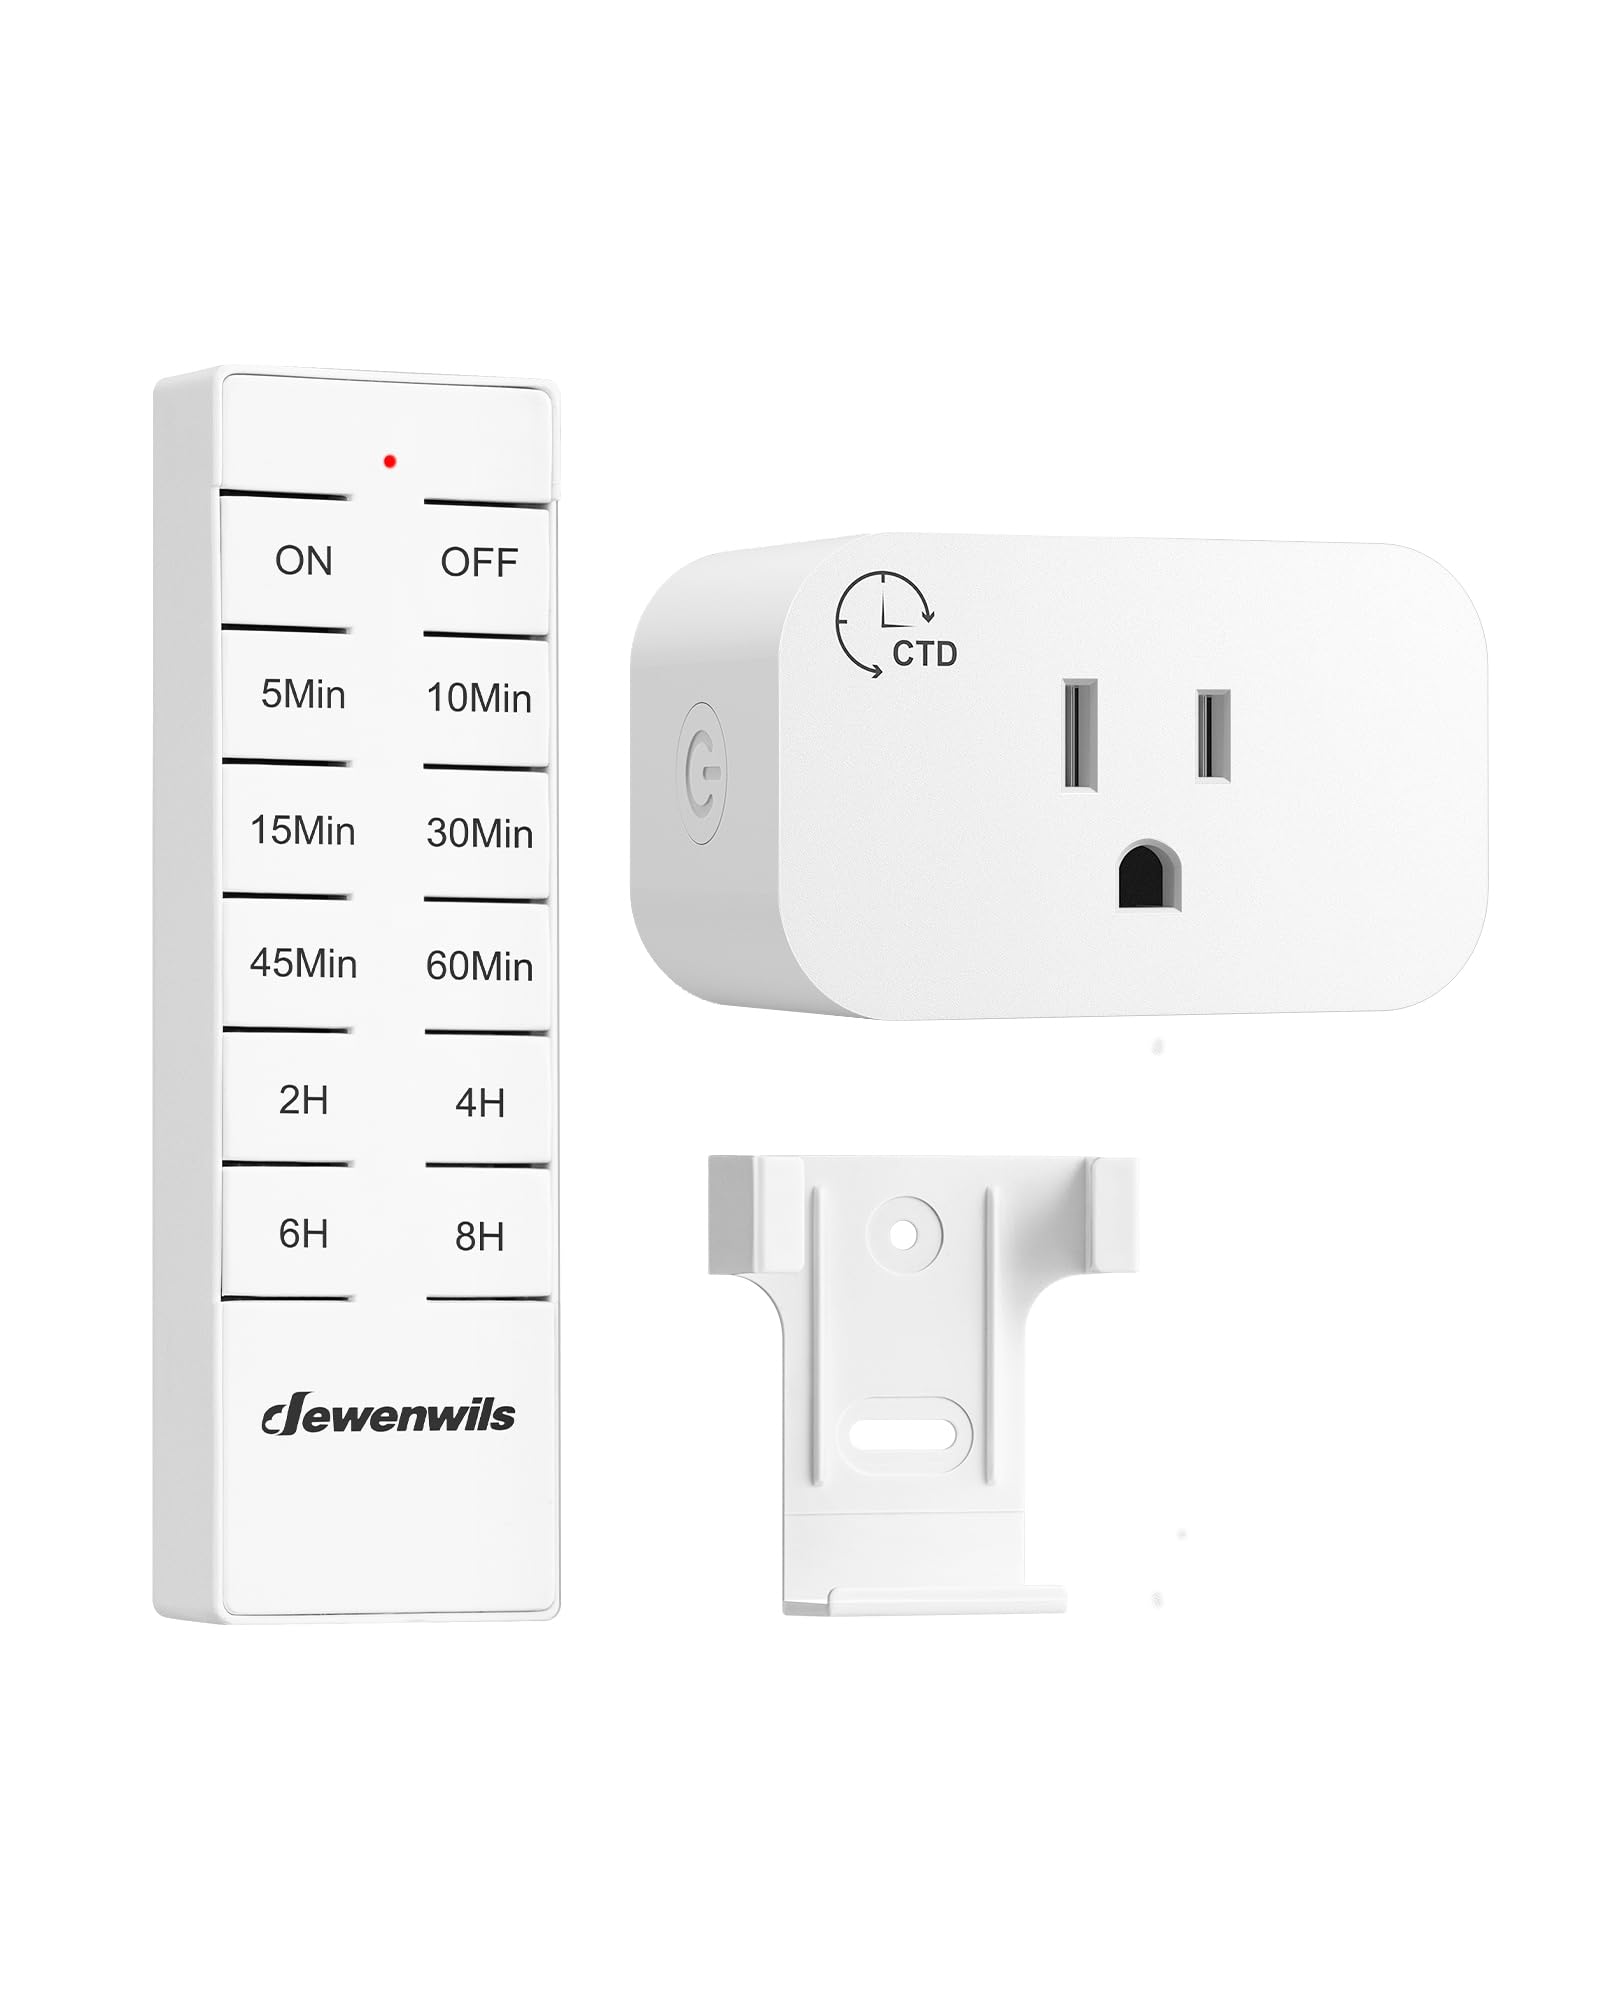
Figure 1: DEWENWILS Wireless Remote Control Outlet and Remote.
4.1 Wireless Remote Control Outlet
The compact design of the outlet ensures it does not block adjacent wall outlets, making it suitable for various home setups. It features a manual ON/OFF button and a status indicator light.

Figure 2: The compact design of the outlet prevents it from blocking other sockets, with dimensions shown for reference.
4.2 Remote Control
The remote control allows you to power your appliances on/off and set countdown timers from up to 100 feet away in open areas. Its strong RF signal can pass through walls without interference.
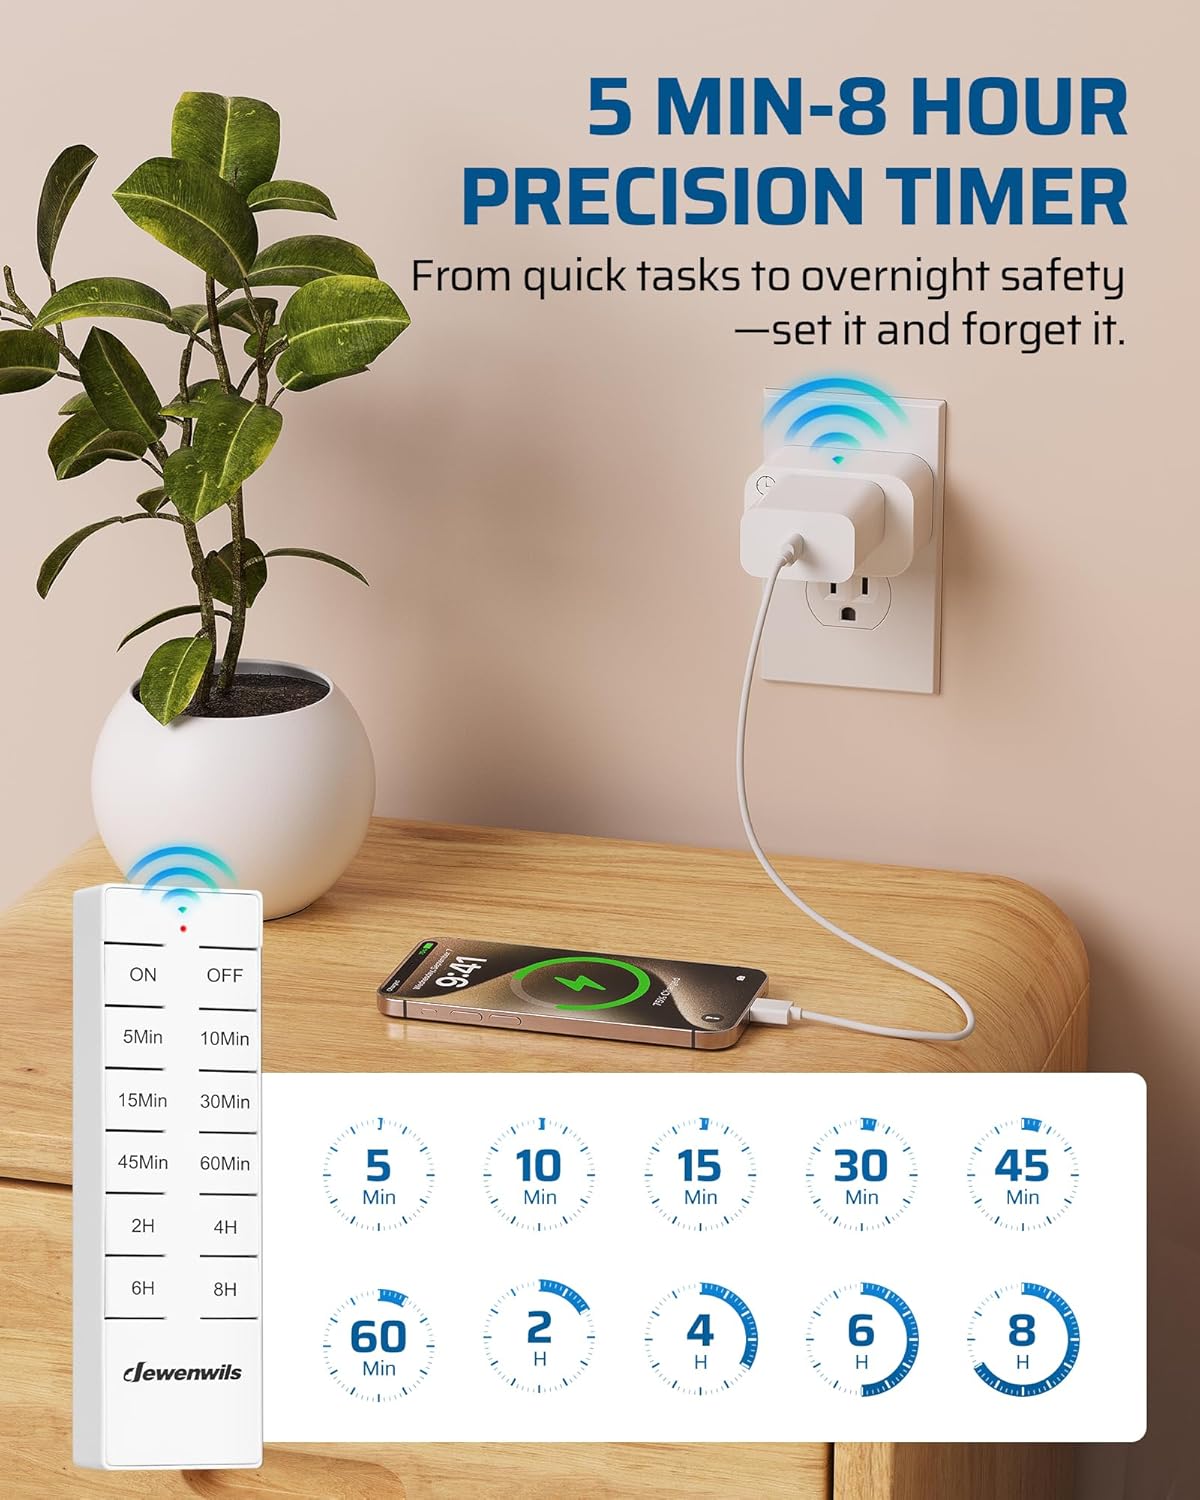
Figure 3: The remote control features ON/OFF buttons and various preset timer options.

Figure 4: The remote control offers a 100-foot RF range, allowing control even through walls.
5. Setup
- Insert Remote Battery: The remote control comes with a pre-installed CR2032 battery. If needed, replace the battery by opening the battery compartment on the back of the remote.
- Plug in the Outlet: Insert the DEWENWILS Wireless Remote Control Outlet into any standard indoor wall outlet (125V AC, 60Hz).
- Connect Appliance: Plug your desired appliance (e.g., lamp, fan, coffee maker) into the outlet on the remote control unit. Ensure the appliance's power switch is in the ON position if it has one.
- Initial Use: The remote and outlet are pre-programmed for immediate use. No additional pairing steps are typically required for initial setup.
6. Operating Instructions
6.1 Manual ON/OFF Control
- Press the ON button on the remote control to turn on the connected appliance.
- Press the OFF button on the remote control to turn off the connected appliance.
- Alternatively, you can press the manual button on the side of the outlet unit to toggle power.

Figure 5: Easily control hard-to-reach switches with the remote control.
6.2 Timer Functions (Countdown Shut-off)
The remote control features 8 preset countdown options to automatically turn off your appliance after a set duration. This is ideal for lights, fans, or charging devices.
- Ensure the appliance is turned ON.
- Press one of the timer buttons on the remote: 5Min, 10Min, 15Min, 30Min, 45Min, 60Min, 2H, 4H, 6H, 8H.
- The appliance will remain ON for the selected duration and then automatically power off.
- To cancel an active timer, press the OFF button on the remote.
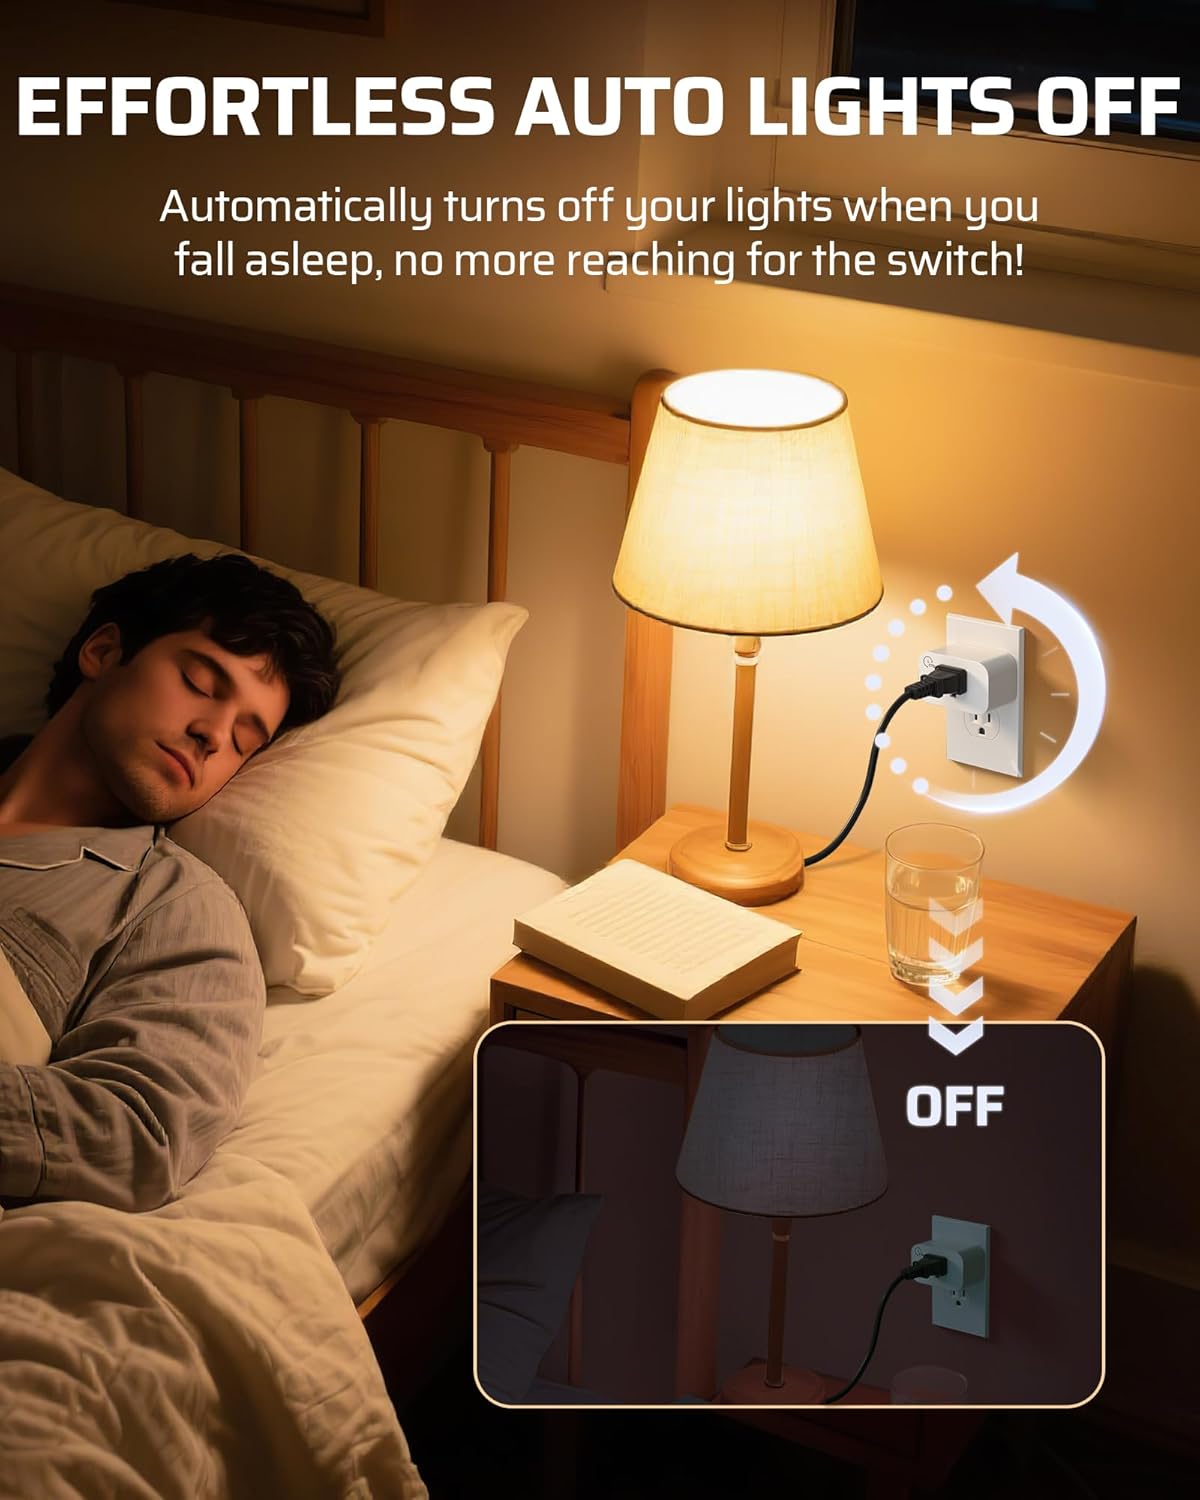
Figure 6: The auto-off feature is convenient for bedside lamps, turning them off after a set time.
7. Remote Control Pairing
The remote control and outlet are pre-programmed at the factory. If re-pairing is necessary or if you wish to pair additional remotes/outlets (sold separately), follow these steps:
- Plug the outlet into a wall socket.
- Press and hold the manual button on the side of the outlet unit for approximately 3 seconds until the indicator light starts flashing slowly.
- While the indicator light is flashing, press the ON or any timer button on the remote control.
- The indicator light on the outlet will stop flashing and remain solid, indicating successful pairing.
8. Maintenance
- Cleaning: Wipe the device with a dry, soft cloth. Do not use harsh chemicals or abrasive cleaners.
- Battery Replacement: If the remote control's range decreases or it becomes unresponsive, replace the CR2032 battery. Ensure correct polarity when inserting the new battery.
- Storage: Store the device in a cool, dry place when not in use for extended periods.
9. Troubleshooting
| Problem | Possible Cause | Solution |
|---|---|---|
| Appliance does not turn ON/OFF via remote. | 1. Appliance not plugged in or switched ON. 2. Remote battery is dead. 3. Remote and outlet are not paired. 4. Remote is out of range. | 1. Ensure appliance is properly connected and its power switch is ON. 2. Replace the CR2032 battery in the remote. 3. Re-pair the remote and outlet (see Section 7). 4. Move closer to the outlet. |
| Timer function does not work. | 1. Timer not activated correctly. 2. Appliance turned OFF manually. | 1. Ensure you press a specific timer button after turning the appliance ON. 2. Activating the timer requires the appliance to be ON first. |
| Reduced remote range. | 1. Low remote battery. 2. Excessive interference or obstacles. | 1. Replace the CR2032 battery. 2. Try to minimize large metal objects or other RF devices between the remote and outlet. |
10. Specifications
- Model Number: CLY801R+IT106
- Voltage: 125V AC, 60Hz
- Max Load: 15A, 1875W (Resistive)
- RF Frequency: 433.92MHz
- Remote Range: Up to 100 feet (open area)
- Plug Format: Type A/B
- Material: Nylon, Plastic
- Remote Battery: 1 x CR2032 (included)
- Package Dimensions: 4.84 x 3.03 x 1.93 inches
- Item Weight: 4.2 ounces
11. Warranty and Support
DEWENWILS products are designed to meet high-quality standards. For any questions, technical support, or warranty claims, please contact DEWENWILS customer service. Refer to the product packaging or the official DEWENWILS website for contact information.
You can also visit the DEWENWILS Store for more information and products.


