
Introduction
This manual provides essential information for the installation, operation, and maintenance of the LDGSUPH Midea Compatible Air Conditioning Motherboard, model 17110600000570 R-WSL250-DXX-A. This motherboard serves as the central control unit for compatible Midea air conditioning systems, ensuring precise temperature and humidity control, intelligent coordination of components, and stable, quiet operation. It is designed with high-quality components for durability and reliability, contributing to the extended lifespan of the air conditioning unit.
Safety Information
Please read all safety instructions before attempting installation or maintenance. Failure to follow these instructions may result in electric shock, fire, property damage, or personal injury.
- Professional Installation Recommended: Installation should only be performed by qualified and experienced technicians.
- Disconnect Power: Always ensure the main power supply to the air conditioning unit is completely disconnected before beginning any installation, maintenance, or inspection.
- Static Discharge: Electronic components are sensitive to electrostatic discharge. Use appropriate ESD precautions (e.g., anti-static wrist strap) when handling the motherboard.
- Handle with Care: Avoid touching electronic components directly. Hold the board by its edges.
- Correct Wiring: Ensure all wiring connections are correct and secure according to the air conditioner's service manual and wiring diagrams. Incorrect wiring can cause damage to the unit or pose a safety hazard.
- Environmental Conditions: Do not expose the motherboard to moisture, extreme temperatures, or corrosive environments.
Setup and Installation
This section outlines the general steps for replacing an air conditioning motherboard. Always refer to the specific service manual for your Midea air conditioning unit for detailed, model-specific instructions and wiring diagrams.
- Power Disconnection: Turn off the air conditioner at the thermostat and disconnect the main power supply at the circuit breaker. Verify power is off using a voltage tester.
- Access the Motherboard: Open the air conditioner's control panel or housing to gain access to the existing motherboard.
- Document Connections: Before disconnecting any wires, take clear photographs or make detailed diagrams of all wire connections to the old motherboard. Label each wire and its corresponding terminal for accurate re-connection.
- Disconnect Wires: Carefully disconnect all wires and connectors from the old motherboard.
- Remove Old Motherboard: Unscrew or unclip the old motherboard from its mounting points and remove it.
- Install New Motherboard: Position the new LDGSUPH motherboard in the same location as the old one. Secure it using the original screws or clips.
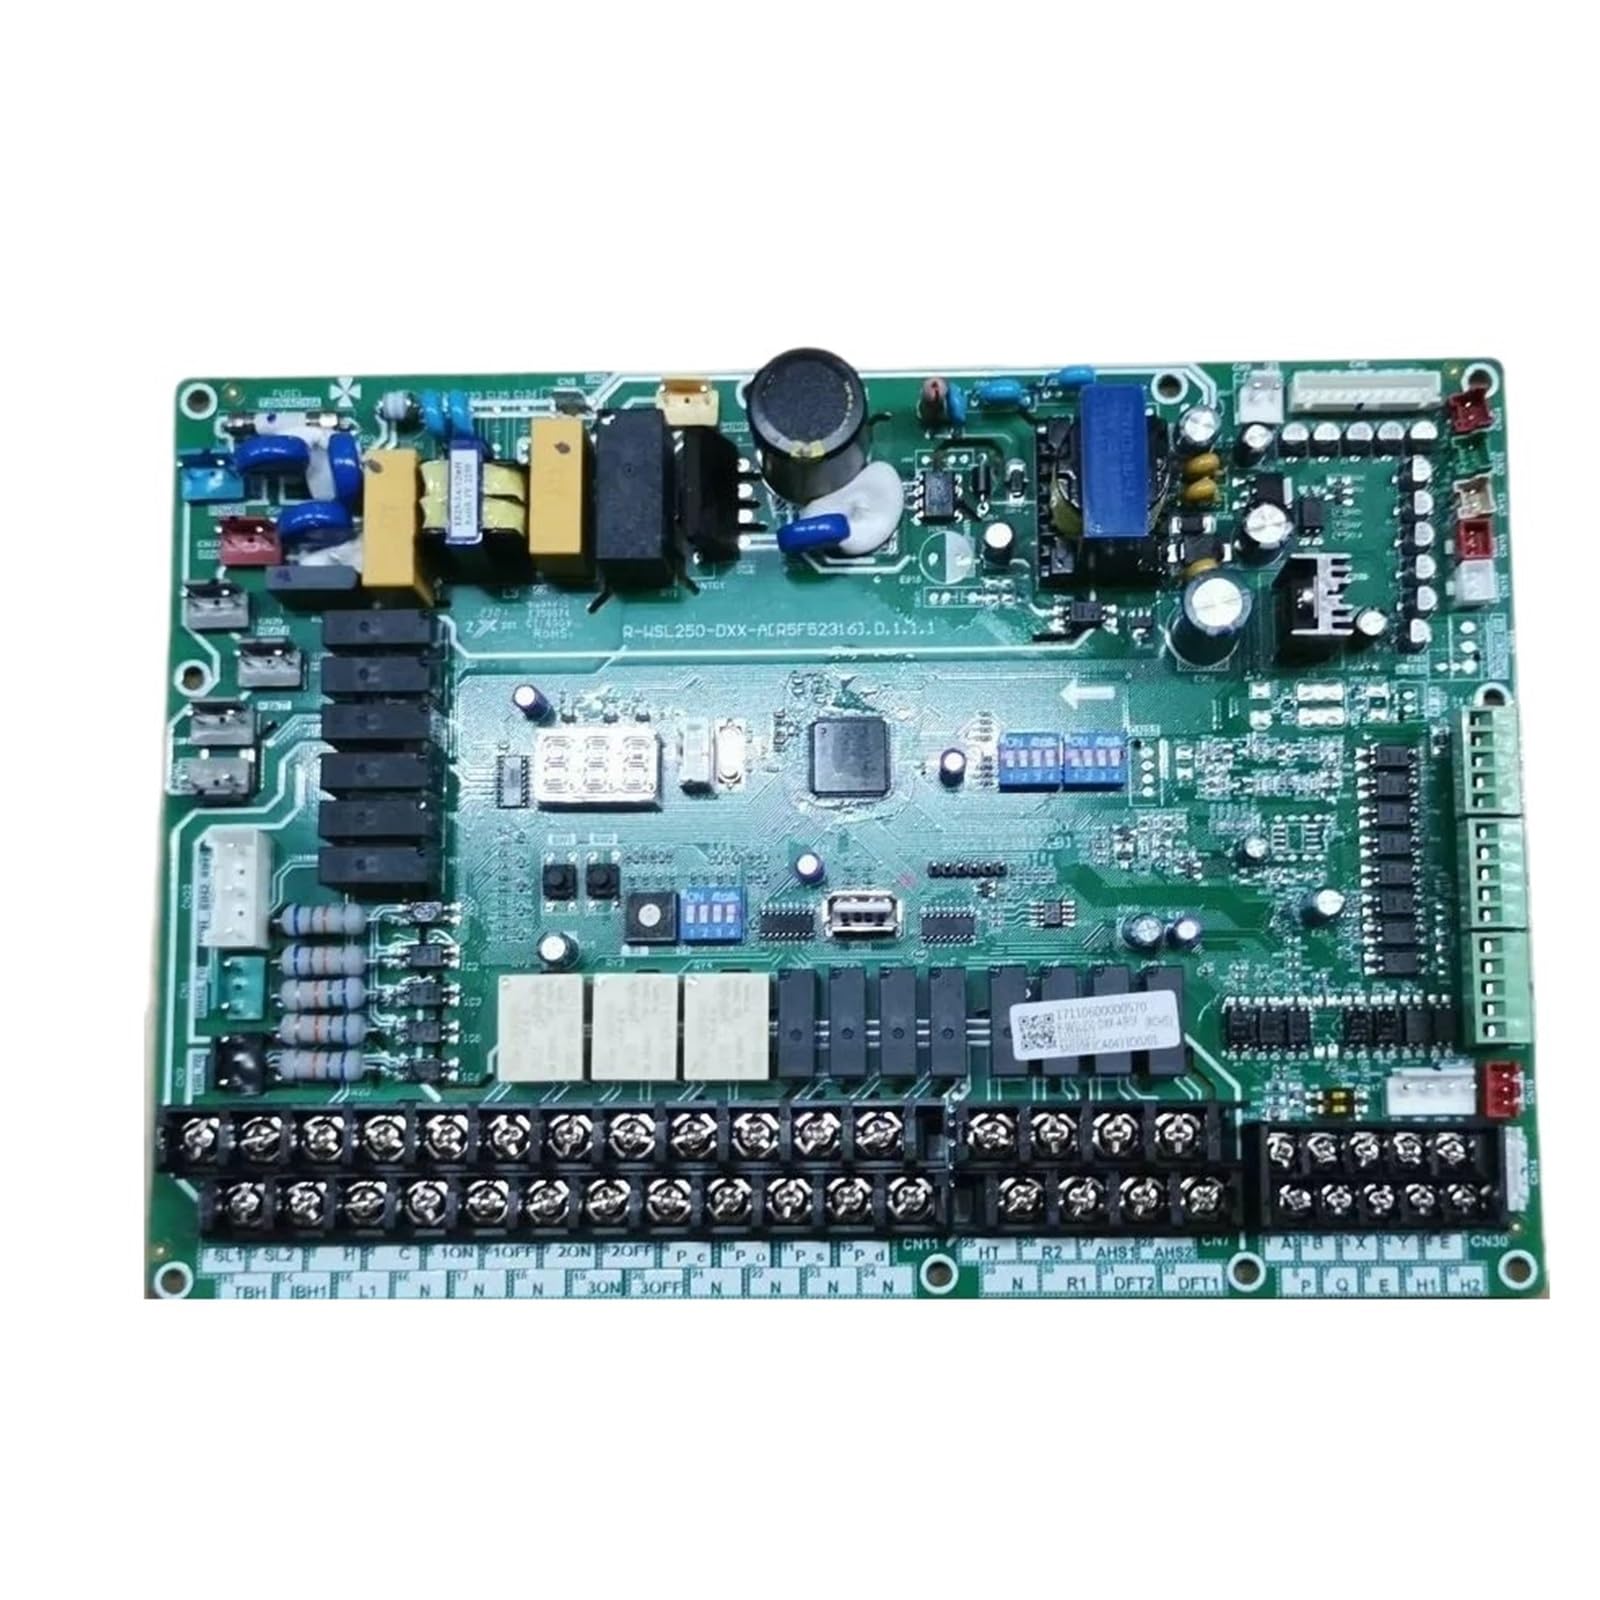
Figure 1: Overview of the LDGSUPH Midea Compatible Air Conditioning Motherboard, showing various components and connection points.
- Connect Wires: Carefully re-connect all wires and connectors to the new motherboard, matching them to your documented photographs or diagrams. Ensure all connections are firm and correctly seated.

Figure 2: Detailed view of the terminal blocks and various connectors on the motherboard, highlighting areas for wire connections.
- Verify Model and Part Numbers: Confirm that the installed motherboard matches the required part number for your specific Midea unit. The label on the board provides critical identification information.
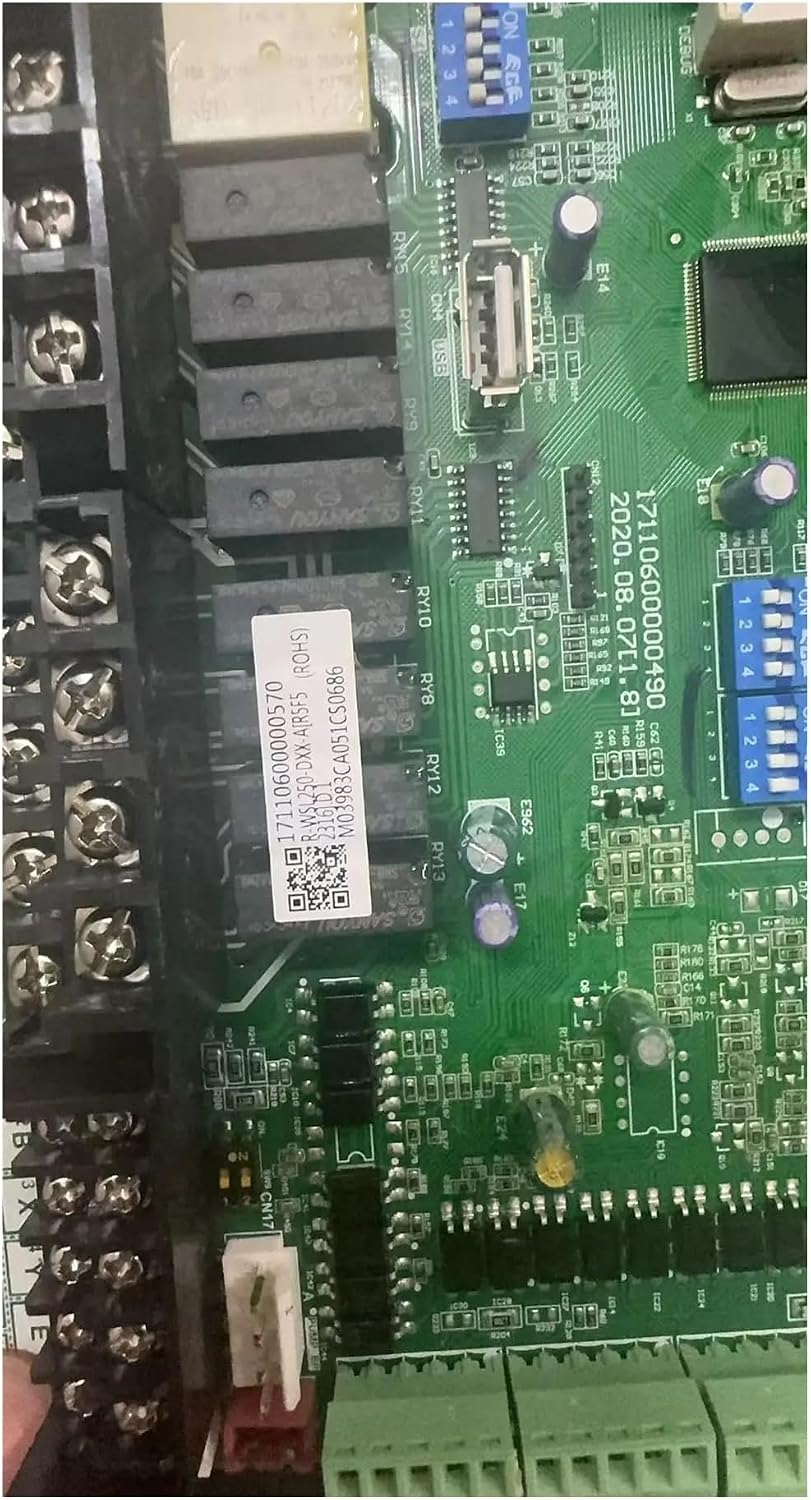
Figure 3: Close-up of the product label on the motherboard, displaying model and part numbers (e.g., 17110600000570) and a QR code for identification.
- Close Panel and Restore Power: Once all connections are verified, close the control panel or housing. Restore power to the air conditioning unit at the circuit breaker.
- Test Operation: Turn on the air conditioner and test its functions (cooling, heating, fan speeds) to ensure proper operation.
Operating Principles
As the core control unit, this motherboard manages the air conditioning system's functions. It continuously monitors environmental conditions via sensors and processes user input from the thermostat or remote control. Based on this data, it sends commands to various components:
- Compressor Control: Regulates the compressor's operation for efficient cooling or heating.
- Fan Speed Management: Adjusts indoor and outdoor fan speeds to optimize airflow and noise levels.
- Mode Switching: Manages transitions between cooling, heating, fan-only, and dehumidification modes.
- Protection Functions: Incorporates safety protocols to protect the system from overcurrent, overheating, and other potential faults.
The motherboard's optimized drive algorithm ensures quick compressor startup and smooth operation, contributing to both powerful performance and reduced noise.
Maintenance
Proper maintenance helps ensure the longevity and reliable performance of the motherboard and the entire air conditioning system.
- Regular Inspection: Periodically inspect the motherboard and its connections for any signs of dust accumulation, corrosion, loose wires, or physical damage. This should be done by a qualified technician during routine air conditioner servicing.
- Keep Clean and Dry: Ensure the area around the motherboard remains clean and dry. Dust and moisture can lead to short circuits or component failure.
- Ventilation: Ensure proper airflow around the control board to prevent overheating.
- Avoid Harsh Chemicals: Do not use harsh cleaning agents or solvents near the motherboard.
Troubleshooting
If your air conditioning unit experiences issues after motherboard replacement, consider the following troubleshooting steps. Always ensure power is disconnected before inspecting internal components.
- No Power: Check the main power supply, circuit breaker, and all power connections to the motherboard. Ensure the thermostat is calling for operation.
- Incorrect Operation: Verify all wire connections are correct and secure according to the wiring diagram. Ensure no wires are swapped or loose.
- Error Codes: If the air conditioner displays error codes, consult your unit's service manual for the meaning of these codes and recommended solutions.
- Component Malfunction: If specific components (e.g., compressor, fan) are not operating, check their individual connections to the motherboard.
- Professional Assistance: For complex issues or if basic troubleshooting does not resolve the problem, contact a qualified HVAC technician.
Specifications
- Model Number: 17110600000570 R-WSL250-DXX-A
- Compatibility: Compatible with specific Midea air conditioning units (verify with your unit's service manual).
- Application: Air Conditioning Fitting, Air Conditioner Parts
- Key Features: Precise temperature/humidity control, intelligent component coordination, powerful and quiet operation, stable and durable design, extends machine lifespan.
- Item Weight: Approximately 1.76 ounces (50 grams)
- Package Dimensions: Approximately 0.39 x 0.39 x 0.39 inches (1 x 1 x 1 cm)
Warranty and Support
For warranty information regarding this LDGSUPH product, please refer to the terms provided by your original point of purchase or contact the seller directly. Specific warranty periods and conditions may vary. For technical support or further assistance, please reach out to the product seller or a certified HVAC professional.