
Introduction
This manual provides essential information for the safe operation, maintenance, and troubleshooting of your Milwaukee M12 FUEL 12V Cordless Brushless 1/2" x 18" Bandfile, Model 2482-20. Please read this manual thoroughly before using the tool to ensure proper function and to prevent injury.

Image: The Milwaukee M12 FUEL 12V Cordless Brushless 1/2" x 18" Bandfile, showcasing its compact design and key performance benefits.
Safety Information
Always follow basic safety precautions to reduce the risk of fire, electric shock, and personal injury. Keep your work area clean and well-lit. Do not operate power tools in explosive atmospheres, such as in the presence of flammable liquids, gases, or dust. Always wear appropriate personal protective equipment, including eye protection, hearing protection, and gloves. Disconnect the battery pack before making any adjustments, changing accessories, or storing the tool.
Package Contents
- 1x M12 FUEL 1/2" x 18" Bandfile (2482-20) - Bare Tool
- 2x 60 Grit 1/2" x 18" Sanding Belts
Key Features
The Milwaukee M12 FUEL Bandfile is designed for efficient material removal and finishing tasks. Its key features include:
- 2 Speed Adjustment Settings: High (14,500 RPM) and Low (7,500 RPM) for versatile applications.
- Tool-Free Belt Change: Simplifies belt replacement for increased productivity.
- 360 Degree Arm Rotation: Allows for quick adjustment of the arm to any desired position for optimal access.
- Belt Alignment Adjustment: Ensures proper belt tracking during operation.
- LED Light: Illuminates the work area for improved visibility.
- Tool Lock-On: For continuous operation during extended use.
- Variable Speed Trigger: Provides precise control over sanding speed.

Image: An annotated diagram illustrating the various components and features of the Milwaukee M12 FUEL Bandfile.
Setup
Battery Installation
- Ensure the tool is switched off.
- Align the battery pack with the battery port on the tool handle.
- Slide the battery pack into the tool until it clicks securely into place.
- To remove, press the release button on the battery pack and slide it out.
Belt Installation and Adjustment
- Tool-Free Belt Change: Locate the compression stop pin. Compress the arm to latch the pin, allowing for easy belt changes.
- Tool-Free Belt Cover: Remove the set-screw and swing the belt cover open for access to the belt path.
- Slide the new 1/2" x 18" sanding belt onto the contact wheel and drive wheel, ensuring it is properly seated.
- Close the belt cover and secure the set-screw.
- Belt Alignment Adjustment: If the belt becomes misaligned during operation, use the belt adjustment screw to guide the belt back into the correct travel path.
Operating Instructions
Powering On/Off
To turn the tool on, depress the variable speed trigger. To turn it off, release the trigger. For continuous operation, engage the tool lock-on feature by pressing the lock-on button while the trigger is depressed.
Speed Adjustment
The tool features two speed settings: High (14,500 RPM) and Low (7,500 RPM). Use the speed adjustment switch to select the appropriate speed for your application. The variable speed trigger allows for fine-tuning the speed within the selected range.
Arm Rotation
The sanding arm can be rotated 360 degrees. To adjust the arm, simply rotate it to the desired position. This feature provides flexibility and access in tight spaces.
Usage Tips
- Always secure your workpiece before sanding.
- Apply light, even pressure. Excessive force can reduce efficiency and damage the belt or workpiece.
- Move the tool smoothly across the surface to achieve a consistent finish.
- For spot weld removal, use the high-speed setting and appropriate grit belt for efficient material removal.

Image: The bandfile in action, demonstrating its use for material removal on a metal component.

Image: The bandfile being used to grind a metal surface on a vehicle, highlighting its application in automotive work.

Image: The bandfile effectively sanding a metal pipe, showcasing its versatility for various metalworking tasks.
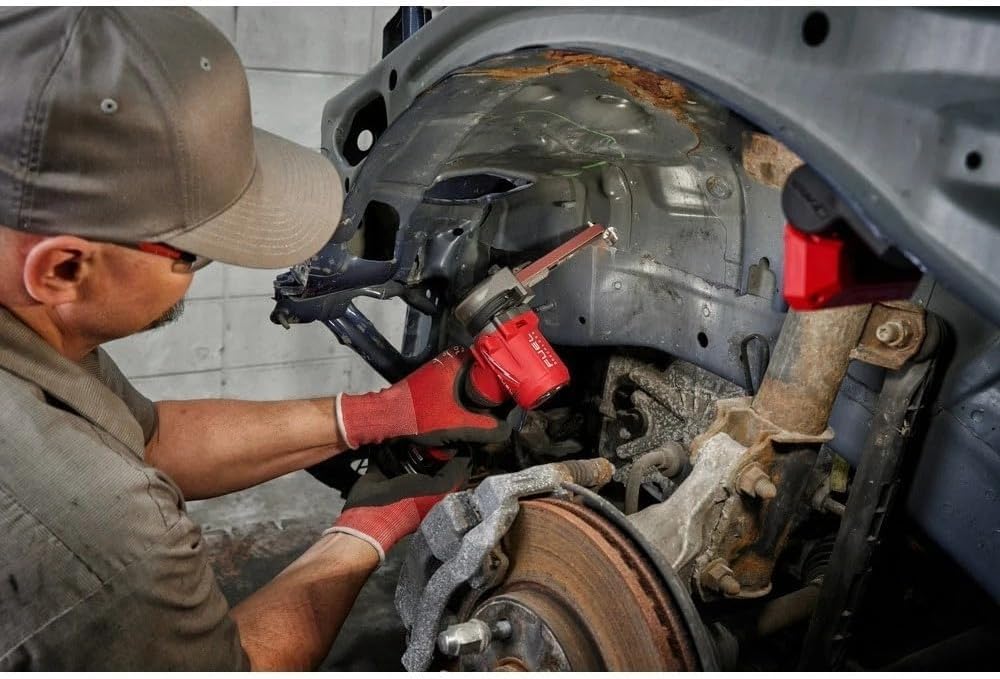
Image: The bandfile being used in a tight area of a vehicle's engine bay, illustrating its access capabilities.
Maintenance
Cleaning
Regularly clean the tool to remove dust and debris. Use a soft brush or compressed air to clear ventilation openings. Do not use solvents or harsh chemicals, as they may damage plastic parts.
Belt Replacement
Replace sanding belts when they become worn or lose their abrasive quality. Refer to the 'Belt Installation and Adjustment' section for detailed instructions on tool-free belt changes.
Contact Wheel Replacement
The contact wheel is a replaceable service part. Over time, it may wear down and require replacement. The part numbers for contact wheels are: 3/8" (14-46-0593) and 1/2" (14-46-0589). Consult a qualified service technician for replacement if needed.
Troubleshooting
| Problem | Possible Cause | Solution |
|---|---|---|
| Tool does not start | Battery not charged or improperly installed | Charge battery; ensure battery is fully seated. |
| Belt slips or runs off track | Belt alignment incorrect; worn belt | Adjust belt alignment screw; replace worn belt. |
| Reduced sanding performance | Worn sanding belt; incorrect speed setting | Replace sanding belt; select higher speed setting. |
| Excessive vibration | Damaged contact wheel; loose components | Inspect and replace contact wheel if damaged; check for loose parts. |
Specifications
| Feature | Specification |
|---|---|
| Model Number | 2482-20 |
| Voltage | 12 Volts |
| Power Source | Battery Powered (M12 Lithium-Ion) |
| Belt Size | 1/2" x 18" |
| Maximum Rotational Speed | 14,500 RPM (High) / 7,500 RPM (Low) |
| Grit Type (Included Belts) | Fine (60 Grit) |
| Disc Diameter (Contact Wheel) | 0.5 inches |
| Included Components | 2482-20 M12 FUEL Cordless Brushless 1/2" X 18" Bandfile (Bare Tool), 2x 60 Grit 1/2" x 18" Sanding Belts |
Warranty and Support
For warranty information, service, or technical support, please refer to the official Milwaukee Tool website or contact their customer service department. Keep your purchase receipt as proof of purchase for warranty claims.


