
TRAILVIBER X01
TRAILVIBER X01 Walking Pad Treadmill User Manual
Model: X01
1. Introduction
Thank you for choosing the TRAILVIBER X01 Walking Pad Treadmill. This manual provides essential information for safe operation, setup, maintenance, and troubleshooting. Please read it thoroughly before using your treadmill to ensure optimal performance and safety.
Important Safety Information
- Always place the treadmill on a flat, stable surface.
- Keep children and pets away from the treadmill during operation.
- Ensure the power cord is not damaged and is properly plugged into a grounded outlet.
- Do not use the treadmill if it is damaged or malfunctioning.
- Consult a physician before starting any new exercise program.
2. Product Overview
The TRAILVIBER X01 is a compact walking pad treadmill designed for home and office use, featuring an auto-incline function and a powerful yet quiet motor.

Figure 1: TRAILVIBER X01 Walking Pad Treadmill with Auto Incline and RGB LED Screen.
Key Features
- 12% 9-Level Auto Incline: Adjust incline automatically to enhance workout efficiency and simulate hiking.
- 450 lbs Weight Capacity: Stable and sturdy design with a high maximum weight support.
- 2.5 HP Powerful Silent Motor: Ensures high-performance operation with low noise, suitable for extended use.
- RGB LED Screen: Displays speed, calories, time, incline level, and distance in multiple captivating colors.
- Bluetooth Speaker: High-fidelity audio for an immersive workout experience.
- Triple Cushioned Structure: Double-deck construction with 4 silicone shock absorption points and a 5-layer anti-slip running belt for joint protection.
- Compact & Portable: Easy to move and store, ideal for small spaces.
3. Setup
Unpacking and Placement
- Carefully remove the treadmill from its packaging.
- Place the treadmill on a firm, level surface, ensuring adequate space around it for safe operation.
- Ensure the power switch is in the OFF position before plugging in the power cord.
- Plug the power cord into a standard 110V grounded electrical outlet.
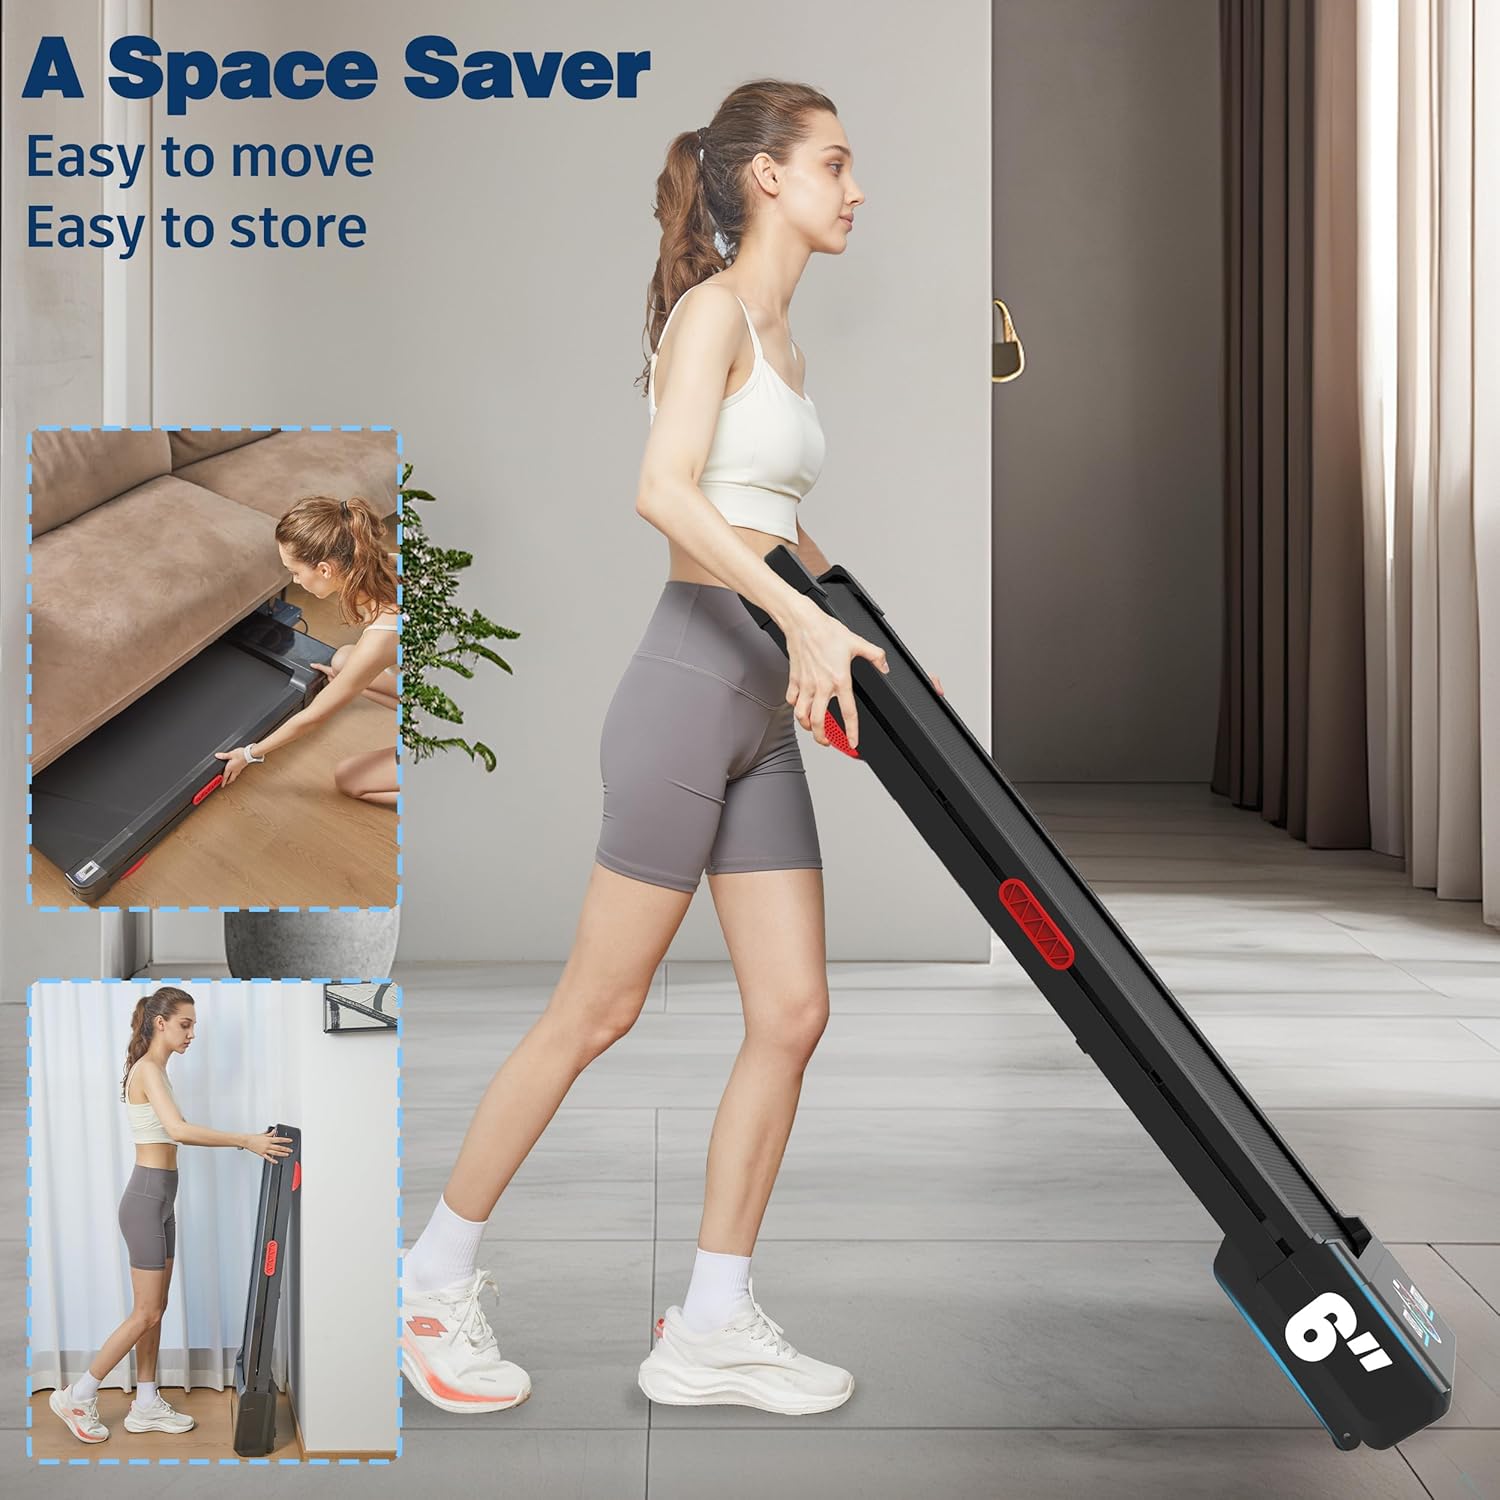
Figure 2: The compact design allows for easy storage, such as upright against a wall or under furniture.
4. Operating Instructions
Powering On/Off
- Locate the main power switch at the front of the treadmill. Flip it to the 'ON' position.
- The LED screen will illuminate.
- To turn off, press the 'OFF' button on the remote control, then flip the main power switch to 'OFF'.
Using the Remote Control
The treadmill is controlled via the included remote control. Ensure batteries are installed (2x AAA, not included).

Figure 3: The RGB LED screen displays workout data, controlled by the remote.
- Start/Stop: Press the power button on the remote to start or stop the treadmill.
- Speed Adjustment: Use the '+' and '-' buttons to increase or decrease the walking speed (0.7 to 4.0 mph).
- Incline Adjustment: Use the 'V' (down) and 'M' (up) buttons to adjust the auto-incline level (0-12%, 9 levels).
- Mode Selection: Press the 'M' button to cycle through different workout modes or display metrics.
- Mute: The remote allows for one-click muting of sounds.
- Screen Off: The remote has a button to turn off the LED screen display.
Bluetooth Speaker
To connect your device to the built-in Bluetooth speaker:
- Ensure the treadmill is powered on.
- On your mobile device, enable Bluetooth and search for 'Treadmill'.
- Pair your device. You can now play audio through the treadmill's speaker.
5. Maintenance
Lubrication
Regular lubrication of the running belt is crucial for optimal performance and longevity. Use the provided lubricant or a compatible silicone-based treadmill lubricant.
- Apply lubricant every 3 months or after 100 hours of use.
- Lift the edge of the running belt and apply a thin line of lubricant down the center of the deck.
- Run the treadmill at a low speed for 5 minutes to distribute the lubricant evenly.
Belt Adjustment
If the running belt is off-center or slipping, it may need adjustment. Use the included L-shaped wrench.
- To center the belt: If the belt drifts to the left, turn the left adjustment bolt clockwise 1/4 turn. If it drifts to the right, turn the right adjustment bolt clockwise 1/4 turn. Repeat until centered.
- To tighten the belt: If the belt is slipping, turn both adjustment bolts clockwise 1/4 turn simultaneously. Test and repeat if necessary.
Cleaning
Wipe down the treadmill with a damp cloth after each use to remove sweat and dust. Avoid using abrasive cleaners.
6. Troubleshooting
| Problem | Possible Cause | Solution |
|---|---|---|
| Treadmill does not power on | Power cord not connected; Main switch off; Outlet issue | Check power cord connection; Ensure main switch is ON; Test outlet with another device. |
| Running belt slips or stops | Belt too loose; Insufficient lubrication | Adjust belt tension (see Maintenance); Lubricate the running belt (see Maintenance). |
| Unusual noise during operation | Loose components; Belt friction | Check all bolts and tighten if necessary; Lubricate the running belt. |
| Incline not adjusting | Remote control issue; Motor malfunction | Check remote batteries; Contact customer support if issue persists. |
7. Specifications
| Feature | Detail |
|---|---|
| Brand | TRAILVIBER |
| Model Name | X01 |
| Product Dimensions | 48"D x 21"W x 6"H |
| Item Weight | 44 Pounds |
| Material | Alloy Steel |
| Maximum Speed | 4 Miles per Hour |
| Minimum Speed | 0.7 Miles per Hour |
| Maximum Incline Percentage | 12% (9 levels) |
| Maximum Horsepower | 2.5 Horsepower |
| Maximum Weight Recommendation | 450 Pounds |
| Display Type | RGB LED |
| Power Source | Corded Electric |
| Included Components | Lubricant, Power Cord, Remote Control, Tool Kit, User Manual |
8. Warranty & Support
The TRAILVIBER X01 Walking Pad Treadmill comes with a 1-year warranty. For any questions, concerns, or technical assistance, please contact TRAILVIBER customer support. Our team of experts is available 24/7 to provide human-centered support.
Contact information for support is typically found in the included user manual or on the official TRAILVIBER website.
Related documentsX01


Ask a question about this manual
Ask about setup, troubleshooting, compatibility, parts, safety, or missing instructions. Manuals+ will review the question and use this page’s manual context to help answer it.