
1. Important Safety Information
Please read all instructions carefully before assembly and use. Failure to follow these instructions may result in injury or damage to the product.
- Ensure the sauna is placed on a level, stable surface.
- Do not use the sauna if you are pregnant, have a heart condition, high blood pressure, or any other serious medical condition without consulting a physician.
- Keep flammable materials away from the heater panels.
- Do not spill liquids directly on the heater. If liquids spill, clean them immediately with a dry cloth.
- Unplug the power cord from the outlet after each use and before cleaning or maintenance.
- Do not allow children to operate the sauna unsupervised.
- Avoid prolonged exposure to high temperatures. Limit sessions to recommended durations.
- Ensure proper ventilation in the room where the sauna is installed.
- Do not modify the sauna or its components. Use only original replacement parts.
2. Package Contents
Verify that all components are present before beginning assembly.
- Sauna Panels (Front, Back, Side Left, Side Right, Floor, Roof)
- Bench
- Control Panel
- Glass Door with Handle
- Infrared Heaters (Pre-installed)
- LED Lighting Strips (Pre-installed)
- Bluetooth Speaker System (Pre-installed)
- Phone Holder
- Power Cord
- Assembly Hardware (Screws, clips, etc.)
- Instruction Manual
3. Assembly Instructions
Assembly typically requires two people and a cross-tip screwdriver. Follow these steps for proper setup.
- Prepare the Area: Choose a dry, level indoor location with access to a 120V power outlet. Ensure sufficient space around the sauna for assembly and ventilation.
- Unpack Components: Carefully remove all parts from the packaging. Inspect for any damage.
- Assemble the Base: Place the floor panel on the chosen location.
- Attach Side Panels: Connect the back panel to the floor panel, then attach the side panels using the interlocking segments and provided hardware. Ensure all connections are secure.
- Install the Bench: Secure the bench inside the sauna according to the pre-drilled holes.
- Mount the Front Panel and Door: Attach the front panel, which includes the glass door. Ensure the door hinges are properly aligned and the door opens and closes smoothly. The door handle may also serve as a phone holder.
- Connect Electrical Components: Connect any internal wiring for the control panel, heaters, and lighting as indicated in the detailed diagrams (refer to specific diagrams in the full manual).
- Place the Roof: Carefully place the roof panel on top of the assembled walls. Secure it with the provided fasteners.
- Final Checks: Double-check all connections and ensure the sauna is stable. Plug the power cord into a grounded 120V outlet.
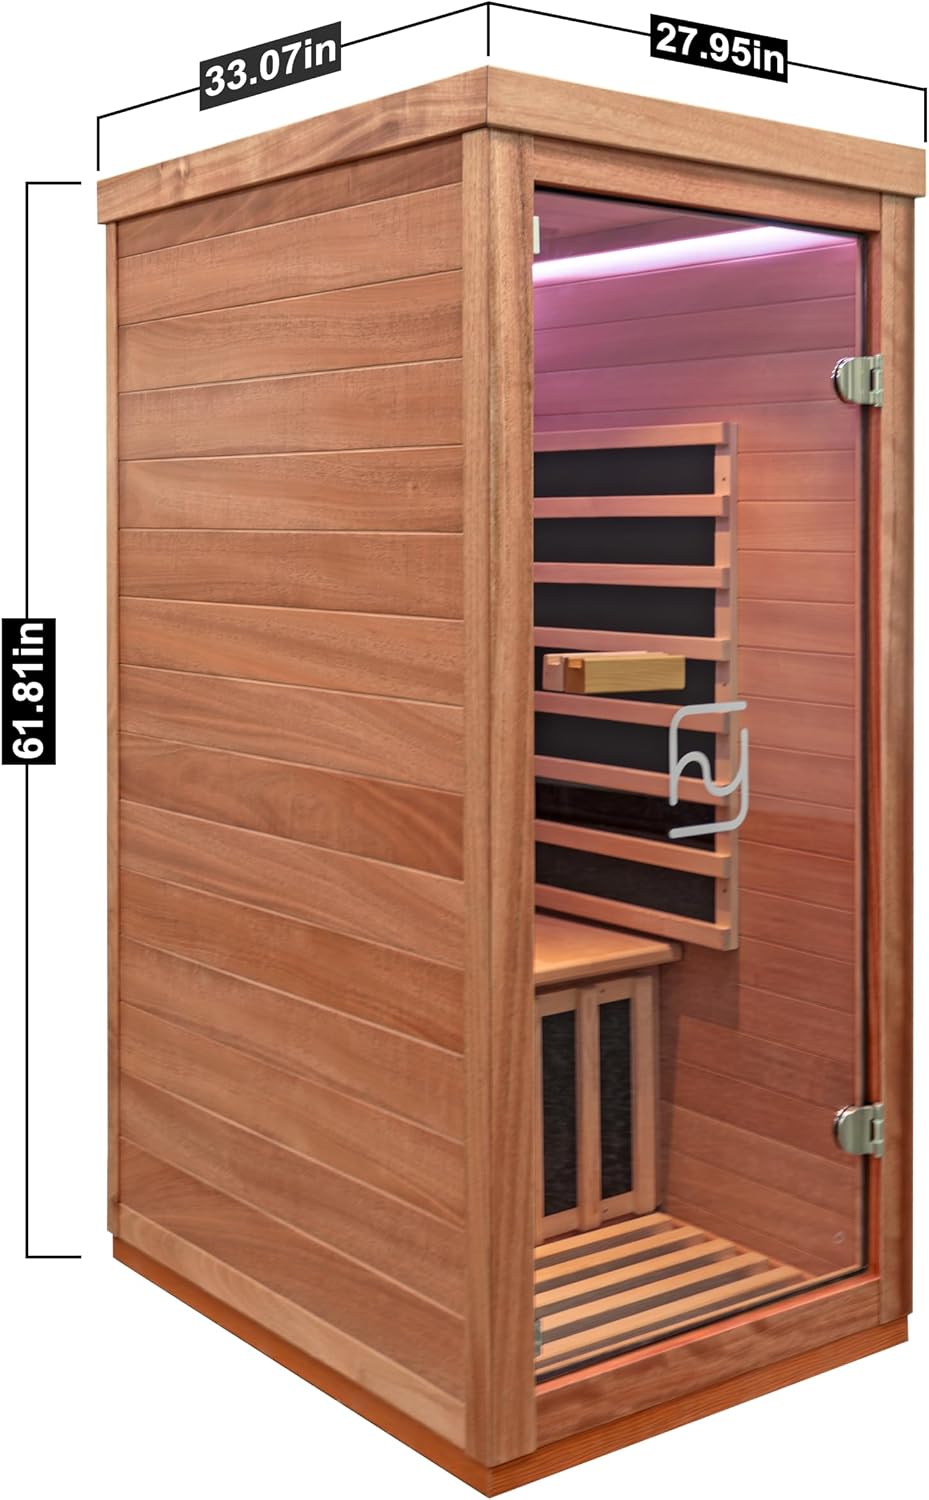
Image: The Haoyao 1-Person Mini Sauna with its overall dimensions (33.07"L x 27.95"W x 62"H), illustrating its compact size for home assembly.

Image: Exterior view of the Haoyao 1-Person Mini Sauna with the glass door open, showing the interior bench and heater panels.
4. Operating Instructions
4.1 Control Panel Overview

Image: Interior view of the Haoyao 1-Person Mini Sauna, highlighting the digital control panel and infrared heaters.
The digital control panel allows you to manage temperature, time, and lighting settings.
4.2 Basic Operation
- Power On/Off: Short press the "ON/OFF" button to turn the sauna on. Long press to turn it off after use.
- Set Temperature: Use the "TEMP UP" or "TEMP DOWN" arrow buttons to adjust the desired temperature. The display shows the current temperature.
- Set Heating Duration: Use the "TIME UP" or "TIME DOWN" arrow buttons to set the desired heating duration in minutes.
- Confirm Settings: After setting temperature and time, press the "ON/OFF" button again to activate the heater. The "HEATING" indicator light will illuminate.
- Change Temperature Unit: Press the "F/C" button to switch between Fahrenheit and Celsius display.
4.3 Lighting Control
- Ambient LED Lights: Press the light bulb button with the "C" letter to cycle through the 6-color LED mood lights (Green, Blue, Orange, Red, White, Yellow).
- Reading Light: Press the other light bulb button to turn the reading light on or off.

Image: Interior ceiling of the Haoyao 1-Person Mini Sauna, showing the integrated LED mood lighting strips.
4.4 Delayed Start Function
To schedule the sauna to begin heating automatically at a later time:
- Press the "SET" button. The "PROGRAM" indicator light will turn on, indicating delayed-start mode is active.
- Use the "TIME UP/DOWN" buttons to set the countdown time (from 1 minute to 24 hours) until heating begins.
- Once the countdown reaches zero, the sauna will automatically begin heating to your preset temperature.
4.5 Bluetooth Speaker System
The sauna includes a built-in Bluetooth speaker system for audio entertainment.
- Ensure the sauna is powered on.
- On your mobile device, enable Bluetooth and search for available devices.
- Connect to the device named "IR Sauna".
- Once connected, you can play music or other audio through the sauna's speakers.

Image: Diagram illustrating the 2-in-1 door handle and phone holder, along with the built-in wireless Bluetooth sound system for the Haoyao Mini Sauna.
4.6 Phone Holder
The innovative door handle doubles as a phone holder, allowing you to comfortably view your device during your sauna session.

Image: Close-up of the wooden phone holder integrated into the door handle of the Haoyao Mini Sauna, holding a smartphone.
4.7 Instructional Video
Video: This official Haoyao video demonstrates the functions and controls of the Mini Sauna, including power, temperature, time settings, ambient lighting, reading light, delayed start, Bluetooth connectivity, and the integrated phone holder.
5. Maintenance
Regular maintenance ensures the longevity and optimal performance of your sauna.
- Cleaning: Wipe down the interior and exterior wood surfaces with a damp cloth after each use. For deeper cleaning, use a mild, non-abrasive wood cleaner. Do not use harsh chemicals or abrasive pads.
- Ventilation: Ensure the sauna is properly ventilated after use to prevent moisture buildup.
- Heater Care: Do not touch the infrared heaters directly when hot. Keep them free from obstructions.
- Wood Care: The Hemlock and Okoume wood is moisture-resistant. However, avoid excessive moisture or direct water exposure to prevent warping or damage.
- Electrical Connections: Periodically check the power cord and connections for any signs of wear or damage. Unplug the sauna before inspection.
6. Troubleshooting
| Problem | Possible Cause | Solution |
|---|---|---|
| Sauna does not power on. | Power cord unplugged, circuit breaker tripped, faulty power button. | Ensure power cord is securely plugged in. Check household circuit breaker. If problem persists, contact customer support. |
| Heaters not warming up. | Heating not activated, incorrect temperature setting, faulty heater element. | Ensure "HEATING" indicator is lit. Verify temperature setting is above ambient. Contact customer support if heaters remain cold. |
| Bluetooth not connecting. | Bluetooth not enabled on device, incorrect device selected, sauna not discoverable. | Ensure Bluetooth is on and search for "IR Sauna". Restart both sauna and mobile device. |
| Lights not working. | Light button not pressed, faulty LED strip/bulb. | Press the respective light button. If lights still do not work, contact customer support. |
| Sauna not reaching desired temperature. | Room temperature too low, door not sealed properly, prolonged use. | Ensure the room is not excessively cold. Check door seal. Allow sauna to preheat longer. |
7. Specifications
- Model: Haoyao 1-Person MINI Sauna
- Power: 1100W
- Voltage: 120 Volts
- Material: Hemlock, Okoume Wood
- Dimensions (L x W x H): 33.07" x 27.95" x 62"
- Item Weight: 185 Pounds
- Seating Capacity: 1 Person
- Features: Infrared Heating, LED Mood Lights (6 colors), Bluetooth Speakers, Integrated Phone Holder
- UPC: 736524219498
- ASIN: B0G2GH2L22
8. Warranty and Support
For warranty information, technical support, or replacement parts, please contact Haoyao customer service. Refer to your purchase documentation for specific warranty terms and contact details.
Manufacturer: Haoyao