
1. Important Safety Information
Please read this manual thoroughly before operating the QYQBOON Portable Cordless Tire Inflator. Failure to follow instructions may result in injury or damage to the device.
- Keep out of reach of children.
- Do not operate in wet conditions or near flammable liquids/gases.
- Ensure the correct nozzle is used for the item being inflated.
- Do not over-inflate. Always refer to the recommended pressure for your tires or items.
- Avoid prolonged continuous operation to prevent overheating. Allow the device to cool down if it becomes hot.
- Store in a cool, dry place when not in use.
2. Package Contents
Verify that all items listed below are included in your package:
- Tire Inflator (1)
- Connecting Air Hose (1)
- Atmospheric Nozzle (1)
- Small-Diameter Mouthpiece (1)
- French Adapter (1)
- Ball Pin (1)
- Type-C Charging Cable (1)
- User's Manual (1)

3. Product Overview
The QYQBOON Portable Cordless Tire Inflator is a versatile device designed for convenient inflation of various items. It features a digital display, multiple inflation modes, and emergency functions.

3.1. Controls and Display
- Power Button: Press and hold to turn on/off. Short press to start/stop inflation.
- Mode Button (M): Short press to cycle through preset inflation modes (Car, Motorcycle, Bike, Ball, Custom).
- +/- Buttons: Adjust target pressure value in custom mode or within preset modes.
- Light Button: Short press to cycle through flashlight modes (steady, SOS, strobe).
- Digital Display: Shows real-time pressure, target pressure, selected mode, and battery level.
4. Charging the Device
The inflator has a built-in high-capacity rechargeable battery and can also be powered via a 12V DC car power cord.
4.1. Charging with Type-C Cable
- Connect the Type-C charging cable to the inflator's Type-C input port.
- Connect the other end of the cable to a compatible USB power adapter (not included) or a USB port.
- The battery indicator on the display will show charging status.
4.2. Charging with 12V DC Car Power Cord
- Plug the 12V DC car power cord into your vehicle's cigarette lighter socket.
- Connect the other end to the inflator's 12V DC input port.
- This method ensures continuous power supply, even if the internal battery is low.
5. Operating Instructions
5.1. Setup for Inflation
- Attach Air Hose: Screw the connecting air hose securely into the inflator's air outlet.
- Select Nozzle: Choose the appropriate nozzle/adapter for the item you wish to inflate (e.g., ball pin for balls, French adapter for certain bike valves). Attach it to the free end of the air hose.
- Connect to Item: Firmly connect the nozzle/air hose to the valve of the item to be inflated.

5.2. Inflation Process
- Power On: Press and hold the power button for 3 seconds to turn on the inflator. The digital display will light up.
- Select Mode: Press the 'M' (Mode) button to cycle through the preset modes: Car, Motorcycle, Bicycle, Ball, and Custom. Each mode has a default pressure setting.
- Set Target Pressure:
- For preset modes, the default pressure is displayed. You can adjust it using the '+' and '-' buttons if needed.
- In Custom mode, manually set your desired pressure using the '+' and '-' buttons.
- Start Inflation: Short press the power button to begin inflation. The display will show the real-time pressure increasing.
- Auto Shut-off: The inflator will automatically stop when the target pressure is reached.
- Disconnect: Carefully disconnect the air hose from the item and then from the inflator.

5.3. Inflation Demonstrations
6. Multi-functional Features
The QYQBOON Tire Inflator is designed with additional features for convenience and emergencies.
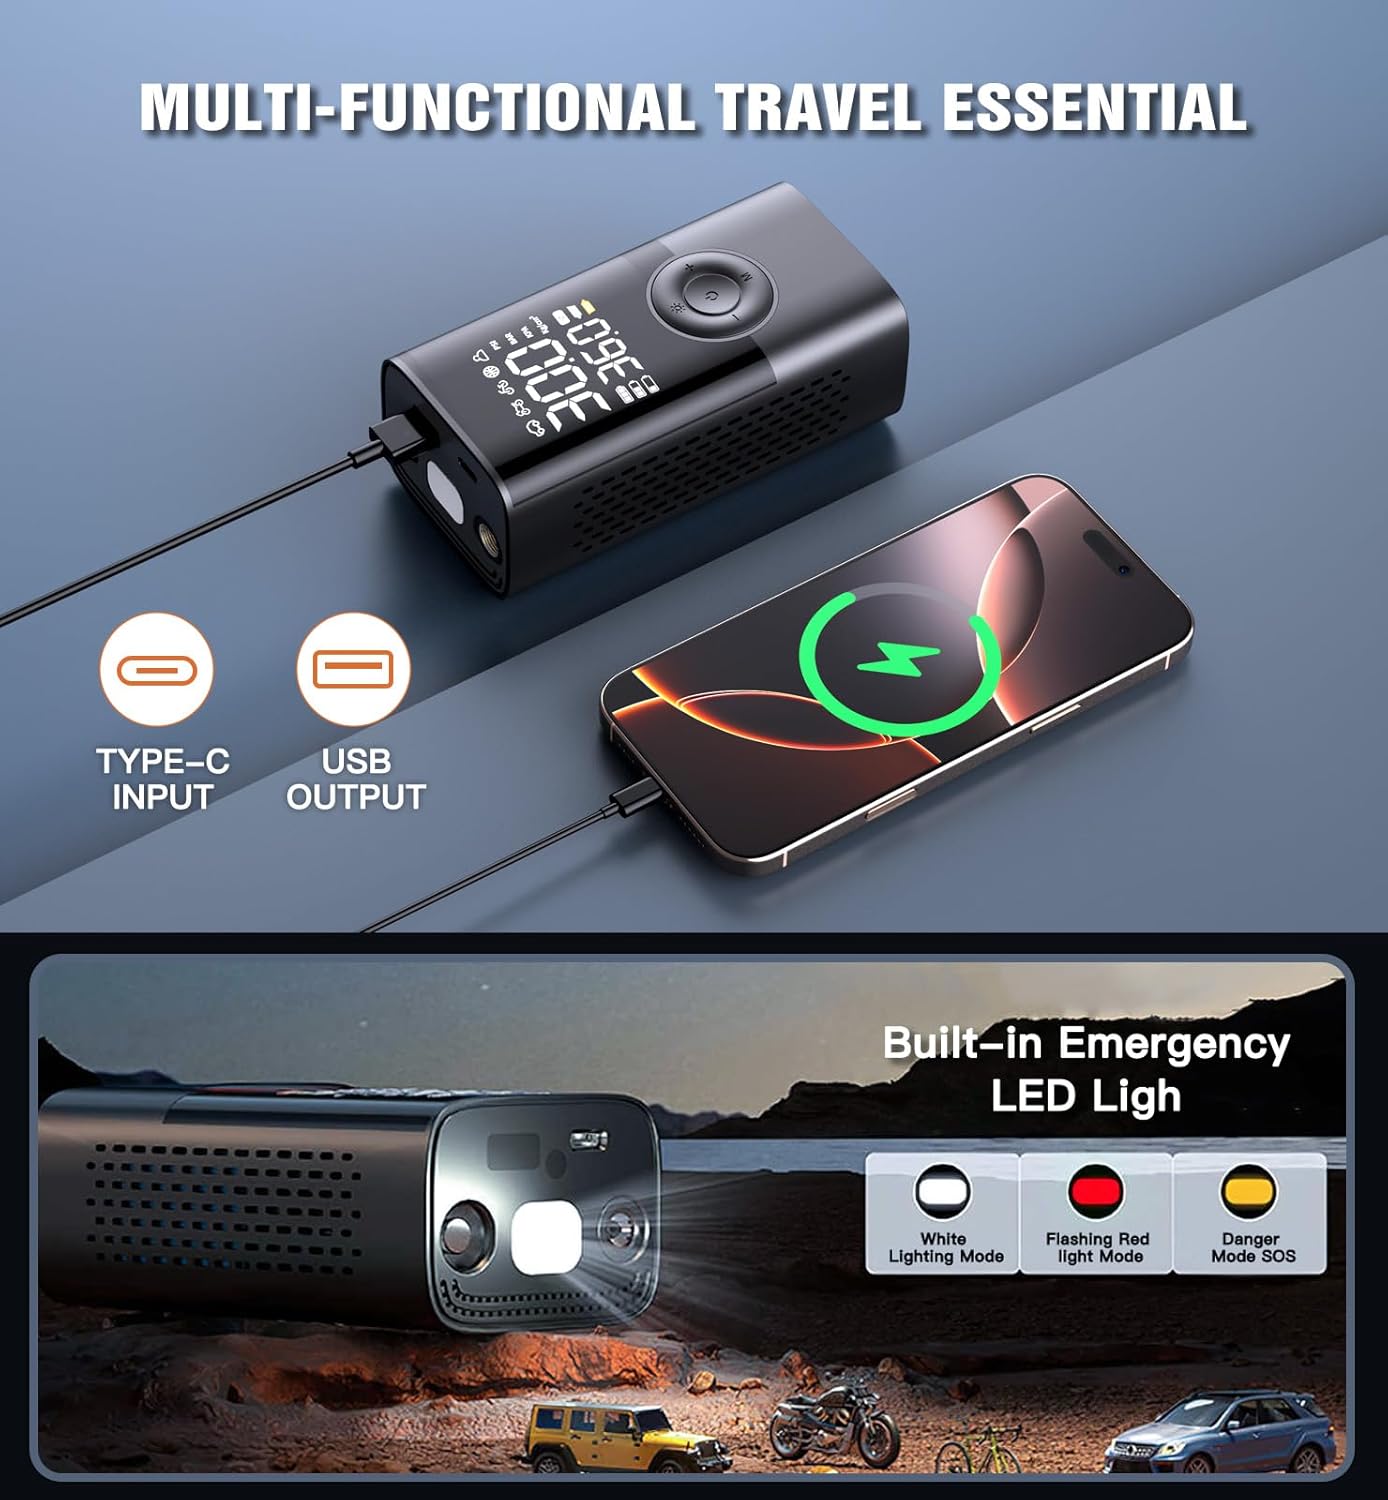
6.1. Emergency LED Flashlight
The built-in flashlight on the top of the device offers three modes:
- Steady Light: For general illumination.
- SOS Mode: Emits an SOS signal for emergency situations.
- Strobe Light: A flashing light for increased visibility.
6.2. USB Charging Ports
The inflator is equipped with USB-C and USB input/output ports, allowing it to function as a power bank to charge your mobile phone or other electronic devices in an emergency.
7. Specifications
| Feature | Specification |
|---|---|
| Brand | QYQBOON |
| Voltage | 7.4 Volts |
| Recommended Uses | Tire Inflation |
| Power Source | Battery Powered |
| Special Features | 12V DC Adaptable, Automatic Shut-Off, Digital, Portable |
8. Maintenance
- Cleaning: Wipe the device with a soft, dry cloth. Do not use harsh chemicals or abrasive cleaners.
- Storage: Store the inflator and its accessories in a cool, dry place, away from direct sunlight and extreme temperatures.
- Battery Care: For optimal battery life, charge the device fully before first use and at least once every three months if not used regularly.
9. Troubleshooting
- Device not turning on: Ensure the battery is charged. If using the 12V DC car power cord, check the vehicle's power outlet.
- No inflation: Check if the air hose and nozzle are securely attached to both the inflator and the item's valve. Ensure the target pressure is set above the current pressure.
- Inaccurate pressure reading: Ensure the connection to the valve is tight and there are no leaks.
- Overheating: If the device becomes hot during prolonged use, turn it off and allow it to cool down for at least 15-20 minutes before resuming operation.
10. Warranty and Support
This product comes with a standard manufacturer's warranty. For detailed warranty information, product support, or any questions regarding use, please contact QYQBOON customer service through the retailer's platform or the contact information provided in your product packaging.