
1. Introduction
This manual provides essential information for the installation, operation, and maintenance of the Generic RT638RG Thermal Printer Head Mechanism. This mechanism is designed for integration into various thermal printing devices, including billing machines, kiosks, POS systems, cash registers, handheld printers, parking machines, bus ticketing devices, and Android mobile POS systems.
The RT638RG supports 78mm, 79mm, and 80mm thermal paper rolls and utilizes direct thermal printing technology, eliminating the need for ink or ribbons.
2. Product Specifications
| Feature | Specification |
|---|---|
| Model Name | RT638RG |
| Printing Technology | Thermal |
| Printer Output | Monochrome |
| Supported Paper Widths | 78mm, 79mm, 80mm |
| Maximum Print Resolution | 203 dpi |
| Connectivity Technology | ware (Hardware Interface) |
| Hardware Interface | Serial Interface |
| Item Weight | 0.15 Grams |
| Item Dimensions (D x W x H) | 5D x 6W x 10H Centimeters |
| Paper Cutting | Manual |
| Compatible Devices | Computers, Laptops (when integrated into a printer) |
3. Setup and Installation
The RT638RG is a printer head mechanism designed for integration into a larger printer assembly. Installation should be performed by qualified personnel familiar with printer hardware.
3.1 Component Identification
Familiarize yourself with the key components of the thermal printer head mechanism.

Figure 1: Thermal printer head mechanism. This image highlights the print roller, the three pressure springs that ensure even contact with the thermal paper, and the flexible flat cable (FFC) for data and power connection.

Figure 2: Underside view of the thermal printer head mechanism. The "638" marking on the flexible flat cable (FFC) indicates the model series or a specific component identifier.
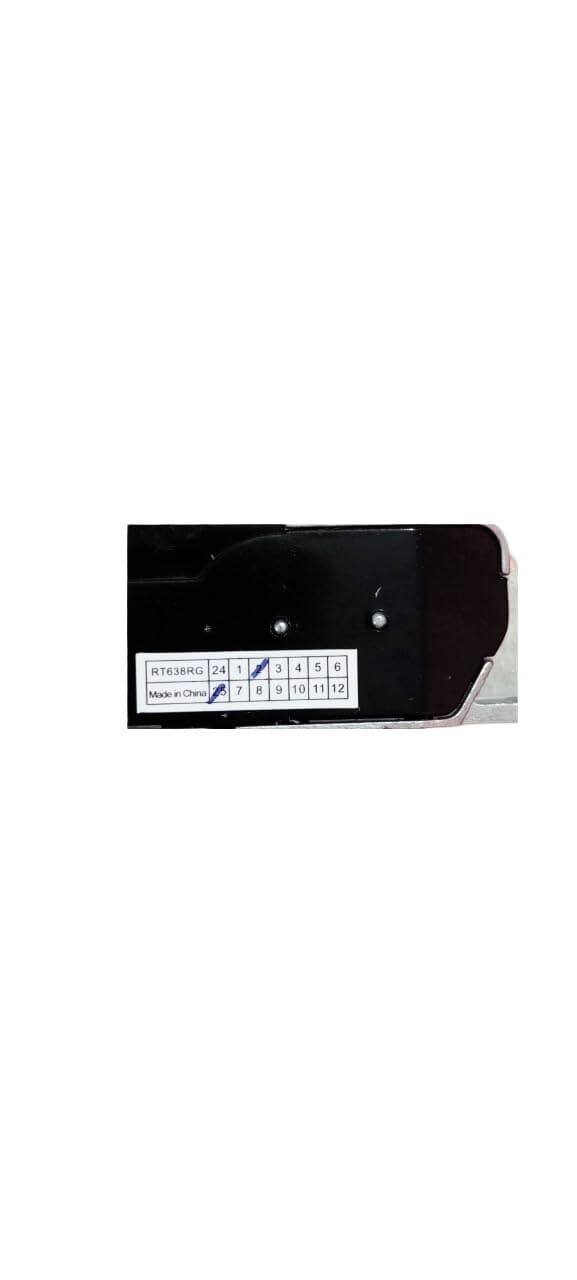
Figure 3: Identification label. This label displays the model number "RT638RG" and a pinout diagram (1-12, 24) for the flexible flat cable connection, crucial for correct electrical integration.
3.2 Installation Steps (General Guidelines)
- Power Off: Ensure the host device (e.g., billing machine, POS system) is completely powered off and disconnected from its power source before beginning installation.
- Access Printer Bay: Open the printer's housing or access panel to expose the printer head bay.
- Remove Old Mechanism (if applicable): Carefully disconnect any cables and unmount the old printer head mechanism. Note the orientation and connection points.
- Mount New Mechanism: Position the RT638RG mechanism into the designated slot. Secure it using the appropriate screws or mounting clips provided by the host device manufacturer. Ensure it is firmly seated and aligned.
- Connect Flexible Flat Cable (FFC): Connect the FFC from the RT638RG to the corresponding connector on the host device's main board. Refer to Figure 3 for pinout identification. Ensure the cable is inserted correctly and the locking mechanism (if present) is engaged. Avoid bending or creasing the FFC.
- Verify Connections: Double-check all connections for security and correct orientation.
- Close Housing: Carefully close the printer's housing or access panel.
Note: Specific installation procedures may vary depending on the host device. Always refer to the host device's service manual for detailed instructions.
4. Operating Instructions
Once the RT638RG thermal printer head mechanism is correctly installed in a compatible host device, its operation is managed by the host device's software and hardware. The following are general operational considerations:
- Paper Loading: Ensure thermal paper of the correct width (78mm, 79mm, or 80mm) is loaded into the host printer according to its specific instructions. The thermal side of the paper must face the print head.
- Power On: Power on the host device. The printer head will typically perform a self-test or initialization sequence.
- Printing Commands: Send print commands from the host device's application or operating system. The printer head will heat specific elements to create images and text on the thermal paper.
- Manual Paper Cutting: As this mechanism features manual paper cutting, the user will need to tear off the printed receipt or label against the printer's tear bar after printing is complete.
For detailed operational procedures, refer to the user manual of the complete thermal printer or host device in which the RT638RG is integrated.
5. Maintenance
Proper maintenance extends the lifespan and ensures optimal performance of the thermal printer head mechanism.
5.1 Cleaning the Print Head
- Frequency: Clean the print head regularly, especially if print quality degrades or after changing several rolls of paper.
- Materials: Use a lint-free cloth or a specialized thermal printer cleaning pen, lightly dampened with isopropyl alcohol (99% pure).
- Procedure:
- Power off the host device and disconnect it from the power source.
- Open the printer cover to access the print head.
- Gently wipe the thermal elements of the print head from the center outwards. Avoid touching the elements with bare hands.
- Allow the print head to dry completely (approximately 2-3 minutes) before closing the cover and powering on the device.
5.2 General Care
- Avoid touching the print head surface directly, as oils and dirt can affect print quality.
- Use only high-quality thermal paper recommended for your printer to prevent excessive wear on the print head.
- Keep the printer environment clean and free from dust and debris.
- Do not use abrasive cleaners or sharp objects on the print head.
6. Troubleshooting
This section addresses common issues related to the thermal printer head mechanism. For issues related to the host device's software or other components, refer to its specific manual.
| Problem | Possible Cause | Solution |
|---|---|---|
| No print output |
|
|
| Faint or incomplete print |
|
|
| Streaks or lines in print |
|
|
7. Warranty and Support
This Generic RT638RG Thermal Printer Head Mechanism comes with a 7-day replacement warranty from the date of purchase. This warranty covers manufacturing defects. Damage due to improper installation, misuse, or physical alteration is not covered.
For warranty claims or technical support, please contact your original vendor or the manufacturer's authorized service center. Please have your purchase receipt and product model number (RT638RG) available when contacting support.