
Introduction
This manual provides essential information for the safe and efficient operation, maintenance, and troubleshooting of your KATOOL Tire Changer Machine (ME-T560) and Wheel Balancer Machine (ME-B620) combo. Please read this manual thoroughly before operating the equipment to ensure proper usage and to prevent damage or injury.
Safety Information
WARNING: Failure to follow these safety instructions may result in serious injury or death.
- Always wear appropriate personal protective equipment (PPE), including safety glasses, gloves, and steel-toed boots.
- Ensure the equipment is properly installed on a level, stable surface and securely anchored.
- Disconnect power and air supply before performing any maintenance or adjustments.
- Keep hands and clothing clear of moving parts during operation.
- Do not exceed the maximum tire and wheel specifications for the machine.
- Ensure proper ventilation when working with tire lubricants or sealants.
- Only trained and authorized personnel should operate this equipment.
- Keep children and unauthorized persons away from the work area.
Product Overview
The KATOOL ME-T560 Tire Changer and ME-B620 Wheel Balancer combo provides a comprehensive solution for tire servicing in professional and home garage environments. Key features include:

Image: An overview of the KATOOL Tire Changer, highlighting its suitability for semi-automatic disassembly and assembly of various high-grade rims.
- Extensive Compatibility: Accommodates rim clamp outside diameters from 10" to 20" and inside diameters from 12" to 24". Services tires up to 37 inches in diameter and wheels with a maximum width of 12".
- Rim Protection: Features an alloy steel jaw with carburization treatment and a plastic rim guard on the stainless-steel mounting head to prevent damage to alloy rims.
- Enhanced Efficiency: Integrated Bead Blaster and Assist Arm (ARM function) simplify breaking stiff beads and lifting/mounting heavy tires.
- User-Centric Operation: Pull-type pedal control system allows hands-free management of functions, including the inflation gauge.
- Durable Construction: Built with high-quality materials and powered by a pure copper winding motor for powerful operation, fast heat dissipation, and extended service life.
Setup
- Unpacking and Inspection: Carefully unpack all components. Inspect for any shipping damage. Report any damage to the carrier immediately.
- Placement: Position the tire changer and wheel balancer on a level, stable concrete floor. Ensure adequate space around both machines for safe operation and movement of tires.
- Anchoring: Securely anchor both machines to the floor using appropriate hardware (not included) to prevent movement during operation.
- Assembly (Tire Changer ME-T560):
- Assemble the main column and assist arm components.
- Connect all air lines. The air lines are color-coded for easier identification and connection.
- Connect the power supply to a suitable electrical outlet as per local regulations.
- Connect the air compressor to the machine's air inlet. Ensure the air pressure is within the recommended operating range (refer to specifications).
- Assembly (Wheel Balancer ME-B620):
- Assemble the display unit and any other peripheral components.
- Connect the power supply to a suitable electrical outlet.
- Initial Checks: Before first use, verify all connections are secure and all moving parts operate smoothly without obstruction.
Operating Instructions
Tire Changer Machine (ME-T560)
Follow these steps for safe and effective tire changing:
- Prepare the Wheel and Tire:
- Deflate the tire completely.
- Remove any wheel weights or valve stems.
- Apply tire lubricant to the tire beads.
- Bead Breaking:

Image: The KATOOL ME-T560 Tire Changer in operation, showing the bead breaker arm positioned to separate the tire bead from the rim. The image highlights the machine's capacity for rim clamping outside 10"-20" and inside 12"-24".
- Position the wheel on the bead breaker arm.
- Use the pedal to activate the bead breaker, carefully pushing the tire bead away from the rim. Repeat for both sides of the tire.
- The integrated Bead Blaster can be used for stubborn beads by directing a burst of air between the tire and rim.
- Mounting the Wheel on the Turntable:

Image: A tire and rim assembly being carefully placed onto the turntable of the KATOOL ME-T560 Tire Changer, preparing for the demounting process.
- Place the wheel onto the turntable, ensuring it is centered.
- Use the clamping jaws to secure the wheel firmly. Adjust the jaws to the appropriate rim diameter (10"-20" outside, 12"-24" inside).

Image: A diagram illustrating the maximum tire diameter of 37 inches and maximum wheel width of 12 inches, along with the rim clamping ranges for the KATOOL Tire Changer.
- Demounting the Tire:
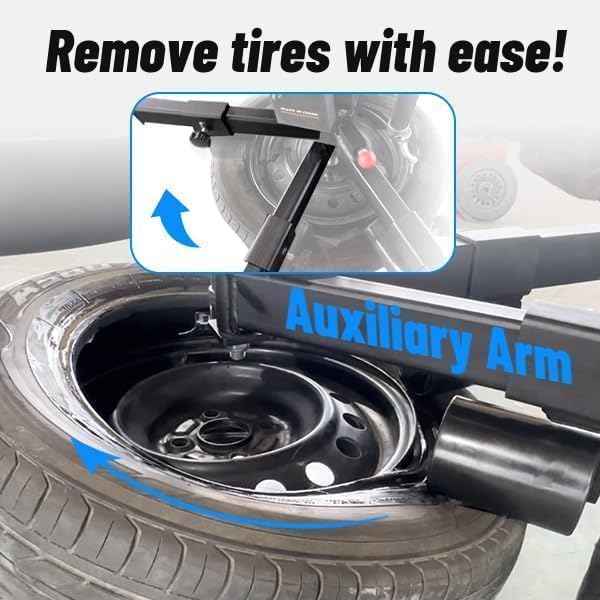
Image: The auxiliary arm of the KATOOL Tire Changer is shown in action, assisting in the removal of a tire from the rim, demonstrating how it helps lift and manipulate the tire bead.
- Position the mounting head just above the rim edge.
- Use the assist arm to help lift the top bead over the mounting head.
- Rotate the turntable using the foot pedal to fully demount the top bead.
- Repeat for the bottom bead.
- Mounting a New Tire:
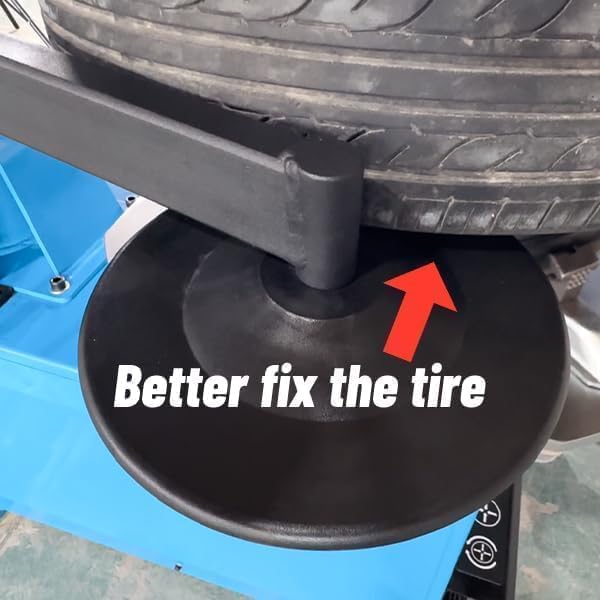
Image: The KATOOL Tire Changer's bead press tool is shown fixing the tire bead onto the rim, ensuring a secure fit during the mounting process.
- Apply lubricant to the beads of the new tire.
- Position the bottom bead onto the rim, using the assist arm and mounting head as needed.
- Rotate the turntable to fully seat the bottom bead.
- Repeat for the top bead.
- Inflation:

Image: A close-up of the air pressure gauge and filter system on the KATOOL Tire Changer, indicating the machine's pneumatic controls.
- Connect the inflation hose to the tire valve.
- Inflate the tire to the manufacturer's recommended pressure, monitoring the pressure gauge.
- Ensure the beads seat properly with an audible pop.

Image: Details of the KATOOL Tire Changer's automatic operation, including rotating functions and step pedal control for ease of use.
Wheel Balancer Machine (ME-B620)
Refer to the separate ME-B620 manual for detailed operating instructions. General steps include:
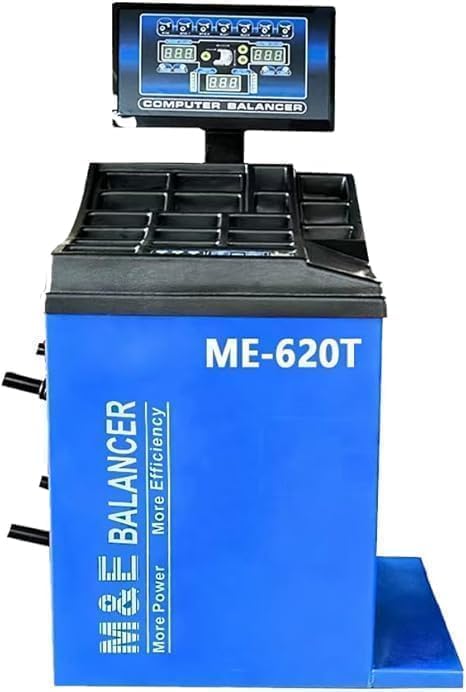
Image: The KATOOL ME-B620 Computer Wheel Balancer Machine, featuring a digital display for precise balancing operations.
- Mount the wheel securely on the balancer's shaft.
- Input wheel dimensions (diameter, width, offset) into the machine.
- Initiate the balancing cycle.
- Apply corrective weights as indicated by the machine.
- Re-spin to verify balance.
Official Product Video: Tire Changer Operation
Video: This video demonstrates the operation of a tire changer, including bead breaking, demounting, and mounting a tire. It provides a visual guide to the steps outlined in this manual.
Maintenance
Regular maintenance ensures the longevity and optimal performance of your KATOOL equipment.
- Daily:
- Clean the machine surfaces and turntable.
- Check air lines and connections for leaks.
- Inspect mounting head and jaws for wear or damage.
- Weekly:
- Lubricate moving parts as specified in the detailed product manual (e.g., turntable bearings, assist arm pivots).
- Check and drain moisture from the air filter/regulator (if applicable).
- Monthly/Quarterly:
- Inspect all bolts and fasteners for tightness.
- Check electrical connections for signs of wear or damage.
- Verify calibration of the wheel balancer (ME-B620) as per its specific manual.
- General:
- Replace worn or damaged parts promptly with genuine KATOOL replacement parts.
- Keep the work area clean and free of debris.
Troubleshooting
This section provides solutions for common issues. For complex problems, contact KATOOL customer support.
| Problem | Possible Cause | Solution |
|---|---|---|
| Tire Changer not powering on. | No power supply; tripped circuit breaker. | Check power cord connection; reset circuit breaker. |
| Air leaks detected. | Loose air line connections; damaged hoses. | Tighten connections; replace damaged hoses. |
| Difficulty breaking tire bead. | Insufficient lubrication; low air pressure; stubborn bead. | Apply more lubricant; check air supply pressure; use Bead Blaster. |
| Wheel Balancer shows inaccurate readings. | Incorrect input data; machine out of calibration; dirty sensors. | Verify wheel dimensions; perform calibration; clean sensors. |
Specifications
KATOOL Tire Changer Machine (ME-T560)
- Rim Clamping (Outside): 10" - 20"
- Rim Clamping (Inside): 12" - 24"
- Maximum Tire Diameter: 37" (960mm)
- Maximum Wheel Width: 12"
- Jaw Material: Alloy Steel with 0.8-1.1mm Carburization Treatment
- Mounting Head: Stainless Steel with Plastic Rim Guard
- Motor: Pure Copper Winding
- Features: Integrated Bead Blaster, Assist Arm (ARM function), Pull-type Pedal Control System

Image: Detailed product parameters for the KATOOL ME-T560 Tire Changer, outlining its operational capacities.
KATOOL Wheel Balancer Machine (ME-B620)
- Model: ME-B620 (as per product title, assuming this is the balancer model)
- Type: Computer Balancer
- (Specific balancing parameters like max wheel weight, balancing speed, etc., are not provided in the JSON, so they are omitted.)
Warranty and Support
For warranty information, technical support, or to order replacement parts, please contact KATOOL customer service. Keep your purchase receipt and product model numbers handy when contacting support.
Optional protection plans may be available for extended coverage. Please refer to your purchase documentation for details on any purchased protection plans.


