
1. Introduction
This manual provides essential information for the safe and effective use of your PawHut Extra High Pet Safety Gate. Designed to create secure areas for your pets, this gate is suitable for doorways, hallways, and staircases. Please read all instructions carefully before installation and use.

Image 1: PawHut Extra High Pet Safety Gate in a home setting.
2. Safety Information
- Always ensure the gate is securely installed before use.
- This gate is designed for pets. Do not allow children to climb on or play with the gate.
- Regularly check all components for wear, damage, or loose parts. Discontinue use if any damage is found.
- The narrow bar spacing of 3.5 cm helps prevent small paws or heads from getting trapped.
- For maximum stability, especially at the top of stairs, always use the screw-mounted installation method.
3. Package Contents
Verify that all components are present before beginning installation:
- Main Gate Panel
- Extension Panels (if applicable, for wider openings)
- Pressure Adjustment Bolts
- Wall Cups (for pressure mounting)
- Screws and Wall Anchors (for screw mounting)
- Instruction Manual (this document)
4. Setup and Installation
The gate offers two installation methods: pressure mounting (no drilling required) and screw mounting (for enhanced stability).
4.1. Measuring Your Opening
This gate is adjustable to fit openings from 77 cm to 104 cm. Measure the width of your desired opening to determine if extension panels are needed.

Image 2: Gate dimensions and adjustable width range.

Image 3: Adjustable width options with extensions.
4.2. Installation Methods
Choose the appropriate installation method for your needs:

Image 4: Two installation methods: Pressure Fit and Screw Mounting.
Pressure Mounting:
- Assemble the gate with any necessary extension panels.
- Insert the pressure adjustment bolts into the four corners of the gate.
- Position the gate in the opening.
- Rotate the adjustment bolts to extend them until they firmly press against the walls or door frame. Ensure the gate is level and secure.
- Periodically check the tension of the pressure bolts to maintain security.
Screw Mounting (Recommended for Stairs):
- Assemble the gate with any necessary extension panels.
- Position the gate in the desired location and mark the drilling points for the wall cups.
- Drill pilot holes at the marked locations. Insert wall anchors if drilling into drywall.
- Attach the wall cups using the provided screws.
- Insert the pressure adjustment bolts into the gate and secure them into the wall cups. Tighten until the gate is firmly held in place.
5. Operating Instructions
The PawHut Pet Safety Gate features a convenient bidirectional opening and a secure latch mechanism.
5.1. Opening and Closing the Gate
- To open: Press the button on the latch and lift the gate handle to disengage the lock. The gate can swing open in either direction.
- To close: Gently push the gate until the latch mechanism clicks into place, indicating it is securely closed.
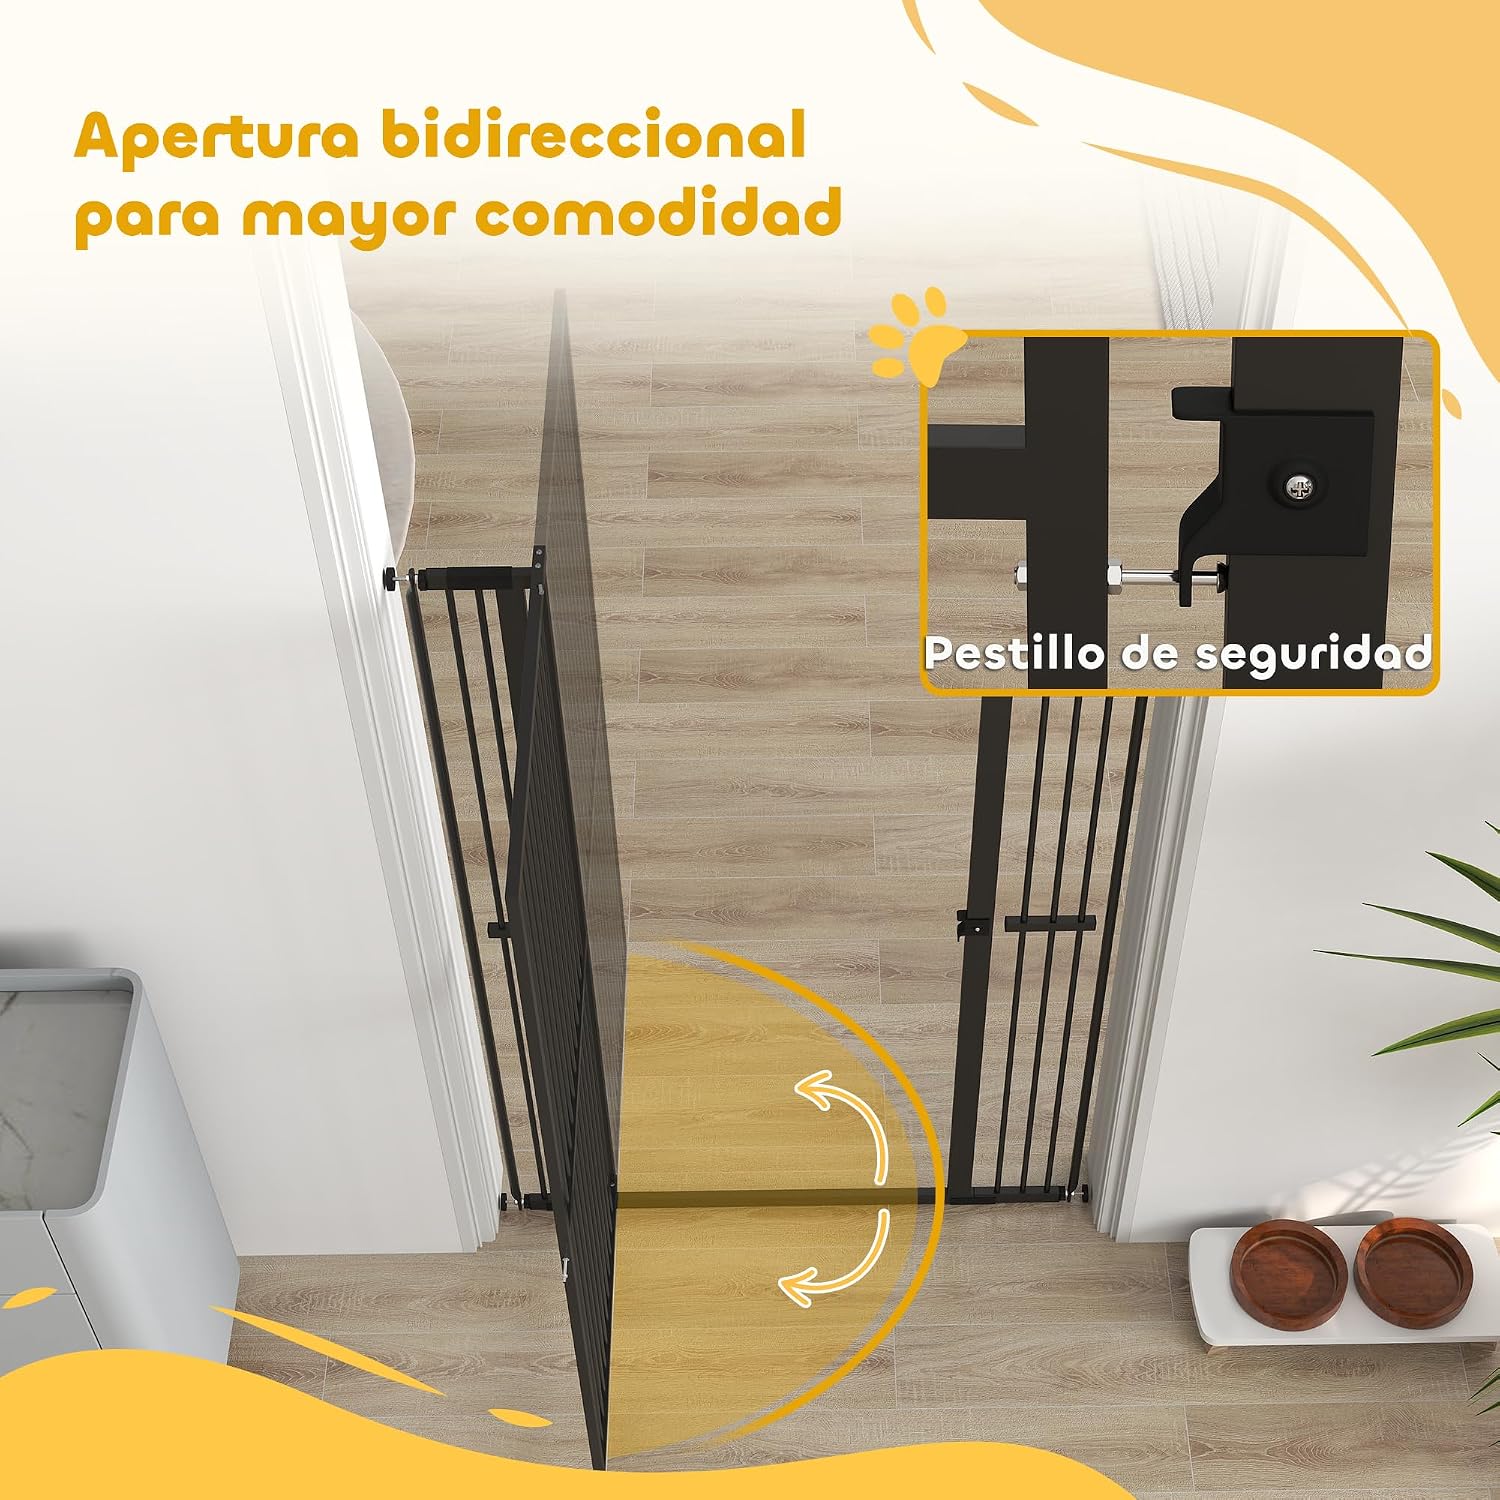
Image 5: Bidirectional opening and safety latch.
5.2. Extra High Design for Cats and Dogs
With a height of 150 cm, this gate is designed to deter even agile cats and larger dogs from jumping over, providing enhanced security for your pets.

Image 6: Gate height demonstration.

Image 7: Narrow bar spacing for pet safety.

Image 8: Suitable for multi-pet households.
6. Maintenance
To ensure the longevity and proper function of your pet safety gate:
- Clean the gate regularly with a soft, damp cloth and mild soap. Avoid abrasive cleaners or harsh chemicals.
- Periodically check all screws and pressure bolts to ensure they remain tight and secure.
- Inspect the gate for any signs of damage or wear. Replace any damaged parts immediately.
7. Troubleshooting
- Gate feels loose after installation: Re-tighten all pressure adjustment bolts. If using screw mounting, ensure screws are fully tightened and wall anchors are properly installed.
- Gate does not close properly: Check for any obstructions in the latch mechanism. Ensure the gate is installed level and within the specified width range. Adjust the pressure bolts if the frame is misaligned.
- Gate is difficult to open/close: Ensure the latch mechanism is clean and free of debris. A small amount of silicone spray can be applied to moving parts if necessary, avoiding contact with pets.
8. Specifications
| Feature | Specification |
|---|---|
| Model Number | D06-240V00BK |
| Overall Dimensions (H x W) | 150 cm (Height) x 77-104 cm (Adjustable Width) |
| Bar Spacing | 3.5 cm |
| Product Weight | 12.5 kg |
| Material | Alloy Steel, PA |
| Color | Black |
| Mounting Type | Pressure Mount, Wall Mount |
9. Warranty and Support
For warranty information or technical support, please refer to the official PawHut website or contact your retailer. Keep your purchase receipt for any warranty claims.
Additional resources:
- Official User Manual (PDF): Download PDF


