
1. Introduction
Thank you for choosing the Elikliv EM3K-AF Max Digital Microscope. This device is designed for detailed observation, inspection, and recording of microscopic objects, featuring advanced autofocus capabilities, a high-resolution 3K camera, and a 10.1-inch IPS display. This manual provides essential information for the safe and effective use of your microscope. Please read it thoroughly before operation and retain it for future reference.
2. Product Overview
The Elikliv EM3K-AF Max combines advanced optics with user-friendly features, making it suitable for various applications including electronics repair, coin inspection, and scientific observation.
Key Features:
- Autofocus (AF) System: Automatically adjusts focus within seconds for clear, sharp images without manual intervention.
- TOF AI Chip: Utilizes a Time-of-Flight sensor for real-time distance measurement, ensuring instant and accurate focus.
- 3K Clarity: Captures images at 38MP and records video at 3840x2160P, providing high-detail observation.
- 10.1-inch IPS Screen: Offers vivid colors, wide viewing angles, and a large display for comfortable viewing.
- Dual-Control Lighting System: Features adjustable gooseneck LED lights with independent brightness and aperture control to optimize illumination and reduce glare.
- Multiple Display Outputs: Supports HDMI output at 1080P 60fps and USB output at 3840x2160P30 (H264), 1080P30, or 720P60 for external monitors.
Components:
Familiarize yourself with the main components of your microscope:

Figure 1: Elikliv EM3K-AF Max Digital Microscope main unit.

Figure 2: The microscope supports both Autofocus (AF) and Manual Focus (MF) modes, demonstrated during soldering and coin inspection tasks.

Figure 3: The microscope can be controlled remotely, and captured images can be stored and reviewed.
3. Setup Instructions
Follow these steps to set up your Elikliv EM3K-AF Max Digital Microscope:
- Unpack Components: Carefully remove all components from the packaging. Verify that all parts are present: microscope unit with screen, base, stand, gooseneck LED lights, power adapter, remote control, and USB cable.
- Assemble the Stand: Attach the main stand column to the base using the provided screws. Ensure it is securely fastened.
- Mount the Microscope Unit: Slide the microscope unit onto the stand column. Tighten the locking knob to secure it at the desired height.
- Attach Gooseneck Lights: Insert the flexible gooseneck LED lights into the designated ports on the base. Adjust their position to illuminate the observation area.
- Connect Power: Plug the power adapter into the microscope's DC input port and then into a standard electrical outlet.
- Initial Power On: Press the power button on the microscope unit to turn it on. The screen should illuminate.
4. Operating Instructions
4.1 Power On/Off
- To Power On: Press and hold the 'POWER' button on the microscope unit or remote control until the screen turns on.
- To Power Off: Press and hold the 'POWER' button until the screen shuts down.
4.2 Autofocus (AF) Mode
The EM3K-AF Max features an intelligent autofocus system for quick and clear observation.

Figure 4: The 2-second autofocus feature quickly brings objects into sharp focus.

Figure 5: The advanced AF chip with TOF sensor enables rapid and precise focusing.
- Place the object you wish to observe on the stage directly beneath the lens.
- The microscope will automatically detect the object and adjust its focus within approximately 2 seconds.
- For optimal autofocus performance, ensure the object is within the microscope's working distance.
4.3 Manual Focus (MF) Mode
If precise manual control is desired or for specific observation scenarios, you can switch to Manual Focus mode.
- Refer to the on-screen menu or remote control for the option to switch between AF and MF modes.
- In MF mode, use the focus knob on the microscope unit to manually adjust the sharpness of the image.
4.4 Adjusting Illumination
The dual gooseneck LED lights provide flexible lighting options.
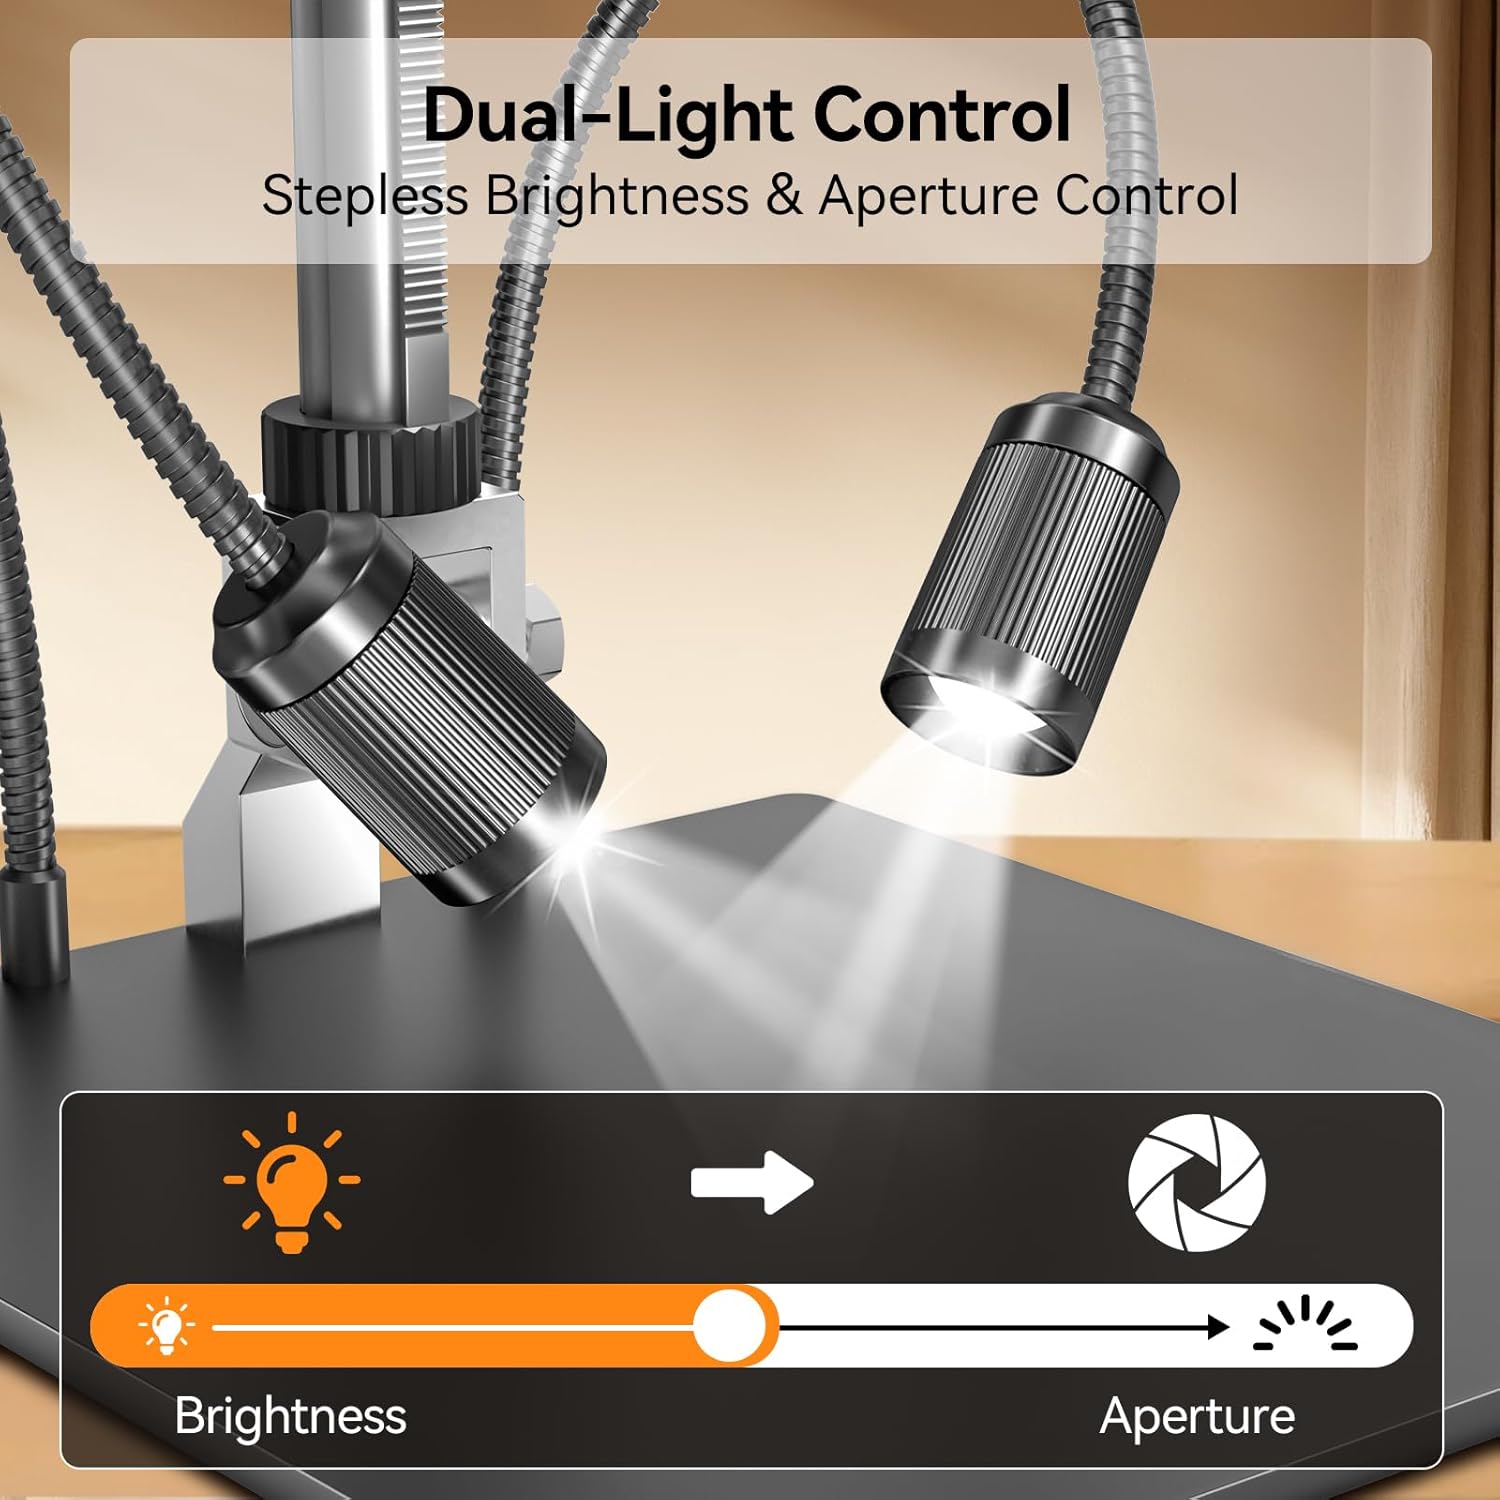
Figure 6: The dual-light system allows for stepless brightness and aperture control.
- Brightness Control: Use the dedicated controls on the microscope or remote to increase or decrease the intensity of the LED lights.
- Aperture Control: Adjust the aperture setting to control the depth of field and contrast, helping to highlight micro details and reduce glare.
- Positioning: Flex the gooseneck lights to direct illumination from different angles onto your specimen.
4.5 Capturing Images and Videos
The microscope allows for capturing high-resolution images and videos.
- Photo Button: Press the 'OK' button on the microscope or the dedicated photo button on the remote control to take a still image.
- Video Button: Press the 'MENU' button on the microscope or the dedicated video button on the remote control to start/stop video recording.
- Captured media is saved to a microSD card (not included) inserted into the microscope's card slot.
4.6 Connecting to External Displays
You can connect the microscope to an external monitor, TV, or computer for larger viewing or data transfer.
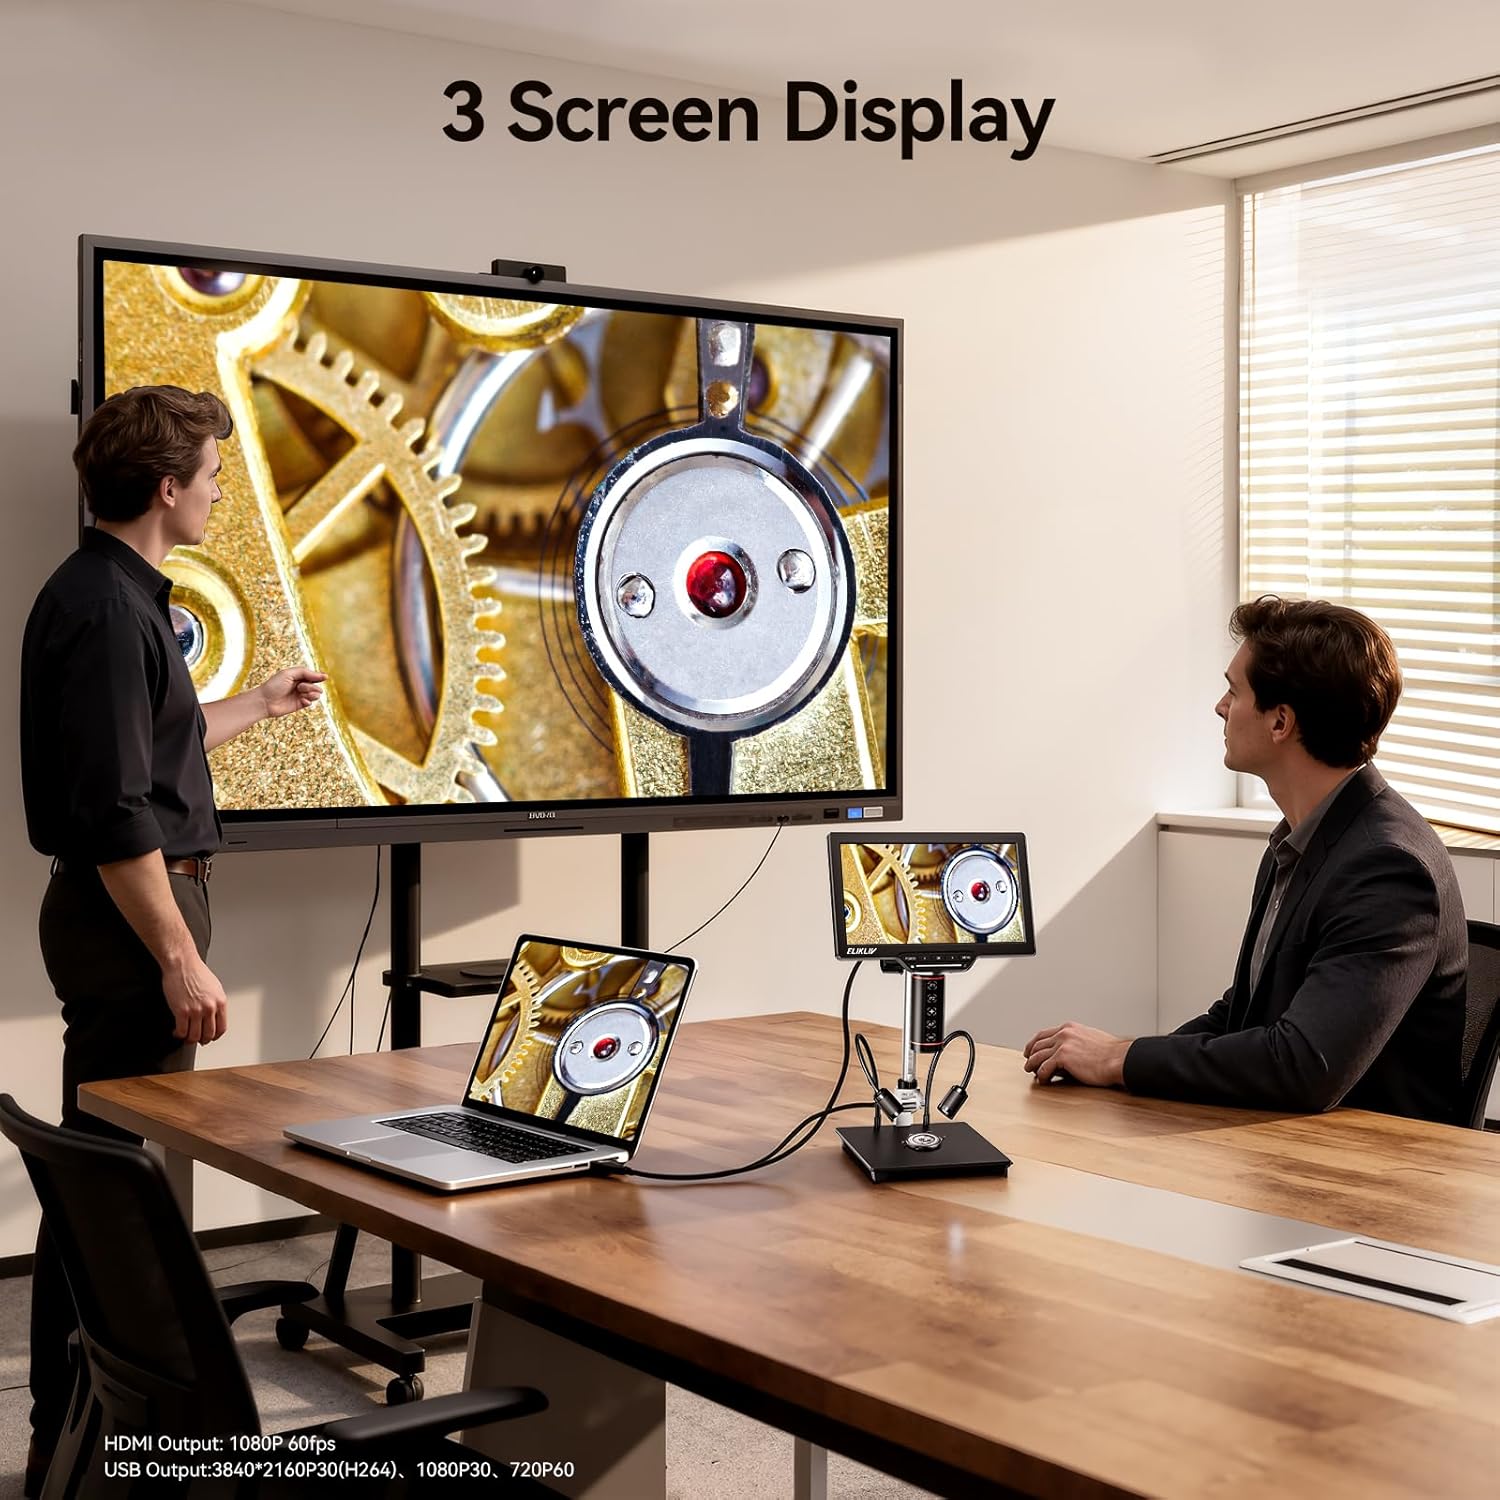
Figure 7: The microscope supports output to multiple screens simultaneously via HDMI and USB.
- HDMI Output: Connect an HDMI cable from the microscope's HDMI port to an HDMI-enabled display. The microscope will output 1080P 60fps video.
- USB Output: Connect a USB cable from the microscope to a computer. The microscope can function as a webcam, outputting video at 3840x2160P30 (H264), 1080P30, or 720P60, depending on the software used.
4.7 Using the Remote Control
The included remote control provides convenient access to various functions without touching the microscope unit.
- Use the remote to power on/off, switch modes, capture photos/videos, and navigate menus.
- Ensure the remote control has working batteries and is pointed towards the microscope's IR receiver.
5. Maintenance
Proper maintenance ensures the longevity and optimal performance of your microscope.
- Cleaning the Lens and Screen: Use a soft, lint-free cloth specifically designed for optical surfaces to gently wipe the lens and screen. For stubborn smudges, a small amount of lens cleaning solution can be applied to the cloth (never directly to the lens/screen).
- General Cleaning: Wipe the body of the microscope with a soft, dry cloth. Avoid using harsh chemicals or abrasive cleaners.
- Storage: When not in use, store the microscope in a clean, dry, dust-free environment. Cover it with a dust cover if available.
- Avoid Moisture: Keep the microscope away from water and high humidity to prevent damage to electronic components.
6. Troubleshooting
If you encounter issues with your microscope, refer to the following common problems and solutions:
| Problem | Possible Cause | Solution |
|---|---|---|
| Microscope does not power on. | No power, faulty adapter, loose connection. | Check power adapter connection. Ensure outlet is functional. Try a different power source if available. |
| Image is blurry or out of focus. | Object not within working distance, AF mode issue, lens dirty. | Adjust object position. Switch to MF mode and manually focus. Clean the lens. Ensure AF mode is active if desired. |
| No image on external display (HDMI/USB). | Incorrect cable, wrong input selected on display, driver issue (USB). | Verify cable connections. Select correct HDMI input on monitor/TV. For USB, ensure necessary drivers are installed on PC. |
| Remote control not working. | Dead batteries, obstructed signal. | Replace remote control batteries. Ensure no obstructions between remote and microscope. |
If the problem persists after trying these solutions, please contact customer support.
7. Specifications
| Feature | Specification |
|---|---|
| Brand | Elikliv |
| Model | EM3K-AF Max |
| Display | 10.1-inch IPS Screen |
| Image Resolution | 38 Megapixels (3K) |
| Video Resolution | 3840x2160P (3K) |
| Focus System | Autofocus (AF) with TOF AI Chip, Manual Focus (MF) |
| Illumination | Dual Gooseneck LED Lights with Brightness & Aperture Control |
| Output Ports | HDMI (1080P 60fps), USB (3840x2160P30, 1080P30, 720P60) |
| Storage | MicroSD card slot (card not included) |
8. Warranty and Support
Elikliv products are designed for quality and reliability. For specific warranty information, please refer to the warranty card included with your product or visit the official Elikliv website. If you require technical assistance, troubleshooting, or have questions about your EM3K-AF Max Digital Microscope, please contact Elikliv customer support through the contact information provided on the official website or your purchase platform.
