
1. Introduction
Thank you for choosing the Haisito 16A Smart Car Battery Charger. This intelligent charger is designed to efficiently and safely charge a wide range of 6V, 12V, and 24V batteries, including Lead-Acid (AGM, Calcium, Gel, MF, EFB, SLA, VRLA, WET) and Lithium (LiFePO4) batteries. It features advanced charging technology, an intuitive LCD screen, and multiple safety protections, making it ideal for cars, RVs, motorcycles, boats, lawnmowers, and other vehicles.
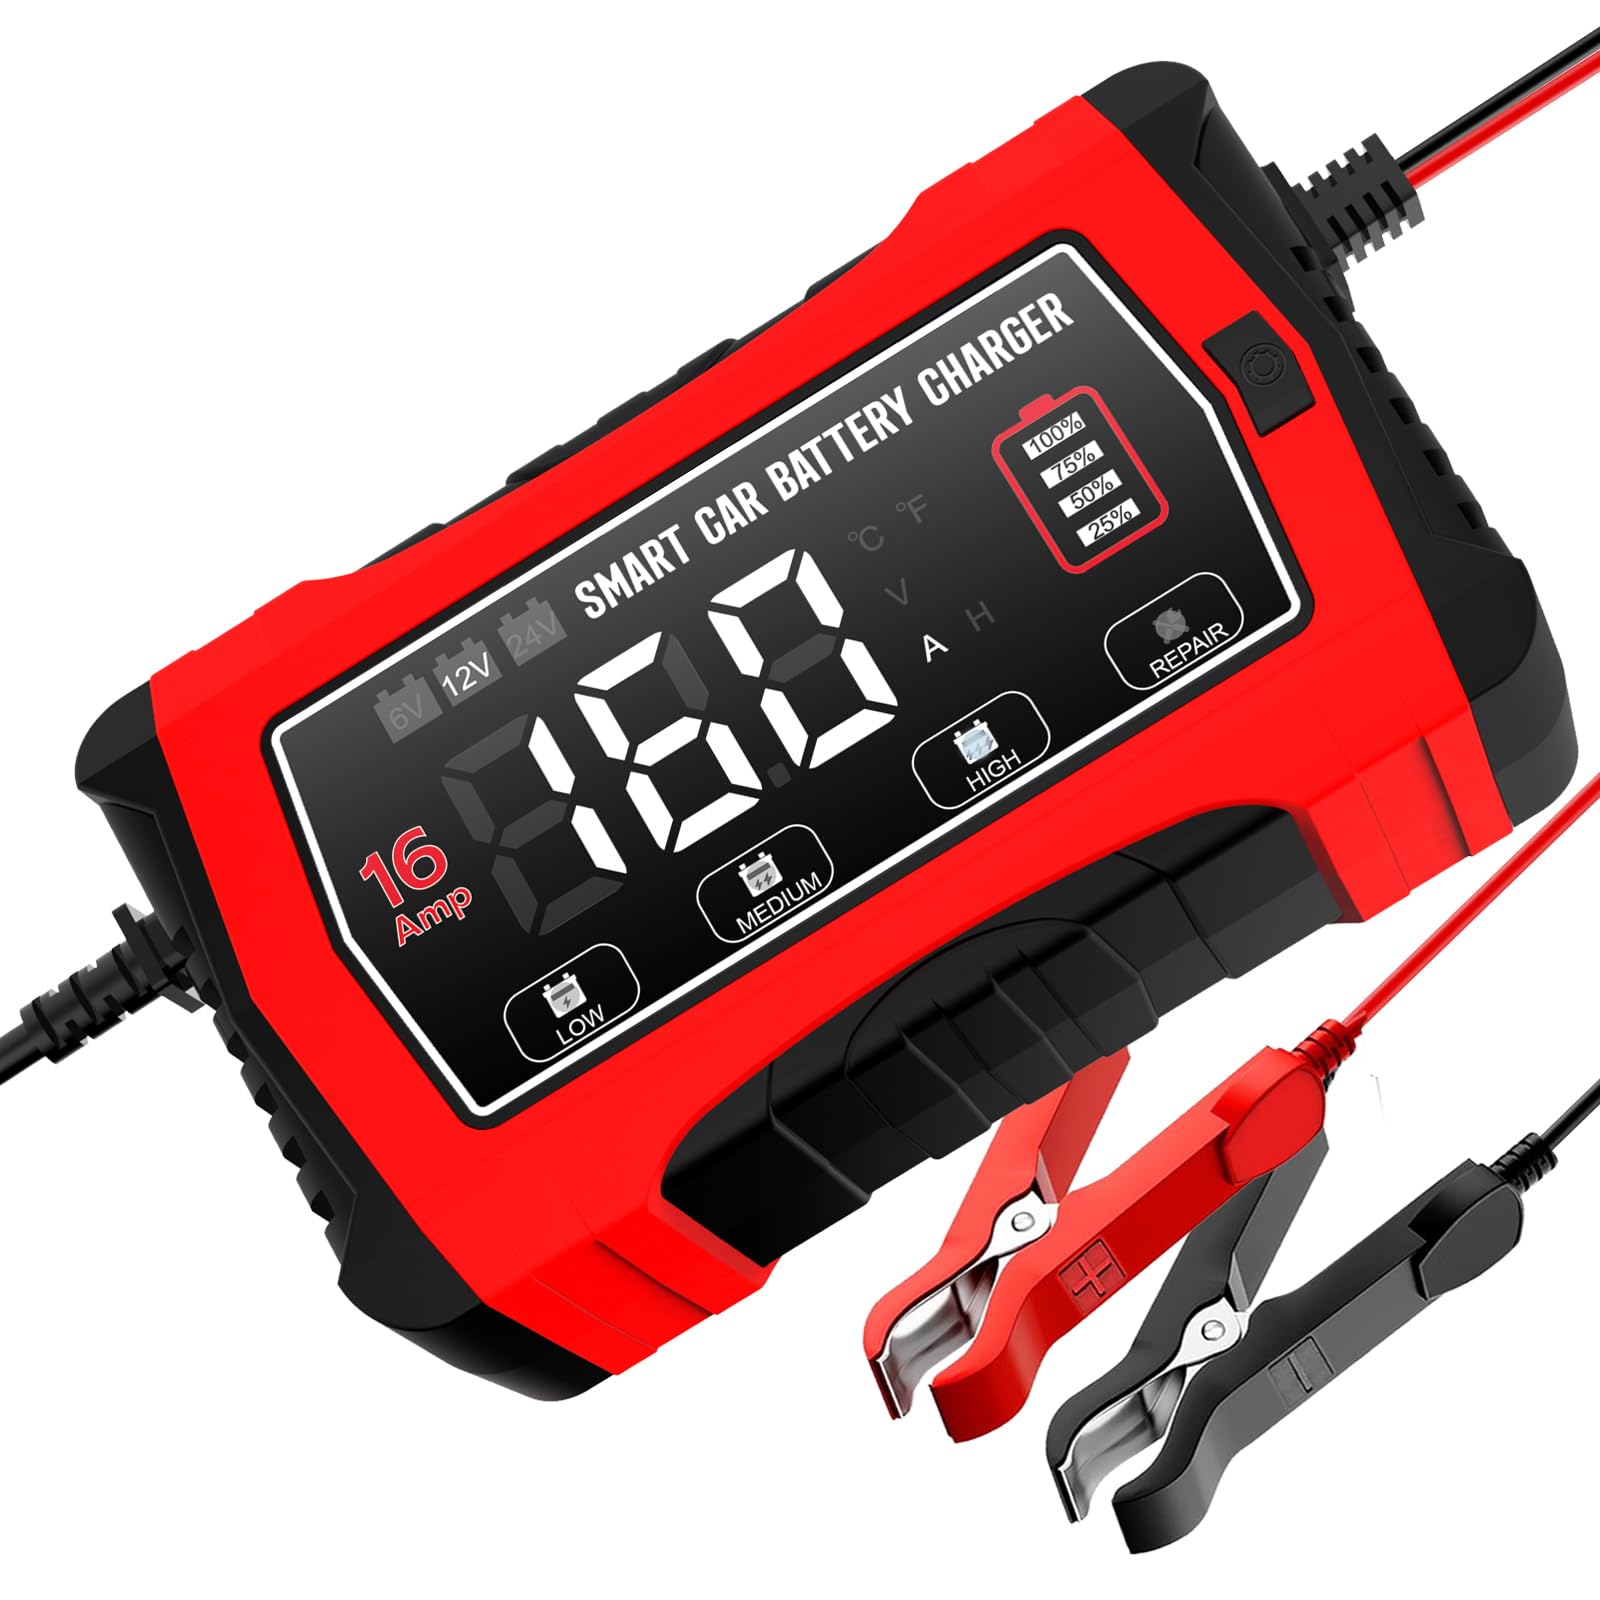
Figure 1: Haisito 16A Smart Car Battery Charger (Red model)

Figure 2: The Haisito charger is suitable for a wide range of vehicles including cars, RVs, motorcycles, boats, and lawnmowers.
2. Safety Instructions
Please read all safety instructions carefully before using the charger. Failure to follow these instructions may result in electric shock, fire, or serious injury.
- Ventilation: Ensure adequate ventilation during charging. Do not operate the charger in a confined area.
- Battery Type: Only charge batteries that match the charger's specifications. Refer to the battery manufacturer's instructions.
- Connection: Connect the charger to the battery terminals correctly (positive to positive, negative to negative). Ensure a secure connection before plugging the charger into a power outlet.
- Disconnection: Always disconnect the charger from the power outlet before disconnecting it from the battery.
- Sparks: Avoid creating sparks near the battery, as batteries can produce explosive gases.
- Water Exposure: Do not expose the charger to rain, moisture, or operate it in wet conditions.
- Damaged Equipment: Do not operate the charger if it has been dropped, damaged, or if the power cord or clamps are compromised. Contact customer support for assistance.
- Children: Keep the charger out of reach of children.
- Repair Mode: The repair mode is exclusively for lead-acid batteries. It cannot activate or charge completely dead batteries.
3. Product Overview
The Haisito Smart Car Battery Charger features a compact design with an integrated LCD display and intuitive controls.
3.1. Key Features
- Wide Application: Supports 6V/5A, 12V/16A, and 24V/10A charging for various battery types.
- 9-Stage Automatic Charging: Optimizes the charging process for efficiency and battery longevity.
- Automatic Battery Detection: Automatically identifies battery voltage and type (for most cases).
- Repair Mode: Desulfurates and reactivates old or weak lead-acid batteries.
- LCD Screen: Displays real-time battery voltage, charging current, charging temperature, and power status.
- Temperature Compensation: Automatically adjusts charging parameters for optimal performance in hot and cold environments.
- Comprehensive Protection: Includes spark-proof, short-circuit, reverse polarity, undervoltage, overcurrent, and overheating protection.
3.2. LCD Display and Controls
The LCD screen provides essential information during operation. A single button allows you to cycle through different charging modes.

Figure 3: The LCD display shows charging status, voltage, and current. The charger automatically recognizes 6V, 12V, and 24V batteries.
4. Setup
Follow these steps to connect the charger to your battery:
- Prepare the Battery: Ensure the battery terminals are clean and free of corrosion. If necessary, clean them with a wire brush.
- Connect Clamps:
- Connect the red positive (+) clamp to the positive (+) battery terminal.
- Connect the black negative (-) clamp to the negative (-) battery terminal.
Important: Ensure a firm and secure connection. Avoid touching the clamps together once connected to the battery.
- Plug in Charger: Once the clamps are securely connected to the battery, plug the charger's power cord into a suitable electrical outlet. The charger will power on and begin its diagnostic process.
5. Operating Instructions
5.1. Automatic Charging Process
The charger features a 9-stage automatic charging process to optimize battery health and charge efficiency. It automatically detects the battery type and voltage (6V, 12V, or 24V) and adjusts the charging parameters accordingly.

Figure 4: Illustration of the multi-stage charging process, including battery activation, constant current, constant voltage, floating charge, and compensation charge.
5.2. Mode Selection
After connecting the charger and plugging it in, press the mode button to cycle through the available charging modes. The LCD screen will indicate the selected mode.
- Standard Charge: For regular charging of most compatible batteries.
- Repair Mode (PUL): For desulfating and reactivating old or weak lead-acid batteries.
- Winter Mode: Automatically activated in cold temperatures to provide a higher charging voltage.
- Summer Mode: Automatically activated in hot temperatures to prevent overcharging.
5.3. Repair Mode (PUL)
The repair mode is designed to help restore the capacity of sulfated lead-acid batteries. It uses pulse technology to break down sulfate crystals.
- Activation: Select 'PUL' mode using the mode button.
- Duration: The repair process can take several hours. Monitor the battery during this time.
- Limitation: This mode is only for lead-acid batteries. It cannot repair severely damaged or completely discharged batteries.

Figure 5: The charger's repair function can help restore older lead-acid batteries through automatic detection and desulfation.
5.4. Forced 24V Charging Mode
In rare cases, if a 24V battery's voltage is extremely low, the charger might incorrectly detect it as a 12V battery. To force 24V charging:
- Press and hold the mode button for 3 seconds. The charger will emit a "Bibibi" alarm.
- Release the button.
- Press and hold the button again for 3 seconds. The charger will emit another "Bibibi" alarm and switch to forced 24V charging mode.
5.5. Temperature Compensation
The charger automatically adjusts its charging voltage based on ambient temperature. This ensures optimal charging performance and prevents overcharging in hot conditions or undercharging in cold conditions.

Figure 6: The charger automatically adapts to hot and cold climates, preventing overcharging in summer (up to 40°C/104°F) and undercharging in winter (down to -10°C/50°F).
6. Maintenance
Proper maintenance ensures the longevity and safe operation of your Haisito charger.
- Cleaning: Disconnect the charger from power and battery before cleaning. Wipe the exterior with a soft, dry cloth. Do not use harsh chemicals or abrasives.
- Storage: Store the charger in a cool, dry place when not in use. Keep cables neatly coiled.
- Cable Inspection: Regularly inspect the power cord and charging clamps for any signs of damage, fraying, or corrosion. Replace if damaged.
- Battery Terminals: Keep battery terminals clean to ensure good electrical contact.
7. Troubleshooting
If you encounter issues with your charger, refer to the following common problems and solutions:
| Problem | Possible Cause | Solution |
|---|---|---|
| Charger does not turn on. | No power from outlet; faulty power cord; internal fault. | Check power outlet; inspect power cord; contact support. |
| Charger displays error or protection mode. | Reverse polarity; short circuit; overvoltage/undervoltage; faulty battery. | Check clamp connections; ensure battery voltage is within range; test battery; contact support. |
| Battery not charging or charging slowly. | Poor connection; incorrect mode selected; severely discharged battery; faulty battery. | Ensure secure connections; select appropriate mode; note that completely dead batteries cannot be activated; test battery. |
| Charger incorrectly detects 24V battery as 12V. | Extremely low voltage on 24V battery. | Use the Forced 24V Charging Mode (refer to Section 5.4). |
If the problem persists after attempting these solutions, please contact Haisito customer support.
8. Specifications
| Specification | Value |
|---|---|
| Brand | Haisito |
| Model Number | 16A-EU |
| Manufacturer | HTRC |
| Product Dimensions (L x W x H) | 16 cm x 12 cm x 5 cm |
| Output Voltage | 6V / 12V / 24V (DC) |
| Rated Current | 6V/5A, 12V/16A, 24V/10A |
| Compatible Battery Types | Lead-Acid (AGM, Calcium, Gel, MF, EFB, SLA, VRLA, WET), Lithium (LiFePO4) |
| Compatible Devices | Automobiles, motorcycles, boats, lawnmowers, etc. |
| Color | Red |
9. Warranty and Support
Haisito products are manufactured to high-quality standards. For warranty information or technical support, please refer to the documentation included with your purchase or contact Haisito customer service through the retailer where the product was purchased.

