
1. Introduction
This manual provides essential information for the safe installation, operation, and maintenance of your Intex SX2100 Plus Sand Filter Pump. The Intex SX2100 Plus is designed to provide efficient and effective filtration for your swimming pool, utilizing sand as a natural and long-lasting filter medium. Proper adherence to these instructions will ensure optimal performance and longevity of your filter pump system.
2. Important Safety Information
WARNING: Failure to follow these warnings can result in serious injury or death.
- Always disconnect the power supply before performing any maintenance or service on the pump.
- This appliance is not intended for use by persons with reduced physical, sensory or mental capabilities, or lack of experience and knowledge, unless they have been given supervision or instruction concerning use of the appliance by a person responsible for their safety.
- Children should be supervised to ensure that they do not play with the appliance.
- The pump must be installed on a horizontal, solid, and level surface.
- Ensure all electrical connections are made by a qualified electrician and comply with local codes.
- Do not operate the pump if the power cord or plug is damaged.
- Never operate the pump dry. Ensure the pump is primed with water before starting.
- Keep the pump and electrical components away from water to prevent electric shock.
3. Package Contents
Verify that all components are present and undamaged before beginning assembly. If any parts are missing or damaged, do not proceed with assembly and contact Intex customer service.
- Sand Filter Pump Unit (Motor and Filter Tank)
- Multi-Port Valve
- Pressure Gauge
- Hoses and Clamps
- Instruction Manual
4. Setup and Installation
4.1 Placement
Position the sand filter pump on a firm, level surface, at least 3.5 feet (1.0 meter) away from the pool wall. Ensure the location is well-drained and protected from direct sunlight and harsh weather conditions. The pump should be below the water level of the pool for optimal priming.
4.2 Assembly
- Attach the multi-port valve to the top of the filter tank. Ensure the O-ring is properly seated and tighten the clamp securely.
- Install the pressure gauge into the designated port on the multi-port valve.
- Connect the pump motor to the filter tank using the provided fittings.
4.3 Adding Filter Media (Sand)
Before adding sand, ensure the internal standpipe is capped to prevent sand from entering it. Carefully pour the recommended amount and grade of filter sand (typically #20 silica sand) into the filter tank. The sand should fill the tank to the level indicated in the manual, usually about two-thirds full. Remove the standpipe cap after filling.
4.4 Connecting Hoses
Connect the pool's skimmer/main drain line to the pump's inlet (SUCTION) port. Connect the pump's outlet (RETURN) port to the multi-port valve's PUMP port. Connect the multi-port valve's RETURN port to the pool's return line. Finally, connect a backwash hose to the WASTE port of the multi-port valve, directing it to an appropriate drainage area.
4.5 Priming the Pump
Before starting the pump, ensure the filter tank is filled with water. Set the multi-port valve to the "RINSE" position. Open all air relief valves on the pool and pump system. Turn on the pump and allow it to run until a steady stream of water flows from the WASTE port, indicating the pump is primed and air has been expelled. Turn off the pump, then set the valve to "FILTER".
5. Operating the Sand Filter Pump
5.1 Control Panel Overview
The control panel allows you to power the pump on/off and set the timer for automatic operation.
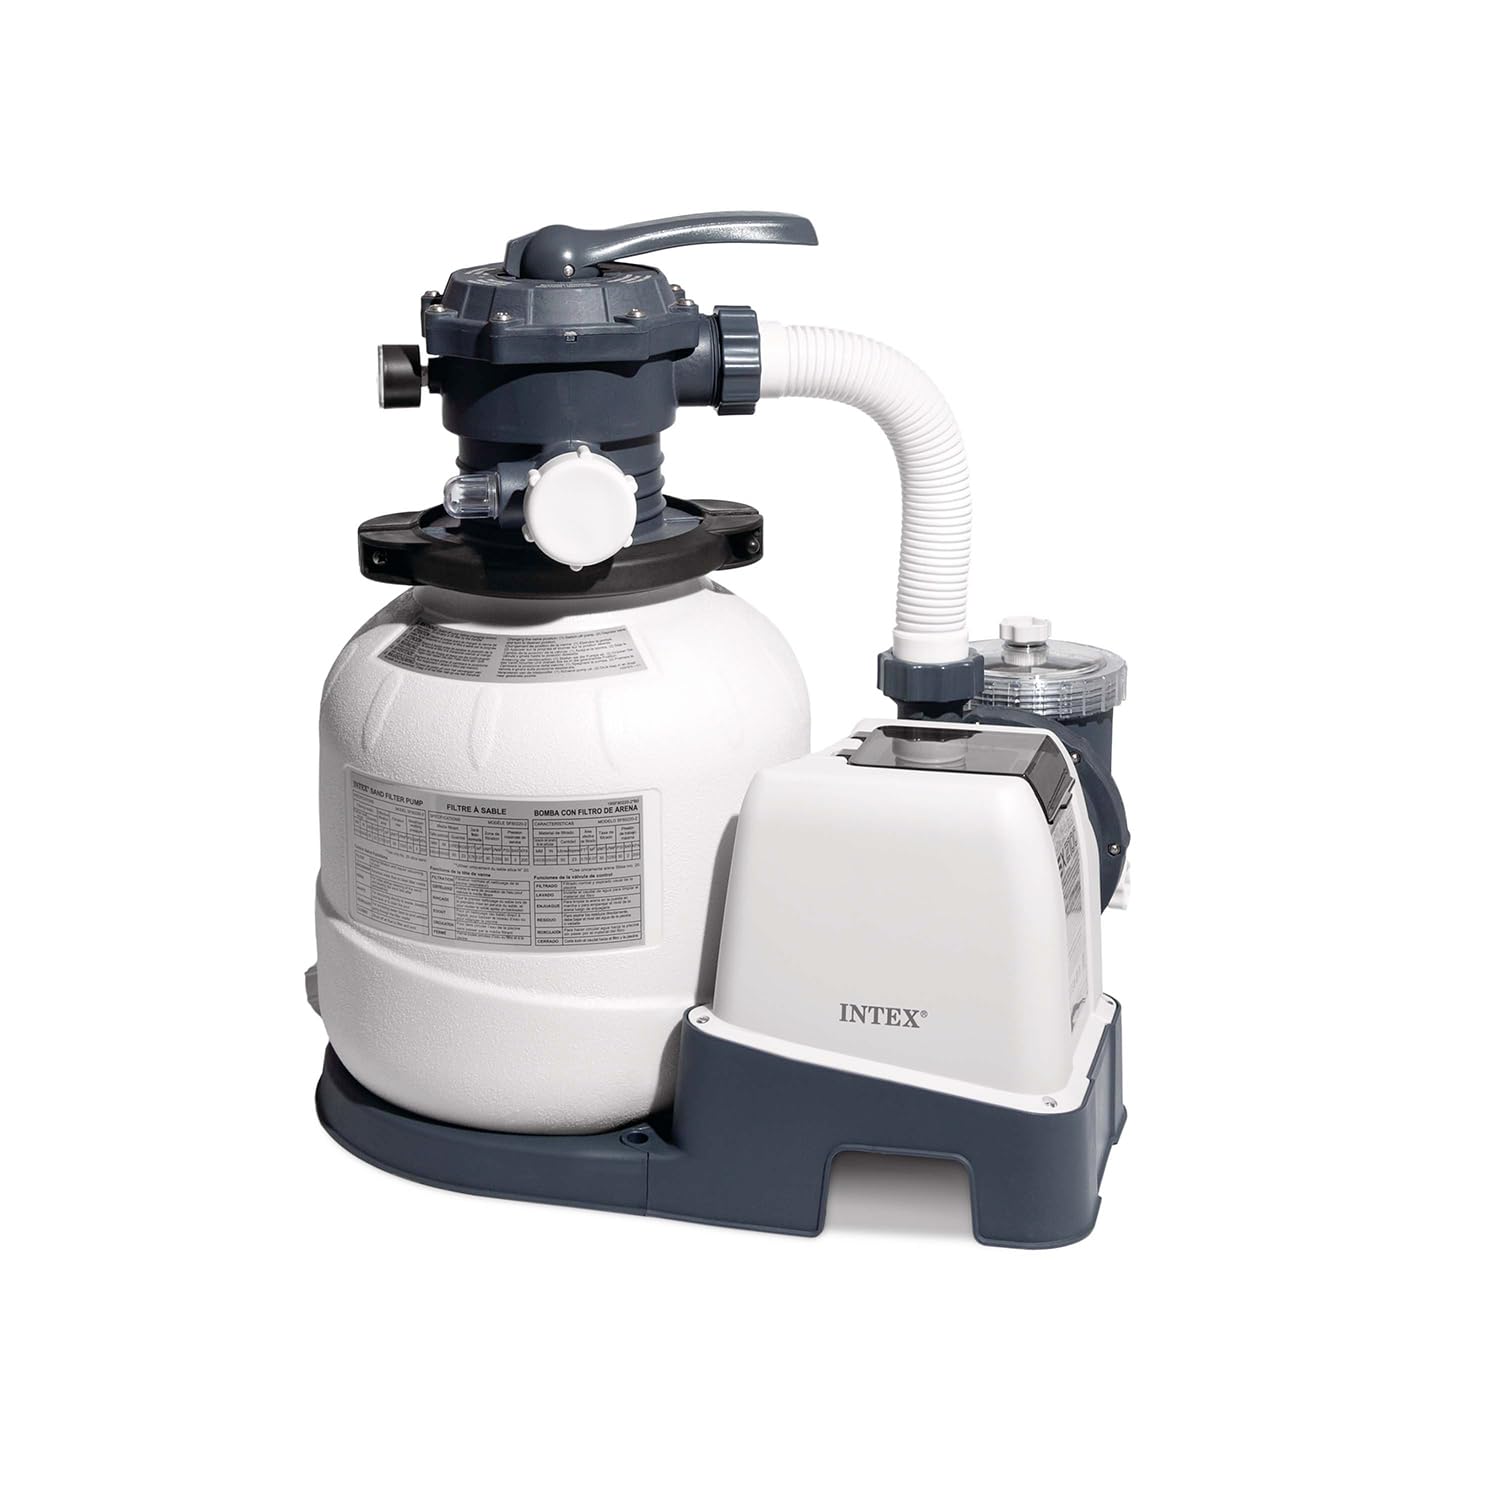
Image: Control panel of the Intex SX2100 Plus Sand Filter Pump, showing the digital display, power button, unlock/lock button, and timer button.
- Power Button: Press to turn the pump ON or OFF.
- Timer Button: Press to set the desired operating duration for the pump. Refer to the display for time settings.
- Unlock/Lock Button: Used to unlock the control panel for setting changes or to lock it to prevent accidental adjustments.
5.2 Multi-Port Valve Functions
The multi-port valve controls the flow of water through the filter system. Always turn off the pump before changing the valve position to prevent damage.

Image: Multi-port valve of the Intex SX2100 Plus Sand Filter Pump, showing the handle and labeled positions for different operations.
| Position | Function | Description |
|---|---|---|
| FILTER | Normal Filtration | For daily filtering of pool water. Water flows through the sand bed, trapping debris. |
| BACKWASH | Cleaning Filter | Reverses water flow to flush trapped debris out of the sand bed and to the WASTE port. |
| RINSE | Post-Backwash Rinse | Used after backwashing to settle the sand bed and flush any remaining dirty water to WASTE before returning to FILTER. |
| WASTE/DRAIN | Draining Pool/Bypassing Filter | Bypasses the filter and sends water directly to the WASTE port. Useful for lowering pool water level or vacuuming heavy debris directly to waste. |
| RECIRCULATE | Circulation without Filtration | Circulates water through the pump and back to the pool without passing through the filter sand. Useful for chemical distribution. |
| CLOSED | Shut Off All Flow | Closes all flow to the filter and pump. Do not operate the pump in this position. Use for maintenance or when the pump is off. |
5.3 Starting the Pump
- Ensure the multi-port valve is set to the "FILTER" position.
- Verify all hoses are securely connected and there are no leaks.
- Plug the pump into a grounded electrical outlet.
- Press the Power button on the control panel to start the pump.
- Observe the pressure gauge. A rising pressure indicates the filter is collecting debris and may require backwashing soon.
6. Maintenance
6.1 Backwashing the Filter
Backwash the filter when the pressure gauge reading is 5-10 PSI (0.34-0.68 BAR) above the clean operating pressure, or when pool water clarity decreases.
- Turn off the pump.
- Set the multi-port valve to "BACKWASH".
- Turn on the pump. Run for approximately 2-3 minutes, or until the water flowing from the WASTE port is clear.
- Turn off the pump.
6.2 Rinsing the Filter
After backwashing, always rinse the filter to settle the sand bed and prevent dirty water from returning to the pool.
- Turn off the pump.
- Set the multi-port valve to "RINSE".
- Turn on the pump. Run for approximately 30-60 seconds.
- Turn off the pump.
- Set the multi-port valve back to "FILTER" for normal operation.
6.3 Filter Media Replacement
Sand filter media typically needs replacement only once every five years, depending on usage and water quality. Refer to the specifications for the correct type and amount of sand.
6.4 Winterizing
Before freezing temperatures, drain all water from the pump, filter tank, and hoses. Disconnect and store the pump and filter in a dry, protected area. Remove the pressure gauge and store it separately.
7. Troubleshooting
This section addresses common issues you might encounter with your sand filter pump.
| Problem | Possible Cause | Solution |
|---|---|---|
| Pump not starting | No power; tripped breaker; motor issue | Check power connection, reset breaker. If issue persists, contact support. |
| Low water flow | Clogged skimmer/pump basket; dirty filter sand; air leak in suction line; pump not primed | Clean baskets. Backwash/rinse filter. Check hose connections for leaks. Re-prime pump. |
| Cloudy pool water | Dirty filter sand; insufficient filtration time; improper chemical balance | Backwash/rinse filter. Increase filtration time. Test and adjust pool chemicals. |
| Water leaking from pump/valve | Loose connections; damaged O-rings/gaskets | Tighten connections. Inspect and replace O-rings/gaskets if damaged. |
| High pressure gauge reading | Dirty filter sand | Perform backwash and rinse cycle. |
8. Specifications
| Feature | Value |
|---|---|
| Model Number | SX2100 |
| Voltage | 220-240V |
| Power | 250W |
| Plug Type | EU 2-pin plug |
| Tank Size | 12 inches |
| Pump Flow Rate | 2,100 gal (7.9 m³/hr) |
| System Flow Rate | 1,600 gal (6.0 m³/hr) |
| Material | Plastic |
| Color | Grey |
| Compatible Pool Types | Ultra XTR Frame Pool 18'/20' (5.49m/6.10m), Ultra XTR Rectangular Frame Pool 24' x 12' (7.32m x 3.66m) |
9. Warranty and Customer Support
Intex products are manufactured to the highest quality standards. For specific warranty details, please refer to the warranty card included with your product or visit the official Intex website. If you encounter any issues or require assistance, please contact Intex customer support through their official channels. Have your product model number and purchase date ready when contacting support.
For further information and support, please visit the official Intex website: www.intexcorp.com


