
1. Introduction
This manual provides detailed instructions for the setup, operation, and maintenance of your PYY Cash Register. Please read this manual thoroughly before using the device to ensure proper functionality and to maximize its lifespan. This cash register is designed for small businesses, offering efficient transaction processing and comprehensive reporting capabilities.
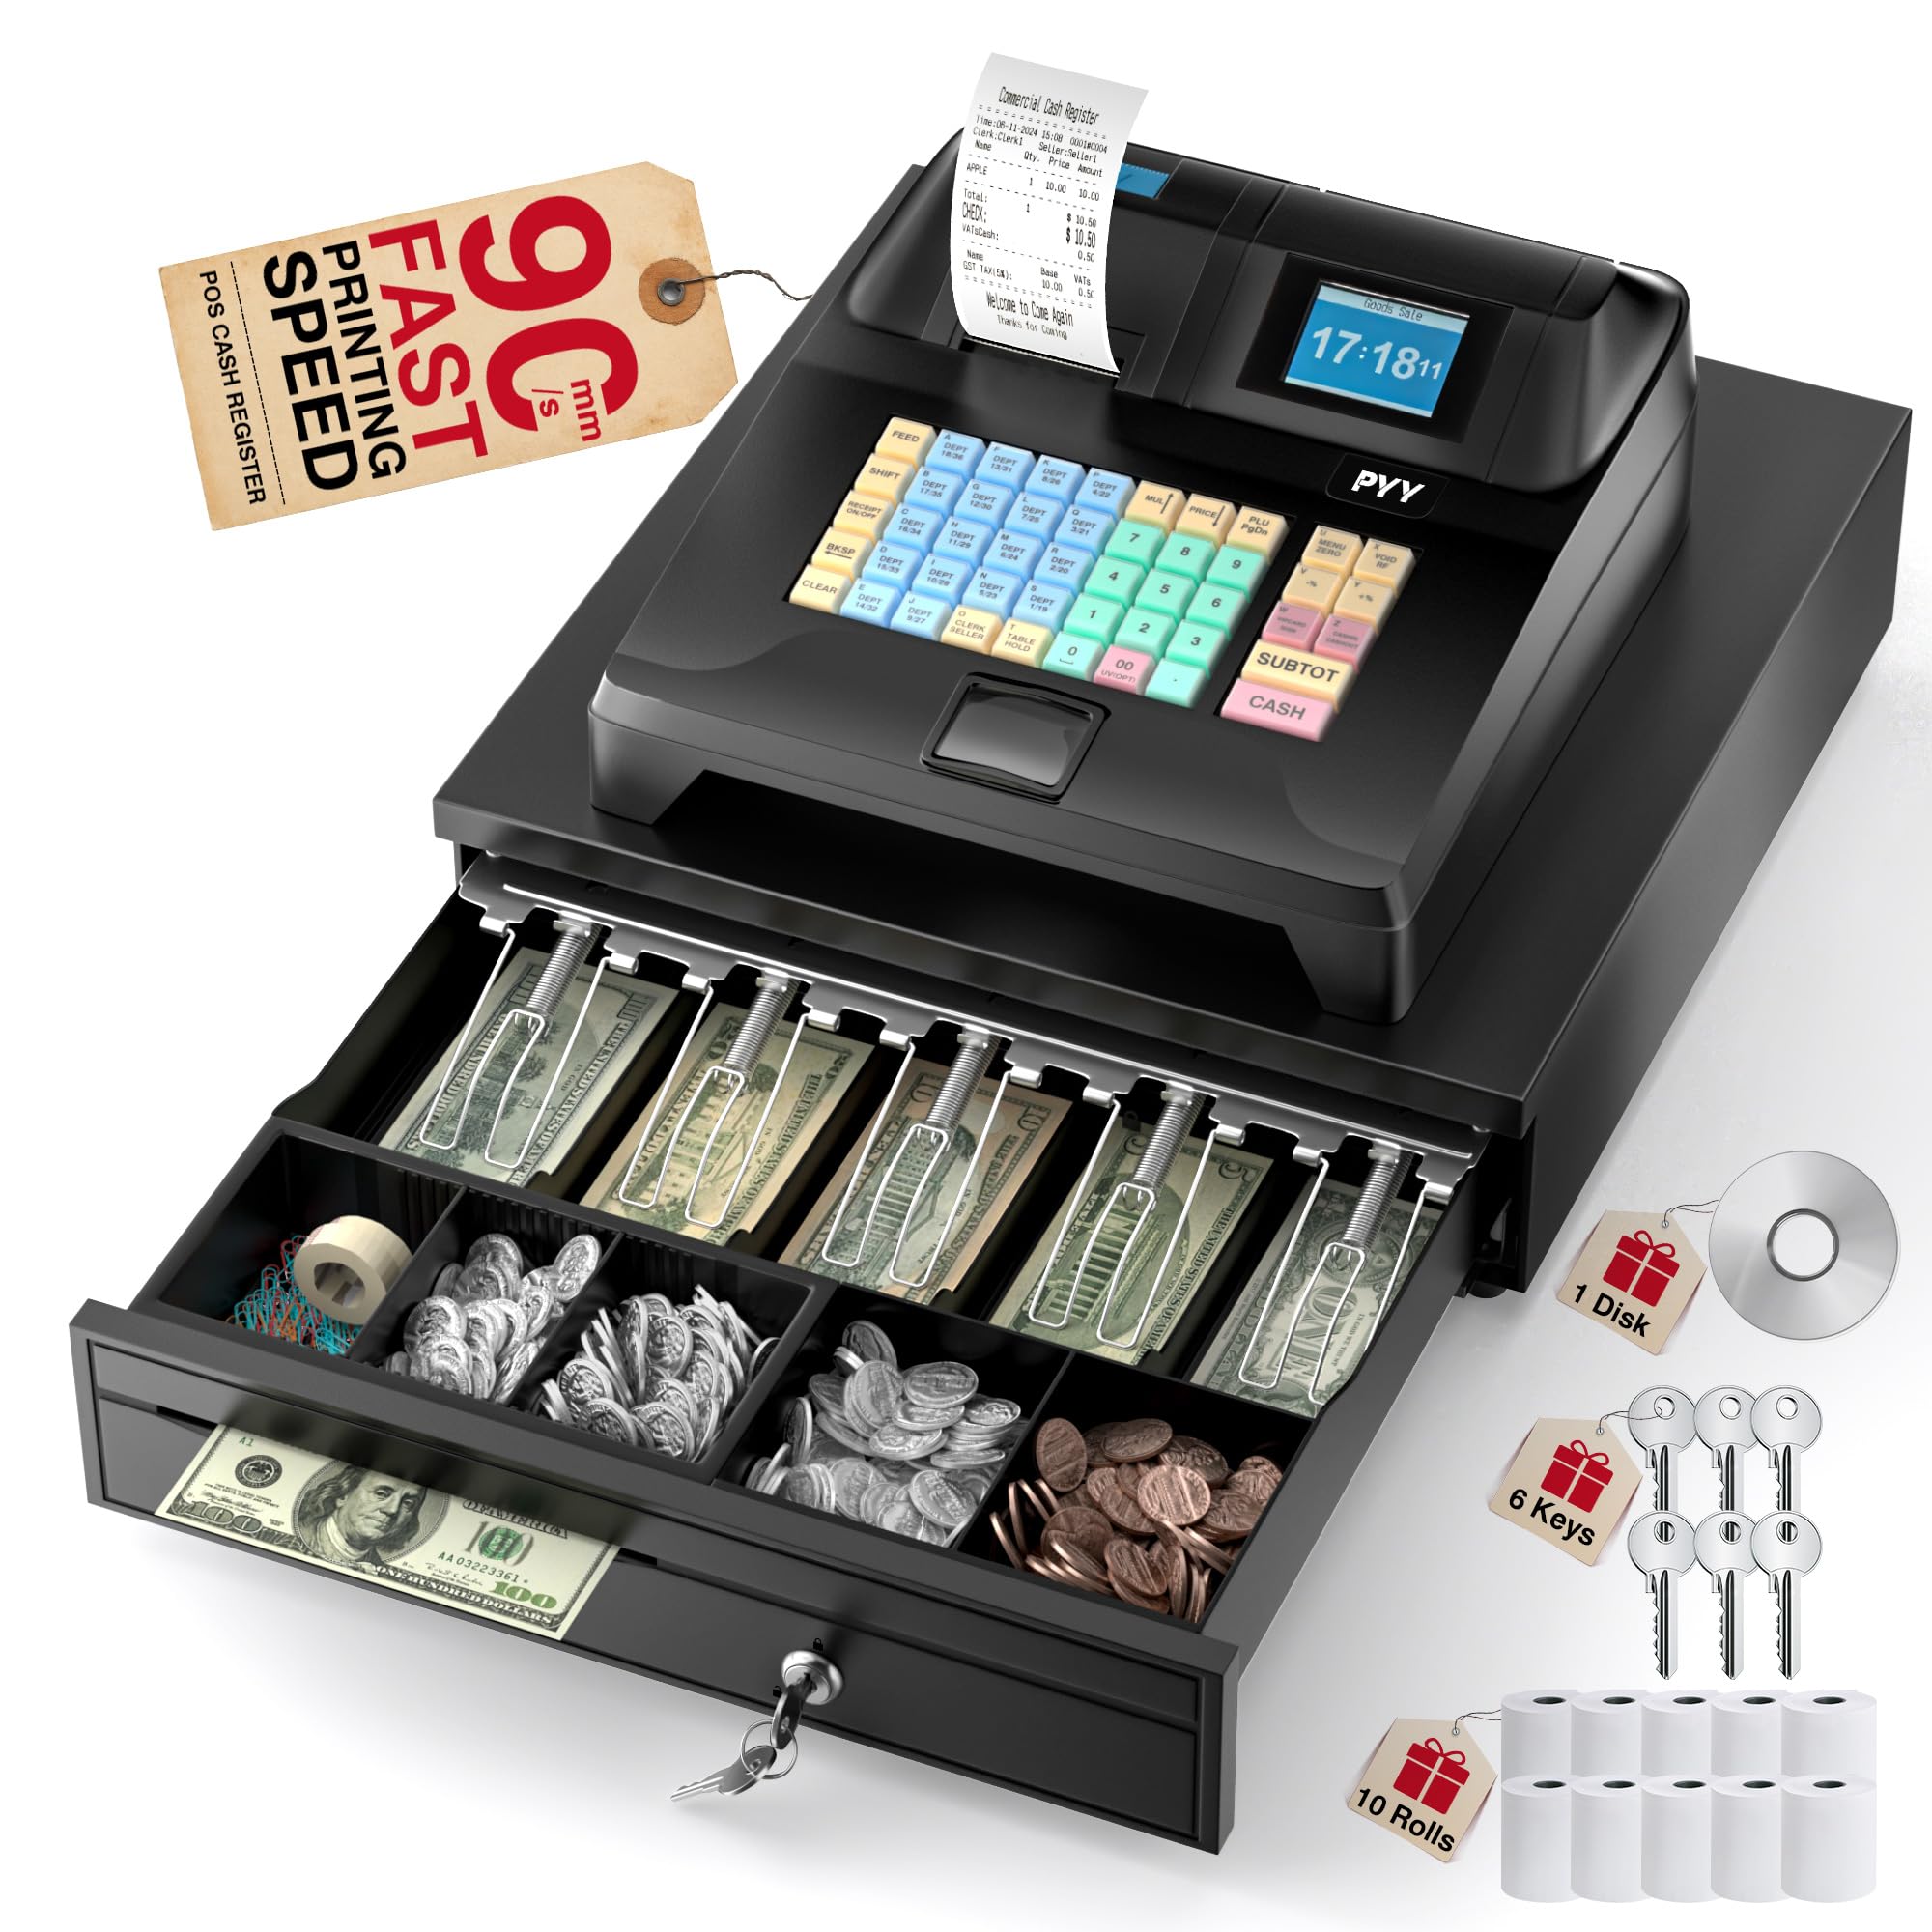
Image: Overview of the PYY Cash Register.
2. Package Contents
Verify that all items listed below are included in your package:
- Electronic Cash Register
- 2-1/4 Inches Thermal Papers * 10 rolls
- Cash Box Keys * 6
- Power Cable
- USB Cable
- User Manual (this document)

Image: The PYY Cash Register along with its power cable, USB cable, cash box keys, and thermal paper rolls.
3. Product Features
The PYY Cash Register offers a range of features designed for efficient business operations:
- Fast Checkout & Comprehensive Reporting: Configured with 200 departments, 10,000 items, 1,000 members, and 200 sessions, with 9 tax rate settings. Supports one-click checkout after item recognition in sales mode. Provides sales data reports per hour, per cashier, per item, per department, refunds, and cash drawer openings.
- Multifunctional All-in-One Design: Integrates a receipt printer, dual screens, and a cash drawer. The built-in thermal printer has a print speed of up to 90mm/s. Features a 2.8-inch TFT LCD for the cashier and an 8-digit LED display for customers. The integrated cash drawer opens automatically during transactions.
- Multiple Device Connections: Equipped with 2 RS232 ports for connecting scanners, scales, and external printers; a USB port for computer connection; and a PS2 port for keyboard connection.
- Secure Design: Supports up to 50 cashiers with individual passwords. Includes 6 cash drawer keys for enhanced security. The cash drawer features 4 bill slots and 5 coin slots for organized currency management. The ABS material casing is waterproof and oil-resistant.
- Offline System: Operates without requiring constant network connection, with automatic data backup.

Image: Close-up of the thermal printer demonstrating 90mm/s speedy printing.

Image: The dual-screen setup, showing the cashier's 2.8-inch TFT LCD and the customer's 8-digit LED display.

Image: The large cash drawer, illustrating its 4 bill slots, 5 coin slots, and a removable tray.

Image: Rear view of the cash register, highlighting the RS232, USB, and PS2 ports for connecting external devices.
4. Setup
4.1 Unpacking and Placement
- Carefully remove the cash register and all accessories from the packaging.
- Place the unit on a stable, flat surface, ensuring adequate ventilation around the device.
- Keep the unit away from direct sunlight, excessive heat, and moisture.
4.2 Power Connection
- Connect the power cable to the DC 12V/3A input port on the rear of the cash register.
- Plug the other end of the power cable into a standard AC 100-240V/50-60Hz electrical outlet.
- Flip the power switch to the 'ON' position. The display screens should illuminate.
4.3 Thermal Paper Roll Installation
- Open the printer cover located on the top of the cash register.
- Insert a 2-1/4 inch thermal paper roll into the compartment, ensuring the paper feeds from the bottom and the leading edge is straight.
- Pull a small amount of paper out past the cutting edge.
- Close the printer cover firmly until it clicks into place.
4.4 Connecting Peripherals
Use the designated ports on the rear of the unit to connect external devices:
- RS232 Ports: For connecting barcode scanners or weighing scales.
- USB Port: For connecting to a computer for data transfer or programming.
- PS2 Port: For connecting an external keyboard for easier data entry or programming.
5. Operating Instructions
5.1 Basic Sales Operation (3-Step Checkout)
The cash register features a simplified 3-step checkout process:
- Enter Sales Mode: From the main menu, select 'Sale'.
- Select Item: Input the item code or use a connected scanner. The item price will appear on the display. Repeat for multiple items.
- Process Payment: Press the 'CASH' button for cash payments or 'SUBTOT' for other payment methods. The cash drawer will open, and a receipt will print.

Image: Visual representation of the 3-step checkout process: Sales Mode, Item Selection, and Cash Payment.
5.2 Programming Departments and Items
To program departments, items, members, or tax rates, access the 'Program' or 'Advance' menu from the main screen. Detailed programming steps are typically found in the dedicated programming section of the full user manual or through the software interface when connected to a computer via USB.
- Departments: The system supports up to 200 departments.
- Items: Up to 10,000 items can be stored.
- Members: Up to 1,000 members can be managed.
- Tax Rates: 9 tax rate settings are available for configuration.
5.3 Generating Reports
Access the 'RptView' or 'RptBill' options from the main menu to generate various sales reports. Reports include sales data per hour, per cashier, per item, per department, refunds, and cash drawer openings. These reports are crucial for business analysis and inventory management.
5.4 Cashier Management
The system supports up to 50 cashiers, each with individual password protection. This feature enhances security and allows for tracking individual cashier performance.
6. Maintenance
6.1 Cleaning
- Regularly wipe the exterior of the cash register with a soft, damp cloth. Avoid abrasive cleaners or solvents.
- Clean the display screens with a soft, lint-free cloth specifically designed for electronics.
- Ensure no liquids enter the device, especially around the keyboard and ports.
6.2 Thermal Printer Care
- Only use high-quality 2-1/4 inch thermal paper to prevent damage to the print head.
- Periodically clean the thermal print head with an alcohol swab to remove paper dust and residue. Ensure the device is powered off before cleaning.
6.3 Data Backup
The system includes an auto-backup feature to protect your sales data. However, it is recommended to regularly back up important data to an external computer via the USB port to prevent data loss in case of unforeseen issues.
7. Troubleshooting
If you encounter issues with your PYY Cash Register, refer to the following common problems and solutions:
| Problem | Possible Cause | Solution |
|---|---|---|
| Cash register does not power on. | Power cable not connected, power outlet issue, power switch off. | Check power cable connection, try a different outlet, ensure power switch is ON. |
| Printer not printing. | Paper roll empty or incorrectly installed, printer cover not closed, thermal paper inserted incorrectly. | Replace paper roll, ensure paper is feeding correctly, close printer cover firmly. Verify thermal paper is loaded with the correct side facing the print head. |
| Display screens are blank or flickering. | Loose connection, power issue, internal fault. | Restart the device. Check power connections. If the problem persists, contact customer support. |
| Cash drawer does not open. | Transaction not completed, drawer jammed, electronic fault. | Ensure a transaction is finalized. Check for obstructions in the drawer. Use the emergency key if necessary. |
| External device (scanner/scale) not recognized. | Incorrect port, device not powered on, driver issue. | Ensure device is connected to the correct RS232 port and is powered on. Refer to the peripheral's manual for setup. |
For issues not listed here or if the problem persists after attempting the solutions, please contact PYY customer support for assistance.
8. Specifications
| Feature | Detail |
|---|---|
| Product Dimensions | 15 x 13.2 x 8.2 inches (33.5 x 38 x 20.9 cm) |
| Item Weight | 14.1 pounds |
| Power | 36W |
| Voltage | AC 100-240V/50-60Hz, DC 12V/3A |
| Cashier Display | 2.8-inch TFT LCD |
| Customer Display | 8-digit LED |
| Printer Speed | Up to 90mm/s |
| Cash Drawer | 4 bill slots, 5 coin slots |
| Connectivity | 2x RS232, 1x USB, 1x PS2 |
| Certifications | RoHS, FCC |
9. Warranty and Support
PYY provides a one-year warranty coverage for this cash register. In case of any issues or technical difficulties, professional one-on-one technical support is available.
Please contact PYY customer service through the retailer where you purchased the product or refer to the contact information provided with your purchase for technical assistance and warranty claims.
Ensure you have your product model number and purchase date available when contacting support.