
1. Introduction
This manual provides detailed instructions for the installation, operation, and maintenance of your DEWIN Single-Phase WiFi 6-in-1 Digital Electric Meter. This device is designed for accurate measurement and monitoring of various electrical parameters in a single-phase AC circuit. Please read this manual thoroughly before installation and use to ensure safe and efficient operation.
2. Product Overview
The DEWIN 6-in-1 Digital Electric Meter is a versatile device capable of simultaneously displaying six key electrical parameters on its high-definition color LCD. It features intelligent control via the Tuya application, allowing for real-time data monitoring and device management.
- Multi-Parameter Display: Simultaneously shows Voltage, Current, Power, Energy, Frequency, and Power Factor.
- Wide Measurement Range: Supports AC 40-300V voltage and 0-100A current.
- Clear LCD Display: High-definition color LCD with a 178° viewing angle and backlight ensures clear visibility day and night.
- WiFi Connectivity: Enables remote monitoring and control through the Tuya Smart app.
- Data Storage: Automatically saves the last measured energy data in case of power interruption.
- One-Touch Reset: Convenient button for resetting accumulated energy data.

Figure 2.1: The DEWIN 6-in-1 Digital Electric Meter display showing all measured parameters.
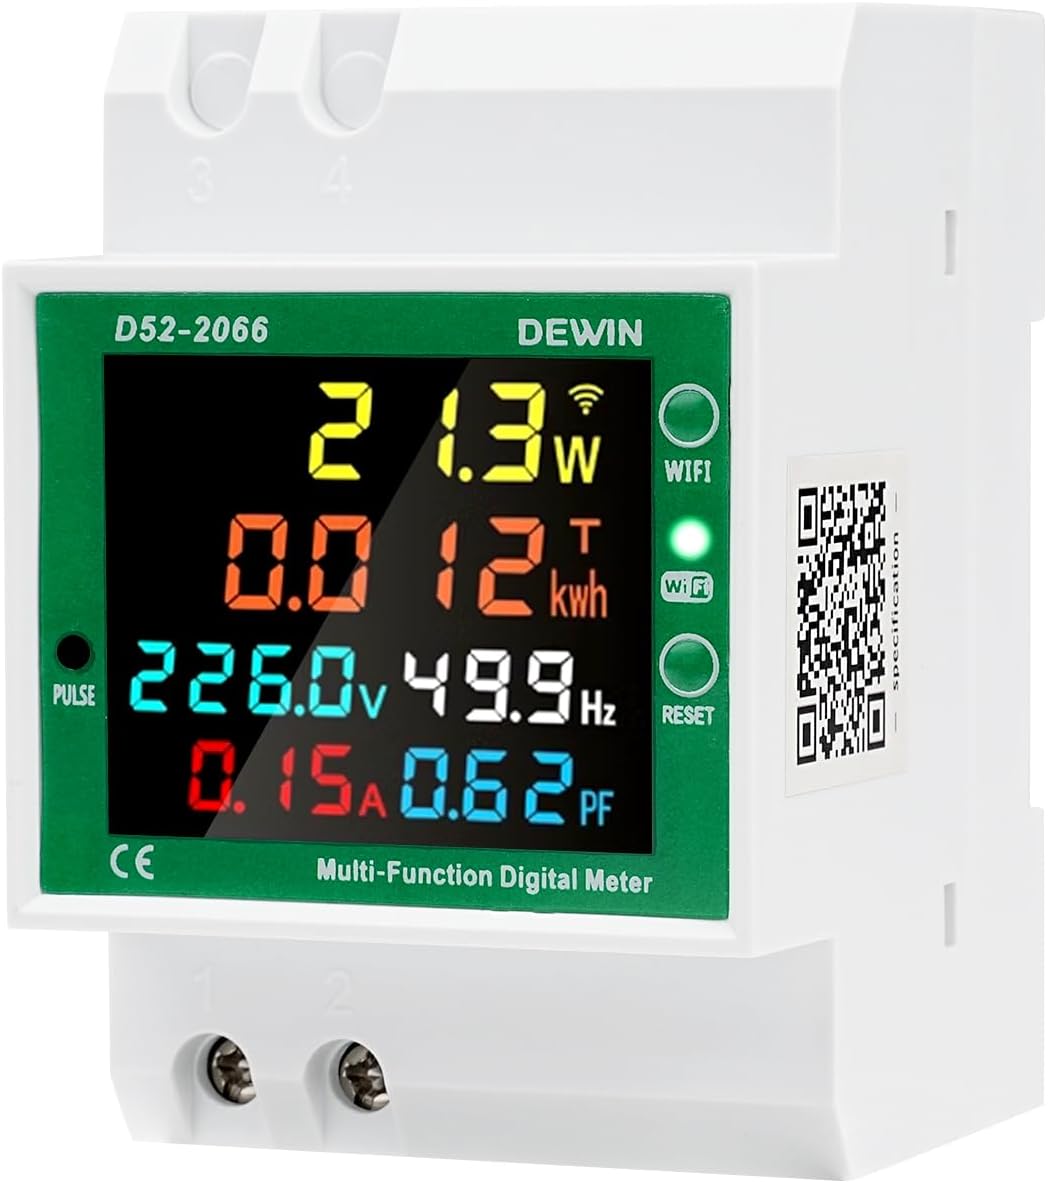
Figure 2.2: Close-up of the meter's display and control buttons.
3. Specifications
| Parameter | Value |
|---|---|
| Product Name | DIN Rail Digital Gauge |
| Model Number | XBREXAQRD-GS99917 |
| Material | Flame-retardant PC |
| Voltage Measurement Range | AC 40-300 V |
| Current Measurement Range | 0-100 A |
| Power Measurement Range | 0-45000 W |
| Energy Measurement Range | 0-9999 kWh |
| Frequency Measurement Range | 45-65 Hz |
| Power Factor Measurement Range | 0-1 PF |
| CT Type | Integrated |
| Dimensions (L x W x H) | 9 x 7 x 6 cm |
| Weight | 147 grams |
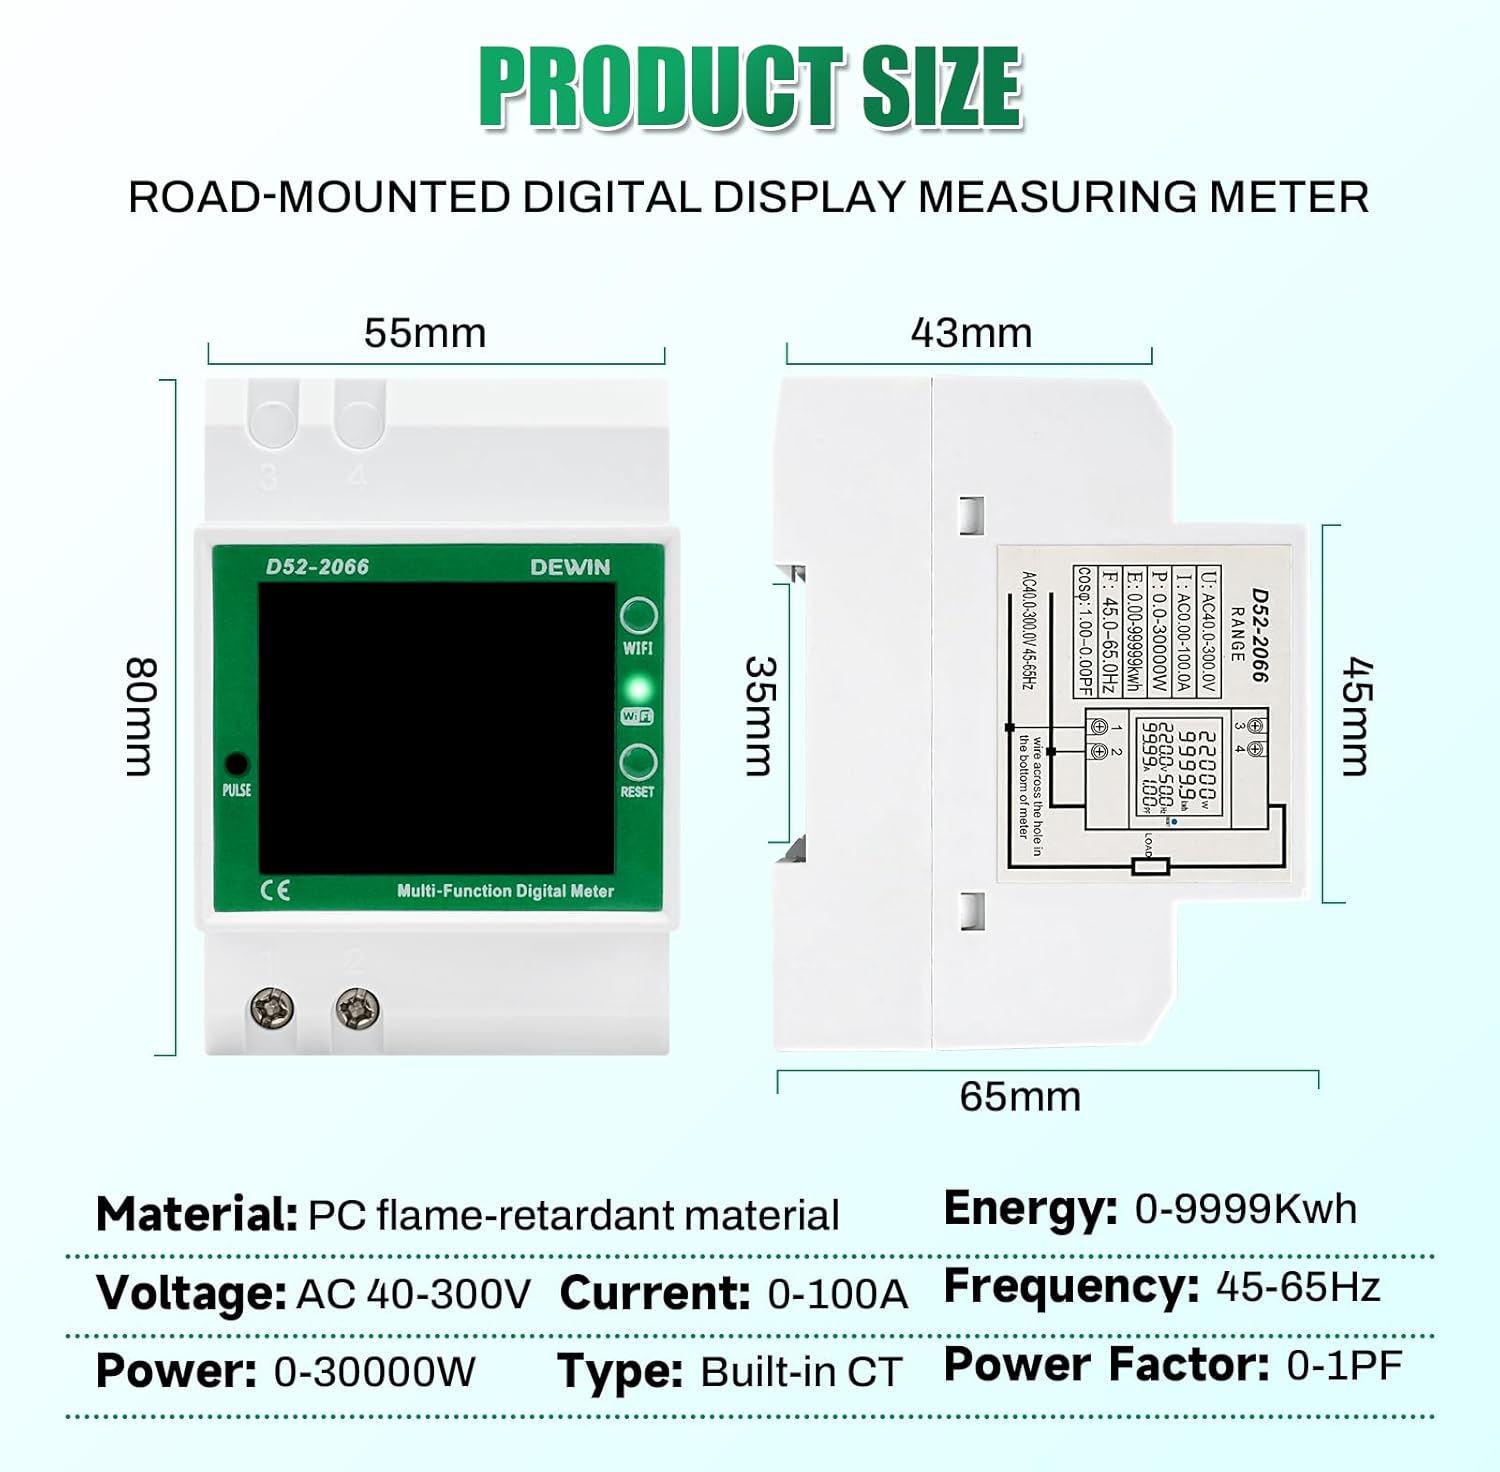
Figure 3.1: Product dimensions of the DEWIN Electric Meter.
4. Setup
4.1. Wiring Diagram
The meter is designed for DIN rail mounting. Ensure all power is disconnected before proceeding with wiring. The device features an integrated Current Transformer (CT). To measure current, pass the live wire of the circuit you wish to monitor through the round hole located in the lower right corner of the instrument, as shown in the diagram below. Connect the measurement input terminals to the AC power supply (40-300V).

Figure 4.1: Wiring diagram for the DEWIN Electric Meter. The load wire passes through the integrated CT.
4.2. WiFi Connection and App Setup
The DEWIN Electric Meter supports intelligent control and monitoring via the Tuya Smart app. Follow these steps to connect your device:
- Download the Tuya Smart App: Scan the QR code on the side of the meter or search for "Tuya Smart" in your mobile app store.
- Power On the Meter: After completing the wiring, apply power to the meter.
- Enter Pairing Mode: The WiFi indicator on the meter should blink rapidly. If not, press and hold the WiFi button on the meter for approximately 5 seconds until it blinks rapidly.
- Add Device in App: Open the Tuya Smart app, register or log in. Tap the "+" icon in the top right corner to add a new device. The app should automatically discover the meter. If not, manually select "Electrician" > "Power Meter (Wi-Fi)" or similar.
- Connect to 2.4GHz WiFi: Ensure your mobile device is connected to a 2.4GHz WiFi network. The meter only supports 2.4GHz WiFi. Enter your WiFi password when prompted.
- Complete Setup: Follow the on-screen instructions in the app to complete the pairing process. Once connected, you can rename the device and access its features.

Figure 4.2: Remote monitoring via the Tuya Smart mobile application.

Figure 4.3: Intelligent control and data monitoring using the Tuya app.
For additional setup details and the digital user manual, please refer to the QR code on the side of the device or visit: https://wx.hlcode.cc/?id=NJzxner
5. Operating Instructions
5.1. Reading the Display
The meter's LCD simultaneously displays six electrical parameters. The values are clearly labeled on the screen. The display is backlit for readability in various lighting conditions.
5.2. One-Touch Reset Function
To reset the accumulated energy (kWh) data, press and hold the RESET button on the front panel of the meter for approximately five seconds. This action will clear the energy accumulation, allowing you to start a new measurement cycle.
5.3. Data Storage
The meter is equipped with an automatic data storage feature. In the event of a power outage, the last measured energy data will be automatically saved. When power is restored, the meter will continue to accumulate data from the last saved point, preventing data loss due to sudden power interruptions.

Figure 5.1: The meter's data storage function ensures continuity of energy measurement.
5.4. Remote Monitoring via Tuya App
Once connected to the Tuya Smart app, you can:
- View real-time electrical parameters (voltage, current, power, energy, frequency, power factor).
- Access historical data and statistical reports.
- Set up alerts or notifications for specific parameter thresholds (e.g., over-voltage, over-current).
6. Maintenance
The DEWIN Electric Meter requires minimal maintenance. To ensure optimal performance and longevity:
- Keep the device clean and free from dust. Use a soft, dry cloth for cleaning. Do not use abrasive cleaners or solvents.
- Ensure the operating environment is within the specified temperature and humidity ranges.
- Regularly check wiring connections to ensure they are secure.
- Do not attempt to open or repair the device yourself. Refer to qualified personnel for any servicing needs.
7. Troubleshooting
If you encounter issues with your DEWIN Electric Meter, refer to the following common troubleshooting steps:
| Problem | Possible Cause | Solution |
|---|---|---|
| Meter display is off | No power supply or incorrect wiring. | Check power connections and ensure AC 40-300V is supplied to the measurement input terminals. Verify wiring according to Section 4.1. |
| No current reading (0A) | Load wire not correctly passed through the CT hole or no load connected. | Ensure the live wire of the circuit is correctly threaded through the integrated CT hole. Verify that a load is connected and drawing current. |
| WiFi connection fails | Incorrect WiFi password, 5GHz network, or meter not in pairing mode. | Ensure your router is broadcasting a 2.4GHz WiFi network and your phone is connected to it. Re-enter the WiFi password carefully. Press and hold the WiFi button on the meter for 5 seconds to re-enter pairing mode (rapid blinking). Ensure strong WiFi signal strength. |
| Inaccurate readings | Improper wiring or external interference. | Double-check all wiring connections. Ensure the meter is installed in a stable environment away from strong electromagnetic fields. |
| Energy data not resetting | Reset button not held long enough. | Press and hold the RESET button for a full five seconds until the energy value clears. |
8. Warranty and Support
Specific warranty information for this product may vary by region and retailer. Please refer to your purchase documentation or contact your point of sale for details regarding warranty coverage and return policies. Generally, products are covered against manufacturing defects for a specified period.
For technical support or further inquiries, please consult the digital user manual accessible via the QR code on the device or the link provided in Section 4.2. You may also contact DEWIN customer service through their official channels, if available.